What did you fix today? (part 2)

TEXTURES

A
TEXTURES

  • 2
  • 0
  • 16
Small Craft Club

A
Small Craft Club

  • 1
  • 0
  • 18
RED FILTER

A
RED FILTER

  • 1
  • 0
  • 17
The Small Craft Club

A
The Small Craft Club

  • 1
  • 0
  • 16
Tide Out !

A
Tide Out !

  • 1
  • 0
  • 10

Recent Classifieds

Forum statistics

Threads
198,894
Messages
2,782,680
Members
99,741
Latest member
likes_life
Recent bookmarks
0
Joined
Nov 7, 2020
Messages
108
Location
SE MI
Format
Multi Format
I'm no where near as advanced as you guys, just getting into it as more of a necessity to get some old cameras working. I'm starting simple, and I guess you can't get much simpler than Argus. I saw this a-four on the 'bay for $5 starting bid, made an offer of $7.50 and they went with it. It's in really stellar condition. Aesthetically both the camera and the case look new. Even the strap doesn't look like it was used much. When it first arrived the shutter was very slow, the speed adjustment was stiff, as was the focus and aperture.

There was a ton of grease in this camera. There was so much I couldn't tell how many turns it took to get the focusing lens off, it was gobbed on and hard. Getting it off the glass was tough, I ended up dunking the lenses is alcohol. This is before cleaning:

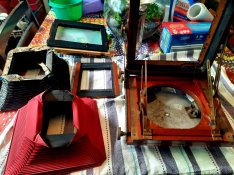
P1062064 by telecast, on Flickr

I'm getting decent at removing the lenses, mirrors, rangefinders etc. but not so much with shutter and aperture assemblies yet. So instead of taking everything apart, I thought I try flushing the aperture and shutter blades with Ronsinol lighter fluid. I stuck the nozzle in every slot and flushed, then directly on the blades front and back. Within seconds everything started working freely. I gently cleaned the blades with a Q-tip on both sides and used canned air to blow out any chunks of dried grease from inside, then flushed again and let it dry.

After cleaning:

P1062060 by telecast, on Flickr

When I put it back together I had to sort out the focusing. It took a couple of tries because as I stated earlier, I had no idea how many turns it needed to get back to where it was and I wasn't at all sure how to accomplish it. Once I figured out the sequence it was pretty easy. It really does look great all cleaned up. Can't wait to run a roll of film through it. I can see how you guys get a lot of satisfaction out of restoring a camera, even something as simple as this was fun and gratifying.

P1062073 by telecast, on Flickr
 

Minolta93

Member
Joined
Aug 19, 2020
Messages
222
Location
Cupertino, CA
Format
35mm
I can see how you guys get a lot of satisfaction out of restoring a camera, even something as simple as this was fun and gratifying.
Looks like you did a good job on that, the camera looks great!

I'm hoping to learn some basic repair skills myself as well.
 

Mr Flibble

Member
Joined
Mar 12, 2014
Messages
365
Location
The Lowlands
Format
35mm RF
I can see how you guys get a lot of satisfaction out of restoring a camera, even something as simple as this was fun and gratifying.

It's true, that feeling of putting something back together so it goes click is very satisfying :smile:
Doesn't matter how simple or complex the job is. Great job on that Argus!

After rebuilding that Midg, Rebuilding a Volna-3, Rebuilding a Franka Rolfix, modifying two Super Ikontas 530/15 to take 120 film over the last weeks, I really was in the mood for something simple;
A friend had an Agfa Box 45 that was scratching the negatives and the shutter was erratic. Challenge accepted!

Cleaned the rollers,
Cleaned the viewfinders,
Cleaned the shutter,
Knocked out a dent,
Repaired the leather strap.

And the reward was a nice bottle of Belgian beer :smile:
 

Jonno85uk

Member
Joined
Dec 15, 2020
Messages
188
Location
England
Format
Multi Format
Sorted out a Tamron Adaptall-2 35-70mm F/3.5 17A on the weekend. I bought it as a replacement to an unfixable oneI had previously (fungus inside but the front element ring was jammed by a previous owner).
The new one came with haze in the rear element which wasn't mentioned in the listing (as per usual). Removed the element but the haze wouldn't go away. I'm guessing a coating had become damaged perhaps.

Replaced the element with one from the broken lens.
 
Joined
Nov 7, 2020
Messages
108
Location
SE MI
Format
Multi Format
This Argus A3. A bit more of a challenge than the A4, it was given to me by someone who purchased a lot of camera gear and didn't want it. Someone had removed the front cover and replaced it with a skull motif contact paper. The extinction meter was unusable due to dirt, as was the rest of the camera. By the time I took the first photo the top had been off and all internals cleaned. The lens glass was removed and cleaned, shutter and aperture blades cleaned but not removed. The exposure calculator on the back was frozen with crud and the middle scale wouldn't move. Lighter fluid flushed it out. For the front cover I used paper to make templates then cut the vinyl a bit oversized, applied with contact cement and final trimmed with an X-acto Knife.

I hope I look as good as this when I'm closing in on 80!

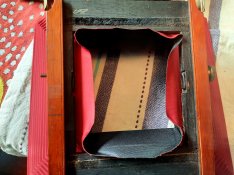
P1062090 (2) by telecast, on Flickr

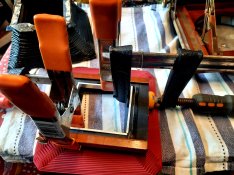
P1062098 by telecast, on Flickr
 

AnselMortensen

Subscriber
Joined
Jun 9, 2020
Messages
2,474
Location
SFBayArea
Format
Traditional
Replaced a missing support block for the focal plane shutter on my 4x5 Pacemaker Speed Graphic project.... got lucky & found the parts I needed on the 'bay at reasonable cost.
 

awty

Subscriber
Joined
Jul 24, 2016
Messages
3,646
Location
Australia
Format
Multi Format
Replaced the ballows on my Superbe Victo triple, in sexy red. Ballsed it up bit, is a bit skewed, should of worked from the centre and not what I thought was the corners. ......gues my pictures will be out of kilter.
 

Attachments

  • 20210503_135231.jpg
    20210503_135231.jpg
    732.9 KB · Views: 119
  • 20210503_135306.jpg
    20210503_135306.jpg
    792.3 KB · Views: 107
  • 20210503_135329.jpg
    20210503_135329.jpg
    672.7 KB · Views: 108
  • 20210503_135356.jpg
    20210503_135356.jpg
    352.4 KB · Views: 113

polka

Member
Joined
May 1, 2008
Messages
167
Format
Medium Format
I fixed the battery drain problem of my Canon EOS 630 but not today, today I know after one month that it is fixed and am developping my first film taken with it.
The battery drain problem occurs when the LCD display backlight dies because then, any new battery is emptied after only a few days, or even overnight. There is a Youtube video explaining how to repair this here :
But I simplified the procedure :
1/ no need to remove the back closure mecanism nor the front panel of the camera ; I could directly remove the bottom : just undoing five little screws and also two little screws on the left side of the front plate, to lift this plate a few mm without removing it.
2/ The procedure ends by cutting a white wire and a black wire : cutting the white wire is enough.

Bye, POLKa
 
Last edited:

Donald Qualls

Subscriber
Joined
Jan 19, 2005
Messages
12,301
Location
North Carolina
Format
Multi Format
2/ The procedure ends by cutting a white wire and a black wire : cutting the white wire is enough.

Does this remind anyone else of the M&M candy commercial that runs before movies in the theater?
 

Ian Grant

Subscriber
Joined
Aug 2, 2004
Messages
23,266
Location
West Midland
Format
Multi Format
Well not today but last Thursday/Friday.

upload_2021-7-6_18-45-35.png


Had to restore the bellows and also the front cross member that the front standard is attached/hinged to. The shutter needs a new crtain and cord as awell as a speed dial. The lens is on a panel from my two shuttered TP Triple Imperial. I have plenty of lens options for this one.

upload_2021-7-6_18-48-52.png


Seems to be a plastic iused for a previous repair. It's a Houghton Triple Victo Half Plate camera, joins my Whole plate Victo and Houghton 1/4 plate King, and Half Plate Houghton Duchess :D

Ian
 

Helios 1984

Member
Joined
Aug 4, 2015
Messages
1,847
Location
Saint-Constant, Québec
Format
35mm
Does anyone has a spare focus ring for a Contaflex IV? Mine is rock solid seized in oxidation & petrified molybdenum, and I don’t think there is much hope for it. I have tried to let it bath in Ronsonol for 2-3 days, then I put the jar in my ultrasonic cleaner, followed by penetrant oil and even the propane torch… The brass rings just seem to have fused together :-/

Picture 01
Picture 02
 
Last edited:

Helios 1984

Member
Joined
Aug 4, 2015
Messages
1,847
Location
Saint-Constant, Québec
Format
35mm
I declare VICTORY!! We are back in business! I clamped my spanner wrench upside down in my vice to have a better gorilla grip, and brute force won. Mind you, the liquid wrench did penetrate as the crud was soaked in the stuff but, oh boy, was it stuck.

KqTqHWC.jpg

DKaZvFX.jpg
 
Last edited:

Nicholas Lindan

Advertiser
Advertiser
Joined
Sep 2, 2006
Messages
4,248
Location
Cleveland, Ohio
Format
Multi Format
Before I can state what I fixed today, I have to state what stopped working today.

Nikon F2A DP-11 finder pantograph mechanism is occasionally sticking. And the AI mechanism on an recently acquired (ebay) TC-300 extender is also occasionally sticking. The combination of the two is bloody frustrating.
 

Tel

Subscriber
Joined
May 9, 2011
Messages
968
Location
New Jersey
Format
Multi Format
Picked up an F2 body on the evil place for $25. Parts or repair, etc. The rewind crank was missing most of its parts, all the light seal and bumper foam was fossilized and one of the carrying strap lugs was broken off. I took a rewind mechanism off a parts camera (and the strap lug), pulled the top covers. I dismantled the mechanisms on the left side and installed the replacement rewind crank. (I'm getting the left side cover removal down to about ten minutes if I use my heat gun to soften up the lock-tight goop and the cement under the little black cover piece.) Took off the right side top cover (using my homemade socket wrench for the little ring that holds the shutter release in place and my suction-cup tool for the winding-arm cover) in order to remove the broken strap lug and also replaced the shutter release bits, cleaned up the grunge and dug out the broken remnants of the old lug before fitting the replacement. Decided the back was too ugly so swapped it for a nicer one and did the light seals using scrap foam from US Camera and the isopropyl release method to install the new foam (from the "Fix Old Cameras" youtube video). The back door latching mechanism was a bit sluggish so it got a cleanout. Shutter speeds sound good and the mirror-return "ping" doesn't happen, so I think it's good to go. Test roll to come today or tomorrow.
 

Donald Qualls

Subscriber
Joined
Jan 19, 2005
Messages
12,301
Location
North Carolina
Format
Multi Format
Fixed a problem with my 3D printer (used to print camera parts, among other things) jamming up the nozzle due to filament transfer tube ("Bowden tube") backing away from the nozzle. Fix used a piece of new tube and 3D printed spacer/support. As a bonus, the new tube used in the hot end is rated for higher temperature, meaning I can now print filament that would have quickly destroyed the old tube.
 

Helios 1984

Member
Joined
Aug 4, 2015
Messages
1,847
Location
Saint-Constant, Québec
Format
35mm
I haven't finished reassembling it yet but the Synchro-Compur of the Contaflex IV is looking good. I started working on it, a couple of days ago, hoping to resurrect it by doing a couple of lighter fluid flushes but It did not go as planned. After flushing the crud a couple of times, the leaves got loose because the rear casing had partly detached from the shutter base plate. Then I removed the speed cam yet more stuff got loose, namely the drive cam, main drive spring & cocking pinion. Fortunately, I found a service manual on Matt's Classic Cameras and worked my way from there. I was able to put back the blades where they belong, clean the escapements & many parts in my ultrasonic cleaner, and then put back everything together. A very rewarding project considering that this thing started its journey as a paperweight :smile:

qGr75il.jpg


.
 
Last edited:

Kino

Subscriber
Joined
Jan 20, 2006
Messages
7,763
Location
Orange, Virginia
Format
Multi Format
I haven't finished reassembling it yet but the Synchro-Compur of the Contaflex IV is looking good. I started working on it, a couple of days ago, hoping to resurrect it by doing a couple of lighter fluid flushes but It did not go as planned. After flushing the crud a couple of times, the leaves got loose because the rear casing had partly detached from the shutter base plate. Then I removed the speed cam yet more stuff got loose, namely the drive cam, main drive spring & cocking pinion. Fortunately, I found a service manual on Matt's Classic Cameras and worked my way from there. I was able to put back the blades where they belong, clean the escapements & many parts in my ultrasonic cleaner, and then put back everything together. A very rewarding project considering that this thing started its journey as a paperweight :smile:


.

Great job! That was probably a nail-biter for a while, but you pulled it off!
 

Tel

Subscriber
Joined
May 9, 2011
Messages
968
Location
New Jersey
Format
Multi Format
Helios 1984: Congratulations! No tiny springs or screws lost! Enjoy shooting with it (X10 because you fixed it yourself).
 

Helios 1984

Member
Joined
Aug 4, 2015
Messages
1,847
Location
Saint-Constant, Québec
Format
35mm
Great job! That was probably a nail-biter for a while, but you pulled it off!

The good thing is that now, I can disassemble and reassemble without worrying. Now, yesterday, after reassembling the whole thing... something jammed. I disassembled the shutter again and was able to source the problems.

1. The escapement needed to be oiled. I thought I could get away running it dry but, alas, the Compur had other plans. I don't have precision oil, at the moment, so I used a tiny bit of Singer Sewing Machine on the pinions and exercised the mechanism. I solved the problem (wiping my forehead). I'll try to put my hands on a bottle of Nyoil or Tri-Flow Superior Lubricant, as recommended by @shutterfinger (2 brands unavailable in these parts).

2. There's something wrong with the flash synch mechanism which prevents the actuation of the shutter. I'm working on this right now. *Thumbs up!

Edit: I'm pretty sure this is what caused the shutter malfunction... I incorrectly reinstalled the aperture ring return spring which ended up pinched between the mating surfaces of the shutter & the rear housing which caused a chain reaction: / The devil is in the details.
pfcyP65.jpg
 
Last edited:

Nicholas Lindan

Advertiser
Advertiser
Joined
Sep 2, 2006
Messages
4,248
Location
Cleveland, Ohio
Format
Multi Format
A good choice for 'clock oil' is Mobil 1 - it won't gum up, which can be a problem with sewing machine oil over the decades (and it is remarkable how quickly decades pass...why it seems they pass in only a year or so -- they lasted much longer when I was young). The 5W grade of Mobil 1 is recommended, but it doesn't really matter. For gawd's sake don't use WD40 or 3-in-1.

Another good choice for mechanisms is straight SAE 30, as used in lawnmowers. It is an additive free oil.

Automotive oil is thousands times cheaper than Nye oil. However it doesn't give that fetishistic satisfaction you get from a $20/5ml oil; except for engineers, where the satisfaction is the other way 'round.
 

Donald Qualls

Subscriber
Joined
Jan 19, 2005
Messages
12,301
Location
North Carolina
Format
Multi Format
Singer Sewing Machine oil was the recommended stuff for amateurs when I first worked on shutter, almost twenty years ago. It will eventually gum up, but you should get several years of good service before it does.
 

Helios 1984

Member
Joined
Aug 4, 2015
Messages
1,847
Location
Saint-Constant, Québec
Format
35mm
Syncro-Compur Update

A few days ago, after the spring episode, I was ready to reassemble to lens-shutter and put it away until the rest of the Contaflex was ready. Before doing so, I decided to actuate the shutter a few times just to enjoy the work I had done. Unfortunately, something went wrong, the shutter wouldn't close completely (Here's what I'm talking about). At first, I thought the leaf actuation ring was gummed up so I disassembled the shutter again, barebone this time, and cleaned everything. I thought I had solved the problem for a moment but it happened again... Then I published every mating surface, and triple-checked that every bit and spring was properly installed but, alas, there was friction somewhere and I just couldn't figure where. I started to believe that maybe the shutter was toasted, you know, maybe it had been actuated one too many thousand times? I put it away for a day or two while concentrating on other small projects. Then, this evening, while giving it another try, my eyes happened to notice that the drive cam would not fully return. Now, what could be the cause of that? I played with the shutter, looked at what was moving when actuating it, and then, BOOM, I spotted the closing spring stuck on the pin on which it is supposed to slide. The leaf actuation ring wasn't able to complete its movement because it just couldn't clear the closing spring! Turns out, the S section of this spring needs to be lubricated, a detail I had overlooked. After applying a micro-dab of Triflow Clear Synthetic Grease, the shutter close completely.

5VVXMOm.png
 
Last edited:

Kino

Subscriber
Joined
Jan 20, 2006
Messages
7,763
Location
Orange, Virginia
Format
Multi Format
Last week I was in Oklahoma for my mother's funeral and to clear her estate. It was a very busy time, the funeral (yes masks and distancing) and with my 4 other siblings sorting and emptying my mother's assisted care room of 80 years of accumulated memories and keepsakes. We all pitched in to sort and distribute all her memories into related boxed for all 5 children and others, so It was a madhouse as you can guess. I didn't discover until I returned that a rather ratty Pentax Spotmatic F resided in the very bottom of my box, all dirty and forlorn.

The mirror was returning to focusing position only occasionally, the battery compartment was frozen shut and the lens was missing it's beauty ring. While there's not much I can do at the moment for the beauty ring, I managed to remove the bottom plate, unfreeze the battery cover and remove the old mercury battery, re-lube the gear train (which solved the mirror issue), clean and polish the lens (the focus ring is a bit warped, so it probably was dropped sometime in the past and the beauty ring popped-off) and give everything a good scrub with Flitz metal polish.

Won't win an awards, but it turned out to be a nice little camera. Haven't confirmed the meter works yet, but overall, it's fairly nice for such a basket case to begin with.

Still trying to find out from the family where it came from and why Mom had it...
65014291144__F01C72BD-916D-494D-8577-9CDF895CBEB1.jpg
 
Photrio.com contains affiliate links to products. We may receive a commission for purchases made through these links.
To read our full affiliate disclosure statement please click Here.

PHOTRIO PARTNERS EQUALLY FUNDING OUR COMMUNITY:


Ilford ADOX Freestyle Photographic Stearman Press Weldon Color Lab Blue Moon Camera & Machine
Top Bottom