What did you fix today? (part 2)

Roses

A
Roses

  • 6
  • 0
  • 97
Rebel

A
Rebel

  • 6
  • 3
  • 118
Watch That First Step

A
Watch That First Step

  • 2
  • 0
  • 80
Barn Curves

A
Barn Curves

  • 3
  • 1
  • 67
Columbus Architectural Detail

A
Columbus Architectural Detail

  • 5
  • 3
  • 77

Forum statistics

Threads
197,490
Messages
2,759,876
Members
99,517
Latest member
RichardWest
Recent bookmarks
0

Helios 1984

Member
Joined
Aug 4, 2015
Messages
1,844
Location
Saint-Constant, Québec
Format
35mm
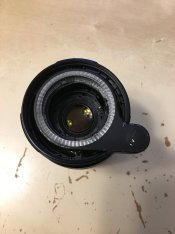
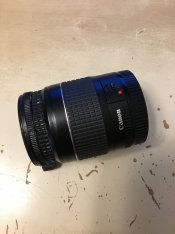
I've cleaned and adjusted the rangefinder of my Topcon 35-L.

GdiH71y.jpg


U0urP7U.jpg
 

Bikerider

Member
Joined
Jun 6, 2008
Messages
431
Location
Stanley, Co. Durham, UK
Format
35mm
Sorry to be slightly OOT, anybody knows where could I get small screw for Nikon top and bottom cover?

How long has the screw to be? I have just taken apart a mobile phone to get at the memory to destroy what is saved on there before sending it for re-cycling and there are a myriad of small screws which I think could be used elsewhere. There were all Philips head, 1mm x 2mm up to 4mm. They are probably a standard miniaturised metric thread, it may be worth trying.
 

jaeae

Member
Joined
Jun 15, 2019
Messages
69
Location
Finland
Format
Hybrid
Today I adjusted my Praktica MTL3/5 (probably 3, this is the black RevueFlex variety..) mirror. Found some threads about Praktica L focusing being off. Mine has also had tendency not reaching infinity with any lens except wide-angles..
It seems there can be 3 reasons

a) the focus screen or mirror has been slightly off from factory already
b) camera has received a shock or someone has tried adjustment previously
c) the mirror stop has deteriorated over time

Since the stop is a soft rubber plug, I'm going with answer c) with this. The mirror stop has a gray eccentric adjustment nut which is supposed to be adjusted before the mirror box is assembled to the rest of the camera. The nut is attached with a screw + spring washer from the other side of the mirror box. I managed to turn it with pliers and a plastic LED collar I happened to have. This way I avoided leaving plier marks on the eccentric nut. I would recommend turning the nut only in clockwise direction since going the other way will loosen the nut from the screw. Which is not optimal :tongue: The eccentric adjustment is not very precise to use. I had to only turn it about 0,5mm or so, that fixed the lenses not reaching infinity (in the viewfinder).


Joined
Dec 27, 2011
Messages
368
Location
The Netherlands
Format
Multi Format
I opened my newly acquired Lanasix 3 to clean and re-glue the window which had come loose. The backplate is easy to remove after heating it for 15-20 seconds with a hairdryer and prying it off with a filed down flat screwdriver. I also very gently cleaned the silver filter on the photocell aperture plate and the glass protector. I have to say, I'm quite impressed by this little thrift store find, I knew it was working but I didn't expect it to be as accurate as my Luna Pro F.

Note: This one was manufactured during the 2nd quarter of 1973.


z3sAm2a.jpg

Very nice. Is yours adapted to it can use modern batteries?
Was the production year somewhere written inside?
 

Helios 1984

Member
Joined
Aug 4, 2015
Messages
1,844
Location
Saint-Constant, Québec
Format
35mm
Very nice. Is yours adapted to it can use modern batteries?
Was the production year somewhere written inside?

I get good readings with alkaline 625 which is why I suspect it's been recalibrated in the past. Both batteries are at about 1.49V yet the needle lands in the upper red mark when doing a battery test.
According to Gossen customer service, the serial number corresponds to the 2nd quarter of 1973.
 

Donald Qualls

Subscriber
Joined
Jan 19, 2005
Messages
12,073
Location
North Carolina
Format
Multi Format
I spent pretty much the whole day learning the basics of FreeCAD and then practicing by designing and drawing a film slitter to convert 120 into either 127 and a 16mm strip, or three 16mm strips with the edge markings removed from all three. Now I have to find a place to put a 3D printer...
 

Helios 1984

Member
Joined
Aug 4, 2015
Messages
1,844
Location
Saint-Constant, Québec
Format
35mm
I re-did this piece of lining on the case of my Topcon 35-L. I'd done it about 2 years ago but it was in 2 pieces instead of 1 and I didn't like how it looked.
The trick is to glue the whole piece of fabric and then trim it to the desired shape. For a clean look, I used a double-edge razor blade to shave the imperfections left by scissors.

I've also replaced the dishwasher drain pump & the magnetron in our 16yo Panasonic convection oven. It cost me 17$ for a used pump and about 50$ for the brand new magnetron.

rMngoYd.jpg
 

nosmok

Subscriber
Joined
Jun 11, 2010
Messages
678
Format
Multi Format
Just got a replacement bellows onto the rear standard of my Century 8x10! Still remaining: rebuild the front standard, stick the bellows to that, wax the tracks, and put it all together!
 

Mr Flibble

Member
Joined
Mar 12, 2014
Messages
363
Location
The Lowlands
Format
35mm RF
Still a Work In Progress, but it's getting there

AiresIIIc_01~0.jpg


Aires IIIc, had 3 loose elements in the VF/RF, and the aperture ring was loose. Probably because the previous owner bounced it off the pavement at some point.
All fixed and calibrated now.
Still need to replace one broken pin on the back of the shutter and give it a good clean.
 

Kino

Subscriber
Joined
Jan 20, 2006
Messages
7,602
Location
Orange, Virginia
Format
Multi Format
Still a Work In Progress, but it's getting there
Aires IIIc, had 3 loose elements in the VF/RF, and the aperture ring was loose. Probably because the previous owner bounced it off the pavement at some point.
All fixed and calibrated now.
Still need to replace one broken pin on the back of the shutter and give it a good clean.
Great camera! I have one that is fully operational and one that is in a box awaiting my attention...

I see your camera has the PX diamond stamped on the shutter cocking lever. Some GI bought it in a PX originally.
 

Kino

Subscriber
Joined
Jan 20, 2006
Messages
7,602
Location
Orange, Virginia
Format
Multi Format
Well, this is analog, so I will post that I just refoamed 3 sets of rather rare speakers.

Fried Signature Series A/2, Q/2 and the Beta IV bookshelf monitors. Got to let them dry and install the drivers back in their cabinets tomorrow.

That was interesting. Hope I did it right!

IMG_5113.JPG
 

Mr Flibble

Member
Joined
Mar 12, 2014
Messages
363
Location
The Lowlands
Format
35mm RF
I see your camera has the PX diamond stamped on the shutter cocking lever. Some GI bought it in a PX originally.

That hadn't even registered with me. Sweet! Thanks.

AiresIIIc_03.jpg


It's back together now, I drilled out the broken pin on the back of the shutter and tapped in a custom replacement
The shutter mechanism itself took a good bath in the ultrasonic cleaner.
Only the aperture dial doesn't feel as smooth as I like it to be. I'll look into that sometime in the near future.

I might also touch up some of the engravings with a wax crayon.
 

Lucid

Member
Joined
Jun 18, 2018
Messages
102
Location
England
Format
Multi Format
This weekend I repaired a well used Lee Wide Angle Lens Hood. The metal frames on both ends were in the process of detaching. The corners of the bellows had a number of pin holes, and the cover material was flacking off.

I used Nitromoors to remove the glue residue from the metal frames and then cleaned then off with isopropyl. I scrubbed the contact surfaces on the bellows with a tooth brush and then cleaned them with iso as well.

Using contact cement I bonded the frames to the bellows. I used dumbbell weights to clamp the surfaces together for 24 hours.

To rectify the general appearance and light leaks, I coated the relevant areas with black Plastidip with a small brush and cotton bud. I then left the paint to cure for several hours.

The lens hood is now back to it's former glory, and the repairs are hardly noticeable. I would recommend Plastidip for enacting repairs to bellows. I may even coat the entire bellow exterior in the future, but for now if it ain't broke, don't fix it.
 

neeksgeek

Member
Joined
Sep 5, 2019
Messages
57
Location
USA
Format
Multi Format
Here are pictures of a Canon 28-80mm zoom with a bad focus motor. It came attached to an EOS Rebel body I found for $15 in a junk shop, I mean, an antique mall. I’ve converted it to a close-up lens, which gives magnification of roughly 1-2x on my EOS 1Ds Mk II. I’ve removed the front element group and cut the body of the lens down a bit to get a little more working distance. The aperture mechanism still works! Also, because the working distance is so short, I fitted it with a ringlight accessory from some random video camera. Waiting for a box of LED key-fob flashlights to arrive so I can attach a more permanent light source.

I love epoxy and my Dremel tool. It’s not the prettiest thing I’ve made, but it works!
 

Attachments

  • 02855C6A-9CF5-40F9-A323-FFBAB19E2FE3.jpeg
    02855C6A-9CF5-40F9-A323-FFBAB19E2FE3.jpeg
    540.6 KB · Views: 82
  • 104BB5A9-F931-4D99-AC93-6DA83A11D715.jpeg
    104BB5A9-F931-4D99-AC93-6DA83A11D715.jpeg
    591.3 KB · Views: 97
  • 5AF1ACAE-34A1-4C34-8057-45A11F68A069.jpeg
    5AF1ACAE-34A1-4C34-8057-45A11F68A069.jpeg
    496.3 KB · Views: 93
  • 3C6201C1-F78B-47C5-B327-E03D4434E05E.jpeg
    3C6201C1-F78B-47C5-B327-E03D4434E05E.jpeg
    504 KB · Views: 81
Joined
Dec 27, 2011
Messages
368
Location
The Netherlands
Format
Multi Format
That hadn't even registered with me. Sweet! Thanks.

View attachment 267062

It's back together now, I drilled out the broken pin on the back of the shutter and tapped in a custom replacement
The shutter mechanism itself took a good bath in the ultrasonic cleaner.
Only the aperture dial doesn't feel as smooth as I like it to be. I'll look into that sometime in the near future.

I might also touch up some of the engravings with a wax crayon.

Didn't know this camera; what a beauty!
 

Kino

Subscriber
Joined
Jan 20, 2006
Messages
7,602
Location
Orange, Virginia
Format
Multi Format
Minox 35 PL. Was apparently dropped in the past, as evidenced by a cracked viewfinder lens. Removed the pressure plate, aperture mask and re-set the actuating lever on the shutter assembly. It appears to be working fine now and the crack in the viewfinder is along the rightmost edge of the viewfinder, so it's not really visible when looking through the assembly.
 

Mr Flibble

Member
Joined
Mar 12, 2014
Messages
363
Location
The Lowlands
Format
35mm RF
Hey Rick, good to see you do the repair now yourself!

btw what was wrong with the camera (what needed to be repaired)?
and.. probably you know...but use epoxy with care - it isn't reversible - ...

The shutter wasn't smooth to wind and a bit sluggish on slower speeds and capping on 1/500th.
But in order to get at it I needed to remove the non-Leica leather covering. Then the filler came off with it, showing the hole in the body and a lot of pitting/oxidation.
I used the epoxy to cover the hole and build up a bit of the lost thickness.
Some screws were rusted/oxidized in place as well, that need some brain-surgery level of Dremel work to remove.


The weird dent isn't fully gone, but better than it was now.
LeicaI_CLA_07.jpg


Just waiting on the replacement skin from Hugo Studio and I'm looking for some replacement screws to secure the edge of top cover to the body (I only had phillips heads in this size! D'oh!)
LeicaI_CLA_09.jpg


I'll probably also replace the take-up spool with a contemporary Leica one.
 
Joined
Dec 27, 2011
Messages
368
Location
The Netherlands
Format
Multi Format
The shutter wasn't smooth to wind and a bit sluggish on slower speeds and capping on 1/500th.
But in order to get at it I needed to remove the non-Leica leather covering. Then the filler came off with it, showing the hole in the body and a lot of pitting/oxidation.
I used the epoxy to cover the hole and build up a bit of the lost thickness.
Some screws were rusted/oxidized in place as well, that need some brain-surgery level of Dremel work to remove.


The weird dent isn't fully gone, but better than it was now.
LeicaI_CLA_07.jpg


Just waiting on the replacement skin from Hugo Studio and I'm looking for some replacement screws to secure the edge of top cover to the body (I only had phillips heads in this size! D'oh!)
LeicaI_CLA_09.jpg


I'll probably also replace the take-up spool with a contemporary Leica one.

Well done ! nice work altogether
 

Lucid

Member
Joined
Jun 18, 2018
Messages
102
Location
England
Format
Multi Format
I have an old Marrutt drying cabinet. It only had 3 hanger rods which were beginning to corrode.

I purchased some 5mm 316 stainless steel rod, an upgrade on the original 3/16 304 rod. I was able to create a full set of 9 rods from a piece of 3 metre stock.

Bolt cutters made quick work of cutting the pieces, and the replacement vinyl caps saved me from having to file the ends of each rod.

I'd like to remove some of the rust from the cabinet and repaint it eventually. The final bit of work will be to replace the thermostat with a PID controller.

Ashamedly, the cabinet has seen more use as a room heater, but when when I am drying film/prints it's a great piece of equipment to have.
 

Attachments

  • MarruttDryingCabinetRods.jpg
    MarruttDryingCabinetRods.jpg
    158 KB · Views: 93

MattKing

Moderator
Moderator
Joined
Apr 24, 2005
Messages
51,949
Location
Delta, BC Canada
Format
Medium Format
They go so well with the keyboard in the background.
Similar vintage? :D
 

Lucid

Member
Joined
Jun 18, 2018
Messages
102
Location
England
Format
Multi Format
They go so well with the keyboard in the background.
Similar vintage? :D
haha, probably. I remember I purchased the keyboard, monitor, and computer for a grand sum of £1 from my school. I would've taken the dot matrix printer too, but my younger self could only walk so many miles back home with the computer/monitor/keyboard.
 

Mr Flibble

Member
Joined
Mar 12, 2014
Messages
363
Location
The Lowlands
Format
35mm RF
Currently servicing a Zeiss Super Ikonta II BX for someone. Just revived the light meter.
Date on the Selenium Cell reads November 8th 1951.
After calibrating it to my VC-2 it appears to be pretty accurate too.
Not bad for a 70-year old cell that's only expected to last 20 years. :wink:
 
Photrio.com contains affiliate links to products. We may receive a commission for purchases made through these links.
To read our full affiliate disclosure statement please click Here.

PHOTRIO PARTNERS EQUALLY FUNDING OUR COMMUNITY:


Ilford ADOX Freestyle Photographic Stearman Press Weldon Color Lab Blue Moon Camera & Machine
Top Bottom