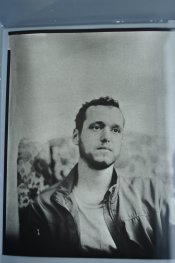
Reversal print processing video..new approach

about to extinct

D
about to extinct

  • 0
  • 0
  • 22
Fantasyland!

D
Fantasyland!

  • 9
  • 2
  • 97
perfect cirkel

D
perfect cirkel

  • 2
  • 1
  • 121
Thomas J Walls cafe.

A
Thomas J Walls cafe.

  • 4
  • 6
  • 281

Recent Classifieds

Forum statistics

Threads
198,745
Messages
2,780,271
Members
99,693
Latest member
lachanalia
Recent bookmarks
0

nmp

Member
Joined
Jan 20, 2005
Messages
2,014
Location
Maryland USA
Format
35mm
Great stuff, Ed and Niranjan. That all makes perfect sense.

I was thinking of trying some phosphoric acid (I have some 35% on hand for making acid phosphate old fashioned beverage "phosphate soda" additive) to replace the citric. I read that the acid in a non-halogenating simple bleach needs to be non-organic, which rules out acetic acid, but phosphoric is a mineral acid, like sulfuric. Would the reduction reaction with phosphoric acid form a fixable or washable silver compound?

Best,

Don

The product with phosphoric acid would be silver phosphate which is actually less soluble than silver citrate. See the table:

http://www.saltlakemetals.com/Solubility_Of_Silver_Compounds.htm

Ironically, the way i understand, you need an insoluble product - in order to function as a bleaching aid. If the salt is soluble, the silver is still in the ionic form in the solution, so the above concept of equilibrium reaction is still in effect. In that regard, phosphoric acid may actually be better than citric acid. But it will still be in the paper until you fix. If you want truly soluble silver salt, try sulfamic acid. Silver sulfamate is readily soluble in water. Presumably, if the reaction slows down, you can rinse out the sulfamate and repeat with fresh chemistry and so on until the image is bleached completely.

On an another note, if you look at the recipe examples in the patent I linked above, they all involve use of NaOH to raise the pH of the bleach to about 5. Just something to consider. pH of around 5 is also the so-called isoelectric point for gelatin - the condition where the gelatin is most stable. Further one is away from this pH on either side, more is the propensity to loosen up the network, resulting in swelling or dissolution.

:Niranjan.
 

himself

Member
Joined
Apr 8, 2011
Messages
513
Format
Multi Format
just a quick update, I've been working on the portraits I had initially hoped to use this process for and despite some early success my attempts seem to have slipped back to the grey/blacks of my initial tests.

My process is the same as when successful except that I had to mix new bleach (and variable first exposure) and since then they've been a bit hit and miss. I realise the 2 spoons of citric acid is hardly a definitive measure and there must be some slight difference in each batch of bleach, but the image is still bleaching to completely white in about 3 minutes.

And but despite this, 3 of the 5 images I developed today where grey/white and show a lot of mottling.

So now I have a series of stupid questions, and if anyone has any ideas..

How would over/underexposing the initial exposure effect the final image?
Can bleaching be incomplete, even if the paper is like totally white?
Does initial exposure effect how much 2nd exposure you need?
And finally, should the second exposure be the same no matter what, and the final effect will look over/underexposed like a normal neg/print?

thanks, and I've been following along with general discussion - lots of interesting information!

Dafydd
 

Joe VanCleave

Member
Joined
Jan 20, 2004
Messages
677
Location
Albuquerque,
Format
Pinhole
I've had better success against mottling by ensuring full development on the first step. And using a stronger developer concentration that what I'd normally use on paper negatives - 1:10 instead of 1:15, in the case of Ilford liquid paper concentrate. I can't remember what H2O2 concentration you're using, but I've had better luck against mottling with a weaker solution. I'm theorizing a weak first development leaves sensitized, unbleached silver halides behind that end up getting exposed again and developed in the 2nd development, causing the mottling. And too-strong H2O2 may cause a 2nd type of mottling by some other means.

I've been using more exposure on the 2nd exposure than I was before. Like 15-30 seconds, enlarger at 16" height and f/22. You'll begin to see a tonal change to the image. The idea is to fully expose the remaining silver halides.

Under-exposing the in-camera image, followed by successful bleaching, results in an under-exposed looking final print, with dense shadows and highlights not as bright. That was my experience last week, between two prints exposed at ISO 3 & 6. I think the crucial step is adequate bleaching. I've seen inadequate bleaching on a print with adequate in-camera exposure but weak first developer; the highlights appeared dark under red lights but not developed enough to bleach. I've also seen too much in-camera exposure can also tax the bleaching step. Hence the reason why I got better results last week by raising the ISO from 0.8 to 3; even ISO 6 was better.

I'm thinking of limiting how many prints go through a single batch of bleach. Last week I used 75mL of 35% H2O2 with 225 mL distilled H2O (a 9% concentration) and 3 tsp of citric acid powder, for two 4x5 prints. There was a bit weaker bleaching by the 2nd print. I think that's the limit for that volume of solution at that concentration, unless I figure something out better. So it seems this process needs a lot of fresh chemicals.
 

Joe VanCleave

Member
Joined
Jan 20, 2004
Messages
677
Location
Albuquerque,
Format
Pinhole
Thinking about your print problems, you seem to be getting good bleaching, as you say the prints turn white-ish. So if the final positive is too dark, you may be under-exposed in-camera, with successful bleaching of whatever highlights turned dark from the first development (and unexposed shadow areas also white), hence why the print, post-bleach, looks white. Then you have lots of unexposed halides that get fogged/developed in the 2nd.

EDIT: To sum up, give more in-camera exposure for these portraits, and stronger/longer developer. It seems like your bleaching is good.
 
Last edited:

DonF

Member
Joined
Jul 19, 2016
Messages
285
Location
Saint Charles, Il
Format
Large Format
just a quick update, I've been working on the portraits I had initially hoped to use this process for and despite some early success my attempts seem to have slipped back to the grey/blacks of my initial tests.

My process is the same as when successful except that I had to mix new bleach (and variable first exposure) and since then they've been a bit hit and miss. I realise the 2 spoons of citric acid is hardly a definitive measure and there must be some slight difference in each batch of bleach, but the image is still bleaching to completely white in about 3 minutes.

And but despite this, 3 of the 5 images I developed today where grey/white and show a lot of mottling.

So now I have a series of stupid questions, and if anyone has any ideas..

How would over/underexposing the initial exposure effect the final image?
Can bleaching be incomplete, even if the paper is like totally white?
Does initial exposure effect how much 2nd exposure you need?
And finally, should the second exposure be the same no matter what, and the final effect will look over/underexposed like a normal neg/print?

thanks, and I've been following along with general discussion - lots of interesting information!

Dafydd

All, feel free to disagree or modify my responses. These are my observations.

"How would over/underexposing the initial exposure effect the final image?"

The paper needs to be overexposed at an ISO lower than the equivalent paper speed would suggest in order to get sufficient density in the final reversed print. I use ISO 1.5 with Arista #2 RC paper, which is rated at P400, which is roughly a calculated ISO of 400/80=5. This gives a "Sunny 16" exposure of 1/2 second (at f/16) at ISO 1.5.

"Can bleaching be incomplete, even if the paper is like totally white?"
Not in my experience with either Hydrogen Peroxide/Citric Acid and Potassium Dichromate/Sulfuric Acid bleaches. Once the paper is white with perhaps only a faint cream colored image remaining, bleaching is complete.

"Does initial exposure effect how much 2nd exposure you need?"
Yes. If the exposure is correct, there should be some image visible after developing to (dark) completion during the first developing. If the image goes completely black (overexposed in-camera), the final image will very overexposed (light after bleaching) or non-existent and may require longer second exposure to bring the density up.

And finally, should the second exposure be the same no matter what, and the final effect will look over/underexposed like a normal neg/print?
To a limited degree, extending the fogging exposure seems to help increase the density of an overexposed paper. I have obtained images when the paper is over-exposed (black after first development) by extending the second fogging exposure after extended bleaching (still only to white). I have noticed a faint positive appears during the second fogging exposure that helps determine when to stop and develop again. Others have not seen the faint image appear. I always see it with Dichromate bleach and Arista #2 glossy RC paper, which has developing agents added to the emulsion. The final print will be light if overexposed in the camera and darker if underexposed if the processing is correct.

Don
 

himself

Member
Joined
Apr 8, 2011
Messages
513
Format
Multi Format
Joe & Don,

A little extra info, I'm rating the paper at iso 1.5, and metering the same way as always. Unfortunately, the light is a little variable because I'm using natural light.

So that's what I was initially thinking too, but looking at the prints today, now dry, the 2 worst (as in most grey) look to be exposed better that the one that could have been said to have worked. There's much better detail in the shadows and overall it looks fine, except that the highlights are grey (looks like a ambrotype again) and not white.

Could it be that overexposing on the first exposure leads to grey highlights? or that overexposing the first exposure and then under/overexposing the second makes it grey?

And just to comment on volumes, I think you're under using your bleach Joe. I'm using 300ml (12%) with 2 tsps and after 5 8x10 prints yesterday they're still bleaching to completely white in 3 minutes.
 
Last edited:

himself

Member
Joined
Apr 8, 2011
Messages
513
Format
Multi Format
So I just had the opportunity to take and process another image, and I think it illustrates well what I mentioned in my previous post ref the first exposure.

The first image, which is grey and black (and no whites) looks to be the better exposed, maybe just a little over, however the second image is the one with white highlights*.
Both were processed in the same bleach to completely white and re-exposed for 2 minutes with the enlarger.

Unfortunately I'm unable to scan them at the moment, so had to snap them with my digital camera, but I think the difference is visible.

1.JPG 2.JPG

*it looks a little more white in person, especially the lettering, but the lighting has added a little bit of a yellow cast
 

DonF

Member
Joined
Jul 19, 2016
Messages
285
Location
Saint Charles, Il
Format
Large Format
So I just had the opportunity to take and process another image, and I think it illustrates well what I mentioned in my previous post ref the first exposure.

The first image, which is grey and black (and no whites) looks to be the better exposed, maybe just a little over, however the second image is the one with white highlights*.
Both were processed in the same bleach to completely white and re-exposed for 2 minutes with the enlarger.

Unfortunately I'm unable to scan them at the moment, so had to snap them with my digital camera, but I think the difference is visible.

View attachment 188674 View attachment 188675

*it looks a little more white in person, especially the lettering, but the lighting has added a little bit of a yellow cast

I think the first has a good in-camera exposure, but was overexposed some during the second exposure. Try 1 minute. Highlights (background) look dark.

The second seems slightly underexposed in-camera and also overexposed on second exposure.

Just my impression based upon my own trials....

Don
 

DonF

Member
Joined
Jul 19, 2016
Messages
285
Location
Saint Charles, Il
Format
Large Format
Joe & Don,

A little extra info, I'm rating the paper at iso 1.5, and metering the same way as always. Unfortunately, the light is a little variable because I'm using natural light.

So that's what I was initially thinking too, but looking at the prints today, now dry, the 2 worst (as in most grey) look to be exposed better that the one that could have been said to have worked. There's much better detail in the shadows and overall it looks fine, except that the highlights are grey (looks like a ambrotype again) and not white.

Could it be that overexposing on the first exposure leads to grey highlights? or that overexposing the first exposure and then under/overexposing the second makes it grey?

And just to comment on volumes, I think you're under using your bleach Joe. I'm using 300ml (12%) with 2 tsps and after 5 8x10 prints yesterday they're still bleaching to completely white in 3 minutes.

In my experience, underexposing in-camera is what causes the muddy print. Possibly underdeveloping during the first development, but that is more likely to cause dark spots in highlighted areas unless severely underdeveloped.

Overexposing during the second fogging exposure may darken the highlights, but doesn't seem to cause an overall muddiness.

Don
 

NedL

Subscriber
Joined
Aug 23, 2012
Messages
3,388
Location
Sonoma County, California
Format
Multi Format
Something is not quite right about our thinking. In my opinion we've made a model of how this process works that is too simple. I think there is more going on than we are accounting for. ( I mean the H2O2 process.. I think the dichromate process IS more like the simple model ).

In the 2nd exposure, if all the remaining silver halides are exposed, how is it that:
* joe gets different results by using a limited re-exposure than processing in full room light
* I get VC contrast control in my second exposure
* Don says an overexposed negative can be compensated for by increasing the 2nd exposure

All of these things argue that there is still some "wiggle room" with unexposed halides during the 2nd exposure. Otherwise, the end result would be completely determined after the bleach step, but none of us are finding that to be true.

I don't think I understand the process well enough to answer Dafydd's questions yet... but they're good questions :smile:
 
Last edited:

himself

Member
Joined
Apr 8, 2011
Messages
513
Format
Multi Format
I think the first has a good in-camera exposure, but was overexposed some during the second exposure. Try 1 minute. Highlights (background) look dark.

The second seems slightly underexposed in-camera and also overexposed on second exposure.

Just my impression based upon my own trials....

Don

Thanks Don,

but ummm, ok, so I did some extra test (without a person) later but before reading this reply - and because of this I decided to try extra exposure on the second exposure (after that had worked so well before) and: metering the same way as before, got and exposure time I would have expected, and but this time re-exposed it for 4 minutes after bleaching.. which worked. Nice white highlights and the overall exposure was good, not perfect, but certainly acceptable.

but 4 minutes? that seems just like a really long time, and is more not less, so what's going on?

I think there is more going on than we are accounting for

Ned,

I think you've just about perfectly summed up the situation, which means we are making progress of some kind
 

Joe VanCleave

Member
Joined
Jan 20, 2004
Messages
677
Location
Albuquerque,
Format
Pinhole
Something is not quite right about our thinking. In my opinion we've made a model of how this process works that is too simple. I think there is more going on than we are accounting for. ( I mean the H2O2 process.. I think the dichromate process IS more like the simple model ).

In the 2nd exposure, if all the remaining silver halides are exposed, how is it that:
* joe gets different results by using a limited re-exposure than processing in full room light
* I get VC contrast control in my second exposure
* Don says an overexposed negative can be compensated for by increasing the 2nd exposure

All of these things argue that there is still some "wiggle room" with unexposed halides during the 2nd exposure. Otherwise, the end result would be completely determined after the bleach step, but none of us are finding that to be true.

I don't think I understand the process well enough to answer Dafydd's questions yet... but they're good questions :smile:

Ned, thinking about your question, I don't see them as mutually exclusive; in fact, you might have answered your own question. We do have "wiggle room" on the second fogging exposure. There may be some masking effect of the bleached silver partially obscuring unexposed silver halides underneath; hence why a prolonged second fogging exposure can yield good results.

My biggest problem to date with this process is getting reliable bleaching. Hopefully I'll have time this week for more tests. Thank you all for your continued sharing of updates.

~Joe
 

himself

Member
Joined
Apr 8, 2011
Messages
513
Format
Multi Format
there must be a lot of "wiggle room" at each stage of the process, otherwise how could we all be having different problems at/or from different stages?

obviously there isn't uniformity across all our processes, but the variety of results seems to suggest that not only is there possible variation at each stage, but that also the previous stage influences (and introduces new variations) the next stage so much that there can't be a standard correct - exposure = Y bleach dilution = X re-exposure - for the process.

and so, if this is the case, could it be that the number of variables is too large to really get a handle on, and that we're just chasing ourselves in circles until we have a large enough sample size to have exhausted all possible combinations (if that's possible)?
 

removed account4

Subscriber
Joined
Jun 21, 2003
Messages
29,832
Format
Hybrid
hi himself

under exposed, over exposed yellow, muddy .. whatever
really nice portraits .. i like them both for different reasons
they both have that glow to it that i can't describe
its that midtone glow that solarized or almost solarized prints get ..
 

nmp

Member
Joined
Jan 20, 2005
Messages
2,014
Location
Maryland USA
Format
35mm
there must be a lot of "wiggle room" at each stage of the process, otherwise how could we all be having different problems at/or from different stages?

obviously there isn't uniformity across all our processes, but the variety of results seems to suggest that not only is there possible variation at each stage, but that also the previous stage influences (and introduces new variations) the next stage so much that there can't be a standard correct - exposure = Y bleach dilution = X re-exposure - for the process.

and so, if this is the case, could it be that the number of variables is too large to really get a handle on, and that we're just chasing ourselves in circles until we have a large enough sample size to have exhausted all possible combinations (if that's possible)?

I wonder if you do experimentation first in the darkroom with the use of a step wedge, like that made by Stouffer, it might be easier/faster to delineate the effects of various steps and their correlation to each other. In order to get the whites, the darkest areas in the negative should contain little or no silver halide at the end of the first exposure/develop. This can be done either by "overexposing" and/or by "overdeveloping" or a combination thereof. Finally, all silver must be oxidized and citrated in the bleach step. If these conditions are achieved, subsequent re-expose and re-develop should become more robust.
 
Last edited:

DonF

Member
Joined
Jul 19, 2016
Messages
285
Location
Saint Charles, Il
Format
Large Format
Yesterday I decided to try out my "new" used Minolta IVf flash meter to see how it performed with my studio flashes and the Arista #2 paper. I mixed up fresh chemistry for both the hydrogen peroxide/citric acid bleach and potassium dichromate/sulfuric acid bleach.

For each exposure setting, I took two identically exposed shots with exactly the same flash settings. As there was very dim ambient light, I simply opened the shutter, popped the flash manually, and closed the shutter.

I tried metering at ISO 1.5, adding 3/4 stop for the bellows extension factor on my 210mm lens. This resulted in consistently overexposed images. Metering at ISO 3 (incident reading) resulted in a very good exposure after adding in the bellows factor.

The developer was Dektol mixed 1+1. The peroxide bleach was mixed 175mL water + 125mL 35% hydrogen peroxide + 2 level teaspoons citric acid (8.2 grams).

The second exposure was about 60 seconds under a 60-watt equivalent daylight-balanced flood lamp. I exposed the front and back of each print with constant motion to avoid hot spots.

The subject is an old Princess phone I grabbed off the shelf as a test subject. All scans are in color. I adjusted the gamma to neutral with full dynamic range in the scan, but otherwise the images are not retouched.

Here is my first test. The first image is with dichromate, the second with peroxide. Otherwise, identical processing was used. Both images are very overexposed, but I did note that the peroxide bleach almost instantly bleached the image white. The dark mottling showed up during the second development.

test1_web_.jpg


Second test shots. The dichromate process was routine. Exposure seems good. This time I noticed intense fizzing from the peroxide bleach, with an almost instant bleaching to white. The darkness and blotchiness in the peroxide print on the right showed up only during the second development.
test2_web.jpg


The third set of test prints. I mixed fresh peroxide bleach for this test. These are overexposed again due to some lighting adjustments. The weird spots on the peroxide-bleached print showed up in the second development.
test3_web.jpg


The final test prints. This is the best exposure in the batch. The dichromate-bleached print has a few spots, but looks good. The peroxide bleach is, well, .....
test4_web.jpg


These tests were side-by-side with identical chemistries except for the bleach. The uneven bleaching is a real mystery. The clearer areas of the peroxide-bleached prints bleached almost immediately, but the darker patches took many minutes to lighten and never really bleached to complete white. The overexposed first print did bleach completely from a near-black first development. However, the second development revealed the dark splotches.

At this point, I am at a loss to explain what is happening as there seems to be no repeatability with the peroxide process. The potassium dichromate bleach works so well and gives such repeatable results, I think I will stick to that chemistry and abandon the peroxide. The dichromate bleach requires care in preparation and handling. It lasts for many, many prints, is inexpensive, and can be rendered relatively inert by adding sodium sulfite until it turns a deep green from orange.

I think the best explanation for what is happening might be that offered by nmp quite a few postings back. The peroxide bleach forms silver citrate as it bleaches, which is insoluble and remains in the paper. Silver citrate is slightly actinic, meaning it is light sensitive.

That's pure speculation, I'm at a loss to explain the wildly variable results.

BTW, the faint discoloration on the dichromate bleach examples is likely due to not leaving in the sodium sulfite clearing bath long enough to remove the orange stain from the print. It shows up on the scanner, but is not really visible on the print in room lighting. Of course, the clearing bath is not needed with the peroxide bleach.

Best,

Don
 
Last edited:

himself

Member
Joined
Apr 8, 2011
Messages
513
Format
Multi Format
jnanian,

Thanks, and it's not that I wholly dislike them, but that it would be nice to have some small amount of control over the final image. And you're right, it seems like a technique that gives lovely midtones and shadows.

I wonder if you do experimentation first in the darkroom with the use of a step wedge, like that made by Stouffer

thanks for the info, but unfortunately I already tried that and it's how I arrived at a 2 minute re-exposure, but now 2 minutes doesn't seem to be working anymore. I tried some new images today and re-exposed them for 4 minutes, which seemed to improve the highlights even if the images were a little underexposed.

It's not so much that I mind them not being perfect or exactly alike, it's just I'm burning through paper at the moment.

Don,

I'll try to digest your full post later when I have time, but you shouldn't give up just yet. getting repeatable prints isn't impossible, it's the fine tuning that seems to be the hardest part.
 

Joe VanCleave

Member
Joined
Jan 20, 2004
Messages
677
Location
Albuquerque,
Format
Pinhole
Don, is the paper wet during the second exposure? Has the front and/or back sides been superficially dried via squeegee? Just curious.
 

DonF

Member
Joined
Jul 19, 2016
Messages
285
Location
Saint Charles, Il
Format
Large Format
Don, is the paper wet during the second exposure? Has the front and/or back sides been superficially dried via squeegee? Just curious.

I did not squeegee, but I see what your getting at! I have softened water, so it sheeted off pretty well after the post-bleach rinse. These are probably the worst results I have gotten. Wildly uneven bleaching!
 

Joe VanCleave

Member
Joined
Jan 20, 2004
Messages
677
Location
Albuquerque,
Format
Pinhole
At a certain angle, a wetted paper surface acts like a good mirror, reflecting lots of light back off before it gets to the emulsion underneath. This might have the effect of reducing the second fogging exposure in those areas. Just another variable to consider. Although the uneven blotches don't look like they're from reflections, they appear too random.
 

DonF

Member
Joined
Jul 19, 2016
Messages
285
Location
Saint Charles, Il
Format
Large Format
I had the print in constant lateral motion, exposing from front and back to avoid hot spots, so it seems unlikely the water would provide such defined spots.

I did completely replace the peroxide bleach with a second batch after the first two prints with an identical mix. The results were different between the first two and last two. I'm tempted to say the issue is with first development time, but I went a full 90 seconds with 1+1 Dektol, which has previously been more than sufficient to avoid the dark patches. The subject was brightly lit on a white background, so it could be additional development time was needed to fully reduce the exposed silver.

I am wondering about separate first and developer baths, with a small amount of hypo added to the first bath, as is recommended for reversal film processing. This is cited as "removing excessive silver halide" and is only used in the first developer. I wonder if that would improve the efficacy of the peroxide bleach.

I am thinking an experiment using phosphoric acid instead of citric might prove interesting. The bleach acts differently from print to print with the same bath. I noticed intense fizzing from the exposed areas once, with no fizzing at all the next print.

Don
 

nmp

Member
Joined
Jan 20, 2005
Messages
2,014
Location
Maryland USA
Format
35mm
I did not squeegee, but I see what your getting at! I have softened water, so it sheeted off pretty well after the post-bleach rinse. These are probably the worst results I have gotten. Wildly uneven bleaching!

In addition to the uneven bleaching, it seems to me from your photographs, that the emulsion is really getting worked over in the peroxide bleach. Weren't you using a 9% peroxide bleach before rather than what looks like 14% in the above experiments.

Also, I am thinking why does Kodak patent always use NaOH to get the pH to 4.5-5.0 range in all of their example recipes. Although they do not specify the reason for it in the patent that I saw, my guess is it is to provide a more stable environment for the gelatin. I don't know how that affects the bleach rates. This seems to be one significant difference with the dichromate bleach where there is a simultaneous hardening/tanning of the gelatin, as pointed out by you earlier.

Alternatively, I wonder if one can use a hardening developer in the first develop step to counter the effect of peroxide.
 

removed account4

Subscriber
Joined
Jun 21, 2003
Messages
29,832
Format
Hybrid
my hand coated exposure didnt' work out, but i am currently bleaching something on regular matte finish rc paper taken this am.
processed in sprint print developer rinsed in citric acid stop and rinsed in water .. put in 200cc of HOHO and 1 tsp of CA
its been bleaching for about 15 mintues slowly ... ambient temperature ...
i made a crude water jacket with warm water ( 120?140?ºF ) that i put the tray in to see if heat speeds things up ,,
it looked like it was a little faint when i came to type this ... who knows maybe it will help ? its 3% HOHO
 

DonF

Member
Joined
Jul 19, 2016
Messages
285
Location
Saint Charles, Il
Format
Large Format
I have been using 15% peroxide consistently, adding two level measuring teaspoons (7.4 grams for the stuff I bought) to the 300ml mix. It does appear there is some weirdness with the emulsion going on. I may have performed less agitation than I usually had with the last two, as I was dealing with a minor floor splash of the bleach from a standing wave in the tray!

The recipes for bleach all seem to be quite acidic, so my assumption is that the low pH is needed for the oxidation reaction. I'm no chemist though! I did see that the patent did specify a neutral to slightly acidic solution. The Kodak R-9 bleach recipe (potassium dichromate and sulfuric acid) certainly has a pH much lower than 4.5.

Don
 

DonF

Member
Joined
Jul 19, 2016
Messages
285
Location
Saint Charles, Il
Format
Large Format
Another factor in my results could have been temperature. I mixed the peroxide straight from the refrigerator at 38 degrees F., with room temperature distilled water. Although it sat in an open tray 20 minutes or so, it still may have been quite cool.

Don
 
Photrio.com contains affiliate links to products. We may receive a commission for purchases made through these links.
To read our full affiliate disclosure statement please click Here.

PHOTRIO PARTNERS EQUALLY FUNDING OUR COMMUNITY:


Ilford ADOX Freestyle Photographic Stearman Press Weldon Color Lab Blue Moon Camera & Machine
Top Bottom