• Welcome to Photrio!
    Registration is fast and free. Join today to unlock search, see fewer ads, and access all forum features.
    Click here to sign up

It's just words, words, words: Describing and interpreting film performance.

Recent Classifieds

Forum statistics

Threads
202,820
Messages
2,845,938
Members
101,544
Latest member
Juergen Lossau
Recent bookmarks
0
Thanks Alan for the compliment.
With your workflow, you can do the same thing though - an "expansion" development is essentially the same as a "push" development, which is something that many labs offer as an extra charge option.
So if you are out there on a day where the light is really flat and your SLR/SBR is fairly narrow, you can add some punch to the negatives by exposing normally and requesting a one stop "push" from the lab.
The net results will be the same or provide slightly increased/better contrast and detail in the shadows, better contrast and tonal differentiation in the mid-tones and, due to the narrow SLR, still very good highlight detail, but better contrast and tonal differentiation there as well.
All of which are the "words, words, words" which I think aparat was referring to in the opening post to this thread.
(Just a reminder: "SLR" means "Subject Luminance Range", which is an arguably more correct reference to light reflected from a subject - "Subject Brightness Range" or "SBR" being arguably more correct when referring to light sources)

My labs do pushing and pulling but I haven;t shot that way. It might be interesting to shoot two sheets, one normal and one pushed 1 stop. Then see if I can see or do anything differently from scanning and editing the scan.

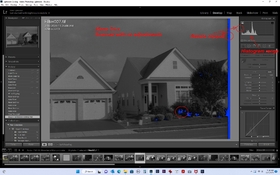
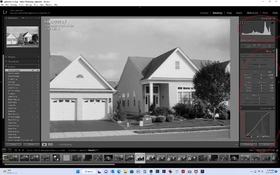
What I've found is that as long as I covered the full range in the negative, the scan will capture it all. I'll be able to apply whatever curves I need to the photo to change contrast. Of course, I don't print now so it's all for the web and display on monitors and 4K TVs. So if I decide to print later, I might have to use a digital negative process rather than chemical which isn't so bad from what I've read.

If my understanding of pushing & pulling is correct, it's main purpose is to apply to chemical printing on paper where the negative limits the contrasting process on the print. So you need to change the negative to get different contrasts. Am I right on that? How would this process be of advantage to a person scanning?
 
I have no comments on your procedures as I don't develop film. I have no darkroom and don't use the ZS. But that's a nice photo. Very sharp and interesting. Good tones.

I forgot to mention the thing that makes it so outstanding. There's a toning look to it or it seems like it was a scan of the actual silver print. Could you elaborate?
 
If my understanding of pushing & pulling is correct, it's main purpose is to apply to chemical printing on paper where the negative limits the contrasting process on the print. So you need to change the negative to get different contrasts. Am I right on that? How would this process be of advantage to a person scanning?

Every adjustment of contrast - whether in the darkroom, or in the digital realm - involves a compromise.
If you increase contrast in either environment, you will affect the way that tones transition ("tonality"), and some of that change will be deleterious. We can all think of situations where a final result lacks contrast, but has beautifully soft tones/tonality. And then when we improve/increase the contrast, the tones/tonality changes in a way that we don't like. And the more we add contrast, the more the tonality suffers.
If you use development changes to adjust the contrast of the negative toward the middle of the range available, than you are more likely to be able to attain the result you want with either no contrast adjustments to your print or scanned files, or very small contrast adjustments to same.
 
I forgot to mention the thing that makes it so outstanding. There's a toning look to it or it seems like it was a scan of the actual silver print. Could you elaborate?

The corresponding darkroom print has been toned lightly in a brown toner. The posted image is a scan, but I've adjusted the colour of the digital file to emulate the tone of the print.
I find that the uploader used in the Photrio software works in a particular way- everything I upload seems to benefit from at least some "warming".
 
Every adjustment of contrast - whether in the darkroom, or in the digital realm - involves a compromise.
If you increase contrast in either environment, you will affect the way that tones transition ("tonality"), and some of that change will be deleterious. We can all think of situations where a final result lacks contrast, but has beautifully soft tones/tonality. And then when we improve/increase the contrast, the tones/tonality changes in a way that we don't like. And the more we add contrast, the more the tonality suffers.
If you use development changes to adjust the contrast of the negative toward the middle of the range available, than you are more likely to be able to attain the result you want with either no contrast adjustments to your print or scanned files, or very small contrast adjustments to same.

It's not apparent from what I'm doing right now to seem to matter as I'm getting the tones I want for display. Since I'm not printing at this time, it;s hard to see any advantage I may get from pushing and feel that normal development is the way to keep going forward.

Part of this is also complexity. I'm trying to keep LF processes more simple. LF is new to me. They're so many more important issues like getting focus correct and using the standard movements in the right way. I need to concentrate on those things now. Thanks for your suggestions.
 
The corresponding darkroom print has been toned lightly in a brown toner. The posted image is a scan, but I've adjusted the colour of the digital file to emulate the tone of the print.
I find that the uploader used in the Photrio software works in a particular way- everything I upload seems to benefit from at least some "warming".

The toning does make it look better and gives it character.
 
it;s hard to see any advantage I may get from pushing

It's not pushing, even if that is the buzz word that your lab might be looking for. There may be labs out there that would understand if you asked for an "N + 1" expansion development.
 
The only part of the "perfect" negative approach that isn't well suited to roll film use is the part that involves tailoring development to a single negative.
But even with that in mind, expansion and contraction development tools are still useful any time you expose an entire roll under similar lighting conditions.
This image is from a roll that I used increased development, due to relatively flat, high overcast lighting that was consistent throughout the day.
View attachment 329371

On the subject of the thread, what I would like to see is a combination of graphs, juxtaposed with example photographs and descriptive words, in order to be able to associate the three descriptive tools.
By the way, the way you overlaid the Zone indicators with the curves in post #44 was really useful!

I avoid the problem of needing multiple developments in a roll by shooting at box speed or using only the exposure portion of the Zone System. With the modern films there is not need to N+1, N-1, N+2 ... development.
 
It's not apparent from what I'm doing right now to seem to matter as I'm getting the tones I want for display. Since I'm not printing at this time, it;s hard to see any advantage I may get from pushing and feel that normal development is the way to keep going forward.

I understand. It is worth considering though if you encounter a scene that is so low in contrast and SLR that you decide that you can't achieve what you want - such as a shot in fog.
 
I avoid the problem of needing multiple developments in a roll by shooting at box speed or using only the exposure portion of the Zone System. With the modern films there is not need to N+1, N-1, N+2 ... development.

Here is an example of where an expansion development was useful - shot on a very foggy day. The expansion meant that the chrome looks like chrome!
46b-res.jpg
 
Here is an example of where an expansion development was useful - shot on a very foggy day. The expansion meant that the chrome looks like chrome!

This is an awesome photograph! It's got everything, just right technically and artistically. I'm thinking of sharing some of my recent prints (I'm still struggling to get my mojo back in the darkroom). Should I just scan them with my old flatbed scanner? I tried taking a picture with my phone, but kept getting reflections and glare.
 
Should I just scan them with my old flatbed scanner?

I have had that work well - this was scanned from a postcard print:
Coquitlam River002.jpg
FWIW, if you wish to show comparisons between prints, it is definitely preferable to scan them side by side at the same time.
 
You make a good point. I just went outside and took some light readings. Keep in mind, this is 1:40 past solar noon for today. The ground is also snow covered, so that reflects quite a bit of light. Today is a cloudless, sunny day.

First, I used an incident meter pointed straight at the sun and it gave me EV15, which for a ISO 100 film is 1/250 F11. Then I used my Nikon F6 set to matrix metering and composed a scene that includes the road ( 50% clear of snow) some trees ( no leaves on them), some sky and a house that is middle toned. Except for the road, there was no snow covered surfaces in the frame. The light reading was 1/200 F8, or about 1-1/3 stops less than the incident reading. The reflective reading is more in line with what I expect would generate a correct exposure on film.

Hello Craig

When you took a reading with your F6, did you have the sun behind you?
 
Every adjustment of contrast - whether in the darkroom, or in the digital realm - involves a compromise.
If you increase contrast in either environment, you will affect the way that tones transition ("tonality"), and some of that change will be deleterious. We can all think of situations where a final result lacks contrast, but has beautifully soft tones/tonality. And then when we improve/increase the contrast, the tones/tonality changes in a way that we don't like. And the more we add contrast, the more the tonality suffers.
If you use development changes to adjust the contrast of the negative toward the middle of the range available, than you are more likely to be able to attain the result you want with either no contrast adjustments to your print or scanned files, or very small contrast adjustments to same.

I wanted to show you what I normally get from a scan if scanned flat with no adjustments during the scan and how that's edited afterwards. The histogram is usually bunched up on the left side as shown. Basically I spread out the white point in LR or use levels for editing in Elements. A few other slider and curves and I;m done. OF course, the curves aprticularly can give me a lot of room to change tonal effects. I;m not sure where +1 development would do to the histogram range on scan that would make much of a differenece. I ight try a couple though to see what happens. Thanks.
 

Attachments

  • Scanned flat.jpg
    Scanned flat.jpg
    368.6 KB · Views: 94
  • adjusted in LR.jpg
    adjusted in LR.jpg
    427.6 KB · Views: 87
I wanted to show you what I normally get from a scan if scanned flat with no adjustments during the scan and how that's edited afterwards.

In case it isn't clear, I would point out that that example looks to be one for which there would be no need to employ an expansion (N+) or contraction (N-) development.
It looks to be a photograph of a subject with a normal SLR/SBR and moderate contrast.
If you are planning to employ expansion adjustment, do so with a subject that has a narrow SLR/SBR and low contrast.
 
Here's KODAK PROFESSIONAL TRI-X 400, in my orphan HC-110, 1+100, semi-stand. The curve family is very interesting, with decent film speed and nice linearity. Graininess is nicely controlled, and we get low B+F density. So far, I like this variant of HC-110 and will continue using it. The prints turned out nice, too. Will post when I am able to scan.

trix400_HC11040 by Nick Mazur, on Flickr

trix400HC110_99_30min by Nick Mazur, on Flickr
 
Here are more words of wisdom. These are from Ansel Adams himself (The Negative, New York Graphics Society, 1948, p.51):

"There is nothing more destructive to a creative approach than the domination of 'the perfect negative' or 'the standard negative' - unless such standard be determined by the individual in relation to his own concept. The time-gamma charts have a definitive comparative value in relation to my approach, chiefly in regard to temperature variations of the developer."​

This one struck me as a bit odd, since the entire book seems devoted …
He must’ve toned this down. I can’t find the passage in the 1981 pressing.

He opens Chapter 3 Exposure with a slightly milder “intriguing and exasperating”.

I would need more context but it sounds like he meant “Only you can decide what a perfect negative is for you. Here’s a bunch of steps that will show you what that is.”
 
So, as I interpret (AA).............he attaches the idea of the perceived perfect negative as being one that, when exposed and developed, becomes a negative that can deliver the visualized print. Not that the negative is acutally "perfect" in all respects (think of all the dodging and burning to achieve the visualized print)........but that it is one that contains the necessary information, in the proper densities, to print as visualized.
 
He must’ve toned this down. I can’t find the passage in the 1981 pressing.

He opens Chapter 3 Exposure with a slightly milder “intriguing and exasperating”.

I would need more context but it sounds like he meant “Only you can decide what a perfect negative is for you. Here’s a bunch of steps that will show you what that is.”

Bill and @Chuck_P My feeling is perhaps he was trying not to alienate a part of his audience? After all, his books have been used as textbooks for aspiring photographers to learn the craft and science of photography. It must have been a tough juggling act for him, trying to sell his photography as fine art and his books as craft and science. I suppose this tension still exists today, even on this very forum. It's not a bad thing. It's just something each of us has to work through.
 
I found an interesting document by N. David King, a blogger. His entire document is very interesting, as it offers a simplified guide to getting perfect negatives, as an alternative to the more laborious Zone System type approach, but what I want to share is his summary table, assigning specific negative density values to ZS zones and certain elements of the scene. I have seen something along the same lines in other publications. Is it possible/useful to have a one-to-one mapping between a set of negative density values and visual elements of the scene we photograph? Here's a screen grab of the table:

Screenshot from 2023-02-16 14-35-06.png
 
I found an interesting document by N. David King, a blogger. His entire document is very interesting, as it offers a simplified guide to getting perfect negatives, as an alternative to the more laborious Zone System type approach, but what I want to share is his summary table, assigning specific negative density values to ZS zones and certain elements of the scene. I have seen something along the same lines in other publications. Is it possible/useful to have a one-to-one mapping between a set of negative density values and visual elements of the scene we photograph? Here's a screen grab of the table:

View attachment 329861

I find AAs descriptions of the Zone print values more informative (pg. 60 'The Negative'). He assigned specific density ranges for a "normal negative" as: Zone I (.09 - 0.11), Zone V (0.65 - 0.75, and Zone VIII (1.25 - 1.35). But I don't believe I've seen density ranges for the other Zones.

He also indicated they are approximate and should be under continual scrutiny as to their effectiveness given the materials being used.
 
Last edited:
Any correlation between negative densities and Zones will be dependent on the photographic paper one is using.
 
Photrio.com contains affiliate links to products. We may receive a commission for purchases made through these links.
To read our full affiliate disclosure statement please click Here.

PHOTRIO PARTNERS EQUALLY FUNDING OUR COMMUNITY:


Ilford ADOX Freestyle Photographic Stearman Press Weldon Color Lab Blue Moon Camera & Machine
Top Bottom