-
Welcome to Photrio!Registration is fast and free. Join today to unlock search, see fewer ads, and access all forum features.Click here to sign up
You are using an out of date browser. It may not display this or other websites correctly.
You should upgrade or use an alternative browser.
You should upgrade or use an alternative browser.
Darkroom Portraits (Part 2)
-
A
- Thread starter Sean
- Start date


Recent Classifieds
-
For Sale Berning Robot lenses and accessories
- Started by Manual Camera
-
For Sale Berning Robot Motor Recorder 24B + Schneider Xenon 50/1.9 _ rare German camera
- Started by Manual Camera
-
For Sale FS: Toyo Long Loupe 3.6X
- Started by B.S.Kumar
-
For Sale Berning Robot II + Carl Zeiss Jena Tessar _ vintage German motor drive 35mm camera
- Started by Manual Camera
-
For Sale Canon Full-Frame EF 28-135mm f3.5-5.6 IS Ultrasonic Zoom Lens
- Started by davela
Forum statistics
ParkerSmithPhoto
Member
Predator Mode
Definitely better in Predator Mode!
It looks like your duck boards are made with wire shelving and PVC pipe. Did you fix the shelves to the pipes or keep it all separate?
Black Dog
Member
Thanks-we did!Predator Mode


The room is a L shape so we had an unusual layout and we have ceiling heights that vary in the closets so it's definitely a little unorthodox. Nonetheless, it's a joy to work in.
Some work in progress:

Designing the sink with the steel fabricator:

Hope you all enjoyed! :munch:
Go! Get to the darkroom...!
xvelids
Member
- Joined
- Jun 29, 2015
- Messages
- 38
- Format
- Medium Format
Definitely better in Predator Mode!
It looks like your duck boards are made with wire shelving and PVC pipe. Did you fix the shelves to the pipes or keep it all separate?
They're fixed to the shelves with cable ties. This is the first time I've used duck boards like this. So far, it's been ok. In my previous darkroom experiences, we didn't have a duckboard which I hated.
Vaughn
Subscriber
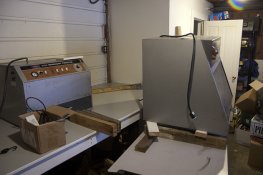
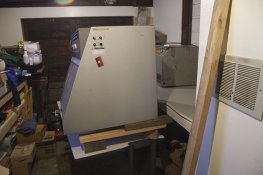
I have been working on a new work surface for my in-progress Dimroom (another name for an alternative process darkroom). I had a couple NuArcs on a table and have replaced that lower table with a built-in taller, larger work surface...6 inches (~15cm) taller.
I finished the project today and really wanted to get the NuArcs up on the new surface. I could man-handle the N750 up, but the N1000 is just too big, bulky and heavy for this old man to handle. But I remembered a good friend of mine who would lower and raise his VW engine out of or into his microbus by rocking the engine back and forth and removing (or adding) a 2x4 to slowly move the engine. So -- it worked! All plugged in and ready to go! Now just have to finish the rest of the Dimroom!
I finished the project today and really wanted to get the NuArcs up on the new surface. I could man-handle the N750 up, but the N1000 is just too big, bulky and heavy for this old man to handle. But I remembered a good friend of mine who would lower and raise his VW engine out of or into his microbus by rocking the engine back and forth and removing (or adding) a 2x4 to slowly move the engine. So -- it worked! All plugged in and ready to go! Now just have to finish the rest of the Dimroom!
Attachments


adelorenzo
Member
Extreme Makeover: Darkroom Edition
I recently completed a major darkroom reno and I couldn't be happier! I tried to take pics throughout so I could share them here. Sorry in advance for the long post but I figured it would be better to add rather than to start a new thread.
My original darkroom was in the sauna. Then we tore out the sauna and I build the darkroom shown on (there was a url link here which no longer exists). It was improved since those photos (better enlarger, added print washer, jobo, etc.) but still the same basic layout, the "wet side" just being a plastic tray and using the laundry sink for water and washing.
First thing I did was tear everything out of the room. I spent several hours peeling up the terrible glued down vinyl flooring.


Removed the exterior door and then did drywall, paint, trim and a new plywood floor. I cut the planks from 1/2 inch plywood, stained and varnished them. It looks great if I say so myself, really happy.


Starting work on the darkroom sink. It's about 7 feet wide and 26 inches deep. The size was dictated by the size of the room and the laundry machines. It will fit 5 12x16 trays which is what I use most often, and my Jobo CPE2+ and print washer both fit in there nicely.

New washer dryer pair installed -- we wanted a front loading set for the new baby on the way, but my ulterior motive was to build a sink overtop! Getting the plumbing roughed in and starting to build the dry side. Adding a new dedicated electrical circuit for the darkroom and installing ventilation. I now have four Kodak beehives in the ceiling that are not shown.


I skipped a few steps but... here's the final result! I still have some small projects to do like add more storage but it's basically done. I did all construction, demolition, plumbing, ventilation and appliances myself. I had someone come in and do most of the electrical work although I did wire the fan.
Also note the computer and scanner are temporary as I'm just working on another room in the house right now. They'll be gone soon.


I recently completed a major darkroom reno and I couldn't be happier! I tried to take pics throughout so I could share them here. Sorry in advance for the long post but I figured it would be better to add rather than to start a new thread.
My original darkroom was in the sauna. Then we tore out the sauna and I build the darkroom shown on (there was a url link here which no longer exists). It was improved since those photos (better enlarger, added print washer, jobo, etc.) but still the same basic layout, the "wet side" just being a plastic tray and using the laundry sink for water and washing.
First thing I did was tear everything out of the room. I spent several hours peeling up the terrible glued down vinyl flooring.
Removed the exterior door and then did drywall, paint, trim and a new plywood floor. I cut the planks from 1/2 inch plywood, stained and varnished them. It looks great if I say so myself, really happy.
Starting work on the darkroom sink. It's about 7 feet wide and 26 inches deep. The size was dictated by the size of the room and the laundry machines. It will fit 5 12x16 trays which is what I use most often, and my Jobo CPE2+ and print washer both fit in there nicely.
New washer dryer pair installed -- we wanted a front loading set for the new baby on the way, but my ulterior motive was to build a sink overtop! Getting the plumbing roughed in and starting to build the dry side. Adding a new dedicated electrical circuit for the darkroom and installing ventilation. I now have four Kodak beehives in the ceiling that are not shown.
I skipped a few steps but... here's the final result! I still have some small projects to do like add more storage but it's basically done. I did all construction, demolition, plumbing, ventilation and appliances myself. I had someone come in and do most of the electrical work although I did wire the fan.
Also note the computer and scanner are temporary as I'm just working on another room in the house right now. They'll be gone soon.
I couldn't help but smile when I saw this...done my heart good to see the ingenuity involved with all your work and foresight. You done good, adelorenzo! Very good-enjoy!
There's lots of talented individuals here who love this hobby. I'm not so gifted and hire most of mine. All I did was build my sink, similar in size to yours but the plumbing was done by someone else.
There's lots of talented individuals here who love this hobby. I'm not so gifted and hire most of mine. All I did was build my sink, similar in size to yours but the plumbing was done by someone else.
adelorenzo
Member
Here are a couple of plumbing tidbits I thought I'd share:
Honeywell thermostatic valve. Gives me all the 21-degree (or 38 degree) water I need for $150 bucks Canadian, brand new. Not as fancy or easy to adjust as an Intellifaucet but way cheaper.

Dole flow control valve installed in the print washer supply line. Gives me steady 0.5 GPM flow so I don't need to worry about it when I turn it on.

Honeywell thermostatic valve. Gives me all the 21-degree (or 38 degree) water I need for $150 bucks Canadian, brand new. Not as fancy or easy to adjust as an Intellifaucet but way cheaper.
Dole flow control valve installed in the print washer supply line. Gives me steady 0.5 GPM flow so I don't need to worry about it when I turn it on.
mob81
Member
- Joined
- Aug 5, 2010
- Messages
- 2
- Format
- Multi Format
Just finished setting it up (need better stable enlarger table  )
)
 My new darkroom by Mohammed Basamh, on Flickr
)My new darkroom by Mohammed Basamh, on Flickrbrunocstreet
Member
I feel a bit embarrassed for putting my darkroom here compared to the wonderful spaces some of you have! But here it goes:
I got this enlarger last summer, directly from Czech Republic, but it came with a wrong bulb.. after that I went to Italy for 6 months, so yesterday was my first day trying it! It works as it should and now I can print MF negatives without cropping them.
(the MDF panels were built to cover the windows, and every time I want to print I need to carry all of this from my attic to the bathroom. And yes, my sister hates when I turn the bathroom into a makeshift darkroom, but in the end she likes the pictures)
Thomas Bertilsson
Member
- removed account8
- Deleted
pbromaghin
Subscriber
Thomas, that is beautiful!
ParkerSmithPhoto
Member
This is nothing sexy, but it gives me a ton of storage and a work table all in one. I used a bunch of ULINE shelves to make it.
Dimensions are 3'x4' and in that space I have a work table, plus storage space for a 40" matt cutter; 11x14, 16x20 and 20x24 easels; Rollcut paper trimmer; standard 11x14 guillotine paper cutter; two paper safes; many boxes of photo paper; and a box of 32"x40" foam core. So nice to be able to tuck things away when they aren’t needed.
It’s massively over built and could surely be constructed with much lighter materials but I just used what I had.
onre
Member
Just finished setting it up (need better stable enlarger table
What is that enlarger? Jobo Lift is a very nice piece of equipment to have, makes C-41 and E-6 really easy.
canvassy
Member
Pretty simple as we don't have a lot of extra room

Beseler 23C II that I haul into the bathroom when I want to print. It's really not all that heavy, and it's just down the hall. Gralab 300 timer goes on the counter, and the trays go in the bath tub behind me. The safelight also on the counter, pointed straight up at the ceiling. That's a 5x7 SpeedEZ-EL, and I have an 8x10 and 11x14 as well. Lenses are El-Nikkor 50mm 2.8 and a Fujinon-ES 75mm 4.5 for 645 and 6x6. I'd like to also get a 105mm of some sort as I have an old Kodak 6x9 folder.
I just sit on the floor and print, it works out pretty well and I'm quite happy to have it. It takes me about 20 minutes to setup including getting the chemicals ready, and about 10 minutes to tear down. When we upgrade to a house with a basement I'd like to make a dedicated spot. Eventually I'd like to get bigger trays to print 16x20 or 20x24.
tedr1
Member
Here's the new darkroom, crammed into the spare bedroom upstairs, I seem to be fated to have darkrooms without running water unfortunately, this is number two. Everything is temporary and can be stripped down and put into the adjacent attic when the room is needed as a visitor room. This is under the roof of the house so it needs AC in spring and summer, the window AC unit is customized with black paint inside so it is light-proof. Work unit bases are Lowes kitchen base units, they provide the right height and also drawers and cupboards beneath the work top for storage. Windows are blacked out using 1/8in hardboard sheet cut to size and taped into the frames using black tape.


Fluids are carried downstairs after printing sessions, I am on a well and septic so chemicals are stored for disposal every three months at the county haz-mat collection site.
The last time I had a darkroom (twenty years ago 1995) the digital imaging revolution had not begun. Now I am catching up on printing the old fashioned way rather than setting up a scanning and digital printing system. I am sure I could have set up a digital system more quickly, because erecting a darkroom involves a lot, but I prefer to work with photographic paper rather than digital printers, I prefer to make prints using eye and hand rather than be a computer operator.
The results I am getting printing medium format black and white negatives 16x20 are fabulous, I am very pleased.
Last edited:
Luminousoctaves
Member
This is my very tiny darkroom in Sweden. One person only. But it works for me.
Also a snapshot of the room where I do framing/mounting etc.
I use Leitz enlargers only. Have six of them (!). They're cheap over here. One Leitz Valoy II, three Focomat IC (2 black, 1 grey), and one Focomat IIC (with the Focotar II).

Predator mode


Also a snapshot of the room where I do framing/mounting etc.
I use Leitz enlargers only. Have six of them (!). They're cheap over here. One Leitz Valoy II, three Focomat IC (2 black, 1 grey), and one Focomat IIC (with the Focotar II).
Predator mode
Luminousoctaves
Member
By the way, I assume you all have seen this beautiful project, soon to become a book!
http://www.richardnicholson.com/projects/last-one-out/
http://www.richardnicholson.com/projects/last-one-out/
RalphLambrecht
Subscriber
looks homy and practical.Here's some pix of my little darkroom - only 4' x 6'6", but it works for me. I made my sink - ply and epoxy coated. Wish I had more space, but hey! I do have an office adjacent that I can use for any non-darkroom work.
View attachment 35336 View attachment 35337
Trond
Subscriber
This is my very tiny darkroom in Sweden. One person only. But it works for me.
Also a snapshot of the room where I do framing/mounting etc.
I use Leitz enlargers only. Have six of them (!). They're cheap over here. One Leitz Valoy II, three Focomat IC (2 black, 1 grey), and one Focomat IIC (with the Focotar II).
Looks like a very workable darkroom. Nice enlargers too!
Trond
Luminousoctaves
Member
Looks like a very workable darkroom. Nice enlargers too!
Trond
Tack Trond! I see you also use the Focomat IIc, which version do you have?
Trond
Subscriber
It's an early black one, and it had the Focotar 95mm. I had it converted to use Schneider lenses by Kienzle two years ago. Very happy with it!Tack Trond! I see you also use the Focomat IIc, which version do you have?
Trond
Luminousoctaves
Member
It's an early black one, and it had the Focotar 95mm. I had it converted to use Schneider lenses by Kienzle two years ago. Very happy with it!
Wow, I've read about that possibility, not cheap I guess!
| Photrio.com contains affiliate links to products. We may receive a commission for purchases made through these links. To read our full affiliate disclosure statement please click Here. |
PHOTRIO PARTNERS EQUALLY FUNDING OUR COMMUNITY:  |