Hello everybody,
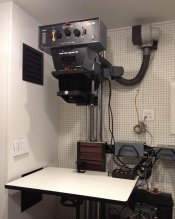
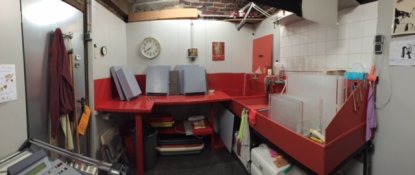
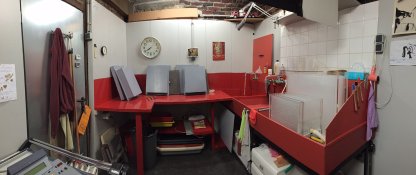
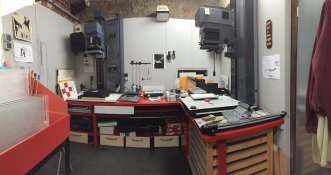
I've been looking for a long time at this thread and since Luis-F-S is making an effort to get this thread moving again I thought it was time for me to participate. So here is my personal paradise (2 pictures -dry area and wet area- made with my only digital camera, my phone). It allows me, appart from being very happy there, to print up to 50x60cm (20x24). The place is a cellar, that looked like a cave, until a very good friend of mine decided 10 years ago, probably due to my heavy whining, he would help me transform it in a darkroom. At that time he was working in the cinema industry and was a set builder. He finished the film he was working on and was allowed to take away whatever he wanted from the sets before they were destroyed. What you see were the elements for 2 elevators cabins built for the movie. The walls of the cabins were used for the darkroom walls and the worktops were made out of the doors. The colours, grey and red, are the original ones. He also brought in the electricty and water, did the wiring and plumbing, the works. He spent one full month doing this, with me trying to be helpful... He didn't charge me anything. He just asked for a print he liked, but I guess that also was to be nice to me. My prints must be worth a fortune...
H'e's a magician and a hell of a friend.
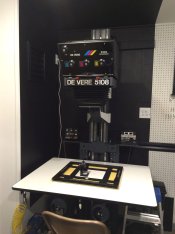
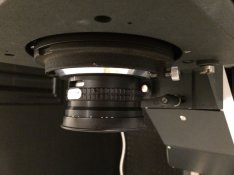
The lab is equiped with 2 Durst Pictographs, one of them autofocus. These are great machines, same base as the L1200, dedicated to B&W (somewhat similar to the Ilford VC heads) with an obturator connected to a closed loop system. Exposure is always the same even if there are slight variations in voltage or if the bulb is older or newer. The light is diffused. They are sturdy, precise and solid like a tank. I personnaly find them much sexier than the otherwise excellent De Vere...(this should generate some reactions). A real pleasure to use and manipulate. I also have 2 washers, 1 for up to 30x40cm (12x16) and 1 for up to 50x60 (20x24). Light for the wet area is provided by a sodium lamp aimed at the ceiling over it and the dry area has a more subdued lighting that switches off when enlarging. There are racks for drying. In one corner you can see a Seal press for prints finishing, although I also use an old big rotative dryer which allows for a better output when needed and works very well. After all, whatever you use you still have to leave the prints under heavy weights for some time. My last acquisition was made 2 years ago when I replaced a kitchen sink by a Meteor lab sink (Greman made), complete whith all the faucets and plumbing, that seemed to have been made to fit exactly in my darkroom. I'm sure the darkroom Gods did something for me there ! It was a great upgrade. I found it on ebay and was the highest bidder at...63€. Delivery was 3 times this amount. My friend came to install it. Quite a friend I told you. Last details, music is excellent and apart from all the paraphernelia most of us need/love, I am the happy owner of a set of dodging wands made by Reinhold Schable. Love them !
Well, I shared. Your turn now, if you feel like it.


 2014-12-14 13.10.12.jpg517.6 KB · Views: 656
 2014-12-20 16.05.13.jpg727.6 KB · Views: 718
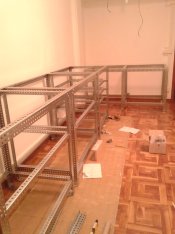 2014-12-25 19.32.48.jpg699.5 KB · Views: 692
 2014-12-26 17.26.24.jpg593.7 KB · Views: 681
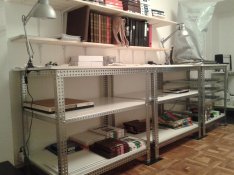 IMG-20150104-WA0000.jpg746.2 KB · Views: 700
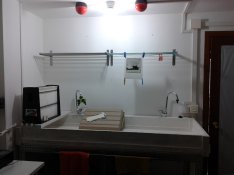 2015-01-06 12.32.40.jpg596.7 KB · Views: 713
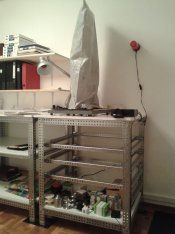 IMG-20150104-WA0004.jpg636.7 KB · Views: 738