Autochromes...

Flowering Chives

H
Flowering Chives

  • 2
  • 0
  • 55
Hiroshima Tower

D
Hiroshima Tower

  • 3
  • 0
  • 51
IMG_7114w.jpg

D
IMG_7114w.jpg

  • 2
  • 0
  • 79
Cycling with wife #1

D
Cycling with wife #1

  • 0
  • 0
  • 75
Papilio glaucus

D
Papilio glaucus

  • 2
  • 0
  • 63

Recent Classifieds

Forum statistics

Threads
198,203
Messages
2,771,023
Members
99,574
Latest member
caseman
Recent bookmarks
0
Joined
Aug 7, 2014
Messages
181
Location
Grand Rapids, MI
Format
Large Format
That's awesome!

Thanks a ton! It's very satisfying to have success after so long...

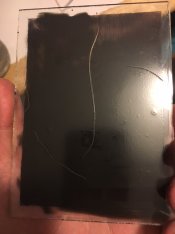
The large starch grains make it hard to take a satisfying digital picture of one of these... I'm not sure what it is, maybe it's how it doesn't quite get the nitty gritty texture of the plate? Here's a video that does it a bit more justice.

Here's a better one - 7 min exposure @f/5.6, EV 4-6. Fairly fast, much faster than my other processes of choice.
 

Attachments

  • IMG_9117s.jpg
    IMG_9117s.jpg
    364.6 KB · Views: 250
Joined
Oct 29, 2006
Messages
4,825
Location
İstanbul
Format
35mm
I had been suggested to Levadrine to use original autochromes as his filter. He said he was doing it already. Now without investing to any chemical , We could photocopy of an original autochrome filter by positive film and use it or sell it. What do you think about it ?
 
Joined
Aug 7, 2014
Messages
181
Location
Grand Rapids, MI
Format
Large Format
For the record, I answered Mustafa's question in this thread.

I won't spam this thread every time I make a new plate, but I wanted to show some examples as I get a little better with the process. A thicker second varnish coating seems to dry thin enough to be suitable for the process, without the cracks and wrinkles. I'm going to have to measure how much exactly, but my guess is ~15-20mL for 4x5 coverage. There is some finer detail visible, despite the massive starch grain size. I really like the way unsorted grain looks currently - just small enough to give the illusion of white at a normal viewing distance, but very obviously colorful upon closer inspection. That being said, in the coming months I'll try my hand at sorting out smaller grains, since it doesn't look all that difficult.
 

Attachments

  • 25399166_10155898203213428_389027372725136894_n.jpg
    25399166_10155898203213428_389027372725136894_n.jpg
    187.4 KB · Views: 247
  • 25508143_10155903573363428_6851383089316841065_n.jpg
    25508143_10155903573363428_6851383089316841065_n.jpg
    153.7 KB · Views: 210
Last edited:

Craig

Subscriber
Joined
Apr 8, 2004
Messages
2,280
Location
Calgary
Format
Multi Format
I'm fascinated to see your progress. As far as I know, this is the closest anyone has come to recreating Autochromes.
 

Nodda Duma

Member
Joined
Jan 22, 2013
Messages
2,685
Location
Batesville, Arkansas
Format
Multi Format
Very nice!

Have you considered an approach to separating the grains? Are mesh screens of necessary size available?
 
Joined
Aug 7, 2014
Messages
181
Location
Grand Rapids, MI
Format
Large Format
Well, that's disappointing. This is good stuff!

I don't know what your longer term plans are, but I'm ready to support your Kickstarter...

Haha, thanks! I'll find a place to show off here periodically -- I just didn't want to clutter a somewhat information-heavy thread with random pictures.

I'm not sure about the long term either. In the coming weeks I'd like to put together a guide in the same manner I did with daguerreotypes and Lippmann plates. Just a collection of everything I've figured out so far, so that other adventurous types can try it themselves. I'd like to make a companion video for it too, just showing off the process from start to finish...

I'm thinking of selling plates in limited batches in the coming months, too. I'd have to start real slow, and they'd be pricey, since I can only make a couple per day with my job and all. But on the plus side, the screens are reusable and coating is one of the easier parts anyway. I've got a programming/automation background, so I've been brainstorming a way to automate the starch pressing... We'll see how that goes before I even think about crowdfunding XD

I'm fascinated to see your progress. As far as I know, this is the closest anyone has come to recreating Autochromes.

Thanks! Frédéric Mocellin's work has always served as inspiration for me, but I think mine might be slightly more closer to the original plate's design. Not that it's a competition or anything... I'm looking forward to making many more! If only the sun would come out...
 
Joined
Aug 7, 2014
Messages
181
Location
Grand Rapids, MI
Format
Large Format
Very nice!

Have you considered an approach to separating the grains? Are mesh screens of necessary size available?

The Lavédrine/Gandolfo book describes a method of mixing starch in water and siphoning off smaller particles (larger ones sink rapidly, while smaller ones stay suspended for some time), and then sorting them with decreasing sized meshes. I'll probably try this when the time comes to dye more starch, but I'm content with the grain sizes for now. I had a large mishap with one of the blue dyes, and over a month later I'm still finding it all over various things in the darkroom. The crystal violet has more or less permanently turned my sink a deep purple. I'm in no rush to start dyeing again...
 

Nodda Duma

Member
Joined
Jan 22, 2013
Messages
2,685
Location
Batesville, Arkansas
Format
Multi Format
haha ok

If you can suspend it in water, then you can rig up a water filter / pump assembly of appropriate size to filter the grains through. The filters are typically specified in terms of particle size that they block down to.
 

Photo Engineer

Subscriber
Joined
Apr 19, 2005
Messages
29,018
Location
Rochester, NY
Format
Multi Format
I've talked to Mark Osterman about this, and he says that rolling the starch grains flat is one of the keys. I don't remember if you mentioned how you flatten them or it. But, this is a comment from Mark.

PE
 
Joined
Aug 7, 2014
Messages
181
Location
Grand Rapids, MI
Format
Large Format
I've talked to Mark Osterman about this, and he says that rolling the starch grains flat is one of the keys. I don't remember if you mentioned how you flatten them or it. But, this is a comment from Mark.

PE

I've been using a steel ball transfer, these models in fact. They work fairly well, but sometimes are prone to getting gunked up by excess charcoal and locking up, causing scratches. I made a fairly good defect-free screen last night by going slow and deliberately, rather than quickly. It's a bit like shading in something with a fine colored pencil. I don't think this method gets the starch as flat as possible, but it seems I'm 90-95% of the way there... I initially tried those glass-roller-on bottles they use to give out perfume, but those pretty much locked up immediately due to the charcoal.

I have a CNC router, I'm thinking about attaching the transfer unit (with a heavy load) where the router would normally go, and just program it to slowly and gently pull the unit back and fourth across the plate.
 

Wayne

Member
Joined
Jul 8, 2005
Messages
3,583
Location
USA
Format
Large Format
Well, that's disappointing. This is good stuff!

I don't know what your longer term plans are, but I'm ready to support your Kickstarter...

I agree. Keep spamming.
 

railwayman3

Member
Joined
Apr 5, 2008
Messages
2,816
Format
35mm
As an aside. there is a book with some amazing Autochromes which is well worth a look if you can find it: "The Autochromes of J H Lartigue, 1912-1927", Ash & Grant, 1981.
ISBN No. 0-904069-45-1.
 
Joined
Aug 7, 2014
Messages
181
Location
Grand Rapids, MI
Format
Large Format
Alright, here's a new fun problem. I'm having issues with the emulsion shifting and cracking. This is a new batch I whipped up, with greater green sensitivity. However, some hours after coating the emulsion cracks - this happens to both unexposed plates, as well as processed plates. I would say the cracks appear somewhere between 4 - 16 hours after pouring. Even if some plates don't crack, the emulsion shifts enough so as to desaturate colors if the plates were shot soon after drying. If the plate was allowed to crack/shift/settle before exposure, it seems to retain the colors just fine. Could it be too much hardener? I'm using chrome alum.
 

Attachments

  • IMG_2298.JPG
    IMG_2298.JPG
    115.6 KB · Views: 184
  • IMG_2299.JPG
    IMG_2299.JPG
    217.8 KB · Views: 177

albertphot

Member
Joined
Jul 4, 2007
Messages
37
Location
Angers, F (G
Format
Multi Format
I've talked to Mark Osterman about this, and he says that rolling the starch grains flat is one of the keys. I don't remember if you mentioned how you flatten them or it. But, this is a comment from Mark.

PE

The Lumières brothers used a rod for that, which went over the glassplates from left to right and back again. They've saved one machine from the factory:
Lyon_institut_freres_lumiere_photographie_lamineuse-1.JPG
 
Joined
Aug 7, 2014
Messages
181
Location
Grand Rapids, MI
Format
Large Format
The Lumières brothers used a rod for that, which went over the glassplates from left to right and back again. They've saved one machine from the factory:
View attachment 192681

Here's a quick video of that machine in operation!

Here's another observation I just noticed - there is no starch in the cracks on those plates! The emulsion itself seems to have dissolved the second varnish. The screens were allowed to dry for over a week, but the second varnish often seems to stay somewhat 'gummy', and I can distinctly smell traces of amyl acetate (what the nitrocellulose laquer comes dissolved in) when washing them with hot water. I've noticed that this seems to happen on the edges of the emulsion, though it never really dissolved the screen all the way before.

I think my dye solutions may be the culprit - they're alcoholic. My uneducated guess would be there are slightly higher concentrations of alcohol on the edges, perhaps due to surface tension? I think I'm going to try remixing the dyes in water and see if that improves things. I put a few drops of Photo-Flo before coating as well, which I can omit in the next batch of emulsion. I can't imagine there are any issues with water - I test these plates by submersing them in water for a few hours, and that doesn't cause any sort of deterioration.
 

Photo Engineer

Subscriber
Joined
Apr 19, 2005
Messages
29,018
Location
Rochester, NY
Format
Multi Format
Add humectants at the rate of 1 ml or less to each 100 ml of emulsion. You can experiment. You know you have too much when the coating gets tacky.

As for the rod device, AFAIK, no one has gotten things working right with it even having all of the instructions from the Lumiere brothers.

Yes, an alcoholic mixture can hurt things. You must control concentration.

PE
 
Photrio.com contains affiliate links to products. We may receive a commission for purchases made through these links.
To read our full affiliate disclosure statement please click Here.

PHOTRIO PARTNERS EQUALLY FUNDING OUR COMMUNITY:


Ilford ADOX Freestyle Photographic Stearman Press Weldon Color Lab Blue Moon Camera & Machine
Top Bottom