A blended ferrocyanide print process

Sonatas XII-51 (Life)

A
Sonatas XII-51 (Life)

  • 0
  • 1
  • 22
Lone tree

D
Lone tree

  • 1
  • 0
  • 48
Sonatas XII-50 (Life)

A
Sonatas XII-50 (Life)

  • 1
  • 1
  • 2K
Tower and Moon

A
Tower and Moon

  • 3
  • 0
  • 2K
Light at Paul's House

A
Light at Paul's House

  • 3
  • 2
  • 3K

Recent Classifieds

Forum statistics

Threads
199,738
Messages
2,795,912
Members
100,020
Latest member
ediestav
Recent bookmarks
0

Andrew O'Neill

Moderator
Moderator
Joined
Jan 16, 2004
Messages
12,197
Location
Coquitlam,BC Canada
Format
Multi Format
Hi Andrew,

Welcome back!

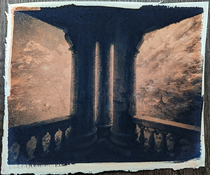
The process described in OP works fine and I've tested it on a variety of papers including Schut (courtesy @koraks), Canson Montval 300 gsm, Magnani Toscana 300 gsm, Magnani Velata 200 gsm, Chitrapat 440 gsm, Fabriano Bristol, Strathmore 300 Bristol, Brustro Bristol, Canson XL Marker, Brustro Marker, Strathmore Layout Bond, Copier Bond paper and even the lowly Butter Paper. Colour palette varies somewhat across papers mostly due to the presence of the buffer and other paper additives, but I don't get rogue pigments, smudges, bleeding or prodigious stain.

The only advice I would give at this stage is the following:

1. If your paper can withstand multiple water development steps, give the paper acid treatment to neutralise the buffer. Remove the residual acid in the paper by giving it a good wash in tap water.

1 tsp of Citric Acid/Sulfamic Acid in 1 l of water can be used for 5 X A4 sized sheets.

2. Prepare just enough sensitiser and developer needed for a session:

Sensitiser to coat one A4 size paper:​
Water: 1 ml​
Ferric Ammonium Citrate (green): 0.25 g​
Potassium Ferricyanide: 0.2 g​
Ammonium Chloride: 0.25 g​
Water to make: 2 ml​
Developer for one A4 size paper:​
Water: 5 ml​
Cupper Sulphate: 0.1 g​
Trisodium Citrate: 0.4 g​

3. Coat the paper in relatively dry environment. If that's not possible, dry the coated paper well by blowing warm air on the coated side as well as the other side with a hair drier for a few minutes, and expose immediately. After the exposure is complete, avoid exposing the print to air till it is developed.

Humidity in the paper as well as the environment influences the formation of Prussian Blue from Prussian White during exposure and afterwards. As the formation of Copper Ferrocyanide during the development step critically depends on the availability of Prussian White, controlling humidity helps.

4. Develop in Copper Complex for 2-5 minutes. Longer development is not required.

5. Use plain water for the first wash as this helps in reducing stain in the whites. Citric Acid can be used in the second wash.

Thank you for your continued interest in FerroBlend and happy printing whenever you get back to it!

-- Raghu

Trisodium Citrate instead of Sodium Citrate in the developer?

Edit: I checked on Google, and apparently, they are sort of the same?
 

koraks

Moderator
Moderator
Joined
Nov 29, 2018
Messages
23,969
Location
Europe
Format
Multi Format
Edit: I checked on Google, and apparently, they are sort of the same?
They are; citric acid is a trivalent acid, meaning it can deprotonate three times. To make up for the loss of those protons, three electrons need to be borrowed from somewhere. Since sodium can share only one, it takes three sodiums to get the job done. Hence, the stable salt of citrate and sodium will always have these constituents in a 1:3 ratio.
 

fgorga

Member
Joined
Aug 31, 2015
Messages
795
Location
New Hampshire
Format
Multi Format
They are; citric acid is a trivalent acid, meaning it can deprotonate three times. To make up for the loss of those protons, three electrons need to be borrowed from somewhere. Since sodium can share only one, it takes three sodiums to get the job done. Hence, the stable salt of citrate and sodium will always have these constituents in a 1:3 ratio.

This is not quite correct. All four forms (i.e. the fully protonated acid, the mono-anion, the di-anion and the tri-anion) of the citric acid can exist in aqueous (water) solution. The exact mix of the various species will depend on the pH.

(The monosodium and disodium salts are also available as solids but usually at much greater cost than either the acid or the trisodium coupounds.)

Shown below is the structure of the fully protonated citric acid; the acidic protons are indicated by the red arrows. The graph to the right of the structure shows the relative amounts of each of the four forms as a function of pH.

Thus if the pH of the desired solution is critical then the difference between using citric acid and trisodium citrate will be important. Using trisodium citrate will yield a solution with a higher pH than one made using citric acid. This difference may or may not be important depending on the application.

Additionally, if the concentration of citrate is important then one must take into account the fact that the molar mass of citric acid (192 g/mol) is significantly less that the molar mass of trisodium citrate (258g/mol); both masses cited are for the anhydrous compounds, adjust as appropriate for hydration (+18 per water).

For the removal of carbonate 'buffer' from paper you definitely want to use citric acid not the trisodium salt. The concentration for this application is not particularly critical except for the fact that a more concentrated solution will have a higher capacity (i.e. will neutralize more paper) than less concentrated solution.

Having no experience with this printing process, I can't say if the difference between citric acid and the indicated trisodium citrate in the developer is critical for this application.

1749947416718.png
 
OP
OP
Raghu Kuvempunagar
Joined
Jul 28, 2016
Messages
2,836
Location
India
Format
Multi Format
Hi Andrew, Trisodium Citrate is what I use for making the developer. It is the most commonly used form of Sodium Citrate and is easily available. If it is not available to you for any reason, please don't spend money on the more expensive forms. You can synthesise by reacting Citric Acid with Sodium Bicarbonate.
 
OP
OP
Raghu Kuvempunagar
Joined
Jul 28, 2016
Messages
2,836
Location
India
Format
Multi Format
Some new prints here:


And here:
 

Jan de Jong

Subscriber
Joined
Jul 20, 2022
Messages
99
Location
Germany
Format
Analog
Raghu as a sidetrack, here an application of the FerroBlend, sort of. I still have some in the spray bottle. Working on a developer for the inkjet printed silver gelatin, I did some hand painted experiments. I thought some color in it would be nice too. So the Red is with FerroBlend sprayed on the Foma Variant 312 paper, then spray some KFerro over it. Same for the blue which is FAC and then spray some KFerro over it. (feel free to delete my post if not fitting) The border was added in Flickr to mask the blotting paper on my photo.


54645420042_3c1e50873b_h.jpg
 

F4U

Member
Joined
Jan 15, 2025
Messages
629
Location
Florida
Format
8x10 Format
Raghu as a sidetrack, here an application of the FerroBlend, sort of. I still have some in the spray bottle. Working on a developer for the inkjet printed silver gelatin, I did some hand painted experiments. I thought some color in it would be nice too. So the Red is with FerroBlend sprayed on the Foma Variant 312 paper, then spray some KFerro over it. Same for the blue which is FAC and then spray some KFerro over it. (feel free to delete my post if not fitting) The border was added in Flickr to mask the blotting paper on my photo.


View attachment 402658

Judging from the picture you posted, it makes me long for the days of Colorvir.
 
OP
OP
Raghu Kuvempunagar
Joined
Jul 28, 2016
Messages
2,836
Location
India
Format
Multi Format
Raghu as a sidetrack, here an application of the FerroBlend, sort of. I still have some in the spray bottle. Working on a developer for the inkjet printed silver gelatin, I did some hand painted experiments. I thought some color in it would be nice too. So the Red is with FerroBlend sprayed on the Foma Variant 312 paper, then spray some KFerro over it. Same for the blue which is FAC and then spray some KFerro over it. (feel free to delete my post if not fitting) The border was added in Flickr to mask the blotting paper on my photo.


View attachment 402658

Lovely work of art Jan! Nice!
 

Andrew O'Neill

Moderator
Moderator
Joined
Jan 16, 2004
Messages
12,197
Location
Coquitlam,BC Canada
Format
Multi Format
I'm throwing the towel in, at least for now. I spent most of yesterday, and all day today farting around with Ferroblend, using Raghu's formula, and Simple Cyanotype. Simple Cyanotype did not work. Barely got any coppering. I went through so much (expensive) paper, and chems, I need a break! I'll keep an eye on this thread in the meantime!
 

Andrew O'Neill

Moderator
Moderator
Joined
Jan 16, 2004
Messages
12,197
Location
Coquitlam,BC Canada
Format
Multi Format
Bonehead me forgot to mix Ammonium Chloride into stock A... 😬 Made another stock A, and resulting print was better...but I think the other issue I'm dealing with is humidity in my room. It's tricky during Summer, even with a dehumidifier, to keep it down. That explains why I was getting much better results back in March... I'll try again tomorrow. If I still can't get positive results, then in goes the towel again! 😆
 

Andrew O'Neill

Moderator
Moderator
Joined
Jan 16, 2004
Messages
12,197
Location
Coquitlam,BC Canada
Format
Multi Format
Results have improved, but still not where they should be...and my resulting prints are far beyond consistent. I'm confident that the humidity in my darkroom is too high for this process. I was getting best results back in March... So, for now, I will shelve this process, until Autumn/Winter, where humidity is not an issue.
This is the last print I made...(using Ferroblend A +B, not Simple Cyanotype, which I gave up on)
 

Attachments

  • 3Columns_2_Ferroblend.jpg
    3Columns_2_Ferroblend.jpg
    488.9 KB · Views: 37

koraks

Moderator
Moderator
Joined
Nov 29, 2018
Messages
23,969
Location
Europe
Format
Multi Format
Quite pretty nonetheless. I wonder if the ambient humidity is really the problem. In any case, hopefully you'll figure out what factor(s) determine(s) the consistency!
 

Andrew O'Neill

Moderator
Moderator
Joined
Jan 16, 2004
Messages
12,197
Location
Coquitlam,BC Canada
Format
Multi Format
@koraks it's the only thing that makes sense to me. It's the only variable that has changed since March. I even tried mixing up new parts A and B... Oh well... we'll see what happens in round 3! Until then, I can focus on my other projects more. 🙂
 

Andrew O'Neill

Moderator
Moderator
Joined
Jan 16, 2004
Messages
12,197
Location
Coquitlam,BC Canada
Format
Multi Format
I decided to keep at it. I think I'm finally getting it. Who would have thought that a garbage paper from the Japanese dollar store here, would win out over the expensive stuff! Of course I had to bathe the paper in Sulfamic Acid (5% solution), followed by a thorough wash, before I got decent results. The other variable? The negative. The density range must be much longer and have a higer Dmax (1.50 was mine for the film neg I printed of the columns). Previously, I was using negatives for traditional Cyanotype. Once I re-jigged the profile and changed the curve (closer to my Kallitype curve), I was off to the races. Here is the print I made today, on the cheap Japanese dollar store paper...
Janion_Ferroblend.jpg
 
Last edited:
OP
OP
Raghu Kuvempunagar
Joined
Jul 28, 2016
Messages
2,836
Location
India
Format
Multi Format
I decided to keep at it. I think I'm finally getting it. Who would have thought that a garbage paper from the Japanese dollar store here, would win out over the expensive stuff! Of course I had to bathe the paper in Sulfamic Acid (5% solution), followed by a thorough wash, before I got decent results. The other variable? The negative. The density range must be much longer and have a higer Dmax (1.50 was mine for the film neg I printed of the columns). Previously, I was using negatives for traditional Cyanotype. Once I re-jigged the profile and changed the curve (closer to my Kallitype curve), I was off to the races. Here is the print I made today, on the cheap Japanese dollar store paper... View attachment 404968

That's a very nice one Andrew! Glad that the cheap paper is working well. No idea why Revere Platinum isn't working as well as expected, but I hope to find out in October when I get some sheets. Will keep you posted.
 
OP
OP
Raghu Kuvempunagar
Joined
Jul 28, 2016
Messages
2,836
Location
India
Format
Multi Format
Yes! You want a long tonal scale for this process. Much longer than for classic cyano.

That's right. I mentioned this in OP but probably could have worded it better.

Exposure

  • 15 minutes using six Philips Actinic BL TL-D 18W lights for a negative with a density range of 1.8–2.2.
  • Expose the sensitized and dried paper as you would for Cyanotype (until highlights appear green and deep shadows are reversed).
 
OP
OP
Raghu Kuvempunagar
Joined
Jul 28, 2016
Messages
2,836
Location
India
Format
Multi Format
This is a test contact print from a 10x8 Foma 200 negative - bird of paradise flower photographed under UV light in the studio.

Workflow:
. I used the OP's directions for sensitiser and developer,
. glass rod coated A/B, 1+1ml
. air dried in the dark,
. about 30 seconds blow dry both sides,
. then exposed for 8 minutes under 365nm LEDs,
. rod coated with developer, 2ml
. left in the dark for 15 minutes,
. initial 2 minute wash in weak citric acid solution, then washed for about 20 minutes.

Still some more work to do, but it looks promising so far. Paper was Bergger COT160.

Sorry I missed this earlier. Nice result!
 
Photrio.com contains affiliate links to products. We may receive a commission for purchases made through these links.
To read our full affiliate disclosure statement please click Here.

PHOTRIO PARTNERS EQUALLY FUNDING OUR COMMUNITY:


Ilford ADOX Freestyle Photographic Stearman Press Weldon Color Lab Blue Moon Camera & Machine
Top Bottom