-
Welcome to Photrio!Registration is fast and free. Join today to unlock search, see fewer ads, and access all forum features.Click here to sign up
You are using an out of date browser. It may not display this or other websites correctly.
You should upgrade or use an alternative browser.
You should upgrade or use an alternative browser.
Multiple Layer Gum Printing
-
AH
- Thread starter Bob Carnie
- Start date
Recent Classifieds
-
For Sale Zone VI, Calumet, Keh vintage catalogs
- Started by Jon Shiu
-
Sold Nikon 10X Slide/Negative Magnifier Loupe
- Started by Jon Shiu
-
Want to Buy Mamiya Press Type "K" multiformat back
- Started by pdccamerqs
-
For Sale Olympus Pen F E.Zuiko Auto-T 100mm f/3.5 lens $70
- Started by loccdor
Forum statistics
Bumping this as it got lost in there somewhere...
Hi all! I wonder how you feel about whether the gum has any major role when it comes down to it's SG (degrees Baume)?
Also could it be one of the contributing factors regarding flaking?
Hi all! I wonder how you feel about whether the gum has any major role when it comes down to it's SG (degrees Baume)?
Also could it be one of the contributing factors regarding flaking?
Anthony another fine gum! How do you apply your gum coating?
Thanks! This is quickly becoming very addictive.
I am using hake brushes to coat because I already had them. This is what Christina Anderson suggests in her book. One brush to coat and one dry brush to do the final smoothing. If you look at Bob's gum printing videos he uses a foam brush for coating I may try that to see if it makes any difference.
fantastic you are getting the hang... try an Opaque first layer may give more ommfff.
I use foam to get the gum over the paper fast, and a really nice brush with a great tip that is slightly damp to do a final smoothing, I work very fast as you can see in the videos, sometimes too fast and I get mistakes.
I use foam to get the gum over the paper fast, and a really nice brush with a great tip that is slightly damp to do a final smoothing, I work very fast as you can see in the videos, sometimes too fast and I get mistakes.
I would like to hear any and all ideas on brushes as I am moving up in size with the purchase of a bigger plate burner so I need bigger tools.
Does anyone here use Da Vinci pigments?? they come in rather large tubes more suited to my needs.. I would be interested to know if they are comparable to Daniel Smith line.. most interested in the lightfastness aspect.
Does anyone here use Da Vinci pigments?? they come in rather large tubes more suited to my needs.. I would be interested to know if they are comparable to Daniel Smith line.. most interested in the lightfastness aspect.
Have you seen this site?
https://www.handprint.com/HP/WCL/water.html
It's kind of hard to navigate, but it has all kinds of very useful information on tons of different brands and colors of watercolors. That site claims that Da Vinci's own ratings of their watercolors are fairly accurate as far a lightfastness is concerned, for whatever that's worth. They also have more specific information for individual paints, including information on staining and opacity. It's really helpful, especially for gum printers.
I dug up some old cyanotype solutions I was given in a box of stuff from another photographer. No clue how old they are but for sure more than five years. Anyways they still seem to work fine so I made a couple of prints.
These are from 4x5 negatives enlarged to 11x14 on Arista lith film. This is the largest size paper I can use in my contact frame. Next time I'll print the negatives smaller to allow for more of a border on the film as this caused some issues. Also at this size I have more problems with registration vs 8x10, my little two-hole punch isn't enough.
I deliberately made the negatives with a lot of contrast. The cyanotypes had good deep shadows and clear highlights. I put a layer of brown gum on top and then a blue-gray on top of that. Lots of brush work on the boat to try to keep it fairly white. (Also note: Some of the foggy looking areas in the print of the boat are ice fog, it's on the negative.)
Sorry for the poor photographs but this is too big for my scanner.
Those prints look amazing Bob!
I added a second hit of umber to yours, I really like the buildup ontop of the palladium.
These only slightly belong here because they weren't digitally altered, other than scanning, enlarging, and printing larger negatives. They are 8x10's printed from 4x5 negatives. They are both a cyanotype base with gum bichromate red, yellow, and black layers. I photographed them with TMX 100 using RGB filters to get the color separations which introduced the element of time into the compositions. The shot under the bridge was taken in a matter of 30 minutes while the still life was taken over the course of a week. I underexposed and overdeveloped the RGB shots to get more contrast, and exposed the black separation normally and without a filter. They took a lot of tries to get the exposures right (or good enough) for each layer, so I have quite a few that didn't turn out so well (I actually have one of each that came out better, but those are mounted and more difficult to scan). The bridge was especially difficult, as I had to manipulate the highlights with a water hose, which explains all of the flaking. I won the best alternative photo contest in the Oklahoma State fair with each, the bridge in 2016 and the still life this year! I think I'm going to start moving into digitally manipulating prints with curves off a single color photo from here on out, as that would make printing a whole lot easier and more consistent.


You went old school In camera separations , then re registered on multiple coatings and exposures.. I like the bottom skull image more than the bridge but quite haunting and good work.
Thanks! Yeah I did! I work at a print shop and was curious as to how they made printing plates back before computers and stumbled across this process. I thought it would be fun to try out. The bridge took me 24 exposures (6 different attempts) to get right, and the still life took me 5 (I loaded one of my darkslides in backwards, so I wasn't sure if there was film in there or not, hence I took one extra as a safety). I also printed the bridge probably 20 times and the still life 8 times trying to figure it all out. So there was a LOT of trial and error involved. But I think for my next few attempts I'm going to go the single color negative with Photoshop curves and see how that goes. This method is just too expensive and time consuming.You went old school In camera separations , then re registered on multiple coatings and exposures.. I like the bottom skull image more than the bridge but quite haunting and good work.
Yes but you have learned how to do it the old school way and when you go the digital route, you will be so far ahead with your knowledge, I printed Pt Pd from 35mm to 16 x20 using ortho then enlarging, and I understand the more difficult way which in turn makes it much easier..Thanks! Yeah I did! I work at a print shop and was curious as to how they made printing plates back before computers and stumbled across this process. I thought it would be fun to try out. The bridge took me 24 exposures (6 different attempts) to get right, and the still life took me 5 (I loaded one of my darkslides in backwards, so I wasn't sure if there was film in there or not, hence I took one extra as a safety). I also printed the bridge probably 20 times and the still life 8 times trying to figure it all out. So there was a LOT of trial and error involved. But I think for my next few attempts I'm going to go the single color negative with Photoshop curves and see how that goes. This method is just too expensive and time consuming.
Why is this so difficult? Three shots should have been enough...
The red filter shot is made and using the filter factors to get the correct exposures bang on for the others...
Do I miss something here?
The red filter shot is made and using the filter factors to get the correct exposures bang on for the others...
Do I miss something here?
Well, I did 4 color, not 3, so the black layer didn’t use a filter. But the reason it took me so many exposures to get it right is because I didn’t use photoshop curves to make my enlarged negatives. So I had to underexposed each shot and then over develop the negatives to give me more more contrast to make the negatives print well with the gum bichromate. Also, I used a cyanotype which didn’t need as much contrast, and the black layer didn’t need as much exposure or development since it wasn’t going to print at 100%, or it would make the final print too dark. So basically unlike a normal silver print, I had to make a bunch of negatives that look pretty horrible on their own, but work well together in the final print. I also had to vary the print times, development times and methods, and formula concentrations to get these to work. And even after all of that, they didn’t turn out much like how the actual scene looked.Why is this so difficult? Three shots should have been enough...
The red filter shot is made and using the filter factors to get the correct exposures bang on for the others...
Do I miss something here?


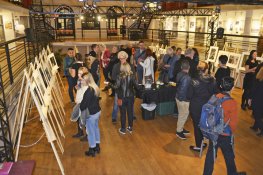
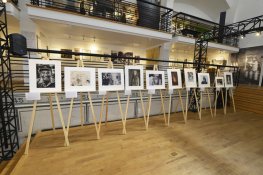
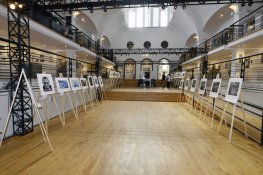
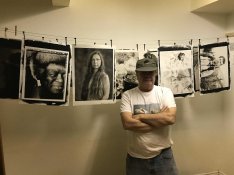
These are some images from our Kindred show in Montreal at The Ecomusee Du Fier Monde gallery space. We popped up for an evening and day and the show will move
to our space in Toronto, Included in this show were over 36 alternative photographs from photographers in Ontario, Quebec and one of our own APUGErs from Yukon.
working in Silver, Lith, Gum TRi and Duotone and Pt Pd is a challenging experience for me but I really enjoy the experience.
That looks fantastic Bob. Wish I could see them myself!
- Joined
- Jun 21, 2003
- Messages
- 29,810
- Format
- Hybrid
you can say THAT again !That looks fantastic Bob. Wish I could see them myself!
Here is a link to another set of prints done by Bob many of which are gum or gum over other process.
http://thepallaslab.com/gallery/
WOW is all I can say. I have seen some of these prints in person and they are amazing.
http://thepallaslab.com/gallery/
WOW is all I can say. I have seen some of these prints in person and they are amazing.
Last edited:
Hi Folks
Just been printing a bunch and I need to warn people of what I think is a really bad batch of paper...
the paper in question is Arches Platine and I must point out there is both good and bad paper out there.. The bad paper is 22 x 30 in size and the sticker is on the good side of the paper not the bad side.. I noted this problem a year ago, and like a fool I gave it another chance..
the Arches Platine that has the sticker on the back side is good...
just thought you all may want to know if you purchase this paper as its 18 dollars a pop.
Bob
Please ignore the poor quality of the print as this was more of an experiment. I was just registering negatives by eye and taking little care with coating and washing so it ain't pretty.
This is three colors of gum (CMY) coated onto a silver gelatin print on Ilford Multigrade Art 300 (K layer). The original source was an iPhone image, I printed the color separation negatives on transparencies at Staples.
I couldn't find any information online that someone had tried this combination so I figured I would give it a go. The yellow layer went on somewhat blotchy and to a lesser extent so did the magenta. The final cyan layer coated quite nicely, which leads me to believe that if I sized the paper on top of the silver gelatin image I could get quite good results. Will keep playing around.
| Photrio.com contains affiliate links to products. We may receive a commission for purchases made through these links. To read our full affiliate disclosure statement please click Here. |
PHOTRIO PARTNERS EQUALLY FUNDING OUR COMMUNITY:  |


