Durst CLS 1840 - Need help and advice :) New Darkroom build.

Sparrow.jpg

A
Sparrow.jpg

  • 1
  • 0
  • 36
Orlovka river valley

A
Orlovka river valley

  • 3
  • 0
  • 85
Norfolk coast - 2

A
Norfolk coast - 2

  • 5
  • 1
  • 78
In the Vondelpark

A
In the Vondelpark

  • 4
  • 2
  • 157
Cascade

A
Cascade

  • sly
  • May 22, 2025
  • 9
  • 6
  • 132

Recent Classifieds

Forum statistics

Threads
197,839
Messages
2,765,398
Members
99,486
Latest member
matgil
Recent bookmarks
0
OP
OP
reneboehmer

reneboehmer

Member
Joined
Oct 6, 2024
Messages
92
Location
Austria
Format
Analog
There were at least two different types of shutter mechanism. In one case the microswitches contact a rotating cam. In the other case the microswitches contact the actual lever that moves the shutter. You should be able to look up there and see which kind you have. They should both function the same. The logic function of the two micro switches and the relay is not outlined in the service manual I have. You might have to figure it out for yourself or see what Gary knows about it and how he programmed the shutter motor function via the arduino.


View attachment 385834

I see, I'll have to see once the power supply is ready to be moved into the darkroom for further testing. But it doesn't look that complicated. :smile:
Thanks for the photos!
 
OP
OP
reneboehmer

reneboehmer

Member
Joined
Oct 6, 2024
Messages
92
Location
Austria
Format
Analog
The picture is wat happens across the 22 ohm resistor in the startup fase.
The challenge is to not trip the safety circuit of the Kemo power control. It’s a very nice feature of the Kemo. It saved me and the Kemo more than once. But also very vast. It will trip almost immediate when the current exceeds (10A ?) only for some milliseconds. Despite the output is only 16V RMS it still peeks at ± 90 V. After all it’s just a PWM signal. 22 Ohm is just enough to keep the current under the tripping level.
The resistor will naturally not come to a fully developed thermal flow but I like to be on the save side. The potential over the resistor peeks at 28.5 volt rms in the startup phase. The potential over the resistor is not the same as over te bulb. Once the bulb has the minimum temperature keep it there for the time the unit is turned on. You don't need the resistor after the initial startup.
Thank you again, Gary!
I am now, after gaining some more experience, more able to understand everything you have mentioned before. I have tripped the Kemo safety multiple times today. :D 
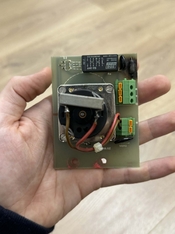
My friend and I are getting close.

I also finally figured that the lamps used are 120V. My enlarger came with a 750W one, but I'll switch to a 1000W one after the new power supply is done.
Have you tested how hot your Kemo gets after long darkroom sessions? I have read online that it's possible it might need active cooling when used over 1kW. I mounted mine to the metal housing of my enclosure and thought of adding some computer fan, in order to dissipate the heat. Well Ill measure the unit and if it doesn't go above 50-60C under normal load I won't do much besides the thermal paste.

One more question I've got for you is the following; Is the Kemo actually required? Is the only down sight to not having an idle mode lamp life?
 
OP
OP
reneboehmer

reneboehmer

Member
Joined
Oct 6, 2024
Messages
92
Location
Austria
Format
Analog
All options have their pros & cons. Ultimately I settled for a boring old 20x4 alphanumerical character display on my present controller. The reason is mostly because I could hack/modify these pretty easily to install a red, amber and a white backlight (the latter was already there; I just added the red & amber). Since I do both color and B&W, I wanted red for B&W work and amber (very dim!) for color.

E-ink is certainly possible, but as you said, the refresh rate is somewhat limited, which is the main reason I also skipped that option. You can do refresh rates of maybe 4Hz or so on e-ink, which doesn't allow for very smooth cycling through numerical values (you need about 10Hz or so to have a smooth user experience).

Initially I used 7-segment displays, which is fine if you're OK with having a single color. If you only do B&W work, then just use a red 7-segment display and call it good. You can put some additional rubylith on top to filter out the smaller wavelengths. It'll work just fine that way. If you also want to do color, you could use amber, which will also work reasonably well for B&W work as long as you keep the light level down. Some papers won't mind (Ilford) while some will fog to amber 7-segment displays (Foma). Note that you can NOT filter an amber 7-segment display to red etc. These are essentially LEDs, so fairly narrow wavelengths. If you put a red filter over an amber LED, you see virtually nothing.

I've seen projects where reasonably fancy red backlight dot matrix displays were used; you could e.g. use something like a Nokia 5110 display (these are quite popular in DIY circles) with a red backlight if you can find/hack one. There are bigger/nicer graphic displays with red backlight as well, but in the DIY community they're few and far between. I think for you it would be ideal if you could just use a ready-made module that you can interface with through SPI or I2C and for which a solid Arduino library is available.

I'd steer clear of IPS displays; they're nice in principle, but the backlight will be a (big) problem. OLED may work if you can find actual RGB displays (most DIY OLEDs are white, blue and/or yellow) and then use only the red channel for your enlarger. This may or may not work well for B&W printing (it'll be useless for color work unless you're OK with the display being off during exposures); the main issue will be the wavelength of the red, which is likely around 620nm (and it'll usually not be specified to begin with, or you have to look very hard to find it). For a B&W safelight it's nicer to steer towards 650-660nm LED. If you hack a cheap 16x2 or 20x4 or so, you can pretty much pick any color LED you want. Plus, they're cheap, easy to control from Arduino projects and it's relatively easy to replace the backlight LED with something of your choice.

Dear Koraks thanks again for this insightful response!
I think, as you mentioned, it might be best to go with a segmented display. I'll see what I can get my hands on. I will post an update here once I found one that suits my needs.
 
OP
OP
reneboehmer

reneboehmer

Member
Joined
Oct 6, 2024
Messages
92
Location
Austria
Format
Analog
Update on my power supply build.

My friend Angelo and I started the build today. We found an old housing that is of high quality and perfectly suits our needs. I will have to laser cut or 3D print an adapter to fit the old Durst plug. I ordered all the parts with the idea in mind (well, actually my friends' idea) to fit them on one of them norm mounts for electrical installations. This has worked out nicely. We 3D printed some holders for the ESP32 and the relay board. This way, everything fits neatly into the box.
We started writing some simple code, thankfully my friend Angelo has some experience with this, and I didn't have to start from 0. We already did some sketchy tests with the lamp. I adhered to what Gary recommended and everything seems to work fine. Next time we will have to move to the darkroom in order to look at how the shutter and fan need to be wired up.

After that, I will start designing the timer and it's functions. I will most likely also switch the electrical up- and down movement of the focus and enlarger head to the timer in order to fully remove the huge original control unit from my tiny space. Derek, from Dektronics, has a really smart feature that displays the Color head filter settings, when dialing in the normal contrast numbers, in his printalyzer timer. I want to include that, an f-stop timer with fine increments, as well as a test strip mode. Maybe also some communication to my LED red light.

I am quite happy with the results thus far and will post and update once done. I'll also share all the links, code and so on collected on a webpage (my friend recommended github) for everyone to use. (If there is interest)

Thanks again for the continued support and lovely help you guys have provided thus far :smile: I appreciate it.
All the best and merry Christmas!

IMG_2113.jpg
IMG_2127.jpg
IMG_2128.jpg
 

gary mulder

Member
Joined
Nov 29, 2006
Messages
98
Format
4x5 Format
One more question I've got for you is the following; Is the Kemo actually required? Is the only down sight to not having an idle mode lamp life?

Your pictures look promising !
There are probably 1000 ways to solve a problem like this one. I only needed one. Can it be done better ? Certainly. My motivation to use the kemo was that it opens the possibility for incorporating a ZMPT101B if there was / is drift in print density. According tot information in the internet from Durst USA using the bulb at 117V instead of 120V prolongs the bulb live with 100%.
In the past I have worked on at least 10 EST1000 boxes. Al had multipull problems. Possible caused by the high inrush current.
 
OP
OP
reneboehmer

reneboehmer

Member
Joined
Oct 6, 2024
Messages
92
Location
Austria
Format
Analog
Your pictures look promising !
There are probably 1000 ways to solve a problem like this one. I only needed one. Can it be done better ? Certainly. My motivation to use the kemo was that it opens the possibility for incorporating a ZMPT101B if there was / is drift in print density. According tot information in the internet from Durst USA using the bulb at 117V instead of 120V prolongs the bulb live with 100%.
In the past I have worked on at least 10 EST1000 boxes. Al had multipull problems. Possible caused by the high inrush current.

The lamp life, officially, is 300h (https://www.amazon.de/dp/B000J45AE8?ref=ppx_yo2ov_dt_b_fed_asin_title).
Do you really think reducing the current by 3V will increase the lamp life to 600h? As far as I can see the lamps are to be used as specified by the manufacturer since the vapor cycle within the lamp is conceptualized for those specif operating conditions.

Were you trying to use the ZMPT101B for controlling the steadiness of the current supplied to the lamp?

As long as a clean RMS 120V measurement arrives at the bulb, there shouldn't be any changes in density, no? In my mind, flicker doesn't really matter since, as long as it's consistent flicker, the consistency of light output won't be affected. The only worry I have is: I phase cut 230Vrms to 120Vrms in order to use it with my 120V bulbs. That doesn't feel right. Wouldn't it be much better to use no phase cut and a 230V lamp (https://www.prolighting.de/lichttec...77-fep-240v-1000w-g-9-5-3200k-300h.html?gQT=0) ?

Can you explain the reasoning for this, I do not fully comprehend this yet.
 
OP
OP
reneboehmer

reneboehmer

Member
Joined
Oct 6, 2024
Messages
92
Location
Austria
Format
Analog
On another note,
The ISO 6846 for BNW paper sensitivity calls for a 3000k tungsten halogen light source. The lamps I found are 3200K. Does this make any difference in a practical setting. In theory, as far as I can tell, the 3200 should just release more visible light and more blue light. (Also more UV)
As far as I can tell, that ok for BNW. Can anyone specify what is critical for color enlargements?
 

gary mulder

Member
Joined
Nov 29, 2006
Messages
98
Format
4x5 Format
Sadly we kan’t ask Jens Jensen why he claimed the prolonged bulb live. The only thing that interests me is that it worked for my color and BW with 8x10” Durst's the past 20 years. But you can setup your gear any way you see fit.
 
OP
OP
reneboehmer

reneboehmer

Member
Joined
Oct 6, 2024
Messages
92
Location
Austria
Format
Analog
Sadly we kan’t ask Jens Jensen why he claimed the prolonged bulb live. The only thing that interests me is that it worked for my color and BW with 8x10” Durst's the past 20 years. But you can setup your gear any way you see fit.
This is what I got out of chatgpt :D


Yes, reducing the voltage fed into a 120V halogen tungsten lamp to 117V will likely lengthen the lamp's life. The lifetime of halogen tungsten lamps, like other incandescent lamps, is highly sensitive to voltage. Even small reductions in voltage can result in significantly longer lifespans due to the physics of filament evaporation and thermal stress.

Here’s why:

  1. Reduced Filament Temperature: Lowering the voltage reduces the temperature of the tungsten filament. Since filament evaporation is a temperature-dependent process, a cooler filament will evaporate more slowly, extending the lamp's life.
  2. Exponential Impact on Lifespan: The relationship between voltage and lamp life is approximately exponential. A common rule of thumb is that for incandescent lamps, a 5% reduction in voltage can nearly double the lifespan.
  3. Trade-Offs:
    • Reduced Light Output: The light output of a halogen lamp decreases significantly with even small voltage reductions (approximately proportional to the voltage raised to the power of 3.5).
    • Color Temperature: The color temperature will also decrease, resulting in a slightly warmer (more yellow/orange) light.
 

koraks

Moderator
Moderator
Joined
Nov 29, 2018
Messages
21,310
Location
Europe
Format
Multi Format
The only worry I have is: I phase cut 230Vrms to 120Vrms in order to use it with my 120V bulbs. That doesn't feel right.

I don't see a problem with it from a perspective of the bulb, quality of the light etc.

Does this make any difference in a practical setting

Not meaningfully so.

Can anyone specify what is critical for color enlargements?

Consistency more so than the 200K difference in the temperatures you mention. You may see a difference in color balance going from a 3000K to a 3200K bulb with all other parameters kept the same. But you can print with the full gamut the paper, film and dichroic filters allow for with either bulb.
 
OP
OP
reneboehmer

reneboehmer

Member
Joined
Oct 6, 2024
Messages
92
Location
Austria
Format
Analog
I don't see a problem with it from a perspective of the bulb, quality of the light etc.


Not meaningfully so.


Consistency more so than the 200K difference in the temperatures you mention. You may see a difference in color balance going from a 3000K to a 3200K bulb with all other parameters kept the same. But you can print with the full gamut the paper, film and dichroic filters allow for with either bulb.

Koraks,

thanks for this!
Well, then I'll continue as planned.
 

ic-racer

Member
Joined
Feb 25, 2007
Messages
16,508
Location
USA
Format
Multi Format
On another note,
The ISO 6846 for BNW paper sensitivity calls for a 3000k tungsten halogen light source. The lamps I found are 3200K. Does this make any difference in a practical setting. In theory, as far as I can tell, the 3200 should just release more visible light and more blue light. (Also more UV)
As far as I can tell, that ok for BNW. Can anyone specify what is critical for color enlargements?
Have you printed color before? A real issue would be a lamp that varies between 3200k and some other value during a string of identical prints or between test print and final. Otherwise. your color pack will account for the lamp with a constant K value.

I don't know about the device you are building, but the original Durst CLS1840 power supply was a pulse wave modulated system, but the lamp does not flicker, it maintains heat during the off part of the duty cycle.
 
OP
OP
reneboehmer

reneboehmer

Member
Joined
Oct 6, 2024
Messages
92
Location
Austria
Format
Analog
Have you printed color before? A real issue would be a lamp that varies between 3200k and some other value during a string of identical prints or between test print and final. Otherwise. your color pack will account for the lamp with a constant K value.

I don't know about the device you are building, but the original Durst CLS1840 power supply was a pulse wave modulated system, but the lamp does not flicker, it maintains heat during the off part of the duty cycle.

I have not done color printing, no, but I want to and therefor want to be sure. I will most likely rent a calibrated color meter from a local film production and meter the lamp's output.

The unit I am building is also using PWM to control the dimmer.
 

gary mulder

Member
Joined
Nov 29, 2006
Messages
98
Format
4x5 Format
If is’s any reassurance the Durst CLS1000, CLS1840, Optimo and Optopa al drive a 120V bulb with a phase cut 120Vrms from 230Vrms
 
OP
OP
reneboehmer

reneboehmer

Member
Joined
Oct 6, 2024
Messages
92
Location
Austria
Format
Analog
IMG_2152.jpg
IMG_2156.jpg
IMG_2166.jpg
img_2176-jpg.386195
IMG_2177.jpg


Some more images for people of the future who might need them :D
The resistor on my shutter motor board looks cooked.
The shutter is just an off center pin on the motor, that fits into a slot on a piece of metal, that is mounted on a hinge.

I once had a really nice iris shutter that was in my Homrich VA250. That would've been a pleasant upgrade. Unfortunately, I don't have it anymore.
 

Attachments

  • IMG_2176.jpg
    IMG_2176.jpg
    103.2 KB · Views: 79
OP
OP
reneboehmer

reneboehmer

Member
Joined
Oct 6, 2024
Messages
92
Location
Austria
Format
Analog
BTW, I uploaded the repair manual on ChatGPT and asked about the 120V output. Quite handy.

The EST 1000 generates 120V from a 230V input using a voltage stabilizer and thyristor-based phase control. Here's a summary of how the conversion is achieved based on the provided document:

  1. Voltage Stabilization Circuit:
    • The EST 1000 employs thyristors (Th1 and Th2) to regulate the output voltage.
    • It uses a feedback loop to compare the actual output voltage to a preset nominal value. This comparison generates a control voltage.
  2. RMS Conversion and Pulse Generation:
    • The actual voltage is measured, rectified, and fed into an RMS converter, which provides a stable representation of the AC voltage.
    • A comparator evaluates the difference between the measured voltage and the nominal target.
    • Based on this difference, a pulse generator creates the required firing pulses for the thyristors to control the voltage output.
  3. Phase-Angle Control:
    • The thyristors regulate the output by varying their conduction angle in each AC cycle. This effectively adjusts the RMS value of the AC output to achieve the desired 120V from the 230V input.
  4. Protection Mechanisms:
    • The circuit includes overload protection to cut the output voltage to 0V in case of excess current.
    • A soft-start mechanism gradually ramps up the voltage to avoid sudden surges that could shorten the lamp's lifespan.
  5. Adjustment and Calibration:
    • A potentiometer (P1) allows fine-tuning of the output to precisely reach 120V. Calibration must be done with a true RMS voltmeter to ensure accuracy.
This approach ensures a stable and precise 120V output suitable for the connected devices, even with fluctuations in the 230V input.
 

ic-racer

Member
Joined
Feb 25, 2007
Messages
16,508
Location
USA
Format
Multi Format
Here is the shutter on my 2000. I wonder what Gary's looks like.
CLS 2000 shutter.jpg
 
Photrio.com contains affiliate links to products. We may receive a commission for purchases made through these links.
To read our full affiliate disclosure statement please click Here.

PHOTRIO PARTNERS EQUALLY FUNDING OUR COMMUNITY:


Ilford ADOX Freestyle Photographic Stearman Press Weldon Color Lab Blue Moon Camera & Machine
Top Bottom