Autochromes...

Recent Classifieds

Forum statistics

Threads
199,071
Messages
2,785,810
Members
99,795
Latest member
VikingVision
Recent bookmarks
1
Joined
Aug 7, 2014
Messages
186
Location
Grand Rapids, MI
Format
Large Format
I just was able to take a relaxing break on my vacation to really reflect on these problems. The more I think, the more it seems to me that the first developer's lack of ability to penetrate the emulsion is ultimately at the core of my problems. I think Nodda Duma is right, and what I mistake for overall emulsion contrastiness is actually halation washing out highlight detail.

So let's take a few minutes to analyze the original Lumière formula and compare it to mine, and try to sort out the relative differences. Strap in, because there's going to be a lot of math!

The original Lumière formula is as follows:

...AgNO3WaterGelatin
Solution A0250015
Solution B30015000
1.5L 20%wv gelatin01500300
Additional Water05000
Spectral Sensitizers09000
TOTAL3006900315
Assuming all AgNO3 (~170g/mol) is consumed during precipitation, can assume there are 1.76mols AgX in this emulsion recipe. From this, we can further conclude that there are 5.6mmol of AgX per gram of gelatin.

Applying the same math to my emulsion recipe from earlier this year, we see that mine has only 1.68mmol of AgX per gram of gelatin. We can see that the Lumière recipe had 3.3x as much AgX per weight gelatin than mine, creating a significantly denser coating after drying.

Next, let's try and take a look at how much emulsion should be applied to a 4x5 plate. I emailed Bertrand Lavendrine yesterday, asking if there was a record of how much emulsion was applied per area of the screens, to which he quickly responded "74,4 g/m2 right after gelification".

Bear with me, because the math is probably about to get a bit fuzzy. We need to figure out the rough density of the Lumière emulsion.

The salts added to the emulsion were as follows

3g of KI, or 18.07mmol
240g KBr, or 2016.8mmol

We can say that mols of AgI ocur in the emulsion at a rate of 0.88% of total AgX. Using a weight of 234.77g/mol for AgI and 187g/mol for AgBr, we can say our weights are:

3.67g AgI
327.07g AgBr

For a total weight of 330.7g of AgX in the emulsion.

Finding the rest of the weights should be easy.

6900mL Water = 6900g
315g gelatin = 315g gelatin

Total weight = 7545.7g

Adding them all up, and assuming the volume of the emulsion to still be 6900mL (fuzzy math, know), we get a rough density of 1.09g/mL.

We can now use the rate given to us earlier to find the amount of emulsion that would have been added to a 4x5 screen. 20in^2 = 0.013m^2

Thus, 0.96g would have been applied to a 4x5 plate, and using our fuzzy density, 1.05mL. This is at a gelatin% of 4.5%. It's been stated over and over how thin the autochrome emulsion was, but this is still crazy thin.

If I were to emulate the same AgX:gelatin ratio, while working with a 2.8% wv of gelatin, I would still need to apply a minuscule 1.72mL per screen, roughly 6x less then what I'm applying now.

...

So, what can we learn from this? It seems that, per weight gelatin, the Lumière emulsion had a much higher AgX content. For me to apply roughly the same amount of AgX to a screen, with my recipe I would end up with 3.3 times as much gelatin. I hypothesize that this much gelatin causes the first developer to slowly disperse, ensuring that the AgX on the top of the gelatin (and thus, the AgX that was most likely to experience halation) is developed more readily.

This also explains the result I've noticed, where fairly good color and contrast is achieved when an extremely dilute developer/long dev time is used for first dev, and then a reducer is used after second dev - the dilute developer's action is allowed to work all the way through to the inner gelatin layer, and the reducer eats away at the top (working its way down), thus removing the part of the image receiving the most halation.

So, using these numbers, I can tweak my recipe a bit.

Using the same mmolAgx:gelatin rate, my overall recipe should now contain a maximum of 8.4g of gelatin. The total emulsion volume would be:

%wvTotal mL
2420
2.8300
4.5186.66
I've got a pretty good color balance the rest of my parameters, so I'm just going to tweak my gelatin/water content now and see how that pans out.

Whew... so much for relaxing on vacation...
 
Last edited:

Photo Engineer

Subscriber
Joined
Apr 19, 2005
Messages
29,018
Location
Rochester, NY
Format
Multi Format
Seems to me that the formula looks OK if low in gelatin. Have you coated just the emulsion on a plate to see how it images and develops? If so, can you describe the result?

Thanks.

PE
 
Joined
Aug 7, 2014
Messages
186
Location
Grand Rapids, MI
Format
Large Format
dontbelieve.jpg


I got distracted by a few things and ultimately never did shoot any negatives with the emulsion. However, I did spend some time experimenting with my previously mentioned theory.

The new emulsion uses mostly the same recipe, but applies some of the changes I proposed in my previous post.

1. The total gelatin composition was backed off to 8.4g. This ensures the final coating has 5.6mmol AgX: 1g Gelatin, as the Lumiere plates had.
2. The emulsion was diluted to 400mL, which achieves an overall 2% gelatin content (thus 2.5mL of emulsion would closely match the 1mL of applied emulsion of the Lumiere plates)
3. Backed off the pinacyanol (from 1mL to 0.5mL of 1:1000 solution)

Getting such a small amount of liquid to evenly coat a plate by hand, so far, is very difficult. I purchased an Adjustable Thin Film Applicator to help with the coating, which has been fairly successful. I use two leveling tables, which are leveled with a machinist's level. 2.5mL of emulsion (heated to 35C) is applied to the 4 inch side, and the blade is slowly drawn down the plate. This fills out a large circle on the plate, but the emulsion still needs to be spread gently with the tip of the syringe. After being fully spread, the plate is rocked quickly to each corner, then back and fourth. This helps to considerably even out the emulsion. Finally, the plate is set on the second leveling table and allowed to gel. This seems to take about an hour, since my basement is unfortunately quite warm. The coating process currently is very nerve wracking and time consuming, and it takes about 20 minutes to coat 10 plates.

With such a thin coating, there is a noticeable improvement in speed and dynamic range -- now you can see all the other junk that's on the table! Usually they sort of disappear into a black void. I think there is still room to increase it a bit more, though, as I'm still dialing in exposure/development times.

Currently I'm using D-19 diluted 1:3, +1g KSCN. I'm hoping to try out a higher KSCN content in the next set of plates, hopefully to increase speed and dynamic range further. It might be good to try out the Dufaycolor FD again and see what I can do with that.

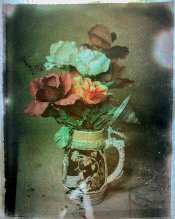
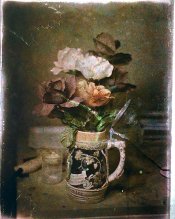
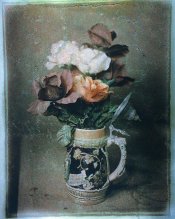
The "5min4min" picture uses a newer batch of starch, which apparently transmits more red and a lot more green than the previous batch. Newer screens will need an emulsion with the erythrosine backed way off. It has nearly no interstitial openings between the starch grains, unlike the other two.

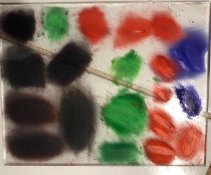
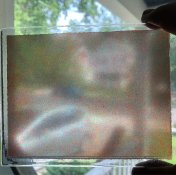
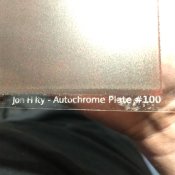
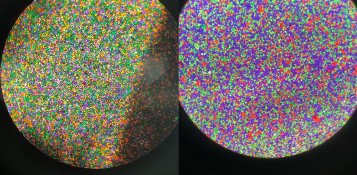
I attached a few other pictures that might be interesting. I'm proud to have finally made my 100th autochrome screen since March. Also attached is a little plate I used to examine starch mixtures under the microscope. Finally, attached is the first preview at a size-sorted starch grain mix (left is from an original autochrome plate, right is mine). I can't use it yet because the green starch is too pale, but very soon I will be making fine-grained starch screens!
 

Attachments

  • 5min4min.jpg
    5min4min.jpg
    403.6 KB · Views: 316
  • 5min2min.jpg
    5min2min.jpg
    337.9 KB · Views: 300
  • 10min2min.jpg
    10min2min.jpg
    323.6 KB · Views: 300
  • starchtest.jpg
    starchtest.jpg
    167.7 KB · Views: 313
  • plate100_2.jpg
    plate100_2.jpg
    277.2 KB · Views: 308
  • plate100_1.jpg
    plate100_1.jpg
    124.2 KB · Views: 504
  • starchcompare.jpg
    starchcompare.jpg
    1.2 MB · Views: 303

NedL

Subscriber
Joined
Aug 23, 2012
Messages
3,388
Location
Sonoma County, California
Format
Multi Format
I have really enjoyed following this. Thanks for continuing with your posts.
( 10 plates in 20 minutes sounds fast to me... it takes me 2 or 3 hours for the final prep of 10 preserved calotypes )
I've used 3% gelatin on papers, I can imagine it would be really difficult to spread that on a glass plate, especially such a small amount of it.
 
Joined
Aug 7, 2014
Messages
186
Location
Grand Rapids, MI
Format
Large Format
I have really enjoyed following this. Thanks for continuing with your posts.
( 10 plates in 20 minutes sounds fast to me... it takes me 2 or 3 hours for the final prep of 10 preserved calotypes )
I've used 3% gelatin on papers, I can imagine it would be really difficult to spread that on a glass plate, especially such a small amount of it.

It's always great to hear your encouragement! Thanks, I appreciate it!

I wasn't very optimistic about this batch, since early tests for outdoors showed they would be way to blue. However, I decided to wing it and shoot the rest of my plates anyway and just see what happens. And I'm glad I did!

All of these were shot at 10s@f/5.6. A few were a bit dark, and I had to hit them with a weak Farmer's Reducer, which seems to work pretty well (though it is apt to blow out the density in the sky entirely).

IMG-1185 and 1186 were both on newer screens that slipped in accidentally, and contained a newer starch mix. All of them had a bit of a bias towards blue, but those especially were blue/green. In the next batch of emulsion I'll definitely be backing down on the erythrosine.

I still need to find a better coating technique... Right now it involves dosing 2.5mL of emulsion onto the plate, spreading it around with my finger, rocking it from corner to corner (even the watery emulsion tends to pool), and crossing my fingers that I totally didn't just mess it up. I haven't tried veil coating, but it just seems like it would have a pretty considerable thickness grating afterward. Spin coating might be possible, but I didn't have much luck with the record player I was playing with (the coating was either too thin or too thick, and generally had a "doughnut" of emulsion on the outside of the plate).
 

Attachments

  • IMG-1186s.jpg
    IMG-1186s.jpg
    1 MB · Views: 318
  • IMG-1183s.jpg
    IMG-1183s.jpg
    1.4 MB · Views: 294
  • IMG-1180s.jpg
    IMG-1180s.jpg
    1.3 MB · Views: 303
  • IMG-1182s.jpg
    IMG-1182s.jpg
    1.4 MB · Views: 291
  • IMG-1185s.jpg
    IMG-1185s.jpg
    1.7 MB · Views: 310
  • IMG-1179.JPG
    IMG-1179.JPG
    1 MB · Views: 316

glbeas

Member
Joined
Sep 25, 2002
Messages
3,936
Location
Marietta, Ga. USA
Format
Multi Format
I wonder how a vibrating stand will work to settle the emulsion after applying it to the glass? I know its helpful when casting acrylics to rattle the bubbles out.
 
Joined
Aug 7, 2014
Messages
186
Location
Grand Rapids, MI
Format
Large Format
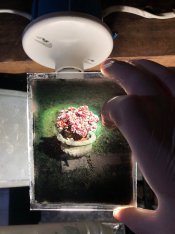
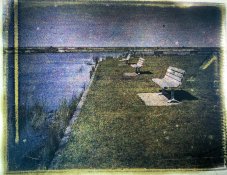
Here are a few more... And here's a video you might think is neat. I've been using 50mL D-19 + 150mL H20 + 10mL 5% KSCN as first developer, and have been consistently achieving really nice results with it. Make it fresh when I start processing plates, and toss it when I'm done (it discolors heavily after a day or so). 2 minutes at 25C seems to do the trick.

I have a couple plates that are in a holding pattern right now -- they're a bit dark and contrasty, but have nice color in their highlights. I'm going to try and hit them with a superproportional reducer to see if I can save them. Just waiting on the ammonium persulfate to get here, now...

I have this goofy problem now where, when I run out of a particular color of starch, the new mix doesn't quite respond the same to the emulsion as the old one did. So now I have 3 different "generations" of screen plates that I have to keep track of, otherwise the colors will be all goofy. 2nd Gen plates have higher sensitivity to green than 1st gen plates, which requires them to be shot with a magenta filter when the same batch of emulsion is used. 3rd Gen plates used a new batch of red starch, but I haven't gotten to shoot very many of those yet. I ordered a Cibachrome CMY filtering kit, which hopefully should give me greater control over color balance.

The old Gen 1 starch was all dyed two years ago, when I was just winging it. This time around I'm taking detailed notes, and saving the dye solutions after vacuum filtration, so hopefully things will be more consistent from here on out. I tried really hard to match the same shades of color, but ultimately I was just kind of eyeballing it under the microscope.

It's not perfect yet, but shooting with a yellow filter on overcast days dramatically helped. The UV filter didn't seem to make much of a difference, so I suppose it's just bluer outside.

I wonder how a vibrating stand will work to settle the emulsion after applying it to the glass? I know its helpful when casting acrylics to rattle the bubbles out.

Interesting thought! It's something I might play with other the winter. I've gotten better at my coating technique now, so it's not quite as stressful as it was. Accidentally spilling some emulsion on the leveling table is disastrous, because it tends to seep underneath the glass, which needs to be clean and clear since the plates are exposed backwards. After getting my ritual down, there was a lot less spillage.

I have a new problem -- my newest batch of emulsion frills and lifts off during processing! Typically it starts during first development, and most of the damage is done during bleaching. I still have a small amount left from the last batch, so by process of elimination I've ruled out problems with the screens or bad chemistry. I jacked up the amount of chrome alum (1% solution) from 1mL to 9mL with no apparent difference. I'm not sure if the chrome alum went bad (I just mixed it in May, so I find that hard to believe), or if the emulsion was diluted just too much. This time I diluted final volume to 450mL (up from 420mL), which leaves the emulsion at a 1.86% gelatin, which is pretty low. It still gels up just fine, but maybe such an insanely low gelatin% is causing problems with adhesion. From what little results that have made it all the way through processing, the dynamic range is improved even more, so I can say that at least.

Another problem -- Now that I'm having consistently good results worth keeping, I'm burning through my backlog of screens! That's a problem you want to have though, I think.

+1 those are amazing.
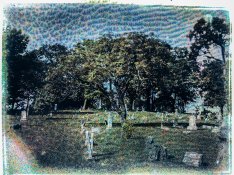
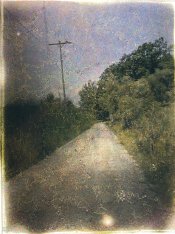
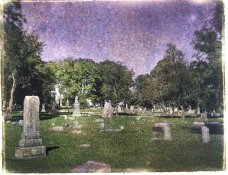
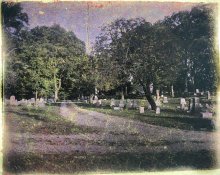
The graveyard and road are both fabulous just the way they are, with the crazing and imperfections adding something rather than detracting, IMHO.

Thanks! I agree, though tbh I don't really have a choice but to embrace the goofy defects that come with the process. But I have yet to make a plate and feel like a crack or wrinkle ruined it in any way.

Thank you all for the compliments and kind words!
 

Attachments

  • 1stGen2minutesYellowFilter1.jpg
    1stGen2minutesYellowFilter1.jpg
    459.7 KB · Views: 245
  • 1stGen10sNoFilter.jpg
    1stGen10sNoFilter.jpg
    296.8 KB · Views: 253
  • 1stGen120sNoFilter.jpg
    1stGen120sNoFilter.jpg
    492.5 KB · Views: 250
  • 2ndGen40sMagenta3.jpg
    2ndGen40sMagenta3.jpg
    263.8 KB · Views: 243
  • 2ndGen120sMagenta3.5.jpg
    2ndGen120sMagenta3.5.jpg
    287.3 KB · Views: 240

Nodda Duma

Member
Joined
Jan 22, 2013
Messages
2,685
Location
Batesville, Arkansas
Format
Multi Format
You should mix chrome alum fresh for each use. I rarely go a week without mixing new.
 
Joined
Mar 5, 2006
Messages
144
Location
Egg Harbor C
Format
Multi Format
Your emulsion lifting May be solveable with the wet plate trick of “albuminizing” your plate initially with a dilute settled and filtered albumen solution (dried on the plate before any emulsion).
 
Joined
Aug 7, 2014
Messages
186
Location
Grand Rapids, MI
Format
Large Format
Hello everyone! Here are a few updates. Good news first!

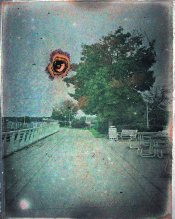
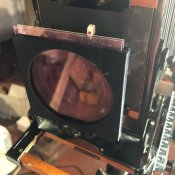
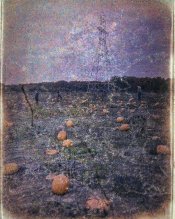
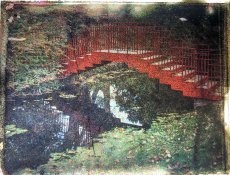
After four failed batches, I was finally able to re-create a satisfactory emulsion. It's still too green sensitive, so I'm shooting with a magenta filter. I designed and 3D printed a fitting to hold 75mm Cibachrome filters. These filters come with 6 levels each of cyan, magenta and yellow filters. Various combinations of these filters should give me fairly precise control of the color balance post-hoc. I'm very proud of the red bridge plate -- that was shot with heavy magneta and yellow filtration, and is probably the best results I've gotten so far in overcast conditions (something that I'm about to get a lot of here in Michigan).

71190751_451447078808976_4516270280003046575_n.jpg

You should mix chrome alum fresh for each use. I rarely go a week without mixing new.

BINGO! This seemed to make a big difference. I'm using 2mL of a 1% solution per 8.4g of gelatin. I did get some minor blistering on a few newer plates, but overall it's seemingly a lot better (could be due to oil on the surface or something). I'll probably add a bit more the next time I go to coat.

Your emulsion lifting May be solveable with the wet plate trick of “albuminizing” your plate initially with a dilute settled and filtered albumen solution (dried on the plate before any emulsion).

That's a really neat idea, and I wish I had tried it. By the time I read your suggestion, I had already tossed out my bad batch of emulsion. I will keep it in mind in the future!

Would LaserJet toner be less water soluble than inkjet?

Off the top of my head, I would guess that it is. What is this in reference to? Possibly printing out a screen on some sort of transparency?

Now, some bad news... getting on about two months later, a lot of my autochromes are experiencing the dreaded "desaturation" issue. This seems to be due to the gelatin layer shrinking and slipping across the second varnish layer, so that the silver grains are no longer masking out the correct grains of starch. In the past, applying a protective top coat seemed to prevent this from occurring, but in all honestly I haven't been making decent autochromes long enough to get a proper sample size. These autochromes from the last two months or so all have had a solvent-based acrylic applied (at most) a few days after development.

IMG-1388.jpg

It seems to start at the very edges of the plate, and slowly spread inwards. This example plate is one of the worst, and only has about a 1"x2" area where it still retains color. Most of these exhibit this to varying degrees around the edges, and I wouldn't be surprised if I lose most of them over the course of the following months. As distressing as this is, I remain optimistic that this can be figured out. From my understanding, this behavior is related to the choice of Second Varnish.

Right now, the desaturation only seems to occur on plates with an acrylic based Second Varnish (either Golden's MSA Acrylic or Amsterdam Gloss Acrylic varnishes). I have three surviving plates that have exhibited no desaturation -- one plate using polyurethane, one plate using the traditional Lumiere nitrocellulose/damar based lacquer, and one using an automotive clear coat made by "Duplo". My hope is that, since these layers seem to help counteract the desaturation, perhaps one of these can be applied as a protective top-coat that can give the gelatin enough grip to stop this shrinkage.

Polyurethane -- I don't think this makes a reasonable candidate. After examining some of the plates I had made in March, I found that, after peeling off a corner of the polyurethane, the bottom remained liquid. It seems to be that once the top of the polyurethane cures, oxygen has considerable difficulty diffusing through to the bottom.

Lumiere Nitrocellulose Lacquer -- I'm hesitant to use this right now. I had some difficulties in the past with the lacquer drying too quickly (becoming orange-peel like upon drying) and, in some instances, large white patches precipitating out. I'd like to troubleshoot this in the coming weeks, and I'm working on getting a fume hood put in.

"Duplo" Clear Coat -- This seems like the best bet for now. It dries quickly and clear. I'm going to be applying about 6-10mL of this per plate and observe the behavior over the next few weeks.

Artist's Grade Damar -- Traditionally, a lacquer of damar in benzene was applied to autochrome plates after processing. As I found out, pure nitrocellulose lacquers don't give much for the gelatin to grip on to. After adding the damar, it sticks with no issues. I figured I'd wing it and see how this performs on two test plates. I applied 6mL of the damar lacquer (damar dissolved in turpentine) per 4x5 a few days ago, but even after a few days it remains quite tacky.

I'm also starting to use a hardener with the plates after processing. I whipped up a batch of SH-1, (10mL 37% formalin and 5g anhydrous sodium carbonate dissolved in 1L of water) and have been treating all my plates with it (except a few control plates). Is SH-1 the most powerful hardener that can be reasonably made by a hobbyist?

Hopefully between these two things, I can find a way to make these things last!

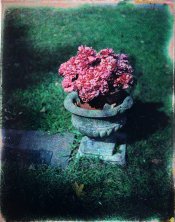
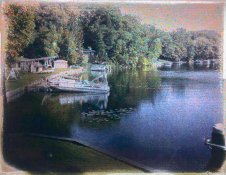
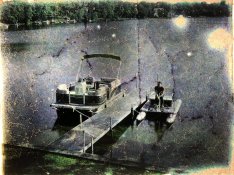
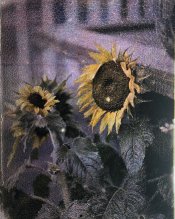
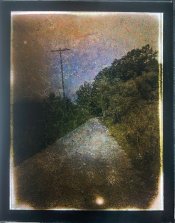
Lastly, here a few plates I've made over the last few weeks. I hope you enjoy!
 

Attachments

  • 74929792_1386776848167111_4780536314682209231_n.jpg
    74929792_1386776848167111_4780536314682209231_n.jpg
    477.7 KB · Views: 221
  • 74573210_164319614764404_219370063084776201_n.jpg
    74573210_164319614764404_219370063084776201_n.jpg
    217.3 KB · Views: 223
  • 70471403_613804575824631_3648296196094130314_n.jpg
    70471403_613804575824631_3648296196094130314_n.jpg
    424.3 KB · Views: 235
  • 75349227_542886259808127_904686002217680403_n.jpg
    75349227_542886259808127_904686002217680403_n.jpg
    429.4 KB · Views: 236
  • IMG-1394.jpg
    IMG-1394.jpg
    1.7 MB · Views: 228

Hologram

Member
Joined
Oct 17, 2006
Messages
143
Format
Medium Format
Hello everyone! Here are a few updates. Good news first!

Now, some bad news... getting on about two months later, a lot of my autochromes are experiencing the dreaded "desaturation" issue. This seems to be due to the gelatin layer shrinking and slipping across the second varnish layer, so that the silver grains are no longer masking out the correct grains of starch.

Sounds like a humidity problem to me. Perhaps an approach like this (https://holowiki.org/wiki/Sealing_DCG_Holograms) may help.
 
Joined
Aug 7, 2014
Messages
186
Location
Grand Rapids, MI
Format
Large Format
Sounds like a humidity problem to me. Perhaps an approach like this (https://holowiki.org/wiki/Sealing_DCG_Holograms) may help.

I'm not sure if it's necessarily down to humidity -- this shrinkage is occurring after the topcoat is applied and (presumably) dried. Meaning the gelatin is sandwiched BETWEEN the Second Varnish layer and the protective top-coat, and it's still shrinking weeks later!

Thanks for the link though, this is something I can definitely try out. I sealed a single DCG hologram once years ago with epoxy, and I recall having a ton of little bubbles trapped after slowly lowering the glass plate on top of the hologram. How can this be avoided?

Come to think of it, I have some very low viscosity UV-cure epoxy (IIRC it's used in some manner for fly fishing). I'll have to try it out on the next plate I make. Thanks for the link!
 

Photo Engineer

Subscriber
Joined
Apr 19, 2005
Messages
29,018
Location
Rochester, NY
Format
Multi Format
The problem as we found with Instant was that the coefficient of expansion of the layers had to be similar. If they were not, then we got the results you see.

PE
 
Joined
Aug 7, 2014
Messages
186
Location
Grand Rapids, MI
Format
Large Format
The problem as we found with Instant was that the coefficient of expansion of the layers had to be similar. If they were not, then we got the results you see.

PE

I hadn't considered that... That could be a big problem. In the mean time, I'll keep playing with different top coats and see if I can slow or prevent the issue, since I have probably around 30 screens left that all used the same varnish. I'm finally getting a fume hood put in, so soon I'll be able to play around with the Lumiere varnish a bit more.

I finally completed my writeup on all the different Second Varnish coatings I tried over the last six months. Anyone interested can take a look here:
https://www.jonhilty.com/single-post/2019/10/30/Lets-talk-about-the-Second-Varnish
 

Hologram

Member
Joined
Oct 17, 2006
Messages
143
Format
Medium Format
Sounds like a humidity problem to me. Perhaps an approach like this (https://holowiki.org/wiki/Sealing_DCG_Holograms) may help.
I'm not sure if it's necessarily down to humidity -- this shrinkage is occurring after the topcoat is applied and (presumably) dried. Meaning the gelatin is sandwiched BETWEEN the Second Varnish layer and the protective top-coat, and it's still shrinking weeks later!

It depends on the nature of your topcoat. Many plastics, varnishes, lacquers are poor water vapor barriers. With glass, PET, PP, PVDC, you should be on the safe side.


I sealed a single DCG hologram once years ago with epoxy, and I recall having a ton of little bubbles trapped after slowly lowering the glass plate on top of the hologram. How can this be avoided?

You might use some acrylic UV adhesive - probably a lot less messy than struggling with epoxy. Before applying the UV light exposure, you can always look for air bubbles.

Reading your blog, I wondered if it wouldn't be easier to form a subbing layer based on Aminopropyltriethoxysilane treatment of the glass. I guess the starch layer would nicely adhere to it.

As for the original Lumière second varnish, the castor oil probably serves as a plasticizer (to make the layer less brittle).
 
Photrio.com contains affiliate links to products. We may receive a commission for purchases made through these links.
To read our full affiliate disclosure statement please click Here.

PHOTRIO PARTNERS EQUALLY FUNDING OUR COMMUNITY:


Ilford ADOX Freestyle Photographic Stearman Press Weldon Color Lab Blue Moon Camera & Machine
Top Bottom