Overhauling Kodak Panoram

Red

D
Red

  • 1
  • 1
  • 15
The Big Babinski

A
The Big Babinski

  • 1
  • 2
  • 37
Memoriam.

A
Memoriam.

  • 6
  • 5
  • 123
Self Portrait

D
Self Portrait

  • 3
  • 1
  • 61
Momiji-Silhouette

A
Momiji-Silhouette

  • 2
  • 3
  • 65

Recent Classifieds

Forum statistics

Threads
197,997
Messages
2,767,963
Members
99,521
Latest member
OM-MSR
Recent bookmarks
1
OP
OP

B&Jdude

Member
Joined
Apr 17, 2008
Messages
584
Location
Clinton, AR
Format
4x5 Format
Hmmm? They must make chamois leather different ways when they split it. The Kodak chamois is pretty smooth and has a velvet-like feel to it . . . not at all rough textured.

I look forward to tearing into the 4C tomorrow, but it will be in the afternoon as I will be taking my Mom and a couple of her HS classmates (class of '44) out for breakfast at a small town cafe up in the far remote reaches of the county, then drive them around through the mountains and valleys for a couple of hours. This is a ritual that I perform for Mom and her buddies about once every month to 6 weeks, as they can't get around to visit each other like they used to.

Anyhoo, as soon as I get to tearing into that camera I will come back with a report on my success or failure as a Panoram tech. I'll be thinking all along on how to fix the bellows, but that isn't an immediate concern, rather the swing lens mechanism is the first order of business.

EuGene
 

Frank R

Member
Joined
Jan 30, 2006
Messages
351
Format
Large Format
I will need to use some plastic rubber or something similar on the inside to seal the corners, because with the leather off the camera, the corners will usually not be light tight.

This may not be necessary. I plan on stripping the remaining leather and then filling in the finger joints with some high quality wood filler. The joints are already so fine it won't take much. That should be all it takes for making it light tight. A final sanding with very fine sandpaper (up to 600 grit), and then a coat of varnish should make it shine.
 
OP
OP

B&Jdude

Member
Joined
Apr 17, 2008
Messages
584
Location
Clinton, AR
Format
4x5 Format
Boy, the more I hear about your varnished Panoram, the more I like it. Ken Ruth has my ragged looking one, and when he is finished with the mechanics, I will strip the remaining old leather off of it and varnish it.

Well, I have all my heavy duty tools out, so I'm ready to start in on tearing apart the 4C . . . I'll be back on-line later to report what sort of mess I have made of things.

EuGene
 
OP
OP

B&Jdude

Member
Joined
Apr 17, 2008
Messages
584
Location
Clinton, AR
Format
4x5 Format
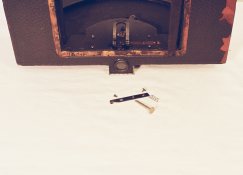
Well, sports fans, I dove into the bowels of the Panoram 4C last night, removed the swing lens, bellows, and the mechanism from the camera, cleaned it up, straightened up a bend in the "U" spring and a mashed & bent gear tooth, and put it back together . . . except for the bellows which are shot.

Then, SURPRISE! The darn thing works like a champ! I guess all it needed was a little cleanup to remove rust and dirt from the mechanism and a little straightening of bent parts to get it going. Well, I did have another surprise . . . I didn't have any leftover parts!

After I removed the swing lens & bellows, the tensioning lever, and the shutter release button, I wrestled with the question of how to reach inside to remove the 4 screws the hold the mechanism mountong plate in place. Then I got hit by a B.G.O. (Blinding Glimpse of the Obvious) . . . I had a stubby little screwdriver, about 1 1/2" long, that came with a phonograph cartridge that I had recently bought, and it fit those little screws perfectly. I did see that I had to pull the mechanism out carefully, as the spring to keep tension on the shutter release lever is loose in a hole in the wood at the top of the camera and falls out when you remove the mechanism. Fortunately it droped into my lap, so I didn't lose it.

The winding mechanism is frozen solid and won't turn either way, so I will fix it this evening.

That's where things are at this time.

EuGene
 
OP
OP

B&Jdude

Member
Joined
Apr 17, 2008
Messages
584
Location
Clinton, AR
Format
4x5 Format
Well, I finally got the winding mechanism back together and it works fine now. Taking it apart wasn't too difficult, but putting it back together was a major hassle.

Looking at Patent #1,023,933, Figure 5, the three little round things (#17), are pushed by little springs (#18), jam between tapered spaces on the 3-lobed cam (#15) and the outer housing (#14 in Figs. #3 & #4), thereby preventing the winder from turning backwards and loosening the film on the take-up spool. Those little round things aren't balls, but rather tiny cylinders that have to stand up against their individual springs while the outer housing is put on. That's the hard part!

Well, I greased those little rascals real good to hold them in place while I installed the outer cover, but since they are held in place inside the outer cover by a small amount of spring tension, without the cover they present an overall diameter which is larger than the ID of the cover. That meant they kept turning sideways or falling over as I attempted to put the cover over them.

Finally, my slow hillbilly brain figured that I should wind a piece of thread about 2 turns around them and pull it tight to push the balls against their springs and decreasing the effective diameter of the cam, spring, & ball assembly so that the cover could fit over them. Once I got the cover over the assembly and about halfway on, I was able to release the thread and remove it then push the cover the rest of the way into place and secure it with its 2 screws.

All total, it took me about 2 1/2 hours to work on the mechanism and get it working, about 30 minutes to remove, disassemble and clean the winder, and about 3 hours to put the darn winder back together!!

I'm tired . . . think I will go to bed early this evening.

EuGene
 
Last edited by a moderator:

NOLARon

Member
Joined
Aug 28, 2008
Messages
5
Format
Medium Format
Panoram Shutter Issue

Hello all, sorry I've been out of touch for a bit. Been intending to post info on what I've figured out by messing with my 4-D. This is my first semester of grad school - and it has been a while since I've worn my school shoes - so I've been feeling like I'm in the center of a tornado. But anyway...

Looks like you've been making a bunch of headway EuGene. Guess you've figured out the screwdriver thing. But just in case anyone is wondering about a small short screwdriver to get at the screws that hold the mechanism in - I found that the one that came with an eyeglass repair kit from the corner drugstore worked well. I filed the head a little to turn the screws and cut the end of the handle off to give more clearance. But it probably wasn't necessary.

My current issue is the shutter firing part doesn't release the lens as it should. There is a part on the spring catch (#74) where it engages with the lever (#70) that catches on the main plate (#65) and prevents firing. This is at the location of the catch (#73). It looks as though this is part of the design of the spring catch (#74) and not a modification, so I'm hesitant to file it off. But it seems to me that by doing so, I would solve the issue. If anyone has any advice (or even knows what all that described) please let me know. I think there is a photo of this part attached if I did it right.

Well, I've got to get back to my reading for tomorrow. I'll check the thread soon.

Ron
 

Attachments

  • Panoram08.jpg
    Panoram08.jpg
    140.3 KB · Views: 317

NOLARon

Member
Joined
Aug 28, 2008
Messages
5
Format
Medium Format
Forgot to mention that all the part numbers are from the patent #689,159.
 

NOLARon

Member
Joined
Aug 28, 2008
Messages
5
Format
Medium Format
As for a bellows. The ratty old one I removed seemed to be made of an ancient suede/velvet mix and that the knowledge of creating a new piece of this material passed with Mr. F. A. Brownell. So I went to Tandy and they did inform me that it is true, the crossbreeding of suede and velvet has certainly been lost. I did get a nice piece of soft, almost velvety pigskin in black to use. I think it will work well. We'll see.
 
OP
OP

B&Jdude

Member
Joined
Apr 17, 2008
Messages
584
Location
Clinton, AR
Format
4x5 Format
Ron, that soft pigskin sounds promising, so I am anxious to find out how it works out. Since you were able to get it already dyed black, I am wondering if they sealed the pores in it? Also, if it works out, we could all use ordering info, such as catalogue number and the ordering address (snail mail & on-line, or 800 number for call in orders). I'm definitely keeping my fingers crossed that you have found the right stuff to use with that pigskin.

Another thing that I have been mulling over is making some sort of adapter/shim type thing to glue, friction fit, or otherwise attach to the film spool spindles to make the 120 film spools fit a little better without being so wobbly. The holes and keyway are large and fit very loosly on the Panoram Model 1 spindles which were made to fit the smaller holes and keyway on the 105 size film spools. I would suspect that the looseness could cause a bit of binding and twisting of the film, which might contribute to the occasional tendency for the film to come out of the track and drop down into the camera.
 

NOLARon

Member
Joined
Aug 28, 2008
Messages
5
Format
Medium Format
OK. Here's where I'm at on the bellows...
The pigskin is quite thin and has a suede surface. It was the closest thing to the original that they had at Tandy. Unfortunately, it had pinholes throughout. The young woman explained that these were follicles and all of their thin leathers would have them. She said that some animals could have fewer (perhaps goat) - but there were no other skins in stock that were as close to the original bellows as the pigskin. I couldn't wait. Pigskin it is.
She suggested I seal the pores with Johnson's Floor Wax (!?). She said that mink oil might work but would leave a residue that could rub off. They only sell leather by the "skin" so I had plenty to experiment with. Wax does not work. I then tried Camp Dry silicone leather spray with a dark furniture wax over the top. The idea was the silicone would plug the follicles and the dark wax would stop the light. Did not work. Then I tried Plasti Dip. I think it worked!
I found the Plasti Dip at the Home Depot next to the spray paint. It comes in different colors- I opted for black of course. The container resembles a small tennis ball can. I used a small brush to apply it. Put the first layer on liberally brushing in one direction. Waited about 30 minutes then applied a second liberal coat across the grain of my first coat. Let it dry overnight. Now the pigskin has a layer of rubber on the inside similar to rubberized light tight cloth. The rubber appears to be of a decently lasting quality. For clean up and thinning of the Plasti Dip I used naptha (lighter fluid). Do keep this in mind if you use naptha to clean the camera mechanism as it can melt your rubber layer. The pigskin did lose a bit of its flexibility, but it still seems sufficient for a Panoram bellows. Also the rubber dries with a glossy surface- I would prefer matte. I'll update after I mount it in my camera. should have some time for that next week.

The Plasti Dip might also be a good seal for those of you that are needing to fill light leaks around the doors. (I swear I don't work for these people)

For reattaching the exterior leather I've been using Orange Shellac. It can be removed/cleaned with denatured alcohol. This doesn't make the bond as permanent as glue, but has sufficient strength. Orange shellac was traditionally used to hold pen sacs in fountain pens,so pen restoration suppliers would be where to look for this. I ordered a small bottle of this product from Pendemonium. It was inexpensive.

I'm mulling over the adapter/shim for a better 120 spool fit. I am going to be building adapters to fit 120 in my 4-D so I'll be exploring that soon. Perhaps some gaffer's tape for a quick fix fit. Let us know if you come up with anything. I'll update after installing the bellows - prob. at the end of next week.
Ron
 

Frank R

Member
Joined
Jan 30, 2006
Messages
351
Format
Large Format
Do you think that black shoe polish (the wax type, like Kiwi brand) would be light tight?
 

Frank R

Member
Joined
Jan 30, 2006
Messages
351
Format
Large Format
As for a bellows. I did get a nice piece of soft, almost velvety pigskin in black to use. I think it will work well. We'll see.

Did you buy the Velvet Pigskin Suede Black, #9120-01?.

Lucky for me I just looked up Tandy's website and found a location nearby.
 
OP
OP

B&Jdude

Member
Joined
Apr 17, 2008
Messages
584
Location
Clinton, AR
Format
4x5 Format
Frank, I suspect that any sort of wax would come out of the pores as the leather is flexed. Wax tends to harden and crumble easily, and just doesn't lend itself to any sort of bending. Ron might be on the right path with the Plasti Dip if it will seal the pores from leaking light, without adding any significant stiffness to the pigskin. As for the shiney surface of the Plasti Dip, that could be a problem . . . I wonder if there is some sort of blace plastic sealer that yields a flat black surface?
 

JackGreen

Subscriber
Joined
Nov 2, 2004
Messages
28
Format
Multi Format
Panoram bellows

I wonder if it wouldn't be possible to use shutter material for a bellows?? It wouldn't be as in the original but it may work.. ??

Jack
 
OP
OP

B&Jdude

Member
Joined
Apr 17, 2008
Messages
584
Location
Clinton, AR
Format
4x5 Format
Jack:

I thought about something similar, using either shutter cloth or dark cloth material (Porter's used to sell the latter, but may not any more). Put the black dyed pigskin on the outside with the cloth on the inside, either loose or glued to the leather with something like rubber cement. The shutter material is so flexible that it should have no discernable effect on the flexibility of the lens membrane (bellows).

I guess I can try the leather-cloth combo idea out on the Panoram 4C that I have been using for a repair training aid. It might take a while while I order the stuff to use for practice. As for "originality", since the original felt-leather type material is no longer made, one can at best only go for something that presents the original appearance, but which is also functional.
 
OP
OP

B&Jdude

Member
Joined
Apr 17, 2008
Messages
584
Location
Clinton, AR
Format
4x5 Format
OK, since Porter's doesn't have the dark cloth material any more, where would I find shutter cloth?
 

JackGreen

Subscriber
Joined
Nov 2, 2004
Messages
28
Format
Multi Format
EuGene:
The people that sell camera repair tool show it on their website. I know of someone who was able to buy large enough to repair a Graflex shutter: Dead Link Removed
Or a search on Google for shutter curtains turned up this from the LF forum: http://www.lungov.com/wagner/DIYShutterCloth.html
Thanks for the patent sheets and the missing Panoram sheets BTW
Jack
 

DougGrosjean

Member
Joined
May 23, 2006
Messages
341
Format
Medium Format
Haven't read all the posts, but a friend sent me the following shop via email. He'd had them do work on his Panoram, and he was pleased with the results:

Panorama Camera Center
124 West 30th Street
Suite# 305
New York, NY 10001
Tel. 212-563-1651
email: panoramacam@aol.com
 
OP
OP

B&Jdude

Member
Joined
Apr 17, 2008
Messages
584
Location
Clinton, AR
Format
4x5 Format
Doug:

Thanks for that info . . . we have very little knowledge of who works on Panorams. We have been attempting to share experiences here in order to learn how to fix our cameras ourselves, as it seems very expensive to have them repaired. I tried calling the number, but inasmuch as it is almost 7:00 PM in NYC, I will have to try again on Monday.

EuGene
 
OP
OP

B&Jdude

Member
Joined
Apr 17, 2008
Messages
584
Location
Clinton, AR
Format
4x5 Format
By the way, I bought a piece of that Tandy Velvet Pigskin Suede Black (#9120-01), and that stuff is great! It is super flexible and soft with an occasional big hole (about 1 or 2 mm, apparently mostly from scratches and wounds) and numerous very tiny holes scattered about . . . they are real small, about the size of a needle point, but not as large as the needle body. They should be very easy to seal.

I got a small size skin, about 10 1/2 sq ft, and by cutting out bellows-size pieces while avoiding the occasional big holes (except where one falls where the lens hole will be cut), I should be able to get a dozen or so bellows leathers out of this skin.

Also, maybe as an overkill, I ordered a piece of the focal plane shutter cloth from Micro-Tools. I might put a piece of it on the inside, behind the suede pigskin bellows, for a double light seal.

I don't mind playing around and trying different things, and I will certainly experiment with the bellows replacement.

A couple other things need to be addressed that we haven't mentioned yet. First, (maybe because of shrinkage of the wood over the years) the Panorams seem to commonly have a problem of focusing beyond infinity. Since the swing lens and its shaft don't lend themselves to being moved, one would most likely need to correct this condition by shimming the curved film track. I dont know how one would test the focus . . . maybe put a strip of wax paper on the film track and get under a dark cloth?? I guess I need some sort of flexible "ground glass".

The second problem that I hear about, but haven't a clue how to deal with it, regards the lens swiveling on its "Nodal Point". I suppose someone who knows a lot more about optics than I needs to address that one.

EuGene
 

freygr

Member
Joined
Jun 5, 2007
Messages
137
Location
Portland Ore
Format
Multi Format
By the way, I bought a piece of that Tandy Velvet Pigskin Suede Black (#9120-01), and that stuff is great! It is super flexible and soft with an occasional big hole (about 1 or 2 mm, apparently mostly from scratches and wounds) and numerous very tiny holes scattered about . . . they are real small, about the size of a needle point, but not as large as the needle body. They should be very easy to seal.

I got a small size skin, about 10 1/2 sq ft, and by cutting out bellows-size pieces while avoiding the occasional big holes (except where one falls where the lens hole will be cut), I should be able to get a dozen or so bellows leathers out of this skin.

Also, maybe as an overkill, I ordered a piece of the focal plane shutter cloth from Micro-Tools. I might put a piece of it on the inside, behind the suede pigskin bellows, for a double light seal.

I don't mind playing around and trying different things, and I will certainly experiment with the bellows replacement.

A couple other things need to be addressed that we haven't mentioned yet. First, (maybe because of shrinkage of the wood over the years) the Panorams seem to commonly have a problem of focusing beyond infinity. Since the swing lens and its shaft don't lend themselves to being moved, one would most likely need to correct this condition by shimming the curved film track. I dont know how one would test the focus . . . maybe put a strip of wax paper on the film track and get under a dark cloth?? I guess I need some sort of flexible "ground glass".

The second problem that I hear about, but haven't a clue how to deal with it, regards the lens swiveling on its "Nodal Point". I suppose someone who knows a lot more about optics than I needs to address that one.

EuGene

1) the focus set, you have to be careful as I'm guesting that the lens is set in the hypofocal curve, were for example 10' to infinity is in focus. I would not shim the film plain but pull shims under the lens mount. Shim materials can be order in sheet form from to places: McMaster-Carr or MSC Industrial Supply Co. links: http://www.mcmaster.com/ , https://www1.mscdirect.com/

2) Unless you have a lot of stuff in the foreground very close in, as the nodal point of the lens is very close to the pivot point you will not see much if not any parallax error in the photos. (I do allot of panoramas using a digital cameras, and most are hand held) Unless a single mucus lens is used the nodal point of the lenses will be close to the aperture.
 
OP
OP

B&Jdude

Member
Joined
Apr 17, 2008
Messages
584
Location
Clinton, AR
Format
4x5 Format
Thanks, Gordon. I won't even ruffle my bangs any more over nodal point issues - more like non-issues - but I will see if I can figure out how to check the focus on the lens. I'll leave all nodal point fixes to Ken Ruth, as he routinely does that sort of stuff to Panarams (and I suppose that shop up in NYC does, too). I don't understand what the nodal point of a lens is anyhoo.

Now, what would be a good flexible stuff to use as a "ground glass" on the curved film plane to check to see if it is properly focused. Since it is my understanding that Panoram lens is about an f11 or f16, will one be able to see the GG image well enough to check the focus . . . no doubt a dark cloth will be needed in any case. Next, I gotta figure out how to get the lens out of the tube. I removed the hood from the front, and see that it seems to clamp the lens in place, as the lens flopped around loose in the tube when I unscrewed the hood. However, I could not get the lens to come out of the tube from the front, so I will try removing the "cone" and see if it comes out from the rear.

I'm not familiar with MSC Industrial Supply Co., so I'll check them out tomorrow. Now, on the other hand, I do know good old McMaster-Carr; they seem to sell every type of hardware known to man, so I consider them my buddies . . . a DIYer's toy store! I think I mentioned early in this thread that they have the same level as used on the Panorams ----> go to page 2240. There the little sucker is, for $12.50. (oh well, it's in chrome rather than nickel)

I also need to get some new screws to replace the 10 that hold the front metal plate on the camera. Mine are badly rusted and some have even become very thin with no threads left on them. I would like to replace them, preferably with stainless steel (though I'll take what I can get), but I am not knowledgeable about how different screws are identified. What would be the correct type and size that I should ask for to order those screws?

It seems that I just keep coming up with more questions, so I don't know if I am making progress or just getting thoroughly confused. Thank God I am not trying to work on something complicated, like a SLR.

EuGene
 
Last edited by a moderator:

Frank R

Member
Joined
Jan 30, 2006
Messages
351
Format
Large Format
I also need to get some new screws to replace the 10 that hold the front metal plate on the camera. Mine are badly rusted and some have even become very thin with no threads left on them. I would like to replace them, preferably with stainless steel (though I'll take what I can get), but I am not knowledgeable about how different screws are identified. What would be the correct type and size that I should ask for to order those screws?
EuGene

(there was a url link here which no longer exists)
 
OP
OP

B&Jdude

Member
Joined
Apr 17, 2008
Messages
584
Location
Clinton, AR
Format
4x5 Format
Thanks, Frank. I found the little beasties at the www.microfasteners.com address that I found when I followed your link. I measured several of my screws that were in the better condition and they seemed to fit the #0 x 1/4" size countersunk slotted screws that company sold.
 
Photrio.com contains affiliate links to products. We may receive a commission for purchases made through these links.
To read our full affiliate disclosure statement please click Here.

PHOTRIO PARTNERS EQUALLY FUNDING OUR COMMUNITY:


Ilford ADOX Freestyle Photographic Stearman Press Weldon Color Lab Blue Moon Camera & Machine
Top Bottom