How to (consistently) make positive E-6 transparencies with C-41 chemicals

Recent Classifieds

Forum statistics

Threads
198,695
Messages
2,779,408
Members
99,680
Latest member
Antoni Pallicer
Recent bookmarks
0

flavio81

Member
Joined
Oct 24, 2014
Messages
5,068
Location
Lima, Peru
Format
Medium Format
Right-o

Here we have the film scanned and corrected the best I can via Lightroom. Promaster SLR, Jupiter 85mm, Kodak Portra 160NC expired. And yes, it's an authentic patch. Why did I use it for a test? Dunno, it was laying around.

Herr SS-Officer Cholentpot,

As an armchair specialist, I'd dare to say the film would need more light on the 2nd reexposure, or more energic 2nd development.

PS: Quite terrifying, your choice of test image...
 

Cholentpot

Member
Joined
Oct 26, 2015
Messages
6,743
Format
35mm
Herr SS-Officer Cholentpot,

As an armchair specialist, I'd dare to say the film would need more light on the 2nd reexposure, or more energic 2nd development.

PS: Quite terrifying, your choice of test image...

Jawohl Herr Falvio,

I agree. the chemistry for C-41 is way past it's intended life. And I need to get more light on the Re-exposure.

I got this from a member of my Synagogue that passed. He had no children due to experimentation. I was documenting it with another camera and took a few test shots once it was out. My family was never issued these, they just got shot instead.

And on a lighter note! Here's another test shot from the roll. Any tips on fogging?

KS1tiZU.jpg


4e6FtkB.jpg
 

fdonadio

Member
Joined
Jan 15, 2015
Messages
2,099
Location
Berlin, DE
Format
Multi Format
Strange... the solarization was pretty much limited to the hydrant and a little to the bushes to the left of it. Have you considered the solarization occurred on the exposure, not on the re-exposure?

Theres a technique to fog film on the reel, but it works better (maybe only?) with stainless steel reels. It consists of moving the reel as to facilitate light getting in between the film. I am looking for a video demonstrating the technique, but can’t find it. My father (who taught me this technique) tells me he used a 500 Watt Photo-Flood bulb and it only took like 30 seconds from each side of the reel. I am not sure if these bulbs are available today.
 
OP
OP
grainyvision

grainyvision

Subscriber
Joined
Feb 19, 2018
Messages
695
Location
Denver, Colorado
Format
Multi Format
@Cholentpot that looks almost exactly like under-blixing with this process. I've never seen it happen with C-41 film, but it's very common when doing E-6, especially with chemicals past capacity. I dare say you need to consider mixing a new C-41 kit, or at least replenishing your blix (if you're really against mixing a new kit, I've heard blowing air through blix helps to regenerate it some). I'd also try doing some really hot blix, like 105F and for insane amounts of time, like 15-20 minutes if your chemicals are that ridiculously old.

Check out this comparison shot on E-6 film where the film was not properly blixed


velvia3[1].jpg
 
OP
OP
grainyvision

grainyvision

Subscriber
Joined
Feb 19, 2018
Messages
695
Location
Denver, Colorado
Format
Multi Format
Also, you can take your existing strips of test film with this problem, and blix them again. This has rescued some of my "test" film (btw, don't use experimental processes when you care about the pictures) in the past after I figured out that this was the problem. This is a quick scan of that same strip of film after blixing it again (and with no color correction at all)

_MG_5360.jpg
 

Wayne

Member
Joined
Jul 8, 2005
Messages
3,583
Location
USA
Format
Large Format
@Cholentpot that looks almost exactly like under-blixing with this process. I've never seen it happen with C-41 film, but it's very common when doing E-6, especially with chemicals past capacity. I dare say you need to consider mixing a new C-41 kit, or at least replenishing your blix (if you're really against mixing a new kit, I've heard blowing air through blix helps to regenerate it some). I'd also try doing some really hot blix, like 105F and for insane amounts of time, like 15-20 minutes if your chemicals are that ridiculously old.

Check out this comparison shot on E-6 film where the film was not properly blixed


View attachment 203582

I wish I could make mistakes like that.
 

flavio81

Member
Joined
Oct 24, 2014
Messages
5,068
Location
Lima, Peru
Format
Medium Format
Mr. Slow cooker,

For fogging the film, why don't you follow the recommendations pointed out on b&w film reversal manuals by Ilford and Kodak? I recall that they specified quite powerful reexposures. It can't hurt.

Blix failures nonwithstanding, of course.

I remember His Holiness Ron M. indicating that modern negative films are quite resilient against inversion due to excessive exposure.
 

Cholentpot

Member
Joined
Oct 26, 2015
Messages
6,743
Format
35mm
Strange... the solarization was pretty much limited to the hydrant and a little to the bushes to the left of it. Have you considered the solarization occurred on the exposure, not on the re-exposure?

Theres a technique to fog film on the reel, but it works better (maybe only?) with stainless steel reels. It consists of moving the reel as to facilitate light getting in between the film. I am looking for a video demonstrating the technique, but can’t find it. My father (who taught me this technique) tells me he used a 500 Watt Photo-Flood bulb and it only took like 30 seconds from each side of the reel. I am not sure if these bulbs are available today.

I've been pulling the film off the reels completely. And I gotta find a 500 Watt Flood? Hoo-ee...

@Cholentpot that looks almost exactly like under-blixing with this process. I've never seen it happen with C-41 film, but it's very common when doing E-6, especially with chemicals past capacity. I dare say you need to consider mixing a new C-41 kit, or at least replenishing your blix (if you're really against mixing a new kit, I've heard blowing air through blix helps to regenerate it some). I'd also try doing some really hot blix, like 105F and for insane amounts of time, like 15-20 minutes if your chemicals are that ridiculously old.

Check out this comparison shot on E-6 film where the film was not properly blixed


View attachment 203582

It might very well be time for a new kid. I've been blixing @ 12 min around 102. So this looks to be a mix of dead blix and bad fogging technique. Can you tell me how I know when a fogging is done? Does the image fog over?

Mr. Slow cooker,

For fogging the film, why don't you follow the recommendations pointed out on b&w film reversal manuals by Ilford and Kodak? I recall that they specified quite powerful reexposures. It can't hurt.

Blix failures nonwithstanding, of course.

I remember His Holiness Ron M. indicating that modern negative films are quite resilient against inversion due to excessive exposure.

Can you link me to this info from Kodak or Ilford?

Thanks,

- Crock O'Pot
 

flavio81

Member
Joined
Oct 24, 2014
Messages
5,068
Location
Lima, Peru
Format
Medium Format
I've been pulling the film off the reels completely. And I gotta find a 500 Watt Flood? Hoo-ee...

Hi Slow Cooker,

Here are the data for the re-exposure step. This is for B&W slide development but as far as i know it should work exactly as well for E6 reversal step.

Ilford says:

"this is a total fogging exposure to make the remaining silver halide develop readily. Open the tank and remove the film from the spiral reel. Expose both sides of the film for the equivalent of 30-60 seconds at 46cm/18in from a 100-watt tungsten lamp or 30cm/12in from a fluorescent light tube. Insufficient second exposure will result in a reduction in density when the film is finally fixed. Two to four times the specified exposure may safely be given, but over exposure beyond this extent may lead to slightly foggy highlights. Do not expose to sunlight as the film may start to print-out, thus affecting maximum density."

https://www.omnifoto.nl/shop_images/pdf_documenten/Ilford/Reversal_Processing.pdf

Foma says: (for R100 development)

"re-exposure to be done in the developing tank using a 100 W bulb in a distance of 1 m in water and with the film moving (turning the spiral with the film) – 30 sec from both sides"

https://www.freestylephoto.biz/static/pdf/pages/product_pdfs/foma/F_pan_R_1_en.pdf
 

Anon Ymous

Member
Joined
Feb 7, 2008
Messages
3,661
Location
Greece
Format
35mm
Every time I've fogged film (E6 and BW), I left the film on the reel. It wasn't even a transparent reel, but typical Jobo and Paterson ones. I use a 60W tungsten lamp and put the film in a bowl with water. I expose each side of the reel for about 2' and spin it slowly. The distance from the lamp is about 20cm. This method has always been successful for me and can't see a reason why it would fail. I really can't find a reason to remove the film from the reel.
 

Cholentpot

Member
Joined
Oct 26, 2015
Messages
6,743
Format
35mm
Hi Slow Cooker,

Here are the data for the re-exposure step. This is for B&W slide development but as far as i know it should work exactly as well for E6 reversal step.

Ilford says:

"this is a total fogging exposure to make the remaining silver halide develop readily. Open the tank and remove the film from the spiral reel. Expose both sides of the film for the equivalent of 30-60 seconds at 46cm/18in from a 100-watt tungsten lamp or 30cm/12in from a fluorescent light tube. Insufficient second exposure will result in a reduction in density when the film is finally fixed. Two to four times the specified exposure may safely be given, but over exposure beyond this extent may lead to slightly foggy highlights. Do not expose to sunlight as the film may start to print-out, thus affecting maximum density."

https://www.omnifoto.nl/shop_images/pdf_documenten/Ilford/Reversal_Processing.pdf

Foma says: (for R100 development)

"re-exposure to be done in the developing tank using a 100 W bulb in a distance of 1 m in water and with the film moving (turning the spiral with the film) – 30 sec from both sides"

https://www.freestylephoto.biz/static/pdf/pages/product_pdfs/foma/F_pan_R_1_en.pdf
Every time I've fogged film (E6 and BW), I left the film on the reel. It wasn't even a transparent reel, but typical Jobo and Paterson ones. I use a 60W tungsten lamp and put the film in a bowl with water. I expose each side of the reel for about 2' and spin it slowly. The distance from the lamp is about 20cm. This method has always been successful for me and can't see a reason why it would fail. I really can't find a reason to remove the film from the reel.

Wilco!

I'll try something like this next time...Beans 'n Barely over and out!
 

wblynch

Member
Joined
Feb 9, 2009
Messages
1,697
Location
Mission Viejo
Format
127 Format
Every time I've fogged film (E6 and BW), I left the film on the reel. It wasn't even a transparent reel, but typical Jobo and Paterson ones. I use a 60W tungsten lamp and put the film in a bowl with water. I expose each side of the reel for about 2' and spin it slowly. The distance from the lamp is about 20cm. This method has always been successful for me and can't see a reason why it would fail. I really can't find a reason to remove the film from the reel.

Thank you, that is very helpful. I took the film off the reel for re-exposure and it was very sticky trying to get it back on. I would prefer to leave it on the reel and this method sounds great.
 
OP
OP
grainyvision

grainyvision

Subscriber
Joined
Feb 19, 2018
Messages
695
Location
Denver, Colorado
Format
Multi Format
I think someone here requested knowing what Ektar looks like in this process. The results are a bit... strange, as expected. Super duper amounts of color saturation, a large amount of color crossing, and surprisingly high contrast.

This was taken using an LC-A+ 120 (hence, the vignetting of this is expected)

_MG_1503_small.jpg


This was of course color corrected to remove the orange mask. Here is the .RAW file straight off the camera (I was using a calibrated 5200K daylight lightpad for scanning, but set an orange C-41 color balance on the camera) if anyone wants to inspect this closer: https://www.dropbox.com/s/jit7m1y9j638o4b/_MG_1503.CR2?dl=1 and see what it would probably look like to the naked eye.

edit: for reference, this was taken at sunset. The sky shouldn't be that deep of blue. I have normal pictures of the scene too, but I haven't developed the film for it yet
 

flavio81

Member
Joined
Oct 24, 2014
Messages
5,068
Location
Lima, Peru
Format
Medium Format
I think someone here requested knowing what Ektar looks like in this process. The results are a bit... strange, as expected. Super duper amounts of color saturation, a large amount of color crossing, and surprisingly high contrast.

This was taken using an LC-A+ 120 (hence, the vignetting of this is expected)

View attachment 203640

This was of course color corrected to remove the orange mask. Here is the .RAW file straight off the camera (I was using a calibrated 5200K daylight lightpad for scanning, but set an orange C-41 color balance on the camera) if anyone wants to inspect this closer: https://www.dropbox.com/s/jit7m1y9j638o4b/_MG_1503.CR2?dl=1 and see what it would probably look like to the naked eye.

edit: for reference, this was taken at sunset. The sky shouldn't be that deep of blue. I have normal pictures of the scene too, but I haven't developed the film for it yet

Wow!!

Would you please also upload the results with lomography xpro 200?
 
Joined
Nov 28, 2014
Messages
248
Location
Frederick MD
Format
Medium Format
Thank you for posting this Earlz! I am definitely giving this a go very soon! The "fogging" step is admittedly a bit of a new stretch for me, but I'm certainly curious to do a trial to see how this works for me!
 
OP
OP
grainyvision

grainyvision

Subscriber
Joined
Feb 19, 2018
Messages
695
Location
Denver, Colorado
Format
Multi Format
Wow!!

Would you please also upload the results with lomography xpro 200?

Rollei CR200 and Lomo X-Pro 200 are the same film as far as I can tell. Here is my results from CR200 in 120 format after correction

_MG_0691_small.jpg


But note that this film in this process comes with a pretty thick teal cast, with underexposure making the cast significantly worse (the parts on the film that should be black, were just very dark teal)


Thank you for posting this Earlz! I am definitely giving this a go very soon! The "fogging" step is admittedly a bit of a new stretch for me, but I'm certainly curious to do a trial to see how this works for me!

Fogging is a lot easier than you think. I assume for the more adventurous types out there though, you can easily create a fogging bath like what E-6 uses. I just prefer not needing to mess with chemicals or having yet another chemical that could potentially go bad and ruin my film
 
OP
OP
grainyvision

grainyvision

Subscriber
Joined
Feb 19, 2018
Messages
695
Location
Denver, Colorado
Format
Multi Format
Also, if anyone wants to experiment further with this process (especially with expired and less than ideal film), I'm super curious about if you can stand or semi-stand develop this stuff to get significantly more exposure latitude than standard E-6 processing. High contrast is good for projecting, but since we live in 2018, anything that works for scanning should suffice. Already even with this process as is, if scanning is the only thing you care about you can get some crazy latitude.

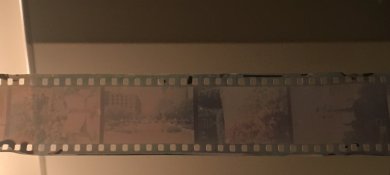
Here is a raw scan to show what I'm talking about:

_MG_1163.jpg


Other than that white highlight, the entire frame looked pitch black to the naked eye, even with a bright backlight. However, scanning this with my DSLR for around 6s at f/11 and ISO 100 resulted in this incredible amount of detail out of something so underexposed. This was with Velvia 50 film in a Pen EES-2 camera. So it was taken inside on a cloudy day, under tungsten lights, using f/2.8 and 1/40s shutter speed. Estimating it in my house results in an effective ISO somewhere around 1200 and 2400. That's effectively 5 stops of shadow latitude. Of course, scanning this and getting any kind of quality out is very difficult at this level, but I think pushing the film to 2 or 3 stops would make decently usable images without any process change (ie, push in camera, not in development).. and in fact, I have a roll of 400 ISO C-41 where I mostly guessed at the exposure in low light that I processed this way and it came out with more shadow detail than I get with typical C-41 pushing.

The thing that makes this really difficult though is contrast. It's really difficult to scan these super dark shadows when you have completely clear highlights surrounding it. My DSLR just gets too much bloom to make it look good. I'm sure a pro scanner could probably do it, but I don't have one. So, my goal for creating an ideal "super push" process with this would be to severely restrict agitation in first developer, to try to prevent the highlights from going clear.. but ensure to develop long enough for the shadows to be as developed as possible. The difficult part is ensuring B/W developer penetrates all layers of the film (so it needs to be hot and not super diluted). After color processing, ideally you should be left with a significantly lower contrast positive that has maybe too dark of shadows to see with the naked eye, but that can be recovered in scanning, and with highlights that still have some detail and aren't completely clear.

From my experience so far, this process increases contrast on both E-6 and C-41 film, but E-6 film is naturally very high contrast. So I think if you can live with weird color crossing, You could potentially take stuff like Portra 400, shoot at 200 all the way up to 6400 and still get reasonable images. It's a real shame there isn't any high speed slide film being produced anymore. I'd love to try this with some Provia 400x
 
Joined
Nov 28, 2014
Messages
248
Location
Frederick MD
Format
Medium Format
I have a fairly old roll of Ektrachrome Elite 400 that I'm using as my initial guinea pig, albeit with some pretty stretched chemistry, largely to get the go of the process and getting comfortable with the fogging process. Exposing it at 250 for most of it, but will do some brackets to finish it off in case 250 is rating it too generously. Will report back on what I am able to do, if anything.

While my transparency shooting has waned, reversals became the only thing I would send out, and when you like to slit film to widths like 127, it gets pricey! This may be just the ticket to bring even more of my work in-house.
 

wblynch

Member
Joined
Feb 9, 2009
Messages
1,697
Location
Mission Viejo
Format
127 Format
Except just for fun, if the goal is not to project, then I fail to see the purpose in reversal processing. It's much too easy and less costly to just use C-41, or E-6 cross-processed, as a negative.
 
OP
OP
grainyvision

grainyvision

Subscriber
Joined
Feb 19, 2018
Messages
695
Location
Denver, Colorado
Format
Multi Format
Except just for fun, if the goal is not to project, then I fail to see the purpose in reversal processing. It's much too easy and less costly to just use C-41, or E-6 cross-processed, as a negative.

E-6 when cross processed turns grainy and gets a varying amount of color crossing, depending on the film stock. This is a nice economical way to get fairly normal looking results out of E-6 film, if you're not afraid to remove some cast. And for some types of film (Provia and maybe Velvia, sometimes) it is possible to project with this method. But honestly, how many people own projectors today? Processing C-41 film in this process is just for fun, and is a cheaper way to get that weird x-pro type look, but with a variety of cheap film stocks, rather than the choice of 4 expensive E-6 stocks still being made. You can also use higher speed film, like potentially even stuff like Natura 1600 with it (not that I'd waste any of that now hard to find film with this). I plan on processing some super expired C-41 film eventually to see what the results look like. I'm hoping that the grain becomes a bit more controllable, but if you're shooting expired film you have to write off color accuracy and grain size anyway.

The thing that drives my thoughts on this less normal "super push" processing is that with reversal processing, you lose the highlights rather than the shadows, meaning it actually is safer to under expose (to an extent, of course) than over expose.

edit:

Also, I've always hated what happens to C-41 film when push processed. Shadows get weird colors, grain gets huge, etc. Since I'm only doing B/W processing for the pushing part, I think that it won't affect color rendition beyond what this process does on it's own, and what under exposure with normal processing looks like. If I can find a type of C-41 film that looks at least almost normal when using this reversal process, then it would be a good candidate for super pushing
 
Joined
Nov 28, 2014
Messages
248
Location
Frederick MD
Format
Medium Format
My first try of this was with far less than ideal circumstances to be a valid control point, but at least gave me some sense of the mechanics of all this. Attached is a cell phone pic.

The film was a roll of Ektachrome Elite 400 that was likely 15 years old.
The chemistry was 500ml of a 1 L kit that was isolated and had already developed 22 rolls of C-41 film (I usually can get 50 rolls developed from a 1L kit this way).

I did the stated 6:30 of 102 degree HC-110 as the first developer.
After several rinses, I tried the method Flavio described above using a flourescent tube.

Then 5:30 in my stretched C-41 kit.
12:30 in my stretched BLIX.

Even with this, I noticed the film was very dark, so I did further blix as Earlz describes, prior to the stabilizer.

The first results are very thin. Either I over BLIXed or perhaps I overfogged the film.

Going forward, going to try shooting 6 frames of much more recent Velvia at a time and redoing this when I thaw the second half of my kit.
 

Attachments

  • IMG_5044.jpg
    IMG_5044.jpg
    299 KB · Views: 207
Joined
Nov 28, 2014
Messages
248
Location
Frederick MD
Format
Medium Format
You cannot overblix or overfog color film in a reversal process.
Thanks! I am a complete newbie to this aspect of self-developing.

Would my results then seem to indicate underdevelopment, since the rebate area also appears faded, or could the film have actually needed more fogging between the developer steps?
 
OP
OP
grainyvision

grainyvision

Subscriber
Joined
Feb 19, 2018
Messages
695
Location
Denver, Colorado
Format
Multi Format
Thanks! I am a complete newbie to this aspect of self-developing.

Would my results then seem to indicate underdevelopment, since the rebate area also appears faded, or could the film have actually needed more fogging between the developer steps?

Looks to me like the C-41 color development wasn't long enough. But it could also be how old expired film behaves when done using reversal. Normally with negative processing, you build up a base fog on expired film. But in reversal, this basically turns into the opposite so that everything looks faded and highlights are more likely to go clear. It looks like there is plenty of detail on the images, so I think B/W development was good. However, to compensate for the base fog, you might try a shorter first development time, like maybe 5:30 or 5:00. I'm interested to see what kind of colors you got with the process though. You can't really tell from the grainy cell phone pic. I've not tried this with unpreserved expired film yet (my Ektachrome had been frozen)

Also, does no one here ever mix a new C-41 kit? lol
 

Photo Engineer

Subscriber
Joined
Apr 19, 2005
Messages
29,018
Location
Rochester, NY
Format
Multi Format
At the cost of this chemistry, I would guess that everyone wants it to last as long as possible.

As for the above photos, it looks like it might be several things.

1. Bad reexposure - way too little.
2. Not enough color development. The E6 color developer is filled with solvents to jack up the image contrast.
3. Bad film.
 
Photrio.com contains affiliate links to products. We may receive a commission for purchases made through these links.
To read our full affiliate disclosure statement please click Here.

PHOTRIO PARTNERS EQUALLY FUNDING OUR COMMUNITY:


Ilford ADOX Freestyle Photographic Stearman Press Weldon Color Lab Blue Moon Camera & Machine
Top Bottom