DIY 31 Megapixel Enlarger

Peaceful

D
Peaceful

  • 2
  • 8
  • 66
Cycling with wife #2

D
Cycling with wife #2

  • 1
  • 1
  • 42
Time's up!

D
Time's up!

  • 0
  • 0
  • 47
Green room

A
Green room

  • 4
  • 2
  • 94
On The Mound

A
On The Mound

  • 6
  • 0
  • 97

Recent Classifieds

Forum statistics

Threads
198,243
Messages
2,771,527
Members
99,579
Latest member
Estherson
Recent bookmarks
0

Glauber

Member
Joined
Dec 3, 2024
Messages
27
Location
Norway
Format
4x5 Format
@avandesande, I have being doing some studying in the code as I want to do my enlarger and exposures a bit different. I need to expose several images, and the "bed"/paper plane will have a stepper which will tilt the paper in some specific fashion at each image. I also want to add a support to the cheap usb relay in order to use any electrical light source. While working on this I have another question...
I wonder if you think I could achieve color printing with this method and using RGB filters and 3 separate grayscales for each image...
 
OP
OP

avandesande

Subscriber
Joined
Sep 7, 2002
Messages
1,345
Location
Albuquerque, NM
Format
Med Format Digital
Well, I thought I had figured it out, but I just ran a test and that might not be the correct… some pixels are showing up as the wrong values, so I’ve got to go back into the code and see what’s wrong. My suspicion is that one of the bits isn’t in the right order currently. Once I figure out where I went wrong I’ll let you know

[edit: the way I programmed it the frames are generated and saved as tiffs by a first script before getting displayed, are you continually writing the frames?)
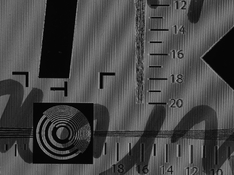
I've attached a test chart you can use for validation. You just need to render it to a tiff in photoshop at what ever bit size you need.

Currently my software stores all the frames in memory. I don't think it will have problem with 32 frames for 8 bit but 512 might be too much.
 

Attachments

  • ISO_12233-reschart.pdf
    210.9 KB · Views: 41

Glauber

Member
Joined
Dec 3, 2024
Messages
27
Location
Norway
Format
4x5 Format
The jobo thing isn't really necessary; you could give it a try with trays on room temperature first.

The main challenge is to create a color profile and/or calibrate the thing. I'd be tempted to try the method put forth by Calvin Grier in his calibration ebook series. This seems to be an application where his approach would work exceedingly well (without the need for separations btw).

Do you mean without separating into 3 grayscales and using filters? I have color printing capabilities here would love to hear more...
 
OP
OP

avandesande

Subscriber
Joined
Sep 7, 2002
Messages
1,345
Location
Albuquerque, NM
Format
Med Format Digital
@avandesande, I have being doing some studying in the code as I want to do my enlarger and exposures a bit different. I need to expose several images, and the "bed"/paper plane will have a stepper which will tilt the paper in some specific fashion at each image. I also want to add a support to the cheap usb relay in order to use any electrical light source. While working on this I have another question...
I wonder if you think I could achieve color printing with this method and using RGB filters and 3 separate grayscales for each image...
I actually ordered one of those usb relays off of ebay to test with and they canceled the order saying there were quality issue. I would like to add support but am always busy with something.

There is no reason you couldn't do color separations, however fumbling with color filters in the dark doesn't sound much fun. If I had endless time and energy I could easily do the separation in software and control a RGB light source to do the exposure automatically. I've already made medium format negatives and have a setup for roll film that works.
 

Glauber

Member
Joined
Dec 3, 2024
Messages
27
Location
Norway
Format
4x5 Format
I actually ordered one of those usb relays off of ebay to test with and they canceled the order saying there were quality issue. I would like to add support but am always busy with something.

There is no reason you couldn't do color separations, however fumbling with color filters in the dark doesn't sound much fun. If I had endless time and energy I could easily do the separation in software and control a RGB light source to do the exposure automatically. I've already made medium format negatives and have a setup for roll film that works.

interesting. I wonder how the exposure usng the 3 images would be done in this case. I guess that a more complex calibration of the material to be used would be necessary? As far as I understood the exposure is done in a sequence of individual frames generated by the program which, somehow, doesn't happen on my pc (Maybe because I don't have the external screen installed yet?) When I try to generate an exposure with the program as it is now, it only displays one unique frame somehow...
 

koraks

Moderator
Moderator
Joined
Nov 29, 2018
Messages
21,935
Location
Europe
Format
Multi Format
Do you mean without separating into 3 grayscales and using filters? I have color printing capabilities here would love to hear more...

The 'without separations' comment referred to monochrome printing. For color work, you would need to break the image down into R, G, B. And yes, that should work just fine with color RA4 paper and color filters or some other kind of filtered/monochromatic light source. You could do the linearization for each individual channel in any of the ways commonly used in the alternative printing domain; whichever works best for you. Have a look at Calvin Grier's approach here: https://thewetprint.com/digital-workshops/ This consists essentially of two steps:
1: Linearizing the process.
2: Constructing an ICC profile so you can print as you would print with any other digital process, including soft-proofing etc.

As to the light source, IMO it would make the most sense to go with R, G and B LEDs and control those for the consecutive exposures. There are many ways to skin that cat. Some are more complex w.r.t. electronics and programming than others. The simplest way would probably be to take a Heiland or Intrepid light source and use that for the individual exposures.

For splitting the color image into CMY you could use Photoshop or GIMP etc.
 
Joined
Nov 20, 2020
Messages
93
Location
Western Massachusetts
Format
8x10 Format
I've attached a test chart you can use for validation. You just need to render it to a tiff in photoshop at what ever bit size you need.

Currently my software stores all the frames in memory. I don't think it will have problem with 32 frames for 8 bit but 512 might be too much.

Got it working! the bits are sequentially written as you would expect, not sure why I was doing it across the different colors before, but I was wrong!
 
Joined
Nov 20, 2020
Messages
93
Location
Western Massachusetts
Format
8x10 Format
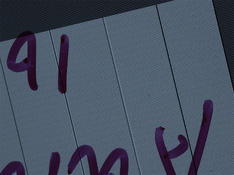
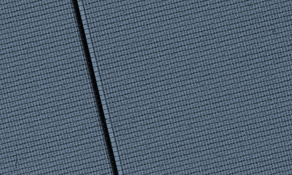
I made some first test prints with the 16k lcd, and there’s still some issues to be sorted out. The main issue I’m seeing now is that between the pixels is a grid which shows up at larger magnifications. I’ve attached a picture of what it looks like through the grain focuser. Have any of you noticed something similar, and figured out a workaround?

IMG_8097.jpeg
 
OP
OP

avandesande

Subscriber
Joined
Sep 7, 2002
Messages
1,345
Location
Albuquerque, NM
Format
Med Format Digital
Do you see it in the print? The 10.3 8k screen looks the same way, but for whatever reason it doesn't show in the print. The 10.1 8k has a different structure and doesn't show these folds. I call it 'curtain construction' for want of a better term.
I made some first test prints with the 16k lcd, and there’s still some issues to be sorted out. The main issue I’m seeing now is that between the pixels is a grid which shows up at larger magnifications. I’ve attached a picture of what it looks like through the grain focuser. Have any of you noticed something similar, and figured out a workaround?

View attachment 389099
 
OP
OP

avandesande

Subscriber
Joined
Sep 7, 2002
Messages
1,345
Location
Albuquerque, NM
Format
Med Format Digital
This is a example of the problem I was never able to fix in the horizontal mapping. These images are taken directly of the LCD with the GFX and a macro lens.
 

Attachments

  • validation_failure.jpg
    validation_failure.jpg
    508.5 KB · Views: 68
Joined
Nov 20, 2020
Messages
93
Location
Western Massachusetts
Format
8x10 Format
that looks like the same as what I was seeing, but I think I just fixed it. I made a print with a large magnification factor, and then looked at the lines with a loupe. what I noticed is that the number of lines I was seeing didn't correlate to the number of pixels there should be. It seems the display actually wants to be sent 12 2 bit pixels in each 24 bit RGB pixel. that would imply that the display is actually a 24k display, which is weird because why would they market it as 16k if its actually more?
 

koraks

Moderator
Moderator
Joined
Nov 29, 2018
Messages
21,935
Location
Europe
Format
Multi Format
This is inherent to LCD's. There are gaps/margins between the pixels. The way to work around this is to print ever so slightly out of focus so that the gaps fill in.
If you take a very close look at your computer monitor (with a good loupe) you'll notice the same thing.
 
OP
OP

avandesande

Subscriber
Joined
Sep 7, 2002
Messages
1,345
Location
Albuquerque, NM
Format
Med Format Digital
Here is an example of a pattern generator test drawing a solid (3 bytes of 1s) and then drawing single pixel lines. There seems to be some adjacency effects I don't understand and I was never able to draw lines at regular intervals.
I've switched to a Nikon Zf for shooting and it doesn't even have enough pixels to fill the 10.1 8k lcd. I'm not super motivated to figure out this 16k screen.
 

Attachments

  • pattern1.jpg
    pattern1.jpg
    633.1 KB · Views: 53
  • pattern2.jpg
    pattern2.jpg
    649.9 KB · Views: 52

Glauber

Member
Joined
Dec 3, 2024
Messages
27
Location
Norway
Format
4x5 Format
The 'without separations' comment referred to monochrome printing. For color work, you would need to break the image down into R, G, B. And yes, that should work just fine with color RA4 paper and color filters or some other kind of filtered/monochromatic light source. You could do the linearization for each individual channel in any of the ways commonly used in the alternative printing domain; whichever works best for you. Have a look at Calvin Grier's approach here: https://thewetprint.com/digital-workshops/ This consists essentially of two steps:
1: Linearizing the process.
2: Constructing an ICC profile so you can print as you would print with any other digital process, including soft-proofing etc.

As to the light source, IMO it would make the most sense to go with R, G and B LEDs and control those for the consecutive exposures. There are many ways to skin that cat. Some are more complex w.r.t. electronics and programming than others. The simplest way would probably be to take a Heiland or Intrepid light source and use that for the individual exposures.

For splitting the color image into CMY you could use Photoshop or GIMP etc.

Thanks for the clarification and link! I will look into that this week. Was a bit what I had suspected. Separate the channels on PS or similar, and do linearization for each color. I hope I can adapt the software to do all three channels in "one take" or like a cue so the 3 channels can be exposed one after the other in sequence. I will look at that also. Again, thanks a lot!
 

koraks

Moderator
Moderator
Joined
Nov 29, 2018
Messages
21,935
Location
Europe
Format
Multi Format
Yes, you got it! A queued exposure should be possible if you have a way to control the light source and particular its color. If you do, it's easy-peasy; just expose three step tablets next to each other on the same sheet, one for each primary. You can then use those tablets for linearization and print a second round for finetuning, if needed.
 

Glauber

Member
Joined
Dec 3, 2024
Messages
27
Location
Norway
Format
4x5 Format
Yes, you got it! A queued exposure should be possible if you have a way to control the light source and particular its color. If you do, it's easy-peasy; just expose three step tablets next to each other on the same sheet, one for each primary. You can then use those tablets for linearization and print a second round for finetuning, if needed.

Cool! I will try to source a good RGB panel (or maybe will have to build my own) for this, and see how to integrate with the program. Thanks for the clarification!
 

travelight

Member
Joined
Dec 1, 2024
Messages
43
Location
Australia
Format
Med. Format RF
Here is an example of a pattern generator test drawing a solid (3 bytes of 1s) and then drawing single pixel lines. There seems to be some adjacency effects I don't understand and I was never able to draw lines at regular intervals.
I've switched to a Nikon Zf for shooting and it doesn't even have enough pixels to fill the 10.1 8k lcd. I'm not super motivated to figure out this 16k screen.

Am I right in thinking that a 16k screen should allow for larger enlargements? It’d be nice to be able to print to 20x24”
 

Glauber

Member
Joined
Dec 3, 2024
Messages
27
Location
Norway
Format
4x5 Format
yes. I'm testing the 16k screen currently, and it can go up to 20x24 without a noticable loss of sharpness

have you had to correct it for the rectangular shaped pixels? If they are squared, are these at about 15um in size each? If so, this must be around the resolution of most films after processed...
 
Last edited:

Glauber

Member
Joined
Dec 3, 2024
Messages
27
Location
Norway
Format
4x5 Format
Do you see it in the print? The 10.3 8k screen looks the same way, but for whatever reason it doesn't show in the print. The 10.1 8k has a different structure and doesn't show these folds. I call it 'curtain construction' for want of a better term.

@avandesande do you have the 10.3, 10.1 or both? And if so which one is better, if there is any difference at all.
 
Last edited:
Joined
Nov 20, 2020
Messages
93
Location
Western Massachusetts
Format
8x10 Format
That’s great news, I might have to upgrade once you have it working :smile:

The main thing I have yet to figure out is whether it can do grayscale. it should have a depth of 3 bits per pixel, but I have yet to figure out how those three bits get distributed across the 24 bit rgb pixel. my solution for the moment is to have it display single bit depth, which is working fine, but it could run 8 times faster if I can figure out the bit distribution.
 
  • Glauber
  • Glauber
  • Deleted
  • Reason: need to be a reply

Glauber

Member
Joined
Dec 3, 2024
Messages
27
Location
Norway
Format
4x5 Format
The main thing I have yet to figure out is whether it can do grayscale. it should have a depth of 3 bits per pixel, but I have yet to figure out how those three bits get distributed across the 24 bit rgb pixel. my solution for the moment is to have it display single bit depth, which is working fine, but it could run 8 times faster if I can figure out the bit distribution.

yes I do the same with a mobile app. How fast exposure are you able to do at the refresh rate it has?
 
Joined
Nov 20, 2020
Messages
93
Location
Western Massachusetts
Format
8x10 Format
yes I do the same with a mobile app. How fast exposure are you able to do at the refresh rate it has?

the display runs at 15hz, but with my pc the image cycle can't run quite that fast. a 10 bit cycle takes about 2 minutes, but between 9 and 10 bit I've not noticed significant differences. that's just by eye though, I haven't done a rigorous comparison.
 
Photrio.com contains affiliate links to products. We may receive a commission for purchases made through these links.
To read our full affiliate disclosure statement please click Here.

PHOTRIO PARTNERS EQUALLY FUNDING OUR COMMUNITY:


Ilford ADOX Freestyle Photographic Stearman Press Weldon Color Lab Blue Moon Camera & Machine
Top Bottom