-
Welcome to Photrio!Registration is fast and free. Join today to unlock search, see fewer ads, and access all forum features.Click here to sign up
You are using an out of date browser. It may not display this or other websites correctly.
You should upgrade or use an alternative browser.
You should upgrade or use an alternative browser.
Darkroom portraits
-
A
- Thread starter argentic
- Start date


Recent Classifieds
-
Want to Buy 4.5"x4.5" wooden lens board with Copal 1 hole (42mm)
- Started by blee1996
-
For Sale Three 126 film cameras - $40
- Started by blee1996
-
For Sale Three Kodak 5x7 film sheath - $30
- Started by blee1996
-
For Sale Three 13x18 FKD wooden plate holder - $30
- Started by blee1996
Forum statistics
- Threads
- 203,325
- Messages
- 2,853,025
- Members
- 101,786
- Latest member
- Softshepherd1975
- Recent bookmarks
- 0
- Status
- Not open for further replies.
Nice and roomy! I have space envy...
Nice set up!
Can you tell me what the light box diffusser is made of and where you picked it up in the GTA?
Todd in Orangeville
Can you tell me what the light box diffusser is made of and where you picked it up in the GTA?
Todd in Orangeville
Thanks Todd, and Kino.
The Light box is home made and the diffuser is just "opal" plastic sheeting. I got it from a local plastics company, of which there are many here in the Mississauga area. The trick with this stuff is to get the opaque kind and the right thickness, which is basically the thickest you can afford. It is sold by a lot of plastic companies because it is used in sign-making so much.
Tim R
It looks very well organised.Timothy said:I finally got around to making some digi-snaps to email family, so it's about time I posted them here as well.
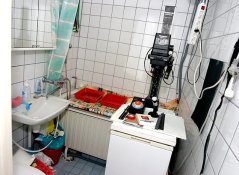
Some of you have very nice darkrooms, but what about this one (my own darkroom that is) - the toilet darkroom in my one-bedroom apartment, aka "tha place 2 be". The enlarger on top of the washing machine, paperbox on top of the toilet seat and dodging cardboards on the floor next to the washing machine. And this magical setup combined with my apartments window placement -- all windows on the same wall = no draft / no ventilation! 
Attachments
PMU,
Hey, that's a great setup. From the looks of your gallery, it seems to work perfectly well for you! Very nice job on both.
Hey, that's a great setup. From the looks of your gallery, it seems to work perfectly well for you! Very nice job on both.
PMU, that's a fine darkroom you have set up there. I am sure it smells better than mine. A word of advice: if you remove the toilet seat, be quick to close up the hole.
Keeping The Dark In
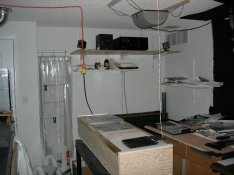
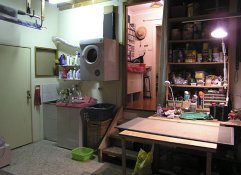
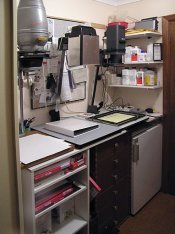
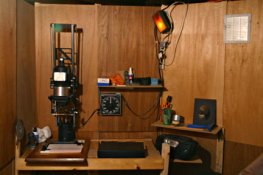
I am new to this forum but not new to photography. I have built several darkrooms for myself and former students. Each one presents challenges based on room size, available power, plumbing, etc. My newest darkroom is built in our single car garage (separate from our two-car garage). When shopping for a new home my wife and I made it a priority to find a plan that would allow us to build a darkroom without too much fuss or remodeling. I did all of the work myself from framing, electrical, plumbing, drywall, cabinetry, countertops, sinks, door installs, etc. I hired nothing out and did it all solo. I started in early July 2004 and finished in November of same year. It was more work than I anticipated but well worth it. The darkroom takes up about 1/2 of the 11' x 22' garage (about 130 sq. ft). Let me know what you think?
I am new to this forum but not new to photography. I have built several darkrooms for myself and former students. Each one presents challenges based on room size, available power, plumbing, etc. My newest darkroom is built in our single car garage (separate from our two-car garage). When shopping for a new home my wife and I made it a priority to find a plan that would allow us to build a darkroom without too much fuss or remodeling. I did all of the work myself from framing, electrical, plumbing, drywall, cabinetry, countertops, sinks, door installs, etc. I hired nothing out and did it all solo. I started in early July 2004 and finished in November of same year. It was more work than I anticipated but well worth it. The darkroom takes up about 1/2 of the 11' x 22' garage (about 130 sq. ft). Let me know what you think?
Attachments
Nice job!
aznative
Very nice. I don't think the waste basket would handle my output but everything else looks 1st class. One question: your sink looks to be of sheet wood and painted. What paint did you use?
Good luck with it,
Very nice. I don't think the waste basket would handle my output but everything else looks 1st class. One question: your sink looks to be of sheet wood and painted. What paint did you use?
Good luck with it,
Bruce (Camclicker) said:aznative
Very nice. I don't think the waste basket would handle my output but everything else looks 1st class. One question: your sink looks to be of sheet wood and painted. What paint did you use?
Good luck with it,
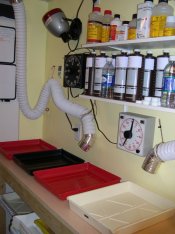
Hi Bruce, You are correct. I constructed the sink using 3/4" AC plywood with 3 coats of Rust-O-Leum garage floor epoxy purchased at Lowe's. I mixed just enough of the two part epoxy to do one complete coat at a time, allowing each coat to dry thoroughly. I used the same stuff to do my darkroom concrete floor which is where I got the idea. I am very happy with the end result and expect it to last a long time. I caulked all of the seems before apply the epoxy to ensure a water tight seal. It cleans up pretty good so far. I used half-round moulding to create the two duck board rails to hold the trays just above the sink surface. I built two sinks attached end to end. The main processing sink is 26" x 84" and the smaller wash sink is 26" x 36" for a total of 10 ft. in length. Both sinks are sloped enough for proper drainage. I have to still build a film drying cabinet which will occupy the space I left at the left end of the sink to handle 35mm x 36 exp. film as well as medium and large format films. I know what you mean about the wasted basket. A 55 gallon drum would have taken up too much space otherwise and the smaller of the two forces me to take out the trash more often.
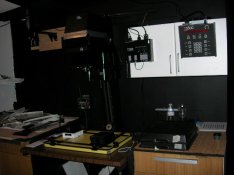
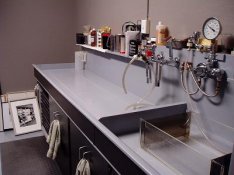
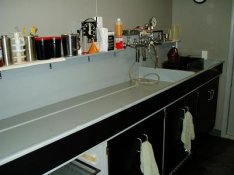
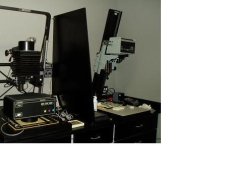
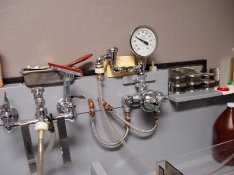
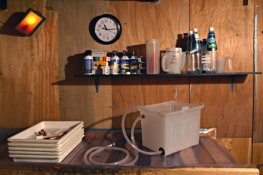
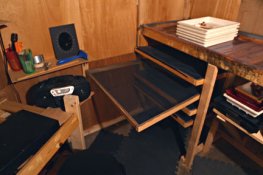
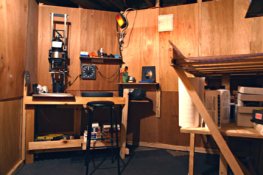
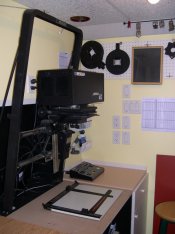
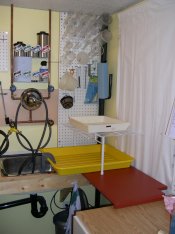
Here are a few shots of my semi-permanent space. A small dark room which leads into a large garage/laundry area for washing,toning and drying. The old magnifax enlarger on the left is for flashing and the unit in the middle is a light source I created for contact priting digital negatives. It is a $10 100watt floodlight with an aluminium housing bent around it to direct the light (no lens). The bottom of the aluminium housing has a couple of lips which hold a diffuser made from draughting film and also multigrade filters. Exposure times using pictorico high gloss white film are between 20-30 seconds as opposed to 5 minutes through a normal enlarger when I first experimented with this technique.
This room also doubles as CD storage area so fine music is always at hand. I kinda like moving from the dark space to the garage to wash and tone especially when using selenium where there is much more open space and fresh air. That's also where the beer fridge is located. The orange Agfa boxes may soon make this a truly historical photo...
This room also doubles as CD storage area so fine music is always at hand. I kinda like moving from the dark space to the garage to wash and tone especially when using selenium where there is much more open space and fresh air. That's also where the beer fridge is located. The orange Agfa boxes may soon make this a truly historical photo...
Attachments
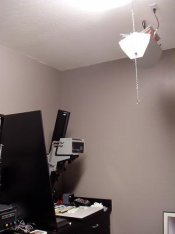
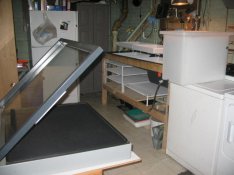
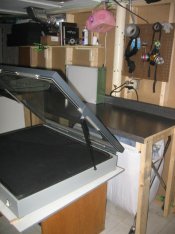
Some great darkrooms here. Here is my first attempt at my own. Unfortunately I rent so cant make it too permanent, though the landlord was kind enough to let me do this in the basement storage area. I haul my water and chemicals up and down 3 flights of stairs, but it works. I cant wait to own a home to build a more permanent darkroom, running water and sink, etc. This thread has really given me some great ideas. I built all myself. My wet area is a recycled futon. Used almost every piece.
Attachments
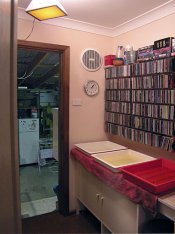
Photos my 4th darkroom (first in 20 years)
It is a corner basement darkroom about 6' by 11' with every inch starting to be filled up. It is small but very comfortable to work in.
It is a corner basement darkroom about 6' by 11' with every inch starting to be filled up. It is small but very comfortable to work in.
Attachments

Portrait of Fred Holland Day by Alvin Langdon Coburn, 1900, platinum and gum bichromate, 11 3/4 x 4 1/4", RPS 3422 (Royal Photographic Society, Bath), from F. Holland Day, Suffering the Ideal, with an essay by James Crump, Santa Fe: Twin Palms, 1995.
Day and Coburn were distant cousins. I just picked up this volume at Powell's bookstore in Chicago and highly recommend it. I believe that Day had a portable darkroom tent, and I'm not sure if this is it, or if this was an indoor setup. The book includes reproductions of Day's prints originally made on silver gelatin POP, cyanotype, and platinum.
Day and Coburn were distant cousins. I just picked up this volume at Powell's bookstore in Chicago and highly recommend it. I believe that Day had a portable darkroom tent, and I'm not sure if this is it, or if this was an indoor setup. The book includes reproductions of Day's prints originally made on silver gelatin POP, cyanotype, and platinum.
Attachments


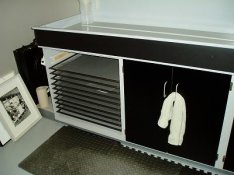
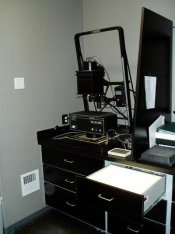
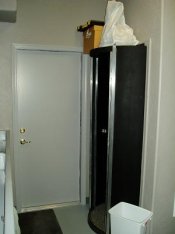
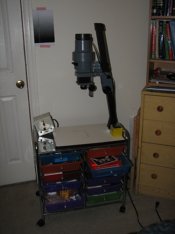
My temporary darkroom utilizes a bathroom and a rolling cart with drawers.
I purchased the cart through *bay, about $20 shipped. It's worth about that, as it can be ricketty and the material is thin. However, it works fine as long as I allow a few moments before each exposure for the enlarger to settle. I like having the drawers, they hold a lot of little odds and ends.
The enlarger is junk, especially for 6x6 but it works. I miss my wall-mounted D2.
When I wish to print, all I have to do is wheel it into the bathroom, screw in my LED safelight, trays with chems. in the tub and i'm good to go.
I also wash the prints in the tub with a larger rubbermaid tub under the tub faucet. The washed prints hang by a clothesline with clothespins (plastic kind, highly recommended!) up near the shower curtain.
It's cramped but workable. Plus the enlarger cart isn't TOO sore on the eyes, my gf actually likes how it looks.
Attachments

Last edited by a moderator:
Funny how I wasn't the only one showing off my box of Agfa paper.. *sigh*
Joe,
Where did you get your material?
Where did you get your material?
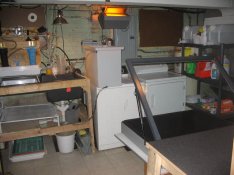
Mike A said:... this is my first darkroom, contact print only although when funds allow I will expand.
The enlarger can sit on top of the dryer.
The pink boom-box adds a nice touch of distinction!
Looks like a good, workable space.
Looks like a good, workable space.
- Joined
- Sep 8, 2002
- Messages
- 2,331
- Format
- Multi Format
grahamp said:The pink boom-box adds a nice touch of distinction!
must have stole that from a daughter!
- Status
- Not open for further replies.
| Photrio.com contains affiliate links to products. We may receive a commission for purchases made through these links. To read our full affiliate disclosure statement please click Here. |
PHOTRIO PARTNERS EQUALLY FUNDING OUR COMMUNITY:  |