Darkroom portraits

On the edge of town.

A
On the edge of town.

  • 7
  • 4
  • 131
Peaceful

D
Peaceful

  • 2
  • 12
  • 283
Cycling with wife #2

D
Cycling with wife #2

  • 1
  • 3
  • 109
Time's up!

D
Time's up!

  • 1
  • 1
  • 103

Recent Classifieds

Forum statistics

Threads
198,271
Messages
2,772,090
Members
99,588
Latest member
FlyingDutchman67
Recent bookmarks
0
Status
Not open for further replies.

jbphoto

Member
Joined
Aug 28, 2006
Messages
6
Location
Idaho
Format
Medium Format
It doesn't matter

The most important thing in your darkroom is the photographer. Edward Weston had a contact printing frame and a lightbulb. His images were made in his mind first then printed simply in the highest quality image possible. Just something to think about.
 

Robert Hall

Member
Joined
Aug 18, 2004
Messages
2,033
Location
Lehi, Utah
Format
8x10 Format

jbrianfoto

Member
Joined
Oct 9, 2006
Messages
164
Location
Fredericksburg, VA
Format
8x10 Format
Robert -

You have a very fine work space here. One of the best thought out I've ever seen. Wow.

I want to make duck boards for my sinks too - what kind of wood is that, and how do you seal it? Do you flood the sink a little to keep the temp constant around your trays (then if you do, does the wood try to float)? Lastly, do you run workshops in your lab? With that many enlargers and that kind of space you sure could! Again, this is the finest lab I've seen here. Bravo!
 

andrew.roos

Member
Joined
Jan 4, 2011
Messages
572
Location
Durban, Sout
Format
35mm
This thread is great. I'm working on building a small darkroom in our two car garage. We rent so I can't do anything too permanent. I need some kind of walls and water and power over to the side I'm building on. It's going to be a challenge but I think it will be worth it. I had a 4x5 enlarger with a bunch of accessories given to me last year and I'm getting the itch to use it. Thanks for the great pix and ideas in this thread. Oh yeah and any input or helpful tips would be greatly appreciated.

Perhaps have a look at the Nova darkrrom tent: http://www.novadarkroom.com/product/329/Nova_Darkroom_Tent.html
 

Neal

Subscriber
Joined
Dec 3, 2004
Messages
2,018
Location
Chicago, West Suburbs
Format
Multi Format
Enlarger Cabinet

This thread is great. I'm working on building a small darkroom in our two car garage. We rent so I can't do anything too permanent. I need some kind of walls and water and power over to the side I'm building on. It's going to be a challenge but I think it will be worth it. I had a 4x5 enlarger with a bunch of accessories given to me last year and I'm getting the itch to use it. Thanks for the great pix and ideas in this thread. Oh yeah and any input or helpful tips would be greatly appreciated.


With luck I've correctly attached a picture of my enlarger cabinet. I can use my enlarger in the garage and still keep it safe from dust and moisture. I run a dehumidifier when necessary and the cabinet is pretty well sealed.

Neal Wydra
 

Attachments

  • EnlargerCabinet.jpg
    EnlargerCabinet.jpg
    65.5 KB · Views: 624

robbalbrecht

Member
Joined
May 3, 2011
Messages
77
Location
Los Osos, CA
Format
Multi Format
Thanks for the ideas everyone. Neal, I like the cabinet idea. I hadn't thought about that before.

My original plan was to build some thin walls much like theater flats and wedge then in between the ceiling and floor. For now I may just try waiting until night time to print as it gets pretty darn dark in my garage.
 

Chuck_P

Subscriber
Joined
Feb 2, 2004
Messages
2,369
Location
Kentucky
Format
4x5 Format
I have visited the "Darkroom Portraits" thread many times over the past few years when the reality of having my own dedicated darkroom was a long way off. This weekend I completed (I'll use that word loosely) work on a once bedroom that I can now call a functional darkroom. There's still things to do, an exhaust fan to install (the wireing is in place), some wall cabinetry, and I'll install a Hass water temperature regulator in time. The WWAD license plate was a X-mas gift from my wife that she had made for me locally after getting the idea from the APUG store.
 

Attachments

  • darkroom4.jpg
    darkroom4.jpg
    91.6 KB · Views: 710
  • darkroom6.jpg
    darkroom6.jpg
    90.2 KB · Views: 700
  • darkroom3.jpg
    darkroom3.jpg
    251.4 KB · Views: 672
  • darkroom2.jpg
    darkroom2.jpg
    252.4 KB · Views: 702
  • darkroom1.jpg
    darkroom1.jpg
    272 KB · Views: 713
Joined
Jan 16, 2010
Messages
1,685
Location
Atlanta, GA
Format
Medium Format
I have visited the "Darkroom Portraits" thread many times over the past few years when the reality of having my own dedicated darkroom was a long way off. This weekend I completed (I'll use that word loosely) work on a once bedroom that I can now call a functional darkroom.

Nice work! What did you use for the table tops? Formica? And how did you join the lumber for the bases?
 

zsas

Member
Joined
May 12, 2011
Messages
1,955
Location
Chicago, IL
Format
35mm RF
Chuck! Congrats! Has been a thrill and motivating to follow your progress in the Gallery this winter! Thanks so much for the update, it looks amazing, the ability to print in the day and pop those windows open to see and evaluate a print w daylight is such a wonderful attribute! Enjoy!
 

Chuck_P

Subscriber
Joined
Feb 2, 2004
Messages
2,369
Location
Kentucky
Format
4x5 Format
Nice work! What did you use for the table tops? Formica? And how did you join the lumber for the bases?

Thanks,
I used a 4x8 sheet of formica purchased at Lowe's, laminated to 3/4 inch MDF board-- I used deck screws to screw all the lumber together.
 
Joined
Jan 16, 2010
Messages
1,685
Location
Atlanta, GA
Format
Medium Format
Thanks,
I used a 4x8 sheet of formica purchased at Lowe's, laminated to 3/4 inch MDF board-- I used deck screws to screw all the lumber together.

I built another sink base this weekend, which matches my other sink and enlarging table. It's put together with the Simpson strong tie connectors. These are really easy to work with; just call all your sticks and screw them together. May be a bit of overkill, but they are rock solid.

For the legs, I added screw inserts that create a thread for a 1/4" screw for leveling out the base. Also keeps the lumber an inch or so off the floor to avoid moisture problems, not that my basement is moist or anything. :laugh:

My new XLG should be here this week and then I will no longer have any excuse for procrastination, although I'm sure I will think of one by then.
 

Attachments

  • IMG_1356.jpg
    IMG_1356.jpg
    331.7 KB · Views: 577
  • IMG_1355.jpg
    IMG_1355.jpg
    280.6 KB · Views: 599
  • IMG_1354.jpg
    IMG_1354.jpg
    425 KB · Views: 666
  • IMG_1347.jpg
    IMG_1347.jpg
    379.8 KB · Views: 578
  • IMG_1345.JPG
    IMG_1345.JPG
    1.2 MB · Views: 590
  • IMG_1344.jpg
    IMG_1344.jpg
    155.7 KB · Views: 566

zsas

Member
Joined
May 12, 2011
Messages
1,955
Location
Chicago, IL
Format
35mm RF
Good stuff Parker, you sure seem busy lately, moving out gear you no longer use...the XLG what you been making room for?
 
Joined
Jan 16, 2010
Messages
1,685
Location
Atlanta, GA
Format
Medium Format
Good stuff Parker, you sure seem busy lately, moving out gear you no longer use...the XLG what you been making room for?

Yes, thank you, I have been very busy buying and selling a bunch of darkroom gear so I could afford the XLG and not have to pull a wad of cash out of my business (which my better half would have frowned upon, with good reason).

Still have a small pile of stuff and three enlargers to get rid of, but shouldn't be much of a problem. Looking forward to getting to work now! I've got years worth of images to print.
 

Chuck_P

Subscriber
Joined
Feb 2, 2004
Messages
2,369
Location
Kentucky
Format
4x5 Format
I built another sink base this weekend, which matches my other sink and enlarging table. It's put together with the Simpson strong tie connectors. These are really easy to work with; just call all your sticks and screw them together. May be a bit of overkill, but they are rock solid.

For the legs, I added screw inserts that create a thread for a 1/4" screw for leveling out the base. Also keeps the lumber an inch or so off the floor to avoid moisture problems, not that my basement is moist or anything. :laugh:

My new XLG should be here this week and then I will no longer have any excuse for procrastination, although I'm sure I will think of one by then.

Looks good------I have Simpson strong ties in all the hidden inside corners of both the dry-side table and the sink stand providing structural support. But deck screws provide the actual binding connections.
 
Joined
Jan 16, 2010
Messages
1,685
Location
Atlanta, GA
Format
Medium Format
Looks good------I have Simpson strong ties in all the hidden inside corners of both the dry-side table and the sink stand providing structural support. But deck screws provide the actual binding connections.

Do you have a second 2x4 running behind the front on the dry side, to connect the cross beam with the legs? It's nice and clean, just wondering how you made it all stick together.

After building three of these over the years, I think the connectors I used for the bottom would be more than adequate and save a few $$ to boot. Still have one more large work table to build, so all the lessons learned can go to work there.
 

Roger Thoms

Subscriber
Joined
Nov 18, 2007
Messages
1,768
Location
Flagstaff, AZ
Format
8x10 Format
I have visited the "Darkroom Portraits" thread many times over the past few years when the reality of having my own dedicated darkroom was a long way off. This weekend I completed (I'll use that word loosely) work on a once bedroom that I can now call a functional darkroom. There's still things to do, an exhaust fan to install (the wireing is in place), some wall cabinetry, and I'll install a Hass water temperature regulator in time. The WWAD license plate was a X-mas gift from my wife that she had made for me locally after getting the idea from the APUG store.

Your darkroom looks great, bet your excited to have "it done". The Hass will be a nice addition, I had one in my old darkroom, very nice, set it and for get it. Congratulations!!!

Roger
 

Chuck_P

Subscriber
Joined
Feb 2, 2004
Messages
2,369
Location
Kentucky
Format
4x5 Format
Do you have a second 2x4 running behind the front on the dry side, to connect the cross beam with the legs? It's nice and clean, just wondering how you made it all stick together.

After building three of these over the years, I think the connectors I used for the bottom would be more than adequate and save a few $$ to boot. Still have one more large work table to build, so all the lessons learned can go to work there.

yes, there's one 2x4 spanning the front on the inside, then, you see two center vertical 2x4s----the one on the left was the original , the one on the right was installed to accomodate the 4 ft. shelf below the enlarger. Then I filled in the spaces with two other 2x4s, those two were actually an after thought. If you go to the (there was a url link here which no longer exists) I have some pictures in there of the dry-side frame. After that photo, I installed more front to back bracing on the top side and the bottom side, it clearly needed more before installing the plywood bottom and the MDF top.
 

gustavlrssn

Member
Joined
Jan 21, 2012
Messages
2
Location
Sweden
Format
Medium Format
6085932176_85a2ea9028_b.jpg

6085927354_f3c725cdef_b.jpg

This darkroom is located in the basement of a student residential building and there are logbooks from the 60's in here, so it has a long history.
 
Joined
Jan 16, 2010
Messages
1,685
Location
Atlanta, GA
Format
Medium Format
This darkroom is located in the basement of a student residential building and there are logbooks from the 60's in here, so it has a long history.

Some knave snuck a scanner into your darkroom! :laugh:
 

gustavlrssn

Member
Joined
Jan 21, 2012
Messages
2
Location
Sweden
Format
Medium Format
Some knave snuck a scanner into your darkroom! :laugh:
That was me I'm afraid :smile:
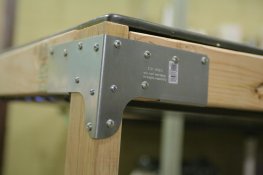
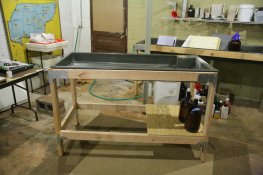
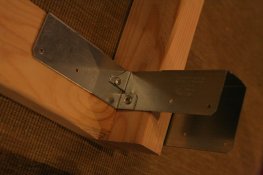
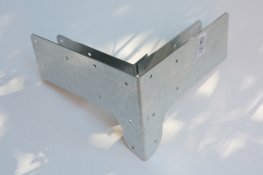
. It looks kind of misplaced in there, but I have no where else to put it.

gustavlrssn - Beautiful! Is that cedar wood? Must smell wonderful if so!

I believe it is regular pine, that has yellowed over the years. So no wonderful smell, but it really brings a special atmosphere to this room.
 
Status
Not open for further replies.
Photrio.com contains affiliate links to products. We may receive a commission for purchases made through these links.
To read our full affiliate disclosure statement please click Here.

PHOTRIO PARTNERS EQUALLY FUNDING OUR COMMUNITY:


Ilford ADOX Freestyle Photographic Stearman Press Weldon Color Lab Blue Moon Camera & Machine
Top Bottom