Darkroom Portraits (Part 2)

$12.66

A
$12.66

  • 5
  • 3
  • 95
A street portrait

A
A street portrait

  • 1
  • 0
  • 133
A street portrait

A
A street portrait

  • 2
  • 2
  • 120
img746.jpg

img746.jpg

  • 6
  • 0
  • 104
No Hall

No Hall

  • 1
  • 4
  • 111

Recent Classifieds

Forum statistics

Threads
198,797
Messages
2,781,026
Members
99,707
Latest member
lakeside
Recent bookmarks
0

Donald Qualls

Subscriber
Joined
Jan 19, 2005
Messages
12,293
Location
North Carolina
Format
Multi Format
Hmm. Let's see. A high-brisance, low-gas explosive, and a very careful charge calculation and loading position...

Nah. Even with the blankets they use in implosion demolition.

Not at all the same as blowing a stump. Maybe hydraulic fracture, by pumping water at water jet cutter pressures into the boreholes...
 

MattKing

Moderator
Moderator
Joined
Apr 24, 2005
Messages
52,906
Location
Delta, BC Canada
Format
Medium Format
Where I grew up, we had a neighbour who lived in a house that they had designed (in the late 1950s?) to fit naturally in a forested site. When they did the necessary excavation, they discovered a massive rock just below the forest floor. Rather than moving the house or removing or modifying the rock, they re-designed the house around the rock.
It was really neat.
 

sruddy

Member
Joined
Aug 31, 2018
Messages
338
Location
CA
Format
Multi Format
Hi All,

We have been using our garage for a studio darkroom and laundry since we moved in 18 years ago. My wife likes to tell the story that I let her park her car inside only for a few months after we moved in. We slowly developed it for a photo studio, and various other things like a workbench for restoration of vintage audio. We were constantly making improvements ending with reclaimed flooring from our house, carpet, black curtains to isolate areas like the laundry and workbench, and finally adding a darkroom section. I kept taking parts of the garage door off until finally ending up with just the door, which we screwed in place as a wall. We hadn’t opened it for years and the hardware was ugly and in the way.

We are approaching retirement, the house is paid off, and we don’t plan on moving, so we decided to make it an official legal space. Construction has started and should by complete by end of October/November. I thought it would be fun to post the plans and progress. Opinions and critique are certainly welcome so don’t be shy.

IMG_0498.JPEG


IMG_0497.JPEG


IMG_3697.JPEG


IMG_3698.JPEG


IMG_3699.JPEG

IMG_3640.JPEG
 

AgX

Member
Joined
Apr 5, 2007
Messages
29,973
Location
Germany
Format
Multi Format
We have been using our garage for a studio darkroom and laundry since we moved in 18 years ago. My wife likes to tell the story that I let her park her car inside only for a few months after we moved in.
IMG_3640.JPEG

And where did you put her car/the cars ?
 

Michael Firstlight

Subscriber
Joined
Mar 2, 2017
Messages
460
Location
Western North Carolina
Format
Multi Format
We are approaching retirement, the house is paid off, and we don’t plan on moving, so we decided to make it an official legal space. Construction has started and should by complete by end of October/November. I thought it would be fun to post the plans and progress. Opinions and critique are certainly welcome so don’t be shy.

Awesome plans! I just retired last month. My plans are similar and are finally coming to completion. We just finished building a new house after a year and a half of planning and construction with a large semi-detached garage that I plan to use as a professional shooting studio (22x24). The room is fully insulated, dry walled, and finished with with a one-ton HVAC unit, and a separate dedicated 14x13 darkroom in another part of the home with a separate adjacent print finishing area. The darkroom is now ready for the built-in cabinets (due to arrive in 3 weeks), sink (plumbing is roughed in), custom countertops, and so on. I'm building it to be sort of a combo high-end darkroom/man cave retreat. We just moved into the main portion of the home over the past few weeks (it was a major cross-country move), so my studio and darkroom gear remains mostly in boxes while I do the final finishing work.

It's a dream come true project after working with makeshift studios and darkrooms for the better part of 50 years. Being able to do as part of new house construction made it much more feasible. I had to plan the electrical, plumbing, ventilation and so on all in advance. The darkroom sits in a portion of the home that is in the back of the first floor which is a walk-out basement that sits on a hill with spectacular mountain views The main room on that floor has a 36" door that leads to a fully finished back basement that is 8 feet wide by 38 feet long that houses the utilities on one end and also serves as a wine cellar with the far end being an exercise area with a treadmill. The other end is a print finishing area where I have my dry mount press and a large format (24" wide) Epson printer. That entire area has no windows (it is all below ground on three sides with the only source of natural light coming from the door that leads to the living area). Next to the print finishing area is another 36" door that leads to the darkroom itself which measures 14x13 feet - again no windows so it is naturally light-tight. I went to the extent of full finishing both spaces during construction - all fully insulated, dry walled, painted, base molding, plumbing, ample power outlets (some at counter height on two sides) , power ventilation, can lights, high 9-foot smooth ceilings, and wood-look water-proof vinyl plank flooring. I also wired it for large flat-screen wall-mount TV opposite the wall on which has a leather sofa and end tables - it'll be a room worth spending a lot of time in along with a great audio system.

The cabinets I just ordered will form an L-shape - 13 feet long on the long wall (wet side) with a corner cabinet and extension that make the short L-side 6 feet long (the dry side). I'm pulling the base cabinets out an additional 6 inches from both walls as I'm installing custom countertops that are 30" wide instead of the standard 25" wide. The extra counter depth will better accommodate my desktop film and print processing machines as well as occasional use of trays. I'm not installing a traditional long stainless darkroom sink as the vast amount of the time I use a PhotoTherm Sidekick SK-8 film processor that will flank a deep 33" X 22" stainless sink on one side and a Fujimoto CP-32 transport paper processor on the other side of the sink. If I ever want a traditional long, wide stainless darkroom sink I have the perfect space for it in the immediately adjacent space, but at this point I don't think I'll ever need it. I have whole house water filtration system but will be adding additional filtration. The Phototherm SIdekick SK-8 is self-cleaning has automatic silver recovery. it doesn't require a water hook-up but that is optional and I'll likely tie it into the digital temp control unit anyway. I'll have enough space left over on the wet side for large trays when I want to use them on occasion. The dry side will hold my LPL-4550 XLG and LPL-6700 (7700) MXL enlargers. I'll likely wall-mount the 4550-XLG as with the 9 foot ceiling I still have ample head room and can avoid the need for a drop table. One thing I still have to work out are the details for installation of final plumbing as I'll be installing a HASS Intellifauct K375 over the sink area so it needs to bypass the sink faucet and provide for independent connections apart from the sink faucet and drill holes in the back of the countertop for the tubes for the two processors.

s-l140.jpg


I'm also a freak when it comes to dust control - so I also have a Honeywell 17000-S HEPA air purifier that covers up to 200sf and about to purchase a Yuchengtech Ionizing DC anti-static ionizer. The pair should make the room as close to a clean-room as is reasonable along with a separate film drying cabinet.

MFL.
 
Last edited:

jvo

Subscriber
Joined
Dec 6, 2008
Messages
1,751
Location
left coast of east coast
Format
Digital
Awesome plans! I just retired last month. My plans are similar and are finally coming to completion. We just finished building a new house after a year and a half of planning and construction with a large semi-detached garage that I plan to use as a professional shooting studio (22x24). The room is fully insulated, dry walled, and finished with with a one-ton HVAC unit, and a separate dedicated 14x13 darkroom in another part of the home with a separate adjacent print finishing area. The darkroom is now ready for the built-in cabinets (due to arrive in 3 weeks), sink (plumbing is roughed in), custom countertops, and so on. I'm building it to be sort of a combo high-end darkroom/man cave retreat. We just moved into the main portion of the home over the past few weeks (it was a major cross-country move), so my studio and darkroom gear remains mostly in boxes while I do the final finishing work.
...
... I'm also a freak when it comes to dust control - so I also have a Honeywell 17000-S HEPA air purifier that covers up to 200sf and about to purchase a Yuchengtech Ionizing DC anti-static ionizer. The pair should make the room as close to a clean-room as is reasonable along with a separate film drying cabinet.

MFL.


all you need is surgical gloves and a scalpel and you can do heart surgery!!!

sounds wonderful... in my virtual reality world, this is what my darkroom, (also know as a closet), looks like.... have fun!
 

sruddy

Member
Joined
Aug 31, 2018
Messages
338
Location
CA
Format
Multi Format
And where did you put her car/the cars ?

We just parked them outside. :smile: We live in Ca so it's not so bad. One of these days we may make a carport.

Awesome plans! I just retired last month. My plans are similar and are finally coming to completion. We just finished building a new house after a year and a half of planning and construction with a large semi-detached garage that I plan to use as a professional shooting studio (22x24). The room is fully insulated, dry walled, and finished with with a one-ton HVAC unit, and a separate dedicated 14x13 darkroom in another part of the home with a separate adjacent print finishing area. The darkroom is now ready for the built-in cabinets (due to arrive in 3 weeks), sink (plumbing is roughed in), custom countertops, and so on. I'm building it to be sort of a combo high-end darkroom/man cave retreat. We just moved into the main portion of the home over the past few weeks (it was a major cross-country move), so my studio and darkroom gear remains mostly in boxes while I do the final finishing work.

It's a dream come true project after working with makeshift studios and darkrooms for the better part of 50 years. Being able to do as part of new house construction made it much more feasible. I had to plan the electrical, plumbing, ventilation and so on all in advance. The darkroom sits in a portion of the home that is in the back of the first floor which is a walk-out basement that sits on a hill with spectacular mountain views The main room on that floor has a 36" door that leads to a fully finished back basement that is 8 feet wide by 38 feet long that houses the utilities on one end and also serves as a wine cellar with the far end being an exercise area with a treadmill. The other end is a print finishing area where I have my dry mount press and a large format (24" wide) Epson printer. That entire area has no windows (it is all below ground on three sides with the only source of natural light coming from the door that leads to the living area). Next to the print finishing area is another 36" door that leads to the darkroom itself which measures 14x13 feet - again no windows so it is naturally light-tight. I went to the extent of full finishing both spaces during construction - all fully insulated, dry walled, painted, base molding, plumbing, ample power outlets (some at counter height on two sides) , power ventilation, can lights, high 9-foot smooth ceilings, and wood-look water-proof vinyl plank flooring. I also wired it for large flat-screen wall-mount TV opposite the wall on which has a leather sofa and end tables - it'll be a room worth spending a lot of time in along with a great audio system.

The cabinets I just ordered will form an L-shape - 13 feet long on the long wall (wet side) with a corner cabinet and extension that make the short L-side 6 feet long (the dry side). I'm pulling the base cabinets out an additional 6 inches from both walls as I'm installing custom countertops that are 30" wide instead of the standard 25" wide. The extra counter depth will better accommodate my desktop film and print processing machines as well as occasional use of trays. I'm not installing a traditional long stainless darkroom sink as the vast amount of the time I use a PhotoTherm Sidekick SK-8 film processor that will flank a deep 33" X 22" stainless sink on one side and a Fujimoto CP-32 transport paper processor on the other side of the sink. If I ever want a traditional long, wide stainless darkroom sink I have the perfect space for it in the immediately adjacent space, but at this point I don't think I'll ever need it. I have whole house water filtration system but will be adding additional filtration. The Phototherm SIdekick SK-8 is self-cleaning has automatic silver recovery. it doesn't require a water hook-up but that is optional and I'll likely tie it into the digital temp control unit anyway. I'll have enough space left over on the wet side for large trays when I want to use them on occasion. The dry side will hold my LPL-4550 XLG and LPL-6700 (7700) MXL enlargers. I'll likely wall-mount the 4550-XLG as with the 9 foot ceiling I still have ample head room and can avoid the need for a drop table. One thing I still have to work out are the details for installation of final plumbing as I'll be installing a HASS Intellifauct K375 over the sink area so it needs to bypass the sink faucet and provide for independent connections apart from the sink faucet and drill holes in the back of the countertop for the tubes for the two processors.

s-l140.jpg


I'm also a freak when it comes to dust control - so I also have a Honeywell 17000-S HEPA air purifier that covers up to 200sf and about to purchase a Yuchengtech Ionizing DC anti-static ionizer. The pair should make the room as close to a clean-room as is reasonable along with a separate film drying cabinet.

MFL.

Sounds spectacular, I decided I didn't need a darkroom developing sink either, but went with a custom made stainless utility sink, with integrated counter top that has a marine edge. I have a Sidekick as well which I will plumb for freshwater feed. I also went with an intellifaucet but the lower model with preset temps. The thing I haven't decided on is the exhaust system for the room. I'm thinking one3 made for a large bathroom may work but am looking for feedback and or recommendations.
 

Michael Firstlight

Subscriber
Joined
Mar 2, 2017
Messages
460
Location
Western North Carolina
Format
Multi Format
We just parked them outside. :smile: We live in Ca so it's not so bad. One of these days we may make a carport.


Sounds spectacular, I decided I didn't need a darkroom developing sink either, but went with a custom made stainless utility sink, with integrated counter top that has a marine edge. I have a Sidekick as well which I will plumb for freshwater feed. I also went with an intellifaucet but the lower model with preset temps. The thing I haven't decided on is the exhaust system for the room. I'm thinking one3 made for a large bathroom may work but am looking for feedback and or recommendations.

Nice on the sink. As for the exhaust I went with a standard bathroom exhaust in the room since the room is only 13x14 feet - it's plenty powerful and on a wall switch. One of the details needed with the Sikdekick is where and how to route the feed and drain lines. I'm going to run lines through the back side of the countertop down to the back of the cabinets (maybe through access holes to the chem supply bottles that I'll store inside the cabinets with waterproof cabinet liners of course. I have the same issue for the Fujimoto CP-32 as I also have the matching auto-replenishment unit for that processor. The rinse drain lines I can route to the sink unless I can work some fittings that route down under the counter and tie into the sink drain pipe which would be ideal - but I'm there yet so the jury is out on those detail. I'm after a clean and tidy look with ideally no makeshift feed or drain lines visible. I have also have a Jobo CPP2 for one-off and color prints for 16x20 to 20x24 that I might wall mount on a shelf above counter. With the Intellifauct and all my water lines coming from underground under the slab I don't think I'll need a chiller as some folks have needed. Just thinking through it all is a job, I want to get it all right this time. The biggest pain has always been film drying. I'd really love a pro-grade drying cabinet, but new ones are out of sight cost wise and the used ones are either rusty or too far away to transport - so far anyway. So I made a makeshift one using a Mistral-like dryer head (mine is a Prinz) with the attached plastic zip-up cabinet. - which is pretty long, then I housed it inside a portable clothing rack and sealed up the base of the vinyl clothing cabinet using 5" thick foam in the base. It gets enough air intake from above, but it provides a double-walled dust barrier combined and a rather inexpensive solution until I might can find a real used film drying cabinet in good condition that is local (enough) to me. Another challenge I think that will be solved by wall mounting the 4550 XLG is the size and use of my larger custom-built vacuum easel. That easel is pretty big 30"x40" (my smaller vacuum easel is a ByChrome and is only 16x20 I use with the 6670 MXL). I picked up a 120mm f5.6 Rodagon-WA (Wide Angle) 4x5 enlarging lens just before I moved that, when combined with the wall-mounted 4550 XLG should give me quite a bit of magnification on the 30 inch deep countertop. I'll likely also route the easel vacuum tubes down through the countertop as well using an PVC elbow connectors - yet more detail to work out there.

MFL
 

Tony-S

Member
Joined
Aug 16, 2009
Messages
1,144
Location
Colorado, USA
Format
Multi Format
Here's mine. Pretty good set up for doing up to 6x7 cm (Bronica GS-1). Basement laundry room, so the sink just drains down the laundry drain. Noisy, but gets the job done. I had to build the table a bit higher than is typical to get the clearance necessary for the sink hose connections. Of course, I had to find a 3/4" hose to 1/2" facet adapter for the hot and cold supply, but fortunately one of my local plumbing supply houses had them for a couple of bucks each. The plastic cabinet under the enlarger is secured in place, so it does not budge when I open or close the drawers. Otherwise, I get my 35mm, 120 and 4x5 development done in here. Really too small for a 4x5 enlarger if I could even find one.

darkroom1.jpg

darkroom2.jpg
 

Lucid

Member
Joined
Jun 18, 2018
Messages
102
Location
England
Format
Multi Format
My cramped closet darkroom and bathroom processing area.

Your darkroom has come along way since then! I really enjoy your YouTube channel. I'm sure your videos will become invaluable to many.
 

ltbphoto

Subscriber
Joined
Apr 22, 2020
Messages
18
Location
Atlanta, GA
Format
Multi Format
Here's mine. Pretty good set up for doing up to 6x7 cm (Bronica GS-1). Basement laundry room, so the sink just drains down the laundry drain. Noisy, but gets the job done. I had to build the table a bit higher than is typical to get the clearance necessary for the sink hose connections. Of course, I had to find a 3/4" hose to 1/2" facet adapter for the hot and cold supply, but fortunately one of my local plumbing supply houses had them for a couple of bucks each. The plastic cabinet under the enlarger is secured in place, so it does not budge when I open or close the drawers. Otherwise, I get my 35mm, 120 and 4x5 development done in here. Really too small for a 4x5 enlarger if I could even find one.

I particularly appreciate the XTol/Franzia setup. :laugh:
 

Michael Firstlight

Subscriber
Joined
Mar 2, 2017
Messages
460
Location
Western North Carolina
Format
Multi Format
This will be the first a pair of posts now that the new darkroom is close to being fully operational.

The effort to move into the new house and finish the remaining construction, (extensive) drainage, and landscaping took several more months than I had anticipated. Building in the mountains brings additional challenges than when I've previously built homes. To make things more complicated I came out of my brief retirement given a great opportunity to do one more working gig before I toss the towel in for good - so the new darkroom had taken a back seat but it is still progressing, albeit more slowly.

Here is the space during the framing stage.before electrical and plumbing rough-ins. This snap was also taken just before I ripped out the standard-width door framing and changed it to a full-size 36" wide door after I realized the door would have been too narrow to get my leather sofa into the room. The pic was also taken before insulation was installed on all four walls (the exterior walls required special insulation made for the concrete block walls).

5.jpg


The next few pics were taken after moving in. The first thing was getting the flooring and cabinets in place. These weren't high grade cabinets - just decent pre-assembled stock cabinets from Home Depot.You might recall from my posts a while back that this will be a hybrid wet/dry (mostly dry) darkroom with programmable film and print processors for most work up to 11x14, so I decided I didn't need nor want a traditional long wet sink for typical tray processing. If I ever regret that decision I could reverse the room and take out the sofa, but I doubt I'll ever do that. Beyond 11x14" use a Jobo CPP2 for up to 20x24 and big trays (washer drain pans custom fitted with drains) for mural prints. I am still kicking myself for not grabbing a Fujimoto CP51 I could have picked up two years ago for $100 plus the cost of freight shipping - but it's a beast of a machine that I wouldn't have used as frequently as my CP-32.

So, in went the cabinets first. The room dimensions are almost 14x14 feet square.My aim was to make the room a combination of a darkroom/retreat - hence the leather sofa on one side and pre-wiring for a 50-inch wall-mounted flat screen on the opposite wall along with a blue-tooth enabled Hi-Fi receiver and speakers. I could have added a few more outlets in the room (there are 20 total - all GFI) but I am finding that I have enough - especially the dual quad outlets in the corner where the two enlargers are located. The ceilings are 9 feet high and the recessed LED lighting is on a dimmer switch. I pre-plumbed for a sink and used a 36" sink cabinet for an oversized standard sink as you can see in the 4th snapshot. As for venting I installed a switched built-in ceiling exhaust fan overhead (not visible in these pics). Since I am not typically doing tray processing, I felt could skip a more elaborate exhaust drop, but I can always extend the venting it if I ever change my mind. The exhaust fan is not very noisy either. The flooring is waterproof resilient one piece vinyl, and the room is ultra-light tight as there are no windows and adjacent space leading to the room is also windowless and underground on three sides in the rear of a walk-out basement. Since I had fully insulated the walls being below ground level on three the space maintains a surprisingly constant humidity and constant temperature of around 68 degrees in both the hottest Summer and coldest Winter months, though the adjacent space has vented auxiliary heating/cooling along with integrated de-humidification if needed, but so far I haven't needed to use it even once.

Next up after this post, a more finished view closer to being operational.


1.jpg


2.jpg

.
3.jpg
4.jpg
 
Last edited:

Michael Firstlight

Subscriber
Joined
Mar 2, 2017
Messages
460
Location
Western North Carolina
Format
Multi Format
New darkroom post Part #2

Here's the project in it's current state - almost operational.

In these snapshots the walls look a little warmer but they are really middle gray like the last set of pics I posed earlier (the color balance is a bit off on this set). Due to the counter lip I had to build up the top of the
cabinets a little and have yet to complete attaching the cabinet kick molding along with drawer and cabinet handles. The power and cable outlets high-up on the wall are for the 50" flat screen that goes in next
week.

In the corner is the LPL 4550 XLG K&IF VCCE enlarger along with a variety of carriers, masking attachments, fine focus with extender arm etc. The enlarger to the right of the 4550 is an LPL 670MXL dichro
I use almost exclusively for 6x7 which I prefer over the 4550 as it has a medium format AN glass carrier. When I want do color with 4x5 I have to swap out the VCCE module for the dichro module. I have a decent
collection of Componon-S and Rodagon lenses for 6x7, 4x5, and occasional 35mm from my 50 year old negative archive.

Next to 4550 is a Fujimoto CP32 programmable print processor and wash/drying unit.. I also have the CP32 replenishment unit that I have yet to hook up as well as hook up the water intake from the temp control unit for the W/D
unit. Not visible are nicely finished holes and rings in the countertop behind the processors that drain reusable chem from the CP32 into large bottles stored inside the base cabinets underneath.

Off to the far right is a large lightweight LED flat panel for reviewing negatives and the tabletop lamps have daylight-balanced LED bulbs for viewing color prints with viewing filters.

The red-belly craftsman unit with the coiled cable on the roller cart is a Craftsman 2.5gal cordless electric adjustable air compressor with an inline filter and air gun.

All of the outlets are GFI.

6.jpg


7.jpg


In the foreground to the right is a classic Harmon Kardon HK730 receiver with a bluetooth adapter that I use to stream music to it from my iPhone. It's connected to two Polk audio bookshelf speakers that I
have yet to wall mount. The small white rectangular tower behind the receiver is a wireless Linksys mesh network node for high speed internet. Buried over on the left side of the sofa is a Honeywell Quietcare
True HEPA 17000-S air purifier that covers up to 200sf - nearly the exact sf of the room.
8.jpg


Sitting below the LPL 4550XLG is a ByChrome 16x20 vacuum easel. I have yet to hook it up to the vacuum unit inside the
corner cabinet and foot switch. The white fan thingy is an static eliminator that also helps reduce odors To the left of the
enlarger is a an RH Designs Analyzer Pro f-stop analyzer Sitting on the vacuum easel is a Peak Model 1 grain focuser.
Not shown is a Jobo Colorstar 3000 with a very rare Mitchell Colorbrator that calibrates the Colorstar a single step with a
reference negative shot with a MacBeth color chart I shoot as the first frame of every shoot.
12.jpg


Wall mounted is a Hass K375 Intellifaucet digital temp control unit. Right now I only have a tube temporally hooked
up to the outlet but I plan to add a horizontal set of outlets to tap into it for the Fujimoto, the Sidekick, and the Jobo
CPP2 which is not pictured and sits on a rolling cart just outside the darkroom entrance. The sink is oversized with
17x30" usable area. I already have a water filtration system for the lines for the whole house but I might yet add a H/C
water filtration at the Intellifaucet itself, but so far the main filtration system does a good job.
10.jpg


To the left side of the sink is a completely rebuilt PhotoTherm Sidekick SSK8 with automatic and precise water temperature control, programmable processing, and automatic cleaning for 35mm through 4x5.
Again there's a finished access hole in countertop behind the SSK8 where the automatic feed and drain tubes are routed to chem storage bottles inside the base cabinet below. I was lucky to amass a variety
of Sidekick4 and 8 reel tanks, accessories, and parts before PhotoTherm ceased production of new units. Like the Fujimoto I have yet to tap into the Intellifaucet water supply so that I don't have to keep a tank
of water below.
19.jpg


Off to the right is a custom-built vacuum easel for up to 30x40", and sitting in front of that is a NuArc DLB1325 Bubblite safelight I have yet to ceiling mount.
13.jpg


The entrance to the room is yet another back-basement area that is also underground on three sides, ully finished and insulated and has a light trap leading to the finished walk-out basement. To the right
is a wide-format 24" Epson 7880 printer and to the left of a RotoTrimmer and a DK 1350W 18.5 x 23" Masterpiece dry mount press (same as the older Seal 210M). In the lower LH corner is a mini fridge/freezer
for film, ice, and snacks. The oversize trays are refrigerator drain pans for occasional large B&W prints. I have have yet to bore the holes for the tray drains and plan to build a tiered stand to stack them on the
portable cart. Sitting almost out of sight is the Jobo CPP2 processor for occasional 16x20 and 20x24 inch RA-4 print processing. Also not shown is a Prinz warm air timer/blower with plastic cabinet for film
drying (equivalent to a Jobo film drying cabinet), a Stack N Dry Floor Drying Rack (up to 20x24) and a Premier Model T2-C Electric Print Dryer. For print washing I have a 16x20 tray print washer and will
eventually spring for something like a Versalab Archival Print Washer 16x20 with 20x24 adapter or equivalent.

18.jpg
 
Last edited:

gordrob

Subscriber
Joined
Jan 29, 2005
Messages
1,008
Location
Western Cana
Format
Multi Format
If I had that sofa in my darkroom I don't think my wife would ever get me out of there
 

khh

Member
Joined
Apr 25, 2020
Messages
90
Location
Oslo, Norway
Format
Multi Format
I've finally set up my first darkroom. I've been developing my own film for maybe a year and a half, and I began acquiring the gear to set up my darkroom almost a year ago. However a temporary setup in my bathroom proved very cumbersome, and I did not repeat that experience. I thought I didn't have room anywhere for a permanent setup, but I kept working on the problem in the back of my head and eventually I figured out a design that could work in my small storage room in the basement.

EsES7He.jpg

Figure 1: Dry area. The paper safe is in the back and the rest of my papers are on a shelf below the enlarger. Pictured is also the labcoat I use to protect my clothing from the chemicals. The light in the top left corner is my inspection light. I plan to turn the door on the cabinet so it can be used for bits and bobs too.

Lnz7cMr.jpg

Figure 2: Wet area. The trays are in convenient working height in a shelf. Above are the chemicals and below the equipment. The washing container is just out of shot below the fixer. Top left is the normal and safe lights. The whiteboard serves as the inspection station.

I've had to give up running water, but from my tests yesterday and today bringing a large container of water for the preliminary wash and then bringing the prints up to the print washer in my bathroom seems to work fine.

v9noSPu.jpg

Figure 3: Washing and drying prints. I was lucky enough to get a Paterson Auto Print Washer with the first lot of darkroom equipment I got.

There are some things left. I'd like to mount a board or something behind the enlarger to provide a good surface for pinning notes, documents and SOPs. I'd like to get a second safelight for the enlarger area (that can be turned off when not needed). I need to create some sort of splash guard between the wet and dry zones. And no doubt further needs will become apparent as I start using it.

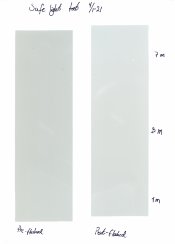
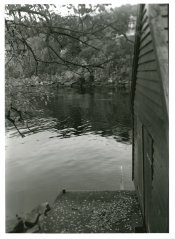
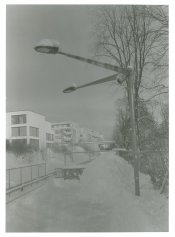
It is however at the stage where it's usable. I did the safelight test, following Greg's excellent video tutorial, and the test came out perfect as far as I can tell. I've attached the result as well as my first two prints. I know that I have a long way to go and a lot to learn, but it's exciting to finally start the journey.

Safe light test 04-01-2021040@0.5x.jpg 19720C10-p01@0.25x.jpg 20201A27-p01@0.5x.jpg
 

Laurent

Subscriber
Joined
Oct 15, 2004
Messages
1,829
Location
France
Format
Multi Format
Somewhere in 2003 or 2004 I started this thread. It seemed to answer a need because it became the longest thread of Photrio (then APUG). And after Sean split it in 2012 it's still running today in 2020.

As a professional photographer I've been working digitally since 2006. In the meantime darkroom equipment has been gathering and I'll have to make a choice among several dozen enlargers, about 50 enlarging lenses and too many trays to count. Now that I'm semi-retired my trusty Nikon D7000 will stay the last digital camera I bought. I'm back to 6x6 and 4x5. And I can't wait to build a new dedicated darkroom and studio in my 80 m² (860 ft²) barn. The darkroom will need to be big enough to teach 5 or 6 people at a time, but also small enough to work alone. This new darkroom will certainly be my last and I've learned many new tricks from this thread. (Unfortunately part 1 seems to have disappeared.) But I'm still learning. So my question to you is threefold :

1. How would your ideal darkroom look like?
2. What is the most useful feature of your present darkroom (not counting the trash can) ?
3. What would you design differently ?

Argentic
Before I publish some pictures of my place, I'll answer your questions:

1) my ideal darkroom would be a tad bigger (this one is quite small, and the available space is not plenty at my home) and would have more room underthe ceiling, and ideally would have a window + fresh air access.
2) the trash can is very helpful... otherwise, I like the Deville sink, even if it's a bit too high (I have to accomodate for water to flow from its bottom, and that's a major constraint in my setup)
3) If I was to redesign a darkroom (may happen in the future, but I have too many things to do) I'd make a better separation between wet and dry spaces.
 

mehguy

Member
Joined
Apr 26, 2015
Messages
513
Location
Canada
Format
35mm
Here is my mobile darkroom! The enlarger sits on a "cart" that I made from a table that I found for free made from particleboard (don't worry, it isn't real marble :wink:) that perfectly fit my enlarger. I then made a platform of sorts for the table made out of 2x2 foot plywood and a 2x3 frame underneath with casters bolted onto it. That was then attached to the bottom of my table. All in, materials cost me about $25 :smile: .

My only concern is the glow in the dark gralab timer, with it being so close, it may fog the paper. Is this an issue other people have found?

My next step is to get one of those paper organizers to be able to stack trays on top of each other.


darkroom.jpg
 

BGriffin23

Member
Joined
Oct 21, 2020
Messages
56
Location
CT, USA
Format
Multi Format
My only concern is the glow in the dark gralab timer, with it being so close, it may fog the paper. Is this an issue other people have found?

I have a Master Time-o-Lite timer which has a similar glow-in-the-dark face and have encountered no problems. IMHO it is a better timer than the big one you have behind the Durst. I am curious how you intend to set up a wash tray.
 

mehguy

Member
Joined
Apr 26, 2015
Messages
513
Location
Canada
Format
35mm
I have a Master Time-o-Lite timer which has a similar glow-in-the-dark face and have encountered no problems. IMHO it is a better timer than the big one you have behind the Durst. I am curious how you intend to set up a wash tray.
I just take the print upstairs in a tray where I have running water and wash there.
 

Renato Tonelli

Subscriber
Joined
Jan 26, 2007
Messages
1,471
Location
New York,NY & Pontremoli
Format
Multi Format
Here is my mobile darkroom! The enlarger sits on a "cart" that I made from a table that I found for free made from particleboard (don't worry, it isn't real marble :wink:) that perfectly fit my enlarger. I then made a platform of sorts for the table made out of 2x2 foot plywood and a 2x3 frame underneath with casters bolted onto it. That was then attached to the bottom of my table. All in, materials cost me about $25 :smile: .

My only concern is the glow in the dark gralab timer, with it being so close, it may fog the paper. Is this an issue other people have found?

My next step is to get one of those paper organizers to be able to stack trays on top of each other.


darkroom.jpg

The glow of the timer has not been a problem for me when I print, and I have several along the sink.
That enlarger: I still have my Durst M601 since 1973! I recently saved all of my pennies, nickels and dimes and converted it to a Heiland LED head. If you need spare lamp holder for yours, let me know and I will send it to you for the cost of shipping.
Enjoy your printing sessions!
 
Photrio.com contains affiliate links to products. We may receive a commission for purchases made through these links.
To read our full affiliate disclosure statement please click Here.

PHOTRIO PARTNERS EQUALLY FUNDING OUR COMMUNITY:


Ilford ADOX Freestyle Photographic Stearman Press Weldon Color Lab Blue Moon Camera & Machine
Top Bottom