Anyone ever make Lippmann plates?

Roses

A
Roses

  • 1
  • 0
  • 2
Rebel

A
Rebel

  • 1
  • 0
  • 25
Watch That First Step

A
Watch That First Step

  • 0
  • 0
  • 30
Barn Curves

A
Barn Curves

  • 0
  • 0
  • 24
Columbus Architectural Detail

A
Columbus Architectural Detail

  • 2
  • 1
  • 26

Forum statistics

Threads
197,484
Messages
2,759,797
Members
99,515
Latest member
falc
Recent bookmarks
0

SemFyzik

Member
Joined
Feb 17, 2013
Messages
4
Format
4x5 Format
Hi,

Here´s my result from my last try. I was using Lumière developer. Exposure was 30min at cloudy sky. Check temprature 18°C and 15°C how´s written in PDF from Hans I. Bjelkhagen. Proccesing was

1. pre-hardenning with Formaldehyd (6min)
2. development (3min)
3. washing (2min)

Results are promissing even colours are there but u have to watch it very carefully. heh have little problem how to photo my result so many light reflections there :/
 

Attachments

  • vysledek orez.jpg
    vysledek orez.jpg
    485.3 KB · Views: 377
  • vysledek orez.jpg
    vysledek orez.jpg
    372.2 KB · Views: 356
Last edited by a moderator:

manalokos

Member
Joined
Mar 5, 2012
Messages
5
Format
8x10 Format
Hello

Thanks to this thread I was able to make my first Lippmann plates.

Here is the result:
[video=youtube;JIV2T1bTdjw]https://www.youtube.com/watch?v=JIV2T1bTdjw&list=UUwof8oQAHKvMQzt3tl1x1Pw[/video]

Kind regards
Filipe Alves
Silverbox
 

michr

Member
Joined
Sep 28, 2012
Messages
440
Format
Multi Format
Congratulations! Those plates look amazing. As far as I know yours are the first successful Lippmann plates in many years.
Would you please publish a detailed set of instructions for those who want to try to make their own?
 

manalokos

Member
Joined
Mar 5, 2012
Messages
5
Format
8x10 Format
Thanks!

It is very surprising if I am the only one doing this right now...
if that is true, I beleive that it will change soon, as I got an amazing response, and there are many people dreaming about this process.

I cannot publish any information because simply used the scattered information in this thread, so I have nothing to add to the common knowledge.
If you follow the instructions on Bjelkhagen's pdf, you'll see that it works like a charm.

Here is a new, and better filmed video of the plates:
[video=youtube;0lVaFdHd2Mo]https://www.youtube.com/watch?v=0lVaFdHd2Mo&feature=youtu.be[/video]

Kind regards
Filipe
 
Joined
Aug 29, 2012
Messages
8
Location
France
Format
Medium Format
Pretty nice results.

It's nice you came to share about your method.

I've carried on preliminary tests with little success.
I used slavich PFG 3m plates, developped in GP-2 at a strength advised by Bjelkhagen (15 mL of stock GP2 qsp 400 mL water for 15 min ) : the image is extremely light even exposing up to 8 min at f/4 at 11AM on bright sunlight.

You used lumière developper (pyrogallol + bromide) or GP2 ?
 

manalokos

Member
Joined
Mar 5, 2012
Messages
5
Format
8x10 Format
Hello.

I used Lumiere's developer.

Here is a new Lippmann photograph this time using a homemade albumen plate:

llll.jpg

Kind regards
Filipe
 

Amphetadream

Member
Joined
Apr 28, 2013
Messages
3
Format
35mm
I was reading an old article on Lippmann photography (here: http://books.google.com/books?id=54...&pg=PA45#v=onepage&q=lippmann albumen&f=false). It details how Lippmann made his silver halide emulsions, but it makes no mention of any sensitizing dyes. It also says that the plates were NOT orthochromatic, so I guess that would imply they were blue sensitive. It also stated that the exposures were extra long to account for the reds -- But how would that work then?

In other news I was looking at dyes to panchromatize emulsion for Lippmann plates -- I know this has been kind of beaten to death on apug... Does anyone see any problems using erythrosine and methyl violet for green and red sensitization, respectively?
 

Photo Engineer

Subscriber
Joined
Apr 19, 2005
Messages
29,021
Location
Rochester, NY
Format
Multi Format
Several people have said that they were going to try it. I have seen no data yet.

OTOH, the Erythrosine works fine and I have posted data on that here.

PE
 
Joined
Aug 29, 2012
Messages
8
Location
France
Format
Medium Format
Making his own plate.. another challenge.
I'm impressed with the result Felipe obtained !

My first "ok" plate with a slavich plate :
978197LIPP3.jpg
 

manalokos

Member
Joined
Mar 5, 2012
Messages
5
Format
8x10 Format
Great to see some results!

Albumen plates promiss to have much better color rendition than slavich plates, I am still trying to determine the exact procedure.
Whe I have consistent results I will post more information.

Kind regards
Filipe
 
Joined
Aug 29, 2012
Messages
8
Location
France
Format
Medium Format
Hello back !


Lot of trials and errors, lot of reading, helful advices and I realized satisfying plates..

But first, back on the last plate I posted motnhes ago.
I find it awful today : no color at all, really sad.

I made it with slavich plates (PFG-03C) testing the "air interface" technique.
If you want "so-so" lippmann plates, that's the way !

Even at Lippmann's era, it has been tested and found not as vivid as those obtained with mercury.
Today, nothing has changed !


The process was as following.


I tested many dilutions and processed by inspection to stop the developpement when it was OK.
I ended using GP-2 for 8min but diluted 4 times (1 stock + 3 water) only.
No agitation.
Washing with gradully concentrated propanol solutions..


But colors were really disappointing !


So I devised a little frame to put mercury behind the same slavich 63x63 plates.


It wasn't easy but rewarding. Just have a look to my last one.. It is shining !!!


854179tomatesprisme2.jpg


The process isn't OK because lot of parameters should still be fixed.


I would need some info on slavich plates composition.
Has anyone ever been in touch with them ?
They answer only when asking to buy something :sad:
 

manalokos

Member
Joined
Mar 5, 2012
Messages
5
Format
8x10 Format
Nice!

What is the plastic thing over the plate?
I was able to achieve fairly decent colors with the slavich plates, although the reds always come a bit orange.
 
Joined
Aug 7, 2014
Messages
177
Location
Grand Rapids, MI
Format
Large Format
I figured I'd pop in with my attempt.

I used Lehmann's emulsion recipe (https://books.google.com/books?id=iBrOBQAAQBAJ&lpg=PA54&ots=Dk_TzRhHo_&dq=lippmann%20gelatin%20air&pg=PA51#v=onepage&q&f=false)

Sensitized with 1:2000 ethyl violet (1mL / 100mL emulsion) and 1:1000 erythrosine (1mL / 100mL emulsion). Placed backwards in a velvet lined modified film holder. 12 minute exposure at f/4.5 on an overcast day.

Developed with the good ol' ammonia-pyrogallol developer. Washed, no fixing.

Pretty much everything came out red/orange/yellow except the blue sky, which I'm guessing must be solarization. Looking with light transmitted, it looks like I'm getting some red/orange activity and no green at all. I'm not sure if I just have way too much ethyl violet or the colors are a result of the colors shifting down during development (I wasn't using any hardeners).

I've still got 300mL of emulsion left, so I guess I'll double the erythrosine content and try again this weekend.
 

Attachments

  • 11850626_10153525983378428_8928142204124914103_o.jpg
    11850626_10153525983378428_8928142204124914103_o.jpg
    501.7 KB · Views: 367
  • IMG_3581.JPG
    IMG_3581.JPG
    988.1 KB · Views: 350
Joined
Aug 7, 2014
Messages
177
Location
Grand Rapids, MI
Format
Large Format
Hi everyone,

I've made some progress since that last (terrible) plate I posted!

Currently I am making plates with Darran Green's recipe in "The True Colour of Photography", though sensitizing with 0.5mL of a 1:1000 alcoholic solution of ethyl violet (per 100mL of emulsion)

I haven't been able to have any success at all with GP-2 thus far. I used pyrogallol-ammonia for a while, but currently I am using pyrogallol and ammonium carbonate (link) which is slower and easier to control development time (most recently about 3 1/2 minutes).

I still have to play around with sensitizing dyes -- 0.5mL / 100mL emulsion still seems a little strong. Despite the attached image, the green sensitivity is quite poor. All my outdoor lack any evidence at all of green grass. I recently came by some eosin y which could remedy this. I have erythrosine too but I'm concerned there will be too much yellow overlap between it and the ethyl violet.

The attached image was exposed for 45 minutes, with the subject 2 feet from a 500 watt halogen light. I haven't had much success outdoors, but generally it has been 4-7 minutes on sunny autumn days. I haven't been using any mirror besides the air-gelatin boundary.

I have been considering using gallium as a replacement to the mercury mirror, with little success thus far. Gallium melts around 85F, so theoretically it can be heated and dripped onto the emulsion and "sandwiched" between the emulsion and another piece of glass, allowed to spread over the emulsion to solidify. This is easier said than done however, and generally my attempts have had the gallium run straight to a corner and drip out rather than spread out uniformly. When it is allowed to dry sufficiently thin enough, it easily peels away from the emulsion without any evidence of "wetting". What gallium lacks in toxicity it makes up for in messiness!

Another gallium alloy, "Galinstan", is liquid at room temperature. Depending in the makeup, it can freeze as low as -19C. It is also notorious for wetting anything it touches fairly easily. I wonder if one could swab on a mirror as a liquid and expose, cool it sufficiently for it to solidify, and peel it away from the emulsion in one piece?

Failing this, Hebert Ives outlines a way to create a flexible silver mirror that can be applied to the wet emulsion and allowed to dry. Drawbacks include slow drying time and loss of sensitivity when using cyanine dyes. I've ordered a small quantity of aluminum mirror film to apply in a similar fashion, though supposedly this should not work due to the layer of aluminum oxide that rapidly forms on the surface of these films. Still, it should be a fun little experiment to try out.
 

Attachments

  • IMG_3712_s.jpg
    IMG_3712_s.jpg
    998.1 KB · Views: 396
Joined
Aug 7, 2014
Messages
177
Location
Grand Rapids, MI
Format
Large Format
Another update:

Here is another plate, sensitized with 0.3mL of 1:1000 ethyl violet and 0.5mL 1:1000 erythrosine (per 100mL emulsion). There is too much erythrosine in this batch. The speed dropped about 1 stop and it is noticeably more green. Despite the similarity to my previous plate, the color balance and brightness on this one is much better. I didn't swell this plate with anything besides breathing on it a few seconds before snapping a shot with the digital camera, so the attached image is a tad more blushifted than in reality. The excess erythrosine did cause neutral colors to be somewhat greenish. I think my next batch of plates will be sensitized with 0.3mL ethyl violet and 0.2mL erythrosine, and hopefully that will balance the colors a bit better.

I've been exposing longer and developing a shorter time. Developing takes about 1.5 - 2.5 minutes. Any longer and you risk getting the red fog, which seems to hurt green reproduction the most (can be seen in the shadows under the ball). There is a sweet spot to hit where the plate is quite bright, along with minimal red fog. I think my pyrogallol solution is going bad though, because initially 1m30sec was sufficient. Now 2m30sec seems to be the right time. I always keep the solution at 20C when developing.


One of my troubles have been those shiny bright splotches (such as the one over the orange ball). I have not been able to figure out what is causing them exactly. Final wash in distilled water, with photo flo, etc. doesn't seem to help. Some plates do not have them at all, although most do, and it is generally in the middle.

Does anyone have any good contacts on getting a Weiner prism made? I talked to a few optics companies on Alibaba but generally the machines were ill-equipped for a 4x5 sized prism and the costs were prohibitively expensive.
 

Attachments

  • IMG_3727_s.jpg
    IMG_3727_s.jpg
    1.2 MB · Views: 294

michr

Member
Joined
Sep 28, 2012
Messages
440
Format
Multi Format
I understand the dimensional stability of glass plates along with the extremely high resolution of the emulsion are important reasons why glass plates are used for Lippmann photography. Has anyone tried using conventional panchromatic film? What is special about glass plates, beyond the reasons I've listed?
 
Joined
Aug 7, 2014
Messages
177
Location
Grand Rapids, MI
Format
Large Format
I understand the dimensional stability of glass plates along with the extremely high resolution of the emulsion are important reasons why glass plates are used for Lippmann photography. Has anyone tried using conventional panchromatic film? What is special about glass plates, beyond the reasons I've listed?

Hey Michr,

I don't there are any conventional films on the market that are have a high enough resolution for this. But I don't really see any reason one couldn't make their own emulsion and slather it on a bunch of clear film leader or something. The thickness of the emulsion affects the sensitivity I believe, so you'll have to be pretty consistent with the coating. As long as the final films are laid flat I wouldn't think you'd get much/any colors shifting.
 

michr

Member
Joined
Sep 28, 2012
Messages
440
Format
Multi Format
Hey Michr,

I don't there are any conventional films on the market that are have a high enough resolution for this. But I don't really see any reason one couldn't make their own emulsion and slather it on a bunch of clear film leader or something. The thickness of the emulsion affects the sensitivity I believe, so you'll have to be pretty consistent with the coating. As long as the final films are laid flat I wouldn't think you'd get much/any colors shifting.

I hadn't considered the thickness of the emulsion. I was just hoping, without any evidence, that there would be a way to try the process without pouring emulsion and without spending $10+ per glass plate for an experimental process. Now I understand why people are going that route.
 

Hologram

Member
Joined
Oct 17, 2006
Messages
143
Format
Medium Format
Does anyone have any good contacts on getting a Weiner prism made? I talked to a few optics companies on Alibaba but generally the machines were ill-equipped for a 4x5 sized prism and the costs were prohibitively expensive.

Why not make a Wiener prism on your own? It can be made very much alike liquid filled lenses: plexi sheets to make the shape of the prism. That structure is then filled with a high refractive index liquid, paraffin, glycerol etc. and, sealed ultimately. Instead of a liquid you could also use some transparent resin that can be cured.
Graham Saxby, Practical Holography, has a chapter on how to make large liquid filled lenses.
 
Joined
Aug 7, 2014
Messages
177
Location
Grand Rapids, MI
Format
Large Format

Those look like they're both glass plates, and pretty pricey. When Michr said "conventional" I took it to mean like Tri-X or something.

Why not make a Wiener prism on your own? It can be made very much alike liquid filled lenses: plexi sheets to make the shape of the prism. That structure is then filled with a high refractive index liquid, paraffin, glycerol etc. and, sealed ultimately. Instead of a liquid you could also use some transparent resin that can be cured.
Graham Saxby, Practical Holography, has a chapter on how to make large liquid filled lenses.

I've looked into that a little bit! A few pieces of glass & some slide mounting fluid (for microscopes) should do it, I think. I still have yet to take a picture of anything that I want to keep so I haven't gone forward with it.

I looked into resin a while back, but all the examples I saw were a bit milky and I wasn't super happy with the outcome. These don't look all that bad though!

There are lots of glass wedges being engraved and sold as awards, and I'm looking into that too. If I can get some un-engraved it looks like they'll work really well!
 

Hologram

Member
Joined
Oct 17, 2006
Messages
143
Format
Medium Format
Those look like they're both glass plates, and pretty pricey.


You're right, they're expensive. Until recently, there was a special Ultimate "Lippmann" emulsion available - both on glass plates or triacetate film. AgX layer thickness was around 2µm only.


I looked into resin a while back, but all the examples I saw were a bit milky and I wasn't super happy with the outcome.

There are many kinds of transparent curable resins available.
Transparent gel wax (for candles) may be a lot easier to handle though. This stuff is pretty clear: http://candleandsoap.about.com/od/gelcandlemakingfaqs/f/gelfaqwhatisgel.htm
 
Joined
Aug 7, 2014
Messages
177
Location
Grand Rapids, MI
Format
Large Format
Hi everyone,

Here's the big prism update!

Obtaining the prisms

There are two major ways to obtain prisms suitable for Lippmann plates -- make your own, or have them made.

I received several prisms from Nobel Crystal, a Chinese trophy manufacturer. I don't want to get caught by the spam filter, so I'll hold off posting the link. But company can be found on Alibaba, by searching for "crystal wedge awards". Message me if you would like a link to the ad. Make sure you specify all dimensions of the prism (I did not specify the top width, so mine are a tad shallow) and request they not be engraved. Mine cost roughly $13 USD per prism (sized for 4x5 plates), which is dramatically lower than anywhere else I was looking.

IMG_8668_s.jpg IMG_8673_s.jpg


Alternately, one can make their own prisms, just like Hologram suggested! Taping up two pieces of glass with duct tape and filling in between them with Eager EP-4101 clear polyester resin (this was at Dr. Hans Bjelkhagen's suggestion), a fairly effective prism can be made for a small price. I should note that these prism's refraction isn't quite as clean as the crystal prism -- looking through, objects are lined with small rainbows. I cannot honestly say I've noticed this at all while viewing a mounted plate. I've made 4x5 and 5x7 sized prisms with this method.
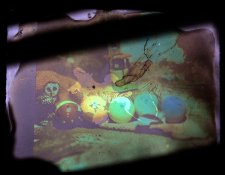
10457204_10153974366898428_6672239547713137421_n.jpg IMG_3775.jpg

Mounting the prism

I have been using Canada balsam, an optical cement that has been favored through the years due to its index of refraction being very similar to glass. Its advantage over other contemporary optical cements lays in its ability to be heated, in case one wants to swap the plate onto another prism for some reason. The balsam I've been using does not have any extra solvents (it is sometimes sold dissolved in xylene).

In my experience, directly mounting a plate will, without a doubt, blueshift the image. My method of avoiding this blueshift has been to lightly coat the plate with clear matte spray (obtained from any hardware store) 3 - 5 times, allowing the coat to dry for 15 minutes in between coats. DON'T use a heavy coat -- this will deeply redshift and RUIN your image! Note: the spray will demolish all reflected color temporarily. The colors will return once the plate is mounted to a prism.

Is a clear acrylic spray archival? I have no idea -- my oldest Lippmann plate using this method is just under 3 months old, with no noticeable signs of degradation. I have a few tintypes from two years ago that were sealed with the same spray, also with no noticeable degradation. Fingers crossed things stay that way!

Canada balsam takes a few days to solidify, and weeks to dry. It is probably best to tape up the sides initially, so the prism won't try to slide out of place. Every few days one can remove a piece of tape, and wipe off extra balsam with acetone. Make sure you have acetone around whenever you work with Canada balsam, the stuff is ridiculously sticky.
 

bendytwin

Member
Joined
Feb 10, 2020
Messages
18
Location
Amherst, MA
Format
Large Format
Jon, I just wanted to say: fantastic work! Off and on I've followed your blog and posts on Lippmann plates and your autochrome attempts for years now. I began taking a serious interest in early color processes in 2014 when preparing for my doctoral exams, and I'm finally (finally!) finishing up my dissertation. Part of it deals with Alfred Stieglitz's pioneering use of autochrome plates in the summer of 1907, and I began doing some research into why/if he hadn't heard of the Lippmann process. Stieglitz even went to college at the Karlsruhe Technische Hochschule where just miles away in a Berlin suburb Richard Neuhauss would do so much famous work in the Lippmann process. As far as I can tell it was a "ships in the night" scenario where the German "school" and cohort of photographic innovation and photo journal publications versus Stieglitz's New York endeavors just passed each other by, partly out of his constant competition and partly just out of distance.

Reflecting on this incredible thread in general, I was struck by how old discoveries resurface and are made new. In particular, I was struck when reading the simple comment by Photo Engineer (rest in peace) from ten years ago on page 1 of this thread that "Prehardening with formalin or the like helps prevent such micro cracks and shrinkage," because just recently I stumbled across an article Stieglitz published in the British Journal of Photography in July 1908, the year Lippmann was given his Nobel Prize in Physics for his plates. Stieglitz's entry is on "Formalin for obviating the frilling of autochrome plates" -- talk about a coincidence! His younger brother Julius was a professor chemistry in Chicago and I'd think they undoubtedly communicated about this. What might have been in terms of early color technology collaborations! In any case, it's too bad the Lippmann process has remained obscure, but I'm glad to see Lippmann plates getting some attention and new life. Just last week, Eastman House held its first Lippmann plate workshop... oh the things I wish I had $1400 for! On that note, I think it's pretty wise for Katherine Hoffman to preface her Stieglitz bio (Stieglitz: A Beginning Light, 2004) with Melville's brief poem, "Art", the first lines of which really encapsulate for me that unending struggle between theory and practice and between thinking about projects and actually having the courage to get out there and try them: "In placid houses well pleased we dream / Of many a brave unbodied scheme." So thank you for your years of work in giving new form to old dreams and schemes!
 
Photrio.com contains affiliate links to products. We may receive a commission for purchases made through these links.
To read our full affiliate disclosure statement please click Here.

PHOTRIO PARTNERS EQUALLY FUNDING OUR COMMUNITY:


Ilford ADOX Freestyle Photographic Stearman Press Weldon Color Lab Blue Moon Camera & Machine
Top Bottom