originalwinslow
Member
Greetings all, I have recently switched to using a narrow band RBG light for DSLR scanning. So far I have only done single capture with much improved results over 95 CRI, but I would like to utilize the capability of capturing individual RGB frames and compositing them so as to forgo use of any conversion software and get more "accurate" conversions. So far I have not had much success finding a step-by-step workflow that works. The closest would be this post by Alexi Machsas. It includes some confusing aspects of exporting linear TIFFs from RawTherapee that I don't quite understand so I skipped that step just to see what would happen.
I attempted following his other steps using just the raw files in PS, but did not have much success. Here are the steps outlined at the end of his rather lengthy piece found here:
https://medium.com/@alexi.maschas/color-negative-film-color-spaces-786e1d9903a4
In order to eliminate any gamma curve your RAW editor may apply to the image, you want to export a TIFF with “linear” gamma. The best way I’ve found to do this is to use RawTherapee and apply a “neutral” profile. If you’re comfortable with the command line, you can use dcraw to apply linear gamma with dcraw -g 0 0. You only want to adjust the gamma curve of the image after you’ve composited it, to account for the inherently low contrast in film negatives.
I realize this is rather niche, but surely there must be a way to layer and convert these properly. Does anyone have a workflow for this relatively new technique?
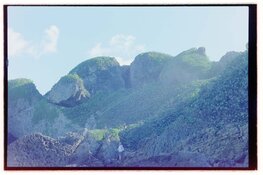
Moderator edit: for anyone who wants to give the conversion a go using the original source/RAW files, here they are:
photrio.com/share/TRI-1.NEF
photrio.com/share/TRI-2.NEF
photrio.com/share/TRI-3.NEF
I attempted following his other steps using just the raw files in PS, but did not have much success. Here are the steps outlined at the end of his rather lengthy piece found here:
https://medium.com/@alexi.maschas/color-negative-film-color-spaces-786e1d9903a4
In order to eliminate any gamma curve your RAW editor may apply to the image, you want to export a TIFF with “linear” gamma. The best way I’ve found to do this is to use RawTherapee and apply a “neutral” profile. If you’re comfortable with the command line, you can use dcraw to apply linear gamma with dcraw -g 0 0. You only want to adjust the gamma curve of the image after you’ve composited it, to account for the inherently low contrast in film negatives.
- Create a new document and set the background color to black.
- Paste each color channel image into your new document.
- Set the blend mode of each color channel to “lighten” in the layers panel.
- Add an “invert” adjustment layer.
- Add a curves adjustment layer and select auto-options -> snap neutral midtones.
- Add a channel mixer adjustment layer and reduce the amount of green and blue in the image until it looks correct. You can use an image with a grey card to calibrate these amounts.
I realize this is rather niche, but surely there must be a way to layer and convert these properly. Does anyone have a workflow for this relatively new technique?
Moderator edit: for anyone who wants to give the conversion a go using the original source/RAW files, here they are:
photrio.com/share/TRI-1.NEF
photrio.com/share/TRI-2.NEF
photrio.com/share/TRI-3.NEF
Attachments
Last edited by a moderator: