Rotary processing for roll film - streaking or uneven development more likely?

Genbaku Dome

D
Genbaku Dome

  • 1
  • 0
  • 11
City Park Pond

H
City Park Pond

  • 0
  • 1
  • 30
Icy Slough.jpg

H
Icy Slough.jpg

  • 1
  • 0
  • 33
Roses

A
Roses

  • 8
  • 0
  • 124
Rebel

A
Rebel

  • 6
  • 4
  • 137

Recent Classifieds

Forum statistics

Threads
197,497
Messages
2,759,963
Members
99,518
Latest member
addflo
Recent bookmarks
0

pentaxuser

Member
Joined
May 9, 2005
Messages
19,616
Location
Daventry, No
Format
35mm
This is intriguing.
I sort of do the opposite. I start the development step with 30 seconds of rotating and reversing continuous agitation, and then use hand agitation thereafter - 5 seconds every 30 seconds.
I wonder how we reconcile Bob Carnie's method of stopping streaking with yours. In terms of a way to stop streaking you can't both be right, can you? NB I use both your names for convenience and solely to identify both methods

Is there a difference with C41 colour films or for that matter with chromogenic that precludes the necessity, assuming it is a necessity, of any hand agitation anywhere in the cycle? I can't recall Ilford saying anything about the necessity or even the advisability of using a mixture of hand inversion and rotary for its chromogenic film on a "better to be safe" basis

Might the truth be that there is no reason for or statistical correlation with streaking problems with rotary processing?

pentaxuser
 

JWMster

Member
Joined
Jan 31, 2017
Messages
1,160
Location
Annapolis, MD
Format
Multi Format
Might the truth be that there is no reason for or statistical correlation with streaking problems with rotary processing?

pentaxuser

Given my post this morning, I want to detail my issue is grain - not streaking. I've not had an issue with streaking with rotary processiing. Early on, I think I had some surge marks, but I think a lot of people have that issue initially with ALL processing (including rotary) early on as well. On going issues? Nah. So I agree with you and tend to believe a Jobo or other rotary processor can help even out a LOT of errors. Is it essential? Absolutely not. But w/o scientific proof, I'm tending to believe rotary is excellent for everything.... BUT the development step may be one in which the operator may choose any number of options: 1) rotary at a variety of speed choices, 2) hand agitation via inversion, 3) stir stick (Paterson), 4) stand, semi-stand or intermittent agitation. Each variable in approach may produce different results. But as to pre-wet, washes and rinses, stop, fixer, hypoclear and wash steps.... I think the TEMP is more important than HOW you manage it. For me, I'm hoping I can keep with rotary for these steps. To be determined.
 

Steven Lee

Subscriber
Joined
Jul 10, 2022
Messages
1,398
Location
USA
Format
Medium Format
I wonder how we reconcile Bob Carnie's method of stopping streaking with yours. In terms of a way to stop streaking you can't both be right, can you?

Well... If that makes a difference, Carnie Bob is talking about sheet film, not roll film.
 

Sirius Glass

Subscriber
Joined
Jan 18, 2007
Messages
50,138
Location
Southern California
Format
Multi Format
Well... If that makes a difference, Carnie Bob is talking about sheet film, not roll film.

And to the point of discussion: When I was searching for sheet tank development, I tried the Jobo 3010 Expert Drum with a Jobo processor I got consistent, properly developed sheet film with C-41 color and black & white film that was not only streak free but superior and any of several tray and tanks that I had done previously. If there is any streaking with the Jobo Processor, then the streaking is an Operator Assisted Failure [OAF; OAF Usage: "The OAF did this." or The OAF did that."]
 

lenspeeper

Member
Joined
Dec 29, 2019
Messages
17
Location
Palm Desert, CA
Format
35mm RF
I'm late to this thread, but I'll put my oar in the water. I looked around for a rotary processor for a long time until I discxovered B's Processor. It is $165 and it works like a charm. It has multiple rotary agitation methods and works ver well. It is much cheaper than the alternatives out there unless you are determined to make it yourself.
See:
 

Attachments

  • Screenshot 2024-03-01 at 11.50.05 AM.png
    Screenshot 2024-03-01 at 11.50.05 AM.png
    1.1 MB · Views: 15
  • Steven Lee
  • Steven Lee
  • Deleted
  • Reason: unnecessary and argumentative

MattKing

Moderator
Moderator
Joined
Apr 24, 2005
Messages
51,951
Location
Delta, BC Canada
Format
Medium Format
I wonder how we reconcile Bob Carnie's method of stopping streaking with yours. In terms of a way to stop streaking you can't both be right, can you? NB I use both your names for convenience and solely to identify both methods

I don't have streaking issues with rotary agitation while developing.
I have issues with films moving in the reels with rotary agitation while developing. Those issues get in the way of developing two 120 films in the same reel, which I often do. So I've standardized on an alternative for all my developing.
If I didn't develop two 120 films in the same reel, I would be happy using rotary agitation for everything, because it has worked fine for me.
 

Melvin J Bramley

Subscriber
Joined
Dec 27, 2021
Messages
504
Location
Canada
Format
35mm
Just developed a roll of 35mm HP5 in a Paterson tank continual agitation on an old Sima roller one way agitation.
Works like a charm as unorthodox as it may seem.
I reduced the development time by 25% and at a rough guess the Sima rolled the tank at about 50 rpm.
I cannot remember why I talked myself out of using continual agitation some time back!
The film was developed in Ilford ID11 at 1:2.
Looked back at some old pics.
Ilford D100 developed in XTOL 1:3 constant agitation , wonderful results.
Why do we talk ourselves out of what works?
 

JWMster

Member
Joined
Jan 31, 2017
Messages
1,160
Location
Annapolis, MD
Format
Multi Format
Lenspeeper (et. al.): Great equipment. I've been loving the B's processor for a few months now, and find with consistent effort to tweak the application, it's giving me what I'm after.

Yesterday I shot 2 rolls of Delta 100 and then processed them in D23 Stock. D23 isn't exactly my go-to objective, but it was easy and lying around and a quick way to check my intended tweak in agitation (which was the purpose of the shots.... so I could run the test... and yeah, that's kind of backwards letting development drive the camera work? Sure, but it happens). My approach is now tweaked from using hand agitation simply at the beginning of the developer step to using it 100% for the developer step as follows:

1) Pre-wet: 2 baths. 1 minute each. The first I hand agitated to help remove whatever's on the film. Soft agitation a la Steve Schaub's video (pacing 2 smoothies in 5 seconds): Standard (Manual) Agitation
2) Developer - Pour in, Start clock, 30-seconds of CONSTANT (Gentle) Manual Agitation per technique in video link above. On EACH minute mark thereafter until done, 10 seconds (4 inversions) of the same.
3) Everything that follows rides the B's processor for agitation AFTER receiving 4 (Gentle) Manual Agitations: Post Developer Rinse, Stop, Rinse, Fix, Rinse, Hypoclear, Rinse X 6, and Wetting Agent before pulling out of the tank, adding a gentle Kimiwipe wipedown and hanging to dry.

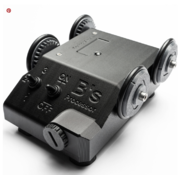
FWIW, I found the wobbly wheels didn't work all the well. And now given that I'm working the DEVELOPER step with hand agitation, they're kind of a moot point. Every step is ON the B's processor is run on the "3" (high speed) setting rather than the "1" - intermittent, or "2" intermediate. Great thing is that this is a pretty rugged piece of equipment. FWIW, I've used the extra thick rubberbands and ESPECIALLY the bracelet rubber bands you can find on Amazon to give a very nice, stable channel for the driving wheels to ride in. That was a problem for me initially, but that seemed a good cure. Benoit was working on an insulated tank for color as a pilot project, but that's probably still a few months out.... and may of course remain on the drawing board.

Benoit (the B of B's processors) prefers manual DEVELOPER inversions, and now I see what he means. Done GENTLY - and I think this is something as a former beginner, Rotary Processing gets you in the ballpark of the right speed, MANUAL inversion has tremendously reduced my grain and defects in the sky that need "removal" in Silverfast HDR. Much as I'd preferred 100% rotary processing, FROM NOW ON I'm going to use it ONLY on the processing steps that do not use DEVELOPER. The fact is the PIA of removing defects after a scan takes a lot longer than the collective time involved in hand agitation for DEVELOPER, and it's just easier. The grains bugaboos also bring out any irregularity in the film, and these are the sort I'm just not seeing in the 2 rolls from yesterday.

Key take-a-way is that this analog process has its fun parts and the not-so-fun. Removing scan defects is kind of the lowest of the low, the worst of the worst IMHO and leaves me wondering, "Why don't I just chuck it all, buy a Monochrome Pentax K3 or whatever and escape this?" or maybe go to a wet darkroom... if only I had the space or a local one (nearest is an hour of mean highway driving away). The problem with Digital B&W from a non-monochrome digital camera is that to my eye, it's the digital "fill-in" from the filter that kind of counteracts the "sharpness" with a smoothness that just looks too much like chocolate pudding. Much as I'm a slacker who LOVES chocolate pudding, it goes in my mouth - NOT on my eyeballs.

So with the grain addressed much more to my liking, now we can get back to the accutance and tonality issues using PC-512, XT3 and/or the Pyrocat HD ordered yesterday. That's a sweet step forward for me.
 

koraks

Moderator
Moderator
Joined
Nov 29, 2018
Messages
20,680
Location
Europe
Format
Multi Format
MANUAL inversion has tremendously reduced my grain and defects in the sky that need "removal" in Silverfast HDR

I'm surprised at the suggestion/experience that rotary processing would somehow create defects. I've never seen this. Do you have an illustration, perhaps?
 

JWMster

Member
Joined
Jan 31, 2017
Messages
1,160
Location
Annapolis, MD
Format
Multi Format
If it appears to you that I have somehow impuned the rotary processin in your mind, then let me 1) apologize and 2) clarify that I intended nothing of the kind. I run a hybrid process that seeks the best of both to help achieve the ends I seek. I'm pretty sure I'm not alone in a hybrid approach, but the suggestion appears to be made that I have impugned the rotary process rather than my own handling of a hybrid process. I didn't think or at least didn't intend that.

And yet it is true that I did not find that the rotary process cured all the ills of mankind and ALL photos ever made - but you're not suggesting that either. Much as it made a huge improvement in everything I did in a darkroom, it did not work complete magic for me. Importantly, Jobo never claimed that btw either. But it does fix and teach a lot that gets us down the road of building a consistent approach to development and that's a good thing. But it isn't going to work for stand development, or according to my Jobo book, even for certain non-stand processes, and it's not really aimed at super fine grain either. Much of the time we don't need that. And yes, there were many at one time who suggested it was primarily intended for C41, but others did find it was fine for B&W and E6. It's a wide world and folks will tend to push the envelopes.

But grain - which can also accentuate the appearance of certain "string like" defects that may or may not be part of the emulsion or some other part of analog - seems to be one of the things that rotary is not going to play a significant role in reducing and controling. Many don't care. When I struggled to just get solid images, I was one of those folks. Rotary did the job. But now that I've been at this some years, and seen a lot of photos others have shot, I know that I can do better than just a "Hey here it is" and try to craft a cleaner image. A little research later and one possibility is that maybe hand agitation of a very gentle smooth sort just might lead to a better result. And so I gave it a try, and am reporting I see what to my eyes are better results without going down some rabit hole to do this with rotary alone. I'm sure plenty could come up with a solution... I'm just taking a short cut... 'cause maybe I'm a slacker, idiot and whatever. My bottom line isn't to focus on proving rotary alone can do it all so much as I want to just get the sort of images I want to get. I don't expect this to satisfy the intellectual purity or system purity others might like, but because I'm a geezer, grumpy old guy, I'm just trying to focus more on the result than on the process.

I make notes on my process so I can repeat it when it works, and I share that just in case anyone else finds it useful. I thank you for thinking you could help, or that I was asking for help, but I wasn't. I don't have THE secret... whatever that is. I don't have a magic elixir - if there is one. I'm just a hobbyist type of guy trying to get this to work.... and for me, this is just another one small victory. There have been a lot of small ones along the way... usually so small it's impossible to make a deal out of them. But there have been lots of small and large defeats as well. It's all part of the experience.
 
  • Sirius Glass
  • Sirius Glass
  • Deleted
  • Reason: unnecessary and argumentative

koraks

Moderator
Moderator
Joined
Nov 29, 2018
Messages
20,680
Location
Europe
Format
Multi Format
If it appears to you that I have somehow impuned the rotary processin in your mind

It doesn't; my question is honest. I've done a lot of rotary and a lot of manual agitation and I'm genuinely curious as to the defects you've experienced. Especially so because you specifically mention defects in the skies (so even areas, I gather). I was just wondering what kind of defects you mean.

To elaborate: my own experience with rotary development is that it can create surge marks especially along the edges of film (both sheet and roll film), but that this is very dependent on the geometry of the reels used (e.g. 2509 vs. 2509N reels) and that presoaking can sometimes help (it does in my case). However, in my experience, these defects have always been limited to the very edges of the film.
 

JWMster

Member
Joined
Jan 31, 2017
Messages
1,160
Location
Annapolis, MD
Format
Multi Format
Ah....thank you for that message, your persistence and especially not taking offense - indeed, as I was somewhat affraid of a flame war. NOW I think I understand you better. Not sure PHOTRIO is set up for this, but I can go through my files and could then either send you a raw scan or upload to FLICKR with a link of an example. Raw scans are about 30MB out of Silverfast 9 AI. I then process in Silverfast HDR which tends to increase size, and then move them to DxO for some simple adjustments and FLICKR gets a quite small JPEG. But for what I'm seeing and believe I've resolved, I might be able to work the same to just output a JPEG of appropriate size that show the issues.

Initially to be fair, I thought it was dust or dirt. I don't think these are surge marks at all. I saw some of those years back and I think those are long gone. No these to me looked as though I forgot to clean the lens, the camera was full of dust, lint settled on the film or scanner or film holder.... etc. But a thoroughly clean - even digitally vaccuumed camera, film holder and scanner later, and these things are still there. It's the sort of string / thread looking things that I find most annoying, and these are the ones I wonder to some extent whether they're just part of the emulsion as they're really only visible on scanning.

Let me know by PM which way you'd like to receive a file and size limits and I'll be glad to send in the next day or so. Schedule's kind of full and I"m trying to be outside today if possible. But I will deliver.

Thanks!
 
Last edited:

koraks

Moderator
Moderator
Joined
Nov 29, 2018
Messages
20,680
Location
Europe
Format
Multi Format
Ok, thanks, I'm happy the misunderstanding has been cleared up. Sorry for not being clear about my intentions initially. Yeah, a Flickr link is good, or you could even just make a screenshot of an area of interest on your monitor (e.g. a 100% magnification view of part of an image in your favorite image editor/viewer) and then paste it into a post here on Photrio. It's really easy if you know how to make a screen capture. On Windows, press the Windows-Key, Shift and "s" at the same time, select the area you want to copy with the marquee tool that appears and then simply paste it into a reply on the forum. On MacOS, I understand the key combination is Shift-Cmd-4. Of course, PM is good, too, if you'd rather not share the snippet in public, although I can see the general utility of publicizing an example in this context. As far as I'm concerned, a small snippet that just shows the defect would be sufficient without the need to post the entire image if this is undesirable.
 

JWMster

Member
Joined
Jan 31, 2017
Messages
1,160
Location
Annapolis, MD
Format
Multi Format
Koraks:

Okay, I'm not proud. Have at it. These were all handheld - the Rolleiflex and the Mamiya RB67.

Here's a photo from some time back. Kind of without a lot of work that I'd do to fix it now. The defects in particular are in the sky and a fair amount right above the umbrella and horizon line.
The cure as I noted has been to dramatically reduce agitation - 1st by shifting to hand agitation along WITH rotary during development, and now the development step is pure hand agitation:

30-seconds initially with 2 inversions every 5 seconds. Then 4 inversions at the top of every subsequent minute.


1709520162473.png


And this second shot is one I took Friday at a now-condemned sad, sad building with a dark history where many black men and women were sent as mental cases for pretty flimsy reasons. This version is pretty much straight off the scanner, unadjusted. Neither RB67 version below has been into the post scanner process. And these were handheld as stated above.... WITH a squad car next to me. I'm not sure what it was there for.... and glad I didn't see anything going on.

1709521314278.png


This 2nd version is after the blackpoint and SRDx were run.

I'm still new to the RB67 running my first ever roll of Delta 100 in D23 Stock. I used to run D23 1:1 and usually prefer a different film. These were all scanned on an Espon V850 which I've slotted to replace the grinding LS8000 Nikon and relieve me from what for me was a dust enhanced DSLR scanning process.... happily abandoned (it was fast, and works for some, but not for me - and some others).


1709520809089.png
 

koraks

Moderator
Moderator
Joined
Nov 29, 2018
Messages
20,680
Location
Europe
Format
Multi Format
Thanks; to be honest, I mostly see some dust and some muck that might be out-of-focus fouling of the scanner platen or scale marks on the film. I'm referring to this bit here:
1709537234733.png


Yes, there's grain in your first image, but it's film, so there will be grain. What film did you use, here?

The second image seems to free from grain, but note that the sky is close to pure white, so grain (and also dust, smudging etc.) will be barely visible, if at all. If I take that image and reduce the brightness level of the sky to a similar grey tone as the sky in the first shot, I get this:
1709537556301.png

Similar issues with dust and graininess. It's exacerbated due to heavy posterization, but if we ignore that for a bit, the outcome is really quite similar.

To determine whether rotary agitation is really your problem (and I very much doubt it), you'd have to develop two frames of an identical scene to the same gamma/contrast with manual resp. rotary agitation and then scan side by side. My expectation is that you'll find that the same contrast on the negative will produce the same graininess in the scan.

Smudging and dust can be mitigated by an appropriate final wash procedure (e.g. demineralized water with a drop of photoflo; dry film in a dust-free area) and ensuring the scanner platen is clean (note that you have four glass faces to keep clean: two on the scanner bed and two on the transparency lid - top and bottom of each glass sheet!)

There's also the issue of how grain renders when film is scanned vs. optical enlargement; many people (including me) experience more graininess in scans than in equivalently-sized optical prints. But since I take it
you're scanning all your film on the same scanner, this is a variable that won't affect a comparison.

So, in short, I don't doubt the existence of the problem you're witnessing, but I honestly don't think it's caused by rotary agitation.
 

JWMster

Member
Joined
Jan 31, 2017
Messages
1,160
Location
Annapolis, MD
Format
Multi Format
Thanks for your comments.

The first film is Delta 400 and the latter 2 shots are Delta 100.

I don't know what "heavy posterization" means, but looked that up and given this has only been scanned, I'm a bit surprised to see that usage. Maybe.... 'cause like I said, the general def seems to be over-processing.

Otherwise I've used dry scans here and not tried a wet mount process but I do have Epson's wet mount for the machine and understand that the fluid can reduce this. Also, I've used Edwal LFN rather than Photoflo, and surely I could be more meticulous about cleaning the film, film holders and scanner with alcohol before scanning. FWIW, this stuff isn't visible to the naked eye, but I'll see if it can be controlled there. If not then maybe it's off to a fully digital process as I really don't have space for a wet darkroom.
 

koraks

Moderator
Moderator
Joined
Nov 29, 2018
Messages
20,680
Location
Europe
Format
Multi Format
The first film is Delta 400 and the latter 2 shots are Delta 100.

That also explains the difference in grain to a large extend. Delta 400 is just a lot grainier than 100.

I don't know what "heavy posterization" means

Coarse transitions between tonal values; this is not so much a problem in the version you showed, but in the snippet I edited to highlight the same problem as in the first shot. I had to drag the curves heavily in an to make a decent comparison with the other image, and in an 8-bit file, this results in posterization. Don't worry about it.

Wet scanning can sure make a difference; I've not tried it myself, but I know others have had good success limiting certain issues with this approach as well as optimizing resolution. I myself have always found the idea too messy to try it, and my emphasis is on wet printing anyway, so I'm a sloppy scanner (as a result of which I'm quite familiar with all manner of scanning issues!)
 

JWMster

Member
Joined
Jan 31, 2017
Messages
1,160
Location
Annapolis, MD
Format
Multi Format
Well... you're making a series of convincing cases for me: 1) Work harder on pre-scan clean up of the hardware and negs; 2) Wet scan for negs I'd print (I haven't really done much printing since I moved), and 3) As my time opens up (my work days cut to 3 a week beginning in June), do the drive to take a class in wet darkroom printing. Surely the class would teach a LOT about cleaning up the whole of this... even though I see plenty of folks whose scanned negatives have a LOT more artifacts than these. Anyway.... thanks for the input. The thing is the more I do this, the more I learn.

Just looked at your blog/website btw. You're doing carbon transfer AND color work? Wow. C41 has its issues (Portra) with balancing a scan for skin tones AND sky tones - basically "known" colors. Tough. Silverfast's recipes don't seem to quite get it done. Pretty similar issues with DSLR scans as well. I find E6 a bit better because you're aping the slide.... so the system seems to work better, and for my experience here on the Chesapeake Bay, the blue senisitivity seems to make our brackish water a more appealing blue "look". I kind of agree with your comment about accepting the color as film gives it and using that to its advantage. And in this water example in particular, it's even better than digital provides. I do a fair amount of digital shooting for my church's events, and can say as everyone's aware, getting color temp balance even from shot to shot is ALWAYS an issue. Easier with out tools and digital (Fuji) originals I think, but no panacea. With fair certainty, I'd say having worked these events for some years, I can pretty easily spot an iPhone photo from the over saturation, uncorrected colors.... these work in many situations or are "good enough" for "mom". But it's not work you'd be proud to offer others.

Your blog gives quite a bit of info - thanks! I see quite a bit to read up on here as I ordered a bottle of Pyrocat-HD to give it a go. I like one-shot developers because I don't have to clog recordkeeping or make time adjustments or anything and consistency in operation is a good thing.... not to mention handling 5 liters of STOCK chems in a cost effective ID11 batch is a bit of a container size issue I'm not real keen on. D23 and PC512 (Karl's formulation) have been my replacements for ID11.... but I've got a few boxes left of Perceptol and given I'm re-reading my Barry Thornton books, I might mix some of that too just for giggles. But generally before taking a hiatus back to digital for a while, I'd say I found sticking with one developer and just getting it done.... works for me MOST of the time. Yes, I have some Diafine to play with when I want to push film up the ISO curve.... but that's just to do B&W instead of digital and more of a thought bubble than something I've done at this point. There is only so much time!!!

I'm mixing TF3 Fixer and Citric Acid Stop myself just 'cause it seems kind of cheap and easy, too. Stop is mostly one or two shot and the TF3 gets the usual usage rules, but it's good to have access to this stuff and not have to worry about shipping schedules. But all this isn't a pursuit in its own right in my case though I admire and try to utilize the reports of those who do like to tinker - especially with Tetenal and Kodak chems kind of wonky in availability and Adox still struggling with capacity/volume replacements. For me... this is first and foremost really just a means to a photo. Easy to get lost in process.... and there are so many appealing ones... I guess that's part of it all. I admire those working with digital negs and alt process printing, and I'd love nothing better than to have the time to push in that direction, too. I've done some Piezographic prints, but even John Cone's gone kind of heavy into alt processes, too these days. But when I think about that.... I have to admit that cyano looks the easiest to place to start, but I really prefer carbon and non-cyanotypes like you're doing as much closer to what I expect in a photo print of some type. One day.... yes, perhaps. For now, I've my hands full trying to get control of the steps using MF and 35mm before cranking out my 4X5 again. I've got a LOT of film on hand, and I came back to this to use it.... 'cause why not?

Thanks for all you're doing here and on your blog - for sharing.
 
Last edited:

JWMster

Member
Joined
Jan 31, 2017
Messages
1,160
Location
Annapolis, MD
Format
Multi Format
FWIW, C41 and E6 scans just don't really have the B&W artifacts issue. I guess that's 'cause the process inherently cleans things up. Steve Schaub once suggested using Ilford XP2 take advantage of this. He's only rarely shooting 4X5.... so I guess that works. But if you're like many of us and hoping to reduce the variables by using one film across formats, that's not really an option. And C41 chem kits tend to be kind of pricey, but given I read you're making your own so that DOES put you in another category where the economics might work.

Thanks again for the rest. Yes, my extended slide into retirement is beginning to look better and better.


PS: Some very useful approaches to cleaning dust and scratches here - refining my SRDx and adding Photoshop cleaning techs (which will be a new add for me): Nick Carver on Scan and Dust/Scratch removal. With these plus the pre-scan dust management, I just might get where I'm trying to go with the less pain and suffering.
 
Last edited:
Photrio.com contains affiliate links to products. We may receive a commission for purchases made through these links.
To read our full affiliate disclosure statement please click Here.

PHOTRIO PARTNERS EQUALLY FUNDING OUR COMMUNITY:


Ilford ADOX Freestyle Photographic Stearman Press Weldon Color Lab Blue Moon Camera & Machine
Top Bottom