Rockland Colloid - Should I bother?

3 Columns

A
3 Columns

  • 5
  • 6
  • 75
Couples

A
Couples

  • 4
  • 0
  • 81
Exhibition Card

A
Exhibition Card

  • 6
  • 4
  • 120
Flying Lady

A
Flying Lady

  • 6
  • 2
  • 131

Recent Classifieds

Forum statistics

Threads
199,046
Messages
2,785,344
Members
99,790
Latest member
EBlz568
Recent bookmarks
1

M Carter

Member
Joined
Jan 23, 2013
Messages
2,147
Location
Dallas, TX
Format
Medium Format
I haven't done plate work, but I'll toss in that I really love the Foma liquid emulsion (for those using Liquid light, etc).

I heat it in a stainless film tank in warm water. Doesn't fog with my superbright-brand LED safelights. it's about a contrast grade 3 or so though. Gorgeous stuff.

I dry it in a darkroom closet with a fan on the floor. I've done it on canvas up to about 15x22". Funny, I got the 1 kilo bottle of it and then it took me two YEARS to get around to trying it. Kept in the fridge it's still 100% perfect. Expensive ($120 a kilo, which is shy of a quart), but you get a lot of emulsion for the money.
 

hoffy

Member
Joined
Jan 21, 2009
Messages
3,073
Location
Adelaide, Au
Format
Multi Format
I'm coating my first plates tonight. I can't wait.

Pictures or it didn't happen! :D

I think it might be a totally different experience coating plates in NY as opposed to little old Adelaide, Australia. Currently its 110F (44C) here. I probably wouldn't need to do anything different to heat the emulsion....
 

MrBrowning

Member
Joined
Aug 21, 2013
Messages
681
Location
Upstate NY
Format
Multi Format
Pictures or it didn't happen! :D

I think it might be a totally different experience coating plates in NY as opposed to little old Adelaide, Australia. Currently its 110F (44C) here. I probably wouldn't need to do anything different to heat the emulsion....

Coating the plate wasnot nearly as easy as I had hoped. 3 plates look like they went through hell and the other 5 don't look nearly as bad (still not that good though ). I bought the bulk kit figuring it would give me more practice. Anyways its 30F outside and I'm glad I'm inside. How I miss summer.
 

removed account4

Subscriber
Joined
Jun 21, 2003
Messages
29,832
Format
Hybrid
you 2 are on a roll !

it gets easier every time you do it ...

good luck and have fun !

- john
 

hoffy

Member
Joined
Jan 21, 2009
Messages
3,073
Location
Adelaide, Au
Format
Multi Format
Hi Folks,

Thought I would dig back into this one again.

So, I have been slack. The kit is still sitting on the shelf at home, so I better use it before the dev goes off!

I was thinking of coating this week, to shoot some plates on Sunday morning. There is one issue - its going to be around 100F on Sunday. Has anyone used these kits in high ambient temps? If I go it when its so hot, am I going to experience issues?

Also, with the coating, the kit suggests using a nail or foam spreader to spread out the emulsion. Is it really necessary if everything is hot enough?

Cheers

EDIT. BTW, I don't know why I never found this review in the past, but I just stumbled across this review:

https://www.flickr.com/groups/moderntintype/discuss/72157638558393163/

Posted for others to reference!
 
Last edited:
OP
OP
bvy

bvy

Member
Joined
Jul 22, 2009
Messages
3,285
Location
Pittsburgh
Format
Multi Format
You're actually better off coating the plates in high ambient temperatures, as the emulsion is quicker to set at more comfortable room temperatures. In higher temps, you have more time to move and manipulate the emulsion until you get it coated how you want. Either way, it's tricky and it's messy, and you'll have to find a way that works for you. I'm pretty sure everyone's doing something a little different to get their plates coated. That's part of what makes them so unique in the hands of different photographers.

You'll want to dry the plates somewhere cool and dry though.
 

Lench

Member
Joined
Jan 4, 2013
Messages
20
Format
Medium Format
Hi all,
I'm in the same situation as hoffy, my box has been sitting on a shelf unloved for the better part of 6 months now (I was hoping to have an 8x10 camera by now, but there are a few too many financial hurdles)
Has anyone here tried enlarging using slide film? (Thinking provia 100f in this case)
I can't seem to find any examples of this being done
 

removed account4

Subscriber
Joined
Jun 21, 2003
Messages
29,832
Format
Hybrid
hoffy,

i don't have experience using plates in HOT weather. it usually isn't that hot when i use them.
maybe ( going out on a limb here ) just in case, get a cooler after they have been dried and ready to use
put them in there ( in your film holders ) and expose them 1 at a time and put them back in the cooler
to keep them cold / cool. i'd be worried they will get tacky and gooy if left in heat for too long and be hard to
remove from your holders !
coating them .. use any way that works :smile: with the tintypes you want a really thin coat if the emulsion is
fresh and full of silver like the stuff included in the kit ( ag+ ) but more coats if it is extremely unresponsive
to light, dull, and old and not like the kit ( vc or olde liquid light ) -- before i started hand pouring, i used a
foamy brush. kind of bubbly, and streaky but it worked -- if you like that sort of look.
fingers and nails souds fun !
==

lench: while i use in a camera these days,
i mostly enlarged / printed on dry plates - some really large ( bigger than 8x10 ) some really small
( 2x3ish or smaller ). it works in under the enlarger, like slow photo paper. coat a piece of paper for your
test strips at the time you coat your glass so you can get better idea about your exposures.
i never used slide film, just regular old black and white.
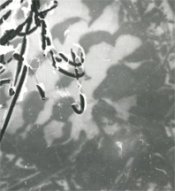
i wish i had more examples to post but most of what i did on glass is from the 1980s, is printed on both
sides, was never scanned, or suffered a terrible fate. this one was is a clipping of something from enlarged
35mm ( maybe tmy ) onto a tiny plate which was then enlarged 16x20 onto b/w paper.
 

Attachments

  • Untitled-1.jpg
    Untitled-1.jpg
    12.8 KB · Views: 217
OP
OP
bvy

bvy

Member
Joined
Jul 22, 2009
Messages
3,285
Location
Pittsburgh
Format
Multi Format
Apparently Rockland has changed the thickness and surface of their plates so they're easier to cut and hold the emulsion better. They've also put everything on sale at 20% off. Just FYI. I got an e-mail about this.
 

removed account4

Subscriber
Joined
Jun 21, 2003
Messages
29,832
Format
Hybrid
hey again hoffy !

bvy prompted me to get on the rockland colloid mailing list and while i was exchanging emails with them
trying to figure out how to sign up, i asked about your 100ºF situation :smile:
he agreed with the cooler idea i suggested :smile:

happy plating !
john
 

DonF

Member
Joined
Jul 19, 2016
Messages
285
Location
Saint Charles, Il
Format
Large Format
I'm a new member.

My daughter got interested in the tintype process when having her portrait taken at a studio in Gettysburg. She asked me if there was a way we could experiment safely with the process. She had never done any traditional darkroom work. Being an old guy who used to have a pretty good darkroom, even making holograms at one point, I told her I thought we could manage it. The Rockland kit seemed just right. I bought an old large format Brownie Model 3 Type B camera on Ebay for $7.00 and the Rockland bulk kit. We had surprising good results with the Brownie, although proper portraits were not possible with the fixed focus lens.

Brownie shots:

jenbrownie1.JPG
jenbrownie2.JPG
jenbrownie3.JPG


We were so encouraged, I bought an old Graflex Graphic View II camera with a 210mm lens on Ebay, from the early 60s/late 50s. It was all in great condition. I had to tear the shutter apart and clean it, but all good after that. I modified a few film holders to hold a tintype plate cut the same size as a sheet of standard 4x5 sheet film. The Trophy Supply place that sells the stock is just a few miles from work. They had 110 plates ready for me an hour after my phone call. Great service.

Graflex view camera:

view1.JPG
view2.JPG


We are still honing in on our plate pouring technique. We originally had lots of issues with the "white" portions of the plate drying to a very grainy finish. We tried heating the plate, heating the emulsion to various temperatures, even placing the poured plate on heating pad for a few minutes to see if we got better adhesion/coverage. It turned out that we were making the emulsion too thin. Best results were with the emulsion heated in a water bath of 110 degrees F, poured onto room temperature "trophy supply" plates (not Rockland's - much too thin and cut from roll stock, so curved). Instead of the heating pad, we placed the poured plates on a cold pizza stone, which sets up the emulsion in a minute or so. The coating was somewhat thicker with this technique, with fewer voids and bubbles. The plates had a nice even grayish cast from the emulsion. Thanks to those who recommended this technique, it does work well.

I also figured out the "secret" developer formula from the Rockland MDS sheets and mixing instructions. I ordered the chemicals from B&H - long lead times, but much cheaper and works the same - it is the same!

Sample shots from Graflex:

flaps.jpg
jandm1.JPG
jandm2.JPG


Don
 

Theo Sulphate

Member
Joined
Jul 3, 2014
Messages
6,489
Location
Gig Harbor
Format
Multi Format
I'm a new member.
...

Welcome to APUG, Don.

Your results are very good and highly encouraging. I've yet to try the process myself, but from what I've seen this is very appealing and satisfying.
 
OP
OP
bvy

bvy

Member
Joined
Jul 22, 2009
Messages
3,285
Location
Pittsburgh
Format
Multi Format
Congratulations! Are you using some sort of applicator to apply the emulsion? Or do you pour it on and tilt the plate to distribute it? My experience with the latter is that it's very messy and leads to a lot of waste. Curious to hear more!
 

DonF

Member
Joined
Jul 19, 2016
Messages
285
Location
Saint Charles, Il
Format
Large Format
The sample pictures are from our sub-standard pours. I don't have any scans from the improved batch yet, but the emulsion dries to a more even, smooth finish with the technique that I mentioned.

My daughter and I tried using glass rods, kitchen spatulas, plastic putty knives to spread the AG Plus.....What worked best was a gloved fingertip. I was in charge of keeping the emulsion the correct temp and transferring the plates from cold pizza slab to the cookie racks for drying. She did the pours. After melting the emulsion in the bottle in a large beaker of 110 degree water, I decanted about 1/2 inch into a very small beaker (shot glass size) with a nice spout. My daughter poured a standard-sized puddle (lol) into the center of the place and just squiggled the stuff all over the plate evenly with a finger tip. She poured off the excess from one corner back into the beaker, back-tilted the plate to even the emulsion and placed on the cold stone to set up. After a minute I transferred to the cookie racks. I dunked the beaker into the same water bath as the main emulsion bottle to keep it warm, then wiped the bottom free from water before handing it to her for the next pour. We had a good rhythm going. We had almost zero spillage and waste with this method. It was important not to pour off too much emulsion to get a nice even grayish coat, BTW.

Best,

Don
 
Last edited:

DonF

Member
Joined
Jul 19, 2016
Messages
285
Location
Saint Charles, Il
Format
Large Format
A few other pictures of mixing the developer, a portion of the stuff we needed to get started and a few more sample images. The first is from the Brownie, the second from the Graflex:

mixing.JPG
supplies.JPG
manandbear.JPG
dangerous.jpg
 

removed account4

Subscriber
Joined
Jun 21, 2003
Messages
29,832
Format
Hybrid
great to see another person making these plates !
while i haven' t used trophy aluminum i have friends who have
but they had trouble getting adhesion, did you treat the aluminium with something
prior to application of the emulsion ?

welcome to apug !
 

DonF

Member
Joined
Jul 19, 2016
Messages
285
Location
Saint Charles, Il
Format
Large Format
We haven't noticed much of a difference between the trophy plates and Rockland plates as far as adhesion is concerned. Rockland's appears to be anodized aluminum, black on both sides. Supposedly, there is a "good"side to use, but the newer plates don't have that indicated on the package. There is a slight bow to the plates as they are VERY thin. This caused problems with the pours, as the emulsion would run to the edges unless the plates were flattened first. If you examine the Rockland plates carefully, you can see fine streaks running in the same direction of the plate curve from whatever rolling/cutting process is used to make them.

The plates from Main Trophy Supply are mirror-smooth black when the protective coat is peeled off. The opposite side is plain metallic aluminum. They are absolutely flat, .025 inches thick. The thicker pour with the temperature adjustments I mentioned seems to have solved most of the adhesion issues.

If the emulsion is too thin, when the plate is transferred into the hardening fixer, the emulsion shrinks slightly as it hardens. Weak spots in the emulsion can form holes or voids in the image while you watch. Disappointing to see a great image emerge from the developer, then see it degrade before your eyes in the fixer.

Keeping the temperature of the rinse water at room temperature, same as the developer and fixer seems to help minimize emulsion shifting. The emulsion is REALLY soft in the developer. You cannot touch it at all without pushing the image off the plate. Gentle constant agitation works best. The developer turns muddy brown and loses the ammonia smell when it is depleted. I can get 3-4 plates from a small developer tray half filled with working developer - a tray just slightly larger than the plate itself.

Don
 

DonF

Member
Joined
Jul 19, 2016
Messages
285
Location
Saint Charles, Il
Format
Large Format
One thing I discovered today while cleaning and re-greasing the rack and pinion focusing mechanisms on the Graflex. The aluminum lens hood had a Wratten "haze" filter in it! I wonder if this is why we were seeing longer exposure times with the new Graflex than I would have expected. The haze filter filters out UV light, I believe, which the AG Plus emulsion is most sensitive to.

I removed that filter. Shooting more this Friday, weather permitting.

Don

filter.JPG
 
Last edited:

Prof_Pixel

Member
Joined
Feb 17, 2012
Messages
1,917
Location
Penfield, NY
Format
35mm
Don, It looks like you and your daughter are really getting in to making tintypes, which is great! You might want to consider taking a class at the George Eastman Museum https://www.eastman.org/events/Workshops

They are doing a tintype workshop this week which was sold out and the next one won't be until next year (unless you set up a private tutorial). They should post next year's schedule soon.
 

DonF

Member
Joined
Jul 19, 2016
Messages
285
Location
Saint Charles, Il
Format
Large Format
Here is one of my vintage Alkon 4x5 film holders, modified for dry tintype plates (would probably work for wet plate too). I had the Main Trophy Supply tintype sheets cut to 3 15/16 x 4 15/16, about the size of a standard 4x5 sheet of film. At .025 inch thick, the plates could not easily be slid into the film slots on an unmodified holder, even after prying up the retainers slightly with a chisel. Either the dark slide or the plate were nearly impossible to remove - no sweet spot.

The septum of the Alkon holders is actually made of two thin back-to-back aluminum sheets. I cut a slot in each sheet and pulled out the septum pieces with a pair of pliers. The remaining slots where the septum sheets fit were perfectly positioned for using two-part epoxy to glue in corners cut from the tintype metal plates. The corners measured 1.5 cm/side. I painted the corners with matte black craft acrylic paint. The corners support a full size 4x5 plate inserted from one side and held in place by a dark slide and "spring" cut from a yogurt container. There is no masking of the 4x5 plate - the full surface is available for exposure. The plates are easy to insert and remove.

A slight tweak of the focus toward the lens after optimal focusing brings the plate into the correct focus point, as it is offset back by about .025 inches (the thickness of the corners).

Best,

Don

plate1.JPG
plate2.JPG
plate3.JPG
plate4.JPG
plate5.JPG
plate6.JPG
plate7.JPG
plate8.JPG
plate9.JPG
 

M Carter

Member
Joined
Jan 23, 2013
Messages
2,147
Location
Dallas, TX
Format
Medium Format
A few other pictures of mixing the developer, a portion of the stuff we needed to get started and a few more sample images. The first is from the Brownie, the second from the Graflex:

I really love that you're doing this with your daughter. Years ago, I'd set up a softbox strobe and a d*g8tal camera when I went to bed. Taught my kids to do stop-motion and claymation. I'd wake up to some pretty funny videos.

My son is 24 now and an animator for a studio that supplies Adult Swim with content. He also is getting work from a national photo rep and just had a "vimeo pick of the day". I think he billed about $6k last month, the little bastard!!! (Every month ain't like that of course!). He's also a really great person and funny as hell.

So you never know what comes of things...

 
Photrio.com contains affiliate links to products. We may receive a commission for purchases made through these links.
To read our full affiliate disclosure statement please click Here.

PHOTRIO PARTNERS EQUALLY FUNDING OUR COMMUNITY:


Ilford ADOX Freestyle Photographic Stearman Press Weldon Color Lab Blue Moon Camera & Machine
Top Bottom