Recreating a Real Photo Postcard - a diary

Brentwood Kebab!

A
Brentwood Kebab!

  • 0
  • 0
  • 46
Summer Lady

A
Summer Lady

  • 0
  • 0
  • 51
DINO Acting Up !

A
DINO Acting Up !

  • 0
  • 0
  • 31
What Have They Seen?

A
What Have They Seen?

  • 0
  • 0
  • 44
Lady With Attitude !

A
Lady With Attitude !

  • 0
  • 0
  • 42

Recent Classifieds

Forum statistics

Threads
198,764
Messages
2,780,582
Members
99,700
Latest member
Harryyang
Recent bookmarks
0

mshchem

Subscriber
Joined
Nov 26, 2007
Messages
14,634
Location
Iowa City, Iowa USA
Format
Medium Format
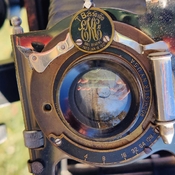
Doh.... I had forgotten that this lens aperture is marked in "American" scale or some such thing, not the "European" fstop system I'm used to. So... I thought I shot those focus shots with F4, since it was a 4 on the lens... but no... a 4 on this cam is really F8. So I'm gonna have to tape a little cheat sheet somewhere on the camera to remember how to convert those.

This is great, I heartily approve. You've gone off the same deep end I did 40 years ago. We ended up using a letter press with zinc "die cuts" copies of old postcard backs, for the back print. Lettering was usually finding an old engineer or draftsman who would letter onto the negative, used 5x7 sheet film cut/or masked for contact prints or 4x5 used for enlarging.

I think a lot of the sharpest main street and depot shots were done using glass plates or sheet film. Some of these cards are simply amazing, the level of detail and how much information is stunning.

Stay with it and keep posting.
 
OP
OP

bud007

Member
Joined
Sep 23, 2024
Messages
62
Location
Chicago
Format
Medium Format
I measured the focal length and came up with a bit over 170mm (176 to be exact), but I found a few resources online that had is as 170mm, so I would guess that's correct. That produces this depth of field for this 3A:

170mm focal length lens

(US16) f16 (hyperfocal 198 feet)
9.5 -> 10 feet <- 10.5
22 -> 25 feet <- 28
40 -> 50 feet<- 67

(US32) f22 (hyperfocal 140 feet)
9.4 -> 10 feet<- 10.7
21 -> 25 feet<- 30
37 -> 50 feet<- 77

(US64) f32 (hyperfocal 99 feet)
9.1 -> 10 feet<- 11
20 -> 25 feet<- 33
33 -> 50 feet<- 100


(US128) f45(hyperfocal 70 feet)
8.8 -> 10 feet<- 11.6
19 -> 25 feet<- 38
29 -> 50 feet<- 171

So quite a bit more shallow than I was (naively) expecting. Shooting with this thing is gonna be a sloooow process with all the allowances and considerations... gonna have to plan it out on paper with a checklist or some such thing.
 
OP
OP

bud007

Member
Joined
Sep 23, 2024
Messages
62
Location
Chicago
Format
Medium Format
Ah... The "U.S." system...
US 16 = f/16, use that as a basis for determining the other aperture settings, since they are marked in one f-stop increments.
For example: US 16 = f/16, open up one marked stop = f/11, and you can ignore the US number.

This is helpful - so just start at 16 and ignore the markings as it's simply the "standard" fstop stepping up and down from there that I would be used to. I should be able to manage that.
 
OP
OP

bud007

Member
Joined
Sep 23, 2024
Messages
62
Location
Chicago
Format
Medium Format
Just thought I'd leave some breadcrumbs to whoever may find this thread down the road... I've seen this discussed quite a few places over the years, but couldn't find where anybody had actually documented the answer. Here's the math I worked out on winding 120 film in a Kodak 3A ... I've verified the number of half turns to get to the first exposure and it matches this math, but I haven't tested this winding pattern yet with an actual roll of film... but it's what I would use if I were to do another test roll. So the math predicts a pattern of 17 to first, then 7 to the 2nd, then 6 to the 3rd, then 6 to the 4th, then 5 to the 5th, then you probably only have a partial frame left, so do a 6th shot if you want, then wind out to the end - about 14 turns.

I think only 5 shots probably, maybe 6 if your brand of film runs generous. If you try to use a simple rule, such as... just always turn 7 between shots... then you're likely to only get 4 shots. Just 6 between shots looks like it would overlap shot 1 and 2. So about as simple as it would get would be to do 7 on shot one, and then 6 thereafter... that'll get you 5 shots, and simplify a little.


Kodak-3A-WindingStart.jpg


Math is attached in a pdf chart. Here's a bit of a screen shot of what it looks like:


Screenshot 2024-10-14 132832.png
 

Attachments

  • Kodak3aWindingPattern.pdf
    31.3 KB · Views: 26

BrianShaw

Member
Joined
Nov 30, 2005
Messages
16,523
Location
La-la-land
Format
Multi Format
To determine and verify the wind count, I used a pencil to mark an old 120 backing paper…

Empirical analysis was much easier for me than mathematical calculations.
 

MattKing

Moderator
Moderator
Joined
Apr 24, 2005
Messages
52,880
Location
Delta, BC Canada
Format
Medium Format
I'm following this thread with interest.
I have an old Airequipt contact printer and a deckle-edge cutter, litho film and India ink!

Looks to be the exact same type as the contact printer I started with!
And Airequipt rings a bell as well!
 

MattKing

Moderator
Moderator
Joined
Apr 24, 2005
Messages
52,880
Location
Delta, BC Canada
Format
Medium Format
Do any of the characters show through a back window?
I ask, because with my 616 camera I was able to put together a frame count "map" by referencing the sequence of characters with appropriate stop points.
Something like: "1 is the first dot after the number 1, 2 is the beginning of the first "Kodak" after the number 3 ......"
 
OP
OP

bud007

Member
Joined
Sep 23, 2024
Messages
62
Location
Chicago
Format
Medium Format
To determine and verify the wind count, I used a pencil to mark an old 120 backing paper…

Empirical analysis was much easier for me than mathematical calculations

I think this idea only works up to the point where the film stock hits the take-up real... because the backer plus the film stock is thicker, so that changes the dimensions on the take up spool and hence the amount that gets wound. So just winding backer works to verify how to get the first exposure positioned (which I did to check my math).
 
OP
OP

bud007

Member
Joined
Sep 23, 2024
Messages
62
Location
Chicago
Format
Medium Format
Do any of the characters show through a back window?
I ask, because with my 616 camera I was able to put together a frame count "map" by referencing the sequence of characters with appropriate stop points.
Something like: "1 is the first dot after the number 1, 2 is the beginning of the first "Kodak" after the number 3 ......"

Good idea... looks like the red window only catches the top couple of millimeters of a 120 roll. Good for light leaks, but bad for seeing any numbers :smile:
 
OP
OP

bud007

Member
Joined
Sep 23, 2024
Messages
62
Location
Chicago
Format
Medium Format
For my first test with cut film, I've got a size of 6" x 3.75" loaded up. That sits nicely between the rollers and camera frame in a way that it can't really move around much. I used a piece of matte black cardboard of the same size as a "backer" in an attempt to keep it snuggly in place. I've got some ortho film on order, so for now, I just cut up a piece of some old 8x10" Kodak Pan (ISO 125). I did the cutting and loading in a changing bag... everything just fit in there... paper slicer, camera, box of film, etc. That changing bag cutting process seems like it would work for a handful of shots. I certainly could cut multiple sheets to size in one session also (two for every 8x10) and just store them in the film box... then I wouldn't have to have that paper slicer in the changing bag to work around. Sounds like I should be able to comfortably use a safelight with the ortho film.

Since I'm using an odd film size, I have to go back to the drawing board on a developing reel for the Jobo - the one I had ready was for 122 sized cut sheet. But the camera's loaded and waiting.

I have to head out of town for a week tomorrow, so there will be a bit of a lull on progress until I return.
 

BrianShaw

Member
Joined
Nov 30, 2005
Messages
16,523
Location
La-la-land
Format
Multi Format
I think this idea only works up to the point where the film stock hits the take-up real... because the backer plus the film stock is thicker, so that changes the dimensions on the take up spool and hence the amount that gets wound. So just winding backer works to verify how to get the first exposure positioned (which I did to check my math).

In practice, it worked quite well for both first image and those following. But if one wants to be more precise using both backing paper and film would give that additional detail.

I commend you on the mathematical approach and will look at it to compare to my empirical approach.
 
OP
OP

bud007

Member
Joined
Sep 23, 2024
Messages
62
Location
Chicago
Format
Medium Format
First full size negative update...

Now that I had settled on a 3.75" x 6" cut size for the negative, I needed something for my Jobo that would handle that. I did two - a single sheet horizontal reel, and a two sheet vertical reel. The smallest Jobo that either one will fit in is a 1540. Doing the math on minimum developer needed, minimum volume needed, etc.... the two sheet reel is a pretty good match for a 1540, whereas a single sheet of this size is a bit wasteful. I did a 3:1 dilution of D76 as a starting point, 470ml liquid volume in total.. I just did a single sheet for this first test, not really knowing what I was going to find. (Ignore the fact that this Jobo extension piece in the pic says 1530... if you know Jobo you know the 1530 extension bit and the 1540 extension bit are identical, except for the volumes printed on the side).
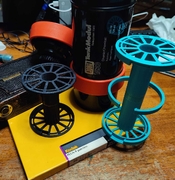
k3aJobo1540.jpg

As I mentioned in an earlier post, I had some old Plus-X pan sheets that I cut down for testing. 125 ASA. It was bright and sunny today, and I ventured out around 3pm in the afternoon and choose an old church that was well lit by the sun. I went two stops down from 16... to what was marked as American 64, which I translate to F32 and a shutter speed of 1/25 to go with that. Set focus to 100 feet.
k3aEV.jpg k3aFocus.jpg
Composition was kinda hard. I was on a tripod and that helped, but the "viewfinder" is just a little 45 degree angled mirror you look through and it's a tiny image. Confirming level was difficult, so I'm thinking I may want to take a level with me next time, or see if I don't have a better tripod head somewhere with a level on it. I was aware I can't really fix the crop in post processing like I'm used to (e.g. I'm full frame contacting printing this). Actually taking the picture was super anti-climatic after all the adjusting and maneuvering of the tripod.... just a tiny little click, barely audible.

Back home, I loaded the horizontal single shot reel without much difficulty - film had a little more play in it than I would like, so might tweak that if I reprint the reel (3D printer). 13 minutes of D76 3:1 totaling 470ml in a Jobo 1540 CPE2. Happy to see I had an image when I popped the tank. This at least will give me something to test the printing side of this little project while I continue to work on exposure and development.

k3aDrying.jpg


I'll let it hang to dry overnight (that ridge on the bottom of the hanging neg is water) and then inspect it and comment more about it tomorrow. I took a snap with my phone of the same church from the same spot also and I'm kinda interested to compare the two and learn a bit more about how to compose with this thing. I'd like to see a little clearer base on the negative, but it's old film so maybe that's a factor.

In parallel with all the above, I came across some bargain Ortho film:
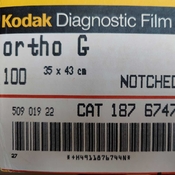
k3aOrtho.jpg

It was suggested a few posts back that Ortho film might be a better modern match to film used in 1908, so I wanted to experiment with that idea. I've not been able to find much about this particular film, so I cut a 120 sized strip and tried to roll it up with some used backer. This film is really thick and I got a little too greedy, trying to roll maybe 8 6x6 shots of it onto a roll... it was a bit oversized when I was done, but I got it loaded up in my Hassy. Took some shots as ASA 1, 5, 10, 25... trying to figure out what speed to shoot this. Developed it in D76 1:1 12 minutes. Top and bottom third of the film was badly fogged and I could see some faint impressions of text from the backing paper, so I'm sure the fogging was from the roll being too fat and spilling out of the backing paper and reel. However, I could see in the center a bit of my test charts, and based on that, I think this stuff is a really low ASA - like 1 or 2. I think I'll try a cut sheet of it in the Kodak 3A at ASA 1 and see what happens. Gonna have to get me a baby snot thing as was suggested earlier to rig up a remote shutter, cause I think ASA 1 on this camera is going to demand some long exposures.
 

Don_ih

Member
Joined
Jan 24, 2021
Messages
7,727
Location
Ontario
Format
35mm RF
Personally I would stick to modern sheet film , like your Plus-x, maybe a Foma 100 speed

I'd use that over the diagnostic film - particularly if I was using a reel in a Jobo to develop. I like ortho film so I can develop it in a tray under a safelight.
 
OP
OP

bud007

Member
Joined
Sep 23, 2024
Messages
62
Location
Chicago
Format
Medium Format
Here's a "scan" (DSLR shot of negative on a light table) of the negative - no retouching except adjusting black and white point.

K3aFirstNeg.jpg

While there certainly could be some thing introduced by the "scan" (glare/reflection etc.), the issues I see are present in the actual negative when I loop it.

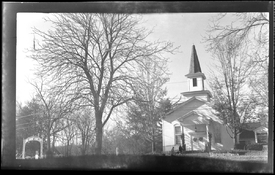
1) Emulsion got scratched off in the upper left hand quadrant - you can see a vertical streak that's obviously kina outa place (not part of the tree). I'll assume maybe this happen when I was wrangling the film in a dark changing bag onto the cutter, though I'm open to the idea that maybe the baffle folds in on the negative in that spot and rubbed it the wrong way. I'll need to be more careful and we'll see if it reappears or moves around in subsequent test images.

2) What's the weird unexposed arc on the bottom? There's also a slight bit on the top of the image. Brainstorming... film flatness? There's just not that much room for the film to bow as much as it would appear it did. Rise/Fall/Tilt issue? The lens as some limited ability to rise/fall and to rotate left/right... I tried to have those both centered, but there's no real indication in the mechanics of this to know where center is, other than to eyeball it. Development issue? Could my custom reel have somehow blocked development? If so, I'd think it would be more random and less of a perfect arc. Something inadvertently in front of the lens? Seems unlikely, but I did have to hand trigger the shutter. My negative is sized so that it lays and contacts the top and bottom of the exposure frame... maybe the camera back "pressure" is pushing the negative into the exposure frame a little bit?

3) Mottling of the area outside the exposure frame. It's twenty year old film, so there's that variable. I think maybe next test shot, since I can develop two sheets at a time, I'll through in an unexposed piece and see what it looks like. I might also put black tape around the seal of the back when I load the cut sheet, just in case there's some light leakage through the back.

Despite all of the above, I feel pretty positive now about this whole thing working out. If I honestly look at the historical postcards we have, I can probably spot plenty of issues in them as well (composition/scratches/etc.) Being non-perfect kinda goes with the territory here. But I'm going to keep trying to fix what I can... just not going to let it get me down.

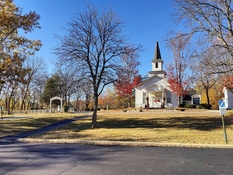
For reference, here's a cell phone shot (28mm 35 equivalent) from the same location as the Kodak 3A negative. For composition, I was trying to make the church dominate in the frame, but also catch the adjacent cemetery arch on the left. That more or less worked, other than I don't think I had things quite level. And the bottom got blotted out by the "arc of unexposed".

Kodak3AFirstNegColor.jpg
 

koraks

Moderator
Moderator
Joined
Nov 29, 2018
Messages
22,745
Location
Europe
Format
Multi Format
1: damage during handling sounds likely. Note that wet film is much more sensitive than dry film. Maybe you marred it when taking it out of the tank while still wet.

2: looks like bellows folds protruding into the image frame.

3: probably just age related.

Only #2 would worry me; the rest is easy enough to fix or prevent.
 
OP
OP

bud007

Member
Joined
Sep 23, 2024
Messages
62
Location
Chicago
Format
Medium Format
1: damage during handling sounds likely. Note that wet film is much more sensitive than dry film. Maybe you marred it when taking it out of the tank while still wet.

2: looks like bellows folds protruding into the image frame.

3: probably just age related.

Only #2 would worry me; the rest is easy enough to fix or prevent.

Ah, good idea on the bellows fold. Certainly possible with me wrangling the camera around on the tripod - I wouldn't have thought to worry about that.
 

Don_ih

Member
Joined
Jan 24, 2021
Messages
7,727
Location
Ontario
Format
35mm RF
Yes - the upper side of the bellows is sagging into the frame.

Mottling outside the image area is not a big deal - it probably wouldn't be noticeable in a contact print within the image itself.

Sometimes a bellows will separate - still be light tight but the inner liner is not really attached to the outer. I made a bellows nice and stiff once by using spray starch on it. If the interior of your bellows is floppy, consider using spray starch and letting it dry with the camera open and the bellows mostly compressed (not all the way).
 
OP
OP

bud007

Member
Joined
Sep 23, 2024
Messages
62
Location
Chicago
Format
Medium Format
I think I was a little hasty in estimating how slow the Orth film I got hold of was. Ran some more tests on it, and best shot so far was at ASA 6. Unexposed border was pretty clear, so film looks to be in decent shape. I'm pretty curios to do side by shots between it and the old Plus X sheet film I have to see how much difference in a contact print there is. So more work to do on the Ortho still, but I'm narrowing in on it.

I upped my D76 1:3 development time to 15 minutes and I like the looks of the negatives better with that (vs. 13 mins), so sticking with that for now. I would hope to actually test/optimize that once I get the other variables nailed down. Doing that 15 minute time for both the ortho film and the Plus X.


I like the "vertical" style reel I did much better than the "horizontal" style - seems much smoother at getting the film loaded.

k3aVerticalJobo.jpg


The unexposed semi-circle on the bottom of the frame was definitely top bellows sag. You can see the sag and my first crue idea of what to do about it (just a tape look that I pull up on when I expose). Of course, when I went to test this I got so wrapped up in setting up the shot I forgot to do the lift thing when I tripped the shutter. I'm sure that's the issue, though. I saw lots of people talking about lifting the bottom with cloth/sponges/cardboard as a way of fixing this and I haven't looked at that to see if that would help in my case. I saw someone mention a binder clip rather than tape, and that sounds like it might work for me and then I could maybe anchor it somewhere so I don't have to actually hold it during the exposure.

k3aSaggyBellows.jpg
 
OP
OP

bud007

Member
Joined
Sep 23, 2024
Messages
62
Location
Chicago
Format
Medium Format
Gotta couple more test negs to look at with the ortho film... it was late in the afternoon, bright sun but low in the sky. I set exposure based on Sunny 16, but probably made a mistake in choosing my location as it only had some sprinkled sun (mostly shadow). If I evaluate only the stuff in the sun (which is what I assume Sunny 16 exposes for...) the ISO 50 is more accurate - ISO 6 blew out all the stuff the sun was shining on (even though the shadow areas were better... that's not what I was exposing for).

Densometer

ISO 6 ISO 50
Base+fog 0.52 0.52
white door trim 1.01 0.97
roof in shadow 1.64 1.36
clear sky 2.16 1.96

I think I'm going to a couple more test shots metering off an 18% card with it in the scene... maybe ISO 25 and ISO 50. As I recall, there's a densometer value that the 18% gray card should be when properly exposed, so I should be able to evaluate the two tests using that.

k3aOrthoSunny16.jpg
 

koraks

Moderator
Moderator
Joined
Nov 29, 2018
Messages
22,745
Location
Europe
Format
Multi Format
As I recall, there's a densometer value that the 18% gray card should be when properly exposed, so I should be able to evaluate the two tests using that.

Your negative is properly exposed if the shadow detail you want to show up in the print differentiates well in the print. Or, put even more simply: your negative is OK if it prints well.
Don't let this discourage you from getting busy with the densitometer - but in your 'period correct' endeavor, there's something to be said for just contact printing your negatives to decide where you need to go!
 

Don_ih

Member
Joined
Jan 24, 2021
Messages
7,727
Location
Ontario
Format
35mm RF
You can get some control over the contrast of the diagnostic film through developer choice (use a 2-bath developer or some other compensating developer). You can also seek to shoot lower contrast scenes (no harsh sunlight).

Your experiments are going well, though.
 
OP
OP

bud007

Member
Joined
Sep 23, 2024
Messages
62
Location
Chicago
Format
Medium Format
Trying to digest the "over base+fog" densitometer readings to see what the next two tests should be. The sky is an easy comparison between the two... shot at ISO 6 it is 1.64, shot at ISO 50 it is 1.44. I gather the sky should be maybe .7 or so. However... this is ortho film, so maybe not picking up any red, which could make skys lighter. So lets say a reasonable value for the sky might fall between .7 and 1.1. My ISO 50 test is better at 1.44, but likely still too high. Seems like this would argue for a test at a higher ISO (e.g. 50 was better than 6... let's try 100).

Looking at another data point... the part of the roof in shadow should probably fall around .4 to .5. What I got was ISO-6=1.12 and ISO-50=.84. So similar observation - ISO 50 was better in this test, but the ISO-50 negative still indicating it's overexposed... so another vote to try evaluating an ISO higher than 50 (because a higher ISO will result in less exposure needed).

So I'm thinking I need to test above ISO 50... maybe ISO 100 and see how that compares to ISO 50.

All of this is about trying to rate this unknown ortho film...
 

BrianShaw

Member
Joined
Nov 30, 2005
Messages
16,523
Location
La-la-land
Format
Multi Format
If post #29 reflects the configuration when you shot those negatives then it might be that some of the artifacts are film sag. That camera has a very rudimentary film tensioning system that doesn’t seem to work well with 120-122 adapters. See my link, provided earlier, and you can see how I jury-rigged a film gate to improve film flatness. I still struggled with consistency of film tension. Only if your interested, of course.
 

Don_ih

Member
Joined
Jan 24, 2021
Messages
7,727
Location
Ontario
Format
35mm RF
If anything, I'd consider the iso50 shot to be underexposed. The sensitivity of the diagnostic film is such that the lit-up sky will show up as very dense on the negative, even if it's underexposed. Whether or not the film is exposed properly is more indicated by detail in the actual stuff you can see.

If I thought that film was iso 50, I would have exposed that scene probably at f5.6 for 1/50th of a second. Maybe more exposure, since there's so much dark-stuff-in-shadows.

If post #29 reflects the configuration when you shot those negatives

These negatives were cut down from larger sheets, so they spanned the entire image frame.
 
Photrio.com contains affiliate links to products. We may receive a commission for purchases made through these links.
To read our full affiliate disclosure statement please click Here.

PHOTRIO PARTNERS EQUALLY FUNDING OUR COMMUNITY:


Ilford ADOX Freestyle Photographic Stearman Press Weldon Color Lab Blue Moon Camera & Machine
Top Bottom