Hi,
TLDR, does anyone here have experience fitting Intrepid 4x5 conversion kits not into a graflox camera but onto a pre-existing enlarger? Or just general experience with Intrepid enlargers?
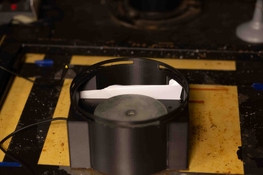
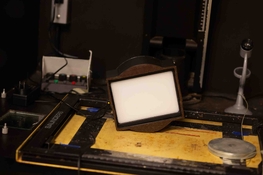
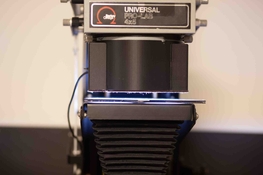
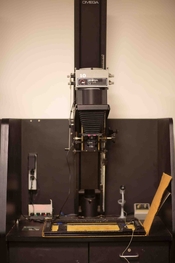
As I've mentioned in the past, I work at my university darkroom as a student technician. We are looking at having a class that seriously uses the darkroom in the coming months (it's been almost 3 years since the last one!), part of my work has been getting the enlargers in shape, we have 10 Omega Ds and an assortment of mostly broken Chromegas. Unfortunately, in our current state we only have 8 working omega Ds and one chromega (the rest are broken, or missing power supplies, 2nd hand they are insane, all our spare power supplies started emitting magic smoke). We've been talking about potentially buying beseler cadets, but that's limiting to 35mm, and we have a good number of really nice Mamiya medium format cameras, we've also talked about Besseler 23Cs, but those are too pricy. My idea of the day is to potentially fit our existing 4x5 Omega enlarger stands that are missing working heads with Intrepid 4x5 camera conversion kits, I found someone who did so with a Beseler 45mx with just a 3d printed part and some foam. The other disadvantage to purchasing replacement parts for our broken Omega Ds and/or Chromegas is the lack of working timers, we currently have zero surplus enlarger timers.
Reddit Link to Post about converted beseler 45mxt
Doing the math, this would be a cost effective way to use our prexisting lens collection, table mounts, and bellows with a modern and theoretically easy to use timing system, while continueing to provide full 35mm-4x5 compatability.
TLDR, does anyone here have experience fitting Intrepid 4x5 conversion kits not into a graflox camera but onto a pre-existing enlarger? Or just general experience with Intrepid enlargers?
As I've mentioned in the past, I work at my university darkroom as a student technician. We are looking at having a class that seriously uses the darkroom in the coming months (it's been almost 3 years since the last one!), part of my work has been getting the enlargers in shape, we have 10 Omega Ds and an assortment of mostly broken Chromegas. Unfortunately, in our current state we only have 8 working omega Ds and one chromega (the rest are broken, or missing power supplies, 2nd hand they are insane, all our spare power supplies started emitting magic smoke). We've been talking about potentially buying beseler cadets, but that's limiting to 35mm, and we have a good number of really nice Mamiya medium format cameras, we've also talked about Besseler 23Cs, but those are too pricy. My idea of the day is to potentially fit our existing 4x5 Omega enlarger stands that are missing working heads with Intrepid 4x5 camera conversion kits, I found someone who did so with a Beseler 45mx with just a 3d printed part and some foam. The other disadvantage to purchasing replacement parts for our broken Omega Ds and/or Chromegas is the lack of working timers, we currently have zero surplus enlarger timers.
Reddit Link to Post about converted beseler 45mxt
Doing the math, this would be a cost effective way to use our prexisting lens collection, table mounts, and bellows with a modern and theoretically easy to use timing system, while continueing to provide full 35mm-4x5 compatability.


 )
) One day I'll hoodwink someone into try in, and then my ingenius computer virus will infect their fridge, near by power stations, global nuclear weapons control systems, and my plan will be complete!