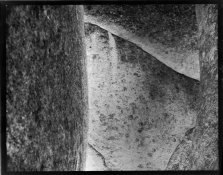
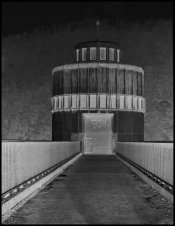
Printing negatives without turning them to positive

Adam Smith

A
Adam Smith

  • 1
  • 0
  • 22
Adam Smith

A
Adam Smith

  • 1
  • 0
  • 23
Cliché

D
Cliché

  • 0
  • 0
  • 45

Recent Classifieds

Forum statistics

Threads
199,093
Messages
2,786,062
Members
99,803
Latest member
SK-2025
Recent bookmarks
1

Laci Toth

Member
Joined
Aug 9, 2019
Messages
408
Location
Budapest
Format
Medium Format
Hi everyone,

I’ve actually a lot of negatives which looks great as a negative and I’m thinking about if it’s possible to print what is exactly on the negative without turning it into positive. I’ve never used a scanner nor I own one, which would make the process easy and the other way I’m thinking of is to take a macro photo of the negative itself so I can print it out after I developed that negative but it seems a bit long process and I might loose from details/quality, though I don’t know to be honest. Also the latter might involve a lot of other processes like how to give the negs backlight so it is well prepared and so on. Sorry I’m just thinking loudly.
Is there any way to sort this out?
 

removed account4

Subscriber
Joined
Jun 21, 2003
Messages
29,832
Format
Hybrid
hey laci :smile:
what you will need to do is make your positive print like you would "normally" and then take that print
and put it face to face on a fresh sheet of photo paper under a sheet of glass and you are going to use THAT as your negative
it will take more exposure than your film negatives but you will get some fun-stuff :smile:
you could also get your hands on some ilford direct positive paper and print on that ...or use your macro / micro lens like you said and
make a copy photo of your negative/s...
good luck :smile:
john
 
OP
OP
Laci Toth

Laci Toth

Member
Joined
Aug 9, 2019
Messages
408
Location
Budapest
Format
Medium Format
Hey, that was also an option in my mind but I thought that I’d say something really stupid. =D
So, direct positive paper, great! Thanks indeed to both of you!
 
OP
OP
Laci Toth

Laci Toth

Member
Joined
Aug 9, 2019
Messages
408
Location
Budapest
Format
Medium Format
So just to clarify it, I just put the negative in the enlarger and make a print like I usually do but this time on a direct positive paper and will get the result I’d like to get, so the exact photo what is on the negative without turning it into a positive print? So it gives back what it ‘sees’?
 

removed account4

Subscriber
Joined
Jun 21, 2003
Messages
29,832
Format
Hybrid
So just to clarify it, I just put the negative in the enlarger and make a print like I usually do but this time on a direct positive paper and will get the result I’d like to get, so the exact photo what is on the negative without turning it into a positive print? So it gives back what it ‘sees’?
yup :smile:
but you might have to buy DP paper on ebay cause i am not sure its made anymore ...
 
OP
OP
Laci Toth

Laci Toth

Member
Joined
Aug 9, 2019
Messages
408
Location
Budapest
Format
Medium Format
yup :smile:
but you might have to buy DP paper on ebay cause i am not sure its made anymore ...
On Ilford’s website I found it but it also says the following:
‘In addition, this versatile paper can be used to creative photograms or substituted for standard photo paper when printing from negatives in an enlarger.’
How can it be also a standard photo paper when printing from negatives when it won’t turn the negs into positive? Or am I missing something?
 

Vaughn

Subscriber
Joined
Dec 13, 2006
Messages
10,109
Location
Humboldt Co.
Format
Large Format
Substituted for standard photo paper, but not used as standard photo paper. Not standard because it not reverse the tonalities.

Just remember, the more light that hits the paper, the lighter the image will be! Like making color transparencies and like printing Cibachromes (another direct positive process).

Another way would be to contact the negative onto more film for minimal loss of sharpness and infomation, then enlarge the new positive. But really, the paper positive from the negative that is then contacted onto more paper is the simplest route and quickest to experiment with. For example: make the paper positive and once washed, dip you new piece of photo paper into water and squeezee the paper negative and the photopaper together. Then expose under the enlarger. Wet paper can transmit light easier and you get good contact between the two without a contact printing frame or glass. I never tried it with RC, though. RC always had the logos on back.
 
Last edited:

AgX

Member
Joined
Apr 5, 2007
Messages
29,973
Location
Germany
Format
Multi Format
Or make an interpositive on negative film. Either on common one or on fine-grain cine-print film, or on the new sheets from Bergger.
 

MattKing

Moderator
Moderator
Joined
Apr 24, 2005
Messages
53,174
Location
Delta, BC Canada
Format
Medium Format
RC always had the logos on back.
Ilford RC papers have no backprint - at least on the type that darkroom workers use. I don't know if the roll papers used by photofinishers do.
 

awty

Subscriber
Joined
Jul 24, 2016
Messages
3,658
Location
Australia
Format
Multi Format
I have made a few negative prints by first making a positive and then contact printing to make a negative using ordinary ilford rc paper. Trick is to make the first print at least one grade lower in contrast than what you want the negative print to be and to do all your dodging and burning on the first positive print, for ease.

These are 8x10 prints made to be negatives.

12 02 19 4x5  hp5 orange filter pyro hd negative print  607 (4).jpg 12 11 19 ilford ortho negative image204 b c.jpg
 
OP
OP
Laci Toth

Laci Toth

Member
Joined
Aug 9, 2019
Messages
408
Location
Budapest
Format
Medium Format
Substituted for standard photo paper, but not used as standard photo paper. Not standard because it not reverse the tonalities.

Just remember, the more light that hits the paper, the lighter the image will be! Like making color transparencies and like printing Cibachromes (another direct positive process).

Another way would be to contact the negative onto more film for minimal loss of sharpness and infomation, then enlarge the new positive. But really, the paper positive from the negative that is then contacted onto more paper is the simplest route and quickest to experiment with. For example: make the paper positive and once washed, dip you new piece of photo paper into water and squeezee the paper negative and the photopaper together. Then expose under the enlarger. Wet paper can transmit light easier and you get good contact between the two without a contact printing frame or glass. I never tried it with RC, though. RC always had the logos on back.
So I make a print on the positive paper and then take a new paper, wet it and squeeze them together. I assume face to face and the upper one should be the already exposed one but should the new paper be a positive paper also or a paper what we usually use for printing?
Sorry if I’m a bit confused, this is really exciting and would like to understand it thoroughly.
 
OP
OP
Laci Toth

Laci Toth

Member
Joined
Aug 9, 2019
Messages
408
Location
Budapest
Format
Medium Format
I have made a few negative prints by first making a positive and then contact printing to make a negative using ordinary ilford rc paper. Trick is to make the first print at least one grade lower in contrast than what you want the negative print to be and to do all your dodging and burning on the first positive print, for ease.

These are 8x10 prints made to be negatives.

View attachment 238915 View attachment 238916
Okay, so the new one should be a normal paper. First I was confused a bit.
The reason why I’m asking all these because I’d like to make lith printing using negative images as the basic and would need to transfer those images to a lith paper.
Your images are very nice, thanks for sharing it!
 

removed account4

Subscriber
Joined
Jun 21, 2003
Messages
29,832
Format
Hybrid
hi laci
emulsion to emulsion yes .. its easiest if you make a test strip like you did for the first print. just remember its going to take a lot of light
because paper is thick ...so open your enlarger lens up and put the enlarger head down low to shorten your exposure time.
i've never made lith prints but i am guessing that's going to be a long exposure with a paper negative too. when i make contact prints from paper negatives
on old azo ( i make a xerox print or ink jet print and coat it with parafin to make it translucent ) i use a 300 watt bulb to make my exposures.
no clue how bright your bulb is but it won't be as short as your film negative.
you might also take a look at this website entry on the unblinking eye
https://unblinkingeye.com/Articles/EnlargeNeg/enlargeneg.html
enlarged negatives might be worth looking into ...
have fuN!
john
 

Vaughn

Subscriber
Joined
Dec 13, 2006
Messages
10,109
Location
Humboldt Co.
Format
Large Format
So I make a print on the positive paper and then take a new paper, wet it and squeeze them together. I assume face to face and the upper one should be the already exposed one but should the new paper be a positive paper also or a paper what we usually use for printing?
Sorry if I’m a bit confused, this is really exciting and would like to understand it thoroughly.
This would be using normal fiber based photo paper if you do not find any direct positive paper. But I see others have jumped in who have more recent experience...mine is decades old! Have fun!
 

NedL

Subscriber
Joined
Aug 23, 2012
Messages
3,389
Location
Sonoma County, California
Format
Multi Format
Agree with all the advice you already received. In my experience, the squeegee method that Vaughn mentioned works best with fiber-based paper ( when it's wet, it kind of "sticks" the two sheets together, and the limp fiber paper really sticks nicely ). I've never gotten it to work very well with RC paper, and if the paper is wet and you try to put a sheet of glass on top, there will be areas of uneven pressure. I usually let the first, positive print dry first ( doesn't take very long with RC paper, 30 minutes or so ) and then contact print onto dry paper under a sheet of glass.

As awty said, it's good if the first positive ( it's called an "inter-positive" ) is low contrast. Have fun!

Some of us do this to make enlarged paper negatives for use in other kinds of printing. The negatives sometimes do look really neat. :smile:
 
Last edited:
OP
OP
Laci Toth

Laci Toth

Member
Joined
Aug 9, 2019
Messages
408
Location
Budapest
Format
Medium Format
Thanks for all the advices! I stick together the pieces of all the infos and give it a go!
 

koraks

Moderator
Moderator
Joined
Nov 29, 2018
Messages
23,255
Location
Europe
Format
Multi Format
I've made interpositives on xray film when I wanted the same as your planning to do. Worked marvelously. An rc paper interpositive will likely be just as good though (and perhaps a little easier). I did try contact printing paper negatives (on rc paper) and that worked fine. Just put a piece of glass on top of the sandwich of papers and press down on the sides to maintain good contact. Ordinary float glass is fine.
Good contact between the negative and the print is essential; you'll run into huge sharpness issues otherwise.
 
OP
OP
Laci Toth

Laci Toth

Member
Joined
Aug 9, 2019
Messages
408
Location
Budapest
Format
Medium Format
I've made interpositives on xray film when I wanted the same as your planning to do. Worked marvelously. An rc paper interpositive will likely be just as good though (and perhaps a little easier). I did try contact printing paper negatives (on rc paper) and that worked fine. Just put a piece of glass on top of the sandwich of papers and press down on the sides to maintain good contact. Ordinary float glass is fine.
Good contact between the negative and the print is essential; you'll run into huge sharpness issues otherwise.
Thanks for your thoughts!
So I make a ‘normal’ print and after I developed/stopped/fixed/washed and dried it, I take another paper (not direct positive but the ‘usual’ paper) and I make it wet (or not) and stick the two together, emulsions facing each other and the one is on the top which has already an image and then put a glass on the top to assure that the surface is even and project the light and give it the experiment a go. Do I get it right?
 

koraks

Moderator
Moderator
Joined
Nov 29, 2018
Messages
23,255
Location
Europe
Format
Multi Format
Yes, exactly. If you use RC paper for both the intermediate print and the final print, there's no need to wet the paper. Just make the first print, dry it, sandwich with the final paper, expose, develop etc. RC paper stays nice and flat and in good contact with only a little pressure applied.
I never tried the squeegee thing simply because I didn't find it necessary, but I'm sure it can be made to work. However I prefer to keep the part of the darkroom where the enlargers are dry.
 
OP
OP
Laci Toth

Laci Toth

Member
Joined
Aug 9, 2019
Messages
408
Location
Budapest
Format
Medium Format
Yes, exactly. If you use RC paper for both the intermediate print and the final print, there's no need to wet the paper. Just make the first print, dry it, sandwich with the final paper, expose, develop etc. RC paper stays nice and flat and in good contact with only a little pressure applied.
I never tried the squeegee thing simply because I didn't find it necessary, but I'm sure it can be made to work. However I prefer to keep the part of the darkroom where the enlargers are dry.
Alright, I got it then! =)
Thanks indeed, I appreciate it!
 
OP
OP
Laci Toth

Laci Toth

Member
Joined
Aug 9, 2019
Messages
408
Location
Budapest
Format
Medium Format
Hi Laci,

Have you seen this new 2 bath reversal kit ?


It also works with paper so you can simply enlarge your negative at the size you want and get a negative image in print. A kit sells for about $40 here : http://www.brancoottico.fineartlabo...te-reversal-kit-for-film-and-paper-p151327029

Hey, thanks, it’s good to know, very useful, really. I save this as an opportunity.
I might try the contact print first.
As I’m interested in lith printing as well I again would have to involve even more chemicals if I choose this merhod as well which I might don’t want at the moment. If I make a positive print and it’s all fine I can keep it and scribble down the details so I could make another one next time or if I need another one for the lith as well. If I need that print as a negative print I can make a contact print (a piece of paper and a glass) and there I go. But if I involve these chemicals I need more trays or on that very day I only could develop negative prints. If I make a mistake then I’ve to make another positive print which I can turn into negative but if I don’t have enough trays then I’ve to pour out everything into their buckets or wherever and pour in the ‘normal’ developer chems again.
I also would like to make negative prints and then put them in the lith developer, so again if I use these chemicals and not the contact print technique then I’d need extra trays and there’s the chance of a mistake so I’ve to go over again the process.
Though I think this is awesome and I love the results it can produce.

Thanks again for sharing it!
 

awty

Subscriber
Joined
Jul 24, 2016
Messages
3,658
Location
Australia
Format
Multi Format
As awty said, it's good if the first positive ( it's called an "inter-positive" ) is low contrast. Have fun!

Some of us do this to make enlarged paper negatives for use in other kinds of printing. The negatives sometimes do look really neat. :smile:

Love it when you talk technical Ned.
Lith sounds great, other things you can do is to ink out parts to look like theres a light on, on "inter-positive" also lay over textured transparent paper to add some texture to the picture and other fun things.
 
OP
OP
Laci Toth

Laci Toth

Member
Joined
Aug 9, 2019
Messages
408
Location
Budapest
Format
Medium Format
Love it when you talk technical Ned.
Lith sounds great, other things you can do is to ink out parts to look like theres a light on, on "inter-positive" also lay over textured transparent paper to add some texture to the picture and other fun things.
Yea, this sounds really like fun. I like to layer negatives anyway so it’s again another option. I also use Washi W films among others to get some extra texture.
How to ‘ink out parts’ by the way?
 
Photrio.com contains affiliate links to products. We may receive a commission for purchases made through these links.
To read our full affiliate disclosure statement please click Here.

PHOTRIO PARTNERS EQUALLY FUNDING OUR COMMUNITY:


Ilford ADOX Freestyle Photographic Stearman Press Weldon Color Lab Blue Moon Camera & Machine
Top Bottom