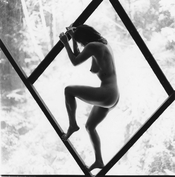
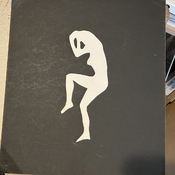
No hybrid, I want standard silver gelatin print, evetualy Lith print. I scan only to see which photo I decide to put in the chemicals, as contact printing never resonated with me.
There's a lot going on in this little bit already.
Firstly, the question is why you want a silver gelatin print? Are we talking about resin coated paper or fiber-based? What paper specifically? And again - why? What aspect of a silver gel print appeals to you?
Secondly, you mention lith printing. That's a very particular approach and whatever you may try with regular enlargement (variable contrast, split grade etc.) you can basically throw out of the window when you're going to do lith. Not that the regular printing won't make any sense - it's just not a logical step towards, or practice for lith printing. If you want to lith print this, then lith print it.
Then, you mention you need to scan in order to select - which in itself is OK, but at the same time, you need to have (learn) ways to determine which negatives will work well (for you) in darkroom printing, what their strengths and weaknesses are, and what approaches will likely work to get a specific negative to print well. You present us with an inverted and contrast-adjusted scan of a negative, which effectively only shows the
image, but says nothing about the
negative as such. This illustrates that you're not yet aware of how differently a negative behaves in the darkroom from how it does on the scanner.
You said 'contact printing never resonated' with you - but what does that mean exactly? Does it mean you don't like the process of making a contact sheet? Or does it mean that the times you made one, you didn't like the results? In case of the latter, what have you tried to make the best contact sheet you could do? And if that wasn't enough to get a good impression of the photos you thought you had - have you considered the possibility that maybe your negatives could need improvement?
Despite all of the above, attempting to answer your original question "Is there any way to print this (and similar) without dodging and burning?" - Yes, there is:
* I assume you've selected a paper, your chemistry is in working order and you know how to properly process your paper, and that you're aware of what the dmax (the blackest black it can produce) of the paper is and how to recognize it. I also assume you're using variable contrast paper and you have a means to adjust contrast of the print.
* Put negative into enlarger. Focus & compose on base board.
* Make a test strip on e.g. grade 2. Ensure that the strip covers the deepest shadows as well as the brightest highlights of the photo. It helps to expose the strip at several time increments sop
* Process test strip and verify the tonal scale
after drying the strip. Determine how the shadows and the highlights look. You're primarily looking for (1) how bright or dark they are in an absolute sense, in relation to the paper's dmax and the paper's white base, and (2) how well the shadow and highlight regions show differentiation in tonal values. Then choose where to go from here based on what you see:
* If both the shadows and the highlights are too light on the entire strip, redo the strip, but with longer exposure times and/or a larger aperture on the enlarging lens.
* If both the shadows and the highlights are too dark on the entire strip, redo the strip, but with shorter exposure times and/or a smaller aperture on the enlarging lens.
* If the shadows look good but the highlights are too dark, do a new strip at a higher contrast grade.
* If the highlights look good, but the shadows are too light, do a new strip at a higher contrast grade.
* If the shadows look good but the highlights are too light/blown out, do a new strip at a lower contrast grade.
* If the highlights look good, but the shadows are too dark/all black, do a new strip at a lower contrast grade.
* Once you've determined the contrast grade and exposure time that gives you both pleasing shadows and highlights, make a print of the full image. Based on evaluation of the (dried!) print, you can make some minor adjustments to contrast grade or exposure time to finetune it.
When starting out, I'd suggest working with smallish prints (e.g. 13-18cm/5x7") and instead of using test strips, print the full image for every 'strip' test so you can more easily see what effects changes in exposure and contrast have.
If you find that the optimum contrast/exposure time setting produces a print with technically OK shadows and highlights (or at least as good as it gets), but you still don't like the results - well, by that time you will have figured out what all the rest are implying in the previous responses: a straight print is not always a satisfactory end point -
especially if the negative happens to fall short of 100% perfect.


