Getting Fiber Based Paper Flat

Friends in the Vondelpark

A
Friends in the Vondelpark

  • 0
  • 0
  • 20
S/S 2025

A
S/S 2025

  • 0
  • 0
  • 39
Street art

A
Street art

  • 0
  • 0
  • 37
20250427_154237.jpg

D
20250427_154237.jpg

  • 2
  • 0
  • 70
Genbaku Dome

D
Genbaku Dome

  • 7
  • 2
  • 90

Recent Classifieds

Forum statistics

Threads
197,513
Messages
2,760,246
Members
99,523
Latest member
Wetplatephotography
Recent bookmarks
0

Danner

Member
Joined
Feb 5, 2021
Messages
182
Location
Fort Worth
Format
Medium Format
I use a Delta 1 Photo Drying Book. Made by CPM, Inc. in Dallas TX. Not sure if still available? Both in 11x14 and 16x20. It's about 20 pages of lint-free heavy blotter paper (120 lb paper) bound with separating sheets that are like parchment paper in-between. The wet prints are inserted, facing the blotter pages, and the book closed (but not compressed) to let the prints dry. They come out somewhat 'wavy', but are generally flat. Once dry, they can be flattened further under a stack of books.

Works pretty well.
 

avizzini

Member
Joined
Jun 17, 2018
Messages
72
Location
United States
Format
Medium Format
I’m looking to flatten some already dried Ilford FB prints. I don’t print FB often enough to warrant investing in any specialty equipment for such a process.

Is there any reason not to put a dried print between two mat boards and then stack some books and other heavier items on top of the mat boards for several days (or however long it takes)? Speed is not a concern in this process.

Is it okay to have dried emulsion sandwiched between mat boards like this?

I saw it mentioned several times that people place prints face-to-face (emulsion to emulsion) when flattening, is there a benefit to this? Any risk to the emulsion when doing this?

I skimmed through this thread, so perhaps I missed others doing something similar to this.
 

wiltw

Subscriber
Joined
Oct 4, 2008
Messages
6,366
Location
SF Bay area
Format
Multi Format
When in high school (over 5 decades ago) the darkroom we used for newspaper and yearbook photos had a print dryer with a polished surface, but we always squeegeed prints onto a separate ferrotyping tin and then put that on the dryer and then closed the cloth cover over that...it dried the prints with a bit of a reverse curl!
 

Danner

Member
Joined
Feb 5, 2021
Messages
182
Location
Fort Worth
Format
Medium Format
I’m looking to flatten some already dried Ilford FB prints. I don’t print FB often enough to warrant investing in any specialty equipment for such a process.

Is there any reason not to put a dried print between two mat boards and then stack some books and other heavier items on top of the mat boards for several days (or however long it takes)? Speed is not a concern in this process.

Is it okay to have dried emulsion sandwiched between mat boards like this?

I saw it mentioned several times that people place prints face-to-face (emulsion to emulsion) when flattening, is there a benefit to this? Any risk to the emulsion when doing this?

I skimmed through this thread, so perhaps I missed others doing something similar to this.
No way would I put the prints face to face.
Putting them under weight will flatten them after some time. I use cooking parchment paper against the emulsion side. Sam's Club and Costco sell inexpensive, wide rolls of parchment paper. It also works well in a heated dry-mount press, which is the ultimate way to flatten FB print, on some 4-ply museum rag board.
Keep in mind the you could also re-wet the prints and dry them in some fattening manner, as discussed in this thread,
 

gone

Member
Joined
Jun 14, 2009
Messages
5,509
Location
gone
Format
Medium Format
I made some experiments last week w/ fb papers. First I ran the shower in the bathroom to get some humidity in there. Then one print was hung on a line by one corner w/ a clothes pin just like rc papers. The next was dried on a screen, and two prints were stuck back to back and hung from their two top edges. I didn't have the courage to put the two prints face to face. Then the door was shut.

I looked in now and then to ck on things, and had to turn the hanging papers the other way around, as the top parts were drying but not the bottom. After they all dried, the print that was hung by one corner had the least curving, and what it had was even, w/ a natural curl look. The two prints that were stuck together unstuck themselves around the perimeter, making them bowed out in the middle and wavy around their edges. The one that had dried on the screen was not bad, but while it was flattish in the center, the ends had curled.

They've been between two pieces of plywood w/ books on them, but the one that was hung by one corner should flatten out pretty well. Before trying all this the prints had been drying too fast due to desert humidity, or lack thereof, and running the shower before hand has helped things along. I think I'll hang all the fb papers by one corner now.
 
Last edited:

lantau

Member
Joined
Jan 15, 2016
Messages
826
Location
Germany
Format
Multi Format
I’m looking to flatten some already dried Ilford FB prints. I don’t print FB often enough to warrant investing in any specialty equipment for such a process.

Is there any reason not to put a dried print between two mat boards and then stack some books and other heavier items on top of the mat boards for several days (or however long it takes)? Speed is not a concern in this process.

Is it okay to have dried emulsion sandwiched between mat boards like this?

I saw it mentioned several times that people place prints face-to-face (emulsion to emulsion) when flattening, is there a benefit to this? Any risk to the emulsion when doing this?

I skimmed through this thread, so perhaps I missed others doing something similar to this.

There is nothing wrong with a print between two sheets of sufficiently strong paper. I haven't tried matt board, but I'm using the sheets of a paper pad for acrylic painting. Seems to be pretty much the same material as the expensive Delta drying book.

You only need to allow the print to air dry until the gelatine isn't sticky anymore. The paper will begin to start curling, gently, at that point. Place it between two sheets and keep some books on it for 2-3 days. Then trim a few mm off the edges with a rotary cutter.

This requires no equipment, except for the cutter. I'm not sure it will work for already dry prints, though. The base may need a little moisture.

My current pad is from Clairefontaine. 10 sheets, 360g/m² (165lb), A3 format, product-# 96309C. I even found it on Amazon US, but only a five-pack for $22.

I definitely wouldn't stack prints face to face.
 

Nicholas Lindan

Advertiser
Advertiser
Joined
Sep 2, 2006
Messages
4,215
Location
Cleveland, Ohio
Format
Multi Format
Lightly dampening the back of a fiber print with a sponge and then putting it between the boards/papers/books of your choice and weighting the it down will help flatten recalcitrant prints. For smaller prints, back in the old days, I used telephone books with good results.

Treatment with Pakosol does help - but, it's no longer made. There are all sorts of variations - glycerin, ethylene glycol, polypropylene glycol - all diluted in water. The purpose is to keep the fiber base from drying out (well, to make the base think it isn't drying out).

My current drying protocol for fiber base prints is to treat in Pakosol, take the surface moisture off with a bath towel and then either lay the prints face up to dry on carpet (vacuum first if you have pets...) or on the spare bed or put them in a heated drier (the type with tight canvas holding the print to the dryer platen). The prints curl up a bit along the edges but relax over the following days.

Dry mounting the print to mat board is the best solution to curling. If you are going to formally show the print it should be mounted. Matting is really only needed if you are framing under glass.
 

Michel Hardy-Vallée

Membership Council
Subscriber
Joined
Apr 2, 2005
Messages
4,790
Location
Montréal, QC
Format
Multi Format
Slow drying is the key if you air-dry. When prints dry too fast, they will curl and harden before you can flatten them.

It's best to have a somewhat humid environment (get a cheap hygrometer from the hardware store and take notes). That way, you don't have to be super-precise about the moment at which you put them under pressure to flatten them.

My pressing setup is made of two Canadian photobooks: Oil, by Edward Burtynsky because it's big enough and has a perfectly shiny dust jacket, and Canada: A Year of the Land by the NFB, because it's even bigger and heavier. I don't use boards and stack prints all in the same direction (emulsion towards Burtynsky, base toward the NFB). My prints are quite dry when I press them, so that I don't transfer water to the books.

Anecdotally, I seem to have better success when using Sistan (now Adox Adostab) as a final rinse, and my prints seem to remain more supple when dry. Not sure what the cause may be (hygroscopy? softening the gelatin? the Illuminati?), but an added benefit.
 

avizzini

Member
Joined
Jun 17, 2018
Messages
72
Location
United States
Format
Medium Format
Slow drying is the key if you air-dry. When prints dry too fast, they will curl and harden before you can flatten them.

It's best to have a somewhat humid environment (get a cheap hygrometer from the hardware store and take notes). That way, you don't have to be super-precise about the moment at which you put them under pressure to flatten them.

My pressing setup is made of two Canadian photobooks: Oil, by Edward Burtynsky because it's big enough and has a perfectly shiny dust jacket, and Canada: A Year of the Land by the NFB, because it's even bigger and heavier. I don't use boards and stack prints all in the same direction (emulsion towards Burtynsky, base toward the NFB). My prints are quite dry when I press them, so that I don't transfer water to the books.

Anecdotally, I seem to have better success when using Sistan (now Adox Adostab) as a final rinse, and my prints seem to remain more supple when dry. Not sure what the cause may be (hygroscopy? softening the gelatin? the Illuminati?), but an added benefit.
That’s part of my problem, I live in a very low humidity area. Even out of the box the FB paper is curled some.
 

Michel Hardy-Vallée

Membership Council
Subscriber
Joined
Apr 2, 2005
Messages
4,790
Location
Montréal, QC
Format
Multi Format
That’s part of my problem, I live in a very low humidity area. Even out of the box the FB paper is curled some.

I would suggest the bathroom trick: run the hot water until you have some steam in the room, and hang the prints.

I've also had some success in the past drying my prints between two blotters and a clothes iron, literally ironing out the prints. A cheap dry-mount press.
 

lantau

Member
Joined
Jan 15, 2016
Messages
826
Location
Germany
Format
Multi Format
Slow drying is the key if you air-dry. When prints dry too fast, they will curl and harden before you can flatten them.

Anecdotally, I seem to have better success when using Sistan (now Adox Adostab) as a final rinse, and my prints seem to remain more supple when dry. Not sure what the cause may be (hygroscopy? softening the gelatin? the Illuminati?), but an added benefit.

Having made my first print in 2016, all my prints are Sistan treated. Could this be the actual reason for flattening FB prints being one problem I never had? Sistan contains a surfactant. Maybe it mellows the paper?

The back of RC prints feel almost like there is a residue, but I believe that haptic goes away over time.
 

Michel Hardy-Vallée

Membership Council
Subscriber
Joined
Apr 2, 2005
Messages
4,790
Location
Montréal, QC
Format
Multi Format
Having made my first print in 2016, all my prints are Sistan treated. Could this be the actual reason for flattening FB prints being one problem I never had? Sistan contains a surfactant. Maybe it mellows the paper?

The back of RC prints feel almost like there is a residue, but I believe that haptic goes away over time.

Yeah, I wonder too. Maybe doing a comparison with Photo-Flo would be enlightening. I have both, so I think next time I print I'll try comparing the drying in the same conditions of a water-rinsed only print, one dipped in photo-flo, and one dipped in Sistan/Adostab to see if the surfactant makes a difference.
 

avizzini

Member
Joined
Jun 17, 2018
Messages
72
Location
United States
Format
Medium Format
I would suggest the bathroom trick: run the hot water until you have some steam in the room, and hang the prints.

I've also had some success in the past drying my prints between two blotters and a clothes iron, literally ironing out the prints. A cheap dry-mount press.

I'm not sure if it was my hanging technique (hung by one corner with a clothes pin) or what but, I soaked two of my prints for about 10 mins to get them wet again, I squeegeed the excess water, and stuck them back to back. I hung them in a well steamed bathroom and left to dry overnight. The curling was worse than laying them flat to dry... the bathroom seemed to remain humid.

With that said, I had better results by misting water on the back of a dried print and placing it between mat boards with a bunch of weight on top. For my initial test, I did 24hrs. After which, the print wasn't 100% flat but, it had a uniform and smooth slight concave bend, it wasn't wavy and winkly. Good enough to hinge mount and put in a mat. Right now, I have another test print in which I'm doing the same thing but, this one I'm going to leave for 72 hours to see what happens. Then, I might do one more for 1 week just to see if I can get any additional benefit or if it's only diminishing returns.
 

gone

Member
Joined
Jun 14, 2009
Messages
5,509
Location
gone
Format
Medium Format
My system above works well, and is fast and archival: I tried it again yesterday and the prints look good, both FB GL and FB Matte. Wash the prints 10 minutes in the sink under running water, give them a 10 minute soak in hypo clear, and then 10 minutes under running water. Run the bathroom shower w/ hot water w/ the door closed. Take the prints out of the drained sink, put them in a bucket and bring to the bathroom. Shut the door immediately. The prints are hung by one corner w/o squeegeeing on a line across the top of the shower stall, and then spritzed on the front and back w/ distilled water.

That's it. I go in after an hr or two and unpeg the prints at their top corner and turn them 180 degrees to be pinned again. A few I wanted to see dried right away, so I used a hair dryer. It took maybe 10 minutes of holding the top and working the hair dryer from one side to the other. It will try to curl, so just turn the paper and dry the back, side to side, top to bottom. Before this I had tried everything, and none of it worked. Taping them w/ watercolour tape to glass was a disaster. The prints were still able to pull out from the tape and dried terribly wavy all around.

So drying very slowly in a steamy bathroom works, and drying very fast and evenly works (which is what happens w/ a print dryer). A microwave works great too, but you have to work in small measures, maybe 5-10 seconds at a time, and you need a print that fits in one. My fb test strips are dried in there to speed things up a little. Be prepared for your matte prints/test strips to turn glossy if you use a microwave though!
 
Last edited:

avizzini

Member
Joined
Jun 17, 2018
Messages
72
Location
United States
Format
Medium Format
My system above works well, and is fast and archival: I tried it again yesterday and the prints look good, both FB GL and FB Matte. Wash the prints 10 minutes in the sink under running water, give them a 10 minute soak in hypo clear, and then 10 minutes under running water. Run the bathroom shower w/ hot water w/ the door closed. Take the prints out of the drained sink, put them in a bucket and bring to the bathroom. Shut the door immediately. The prints are hung by one corner w/o squeegeeing on a line across the top of the shower stall, and then spritzed on the front and back w/ distilled water.

That's it. I go in after an hr or two and unpeg the prints at their top corner and turn them 180 degrees to be pinned again. A few I wanted to see dried right away, so I used a hair dryer. It took maybe 10 minutes of holding the top and working the hair dryer from one side to the other. It will try to curl, so just turn the paper and dry the back, side to side, top to bottom. Before this I had tried everything, and none of it worked. Taping them w/ watercolour tape to glass was a disaster. The prints were still able to pull out from the tape and dried terribly wavy all around.

So drying very slowly in a steamy bathroom works, and drying very fast and evenly works (which is what happens w/ a print dryer). A microwave works great too, but you have to work in small measures, maybe 5-10 seconds at a time, and you need a print that fits in one. My fb test strips are dried in there to speed things up a little. Be prepared for your matte prints/test strips to turn glossy if you use a microwave though!

I'll give it another try while more closely following your suggestions (this time I won't squeegee, I'll hang them 1 by 1, not back to back, I'll mist them, and I'll rotate them at the 1 hour mark). I'm using Ilford's FB Glossy, I don't want it to get any glossier, does the heat of a hair dryer afect the gloss any?
 
  • jtk
  • jtk
  • Deleted

Jim Jones

Subscriber
Joined
Jan 16, 2006
Messages
3,745
Location
Chillicothe MO
Format
Multi Format
Long ago in a primitive darkroom, I stacked washed but still wet prints in a tray and leaned the tray against the back of the sink. Prints were peeled from the front of the stack, which pulled much of the water off through capillary action. Then remaining surface water was removed with a towel spread flat on a firm surface. First the print, face up, was drawn across the towel with one hand while the spread fingers of the other hand applied slight pressure across the face. Then the print was rotated 180 degrees and the process repeated. Next the print is flipped over, and the processes repeated. The fingers should be dried on a corner of the towel between each step. Now the prints can be clipped with clothespins to a wire strung across the room. Once dry, any prints not immediately used should be stored face to face and back to back in an original photo paper box with enough weight spread across the top print to keep the entire stack of prints flat.
 

Nicholas Lindan

Advertiser
Advertiser
Joined
Sep 2, 2006
Messages
4,215
Location
Cleveland, Ohio
Format
Multi Format
With that said, I had better results by misting water on the back of a dried print and placing it between mat boards with a bunch of weight on top.

Back in the "old days" I used to lightly damp the back of a print with a sponge and then put it in a phone book with a weight on top. Worked well, and as avizzini noted the prints came out with a slight almost-but-not-quite-flat curl. A stack of available phone books meant there was always a dry one available; and if not "Nick, have you seen the phone book?" was hollered down the stairs - I could always get a dry one from next to the phone.
 
Joined
Jul 1, 2006
Messages
875
Location
Oklahoma, US
Format
Multi Format
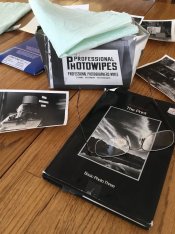
For decades I used Premier photo wipes. Lay the prints face up on a photo wipe and plot with another clean one. They are reusable if previously used to dry properly washed prints. The towel idea is mentioned by Kodak but not my preferred method. I think of towel fibers in my imagination or some other residual.

I abandoned photo flow for film or any other surface because it left…..a film. A distilled water soak/rinse always works to avoid spots, especially on film.

Currently I’m lying 5x7 fiber prints on tray corners and letting them air dry. That works helped by the small size. I’m guessing our winter indoor relative humidity is around 40-50%. I don't experience excessive curl. I insert my my dried prints inside books for several days and they “always” come out flat….at least for a time.

In Kodak’s book, Quality Enlarging, they write roll plotters work better than back to back print drying.

Some papers resist curl. Unfortunately the ones I know of are out of production. Emaks graded and to a lesser extent Fomatone MG 532-II resisted curl. Manufacturers have tricks to reduce curl but that would raise costs.

Is there any fiber paper….perhaps Bergger, that tends to dry flat; relative term of course?
 

Attachments

  • image.jpg
    image.jpg
    898.3 KB · Views: 161
Last edited:

GRHazelton

Subscriber
Joined
May 26, 2006
Messages
2,245
Location
Jonesboro, G
Format
Multi Format
Back in the day we used a highly diluted solution of ethelyne glycol as a final "rinse" for fiber prints. The glycol made the prints slightly hygroscopic, the moisture content made the prints flat. I suspect that propylene glycol, which is food safe, would be effective and safer.
 

Brendan Quirk

Subscriber
Joined
Dec 3, 2018
Messages
227
Location
Mayville, WI USA
Format
Medium Format
I used to use a liquid called "Pak-o-sol" or something similar. Prints were soaked and then ferrotyped - gave very good gloss. Very likely was a glycol of some sort.

Prints will flatten under weights, but will never be perfectly flat.

Best solution for me is 30 seconds in a dry mount press, then stored in an envelope. Never perfectly flat, but close. Only perfectly flat prints are dry mounted.

Air dried fiber prints will never be as flat as RC prints.
 

jenurk

Member
Joined
Dec 8, 2008
Messages
1
Location
New Zealand
Format
Medium Format
edge ripple from flattening in low humidity.jpg I hadn't realised prints that were over dry don't flatten well but lately this is my experience also. Normally just wipe them each side and leave to air dry on fibreglass screens. When dry I put between blotters and flatten between mdf weights and have no problems but lately it's been hot and windy (mid summer here) and one side of each print is almost pleated! It's always the original paper edge not the side I've trimmed. Prints are 12x16s cut down from 20x24inch paper. I thought the problem might be a bad batch of paper so thank you for suggesting this possibility. Will try flattening before they are totally dry and post the result. Here's what happens with too little humidity. The print in front hasn't been flattened compared to the one behind which has.
 

gone

Member
Joined
Jun 14, 2009
Messages
5,509
Location
gone
Format
Medium Format
I live in a very low humidity area. Even out of the box the FB paper is curled some.
This is the same here in Arizona. Honestly, I tried everything except a dry mount press, and the best results (and by far the easiest) come from running a hot shower for a long time w/ the door closed to build up humidity, and popping back in to hang the papers by 1 corner. Then mist w/ distilled water and leave and shut the door.

I go back in occasionally to run the shower for more humidity. The 11x14 fb papers dry with no wavy edges, just a gentle, smooth curl. If you wish, then maybe put some books on them, but its not really necessary.
 

markbau

Member
Joined
Apr 16, 2009
Messages
867
Location
Australia
Format
Analog
I just got a new box of 100 8 x 10 Ilford MG FB and was surprised at how curly it is. Not that it's a problem as the easel holds it flat. I also got a box of 50 11 x 14 and it is quite flat.
 

mshchem

Subscriber
Joined
Nov 26, 2007
Messages
14,240
Location
Iowa City, Iowa USA
Format
Medium Format
I use a Pako drum dryer. Arkay still makes such a dryer. These work great, important to not over dry. I don't ferrotype, I dry with emulsion towards fabric belt, use a hardener bath or simply hardening fixer to keep prints from sticking to the belt. Important to keep belt clean/ replace. Pakosol works well balances paper moisture content to reduce curl.
 
Photrio.com contains affiliate links to products. We may receive a commission for purchases made through these links.
To read our full affiliate disclosure statement please click Here.

PHOTRIO PARTNERS EQUALLY FUNDING OUR COMMUNITY:


Ilford ADOX Freestyle Photographic Stearman Press Weldon Color Lab Blue Moon Camera & Machine
Top Bottom