Colin Graham
Member
- Joined
- Sep 5, 2004
- Messages
- 1,264
- Format
- Plastic Cameras
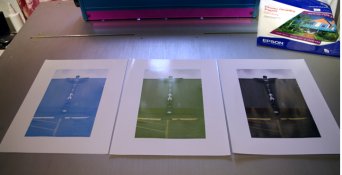
Colin that's nice - thanks for the trouble. I find myself often upping the saturation for RGB separations. And let me tell you: it works! All depends on your pigments and pigment saturation... I don't think there's an absolute correct way of doing it; depends on your materials / work flow and (ALSO) image / purposes...
Regards,
Loris.
That's very true, Loris. I notice the cmyk version tends to sacrifice depth and dimensionality in favor of saturation, so it's definitely not a cure-all. It's fun to play around with though. I'm still looking for a good compromise between RGB and CMYK. Thanks for the boost saturation suggestion, I will try that out for sure.