F-stop scale

Zakynthos Town

H
Zakynthos Town

  • 0
  • 0
  • 728
Driftwood

A
Driftwood

  • 11
  • 1
  • 865
Trees

D
Trees

  • 4
  • 3
  • 1K
Waiting For The Rain

A
Waiting For The Rain

  • 5
  • 1
  • 1K
Sonatas XII-53 (Life)

A
Sonatas XII-53 (Life)

  • 5
  • 3
  • 2K

Recent Classifieds

Forum statistics

Threads
199,785
Messages
2,796,682
Members
100,034
Latest member
Thelongdark
Recent bookmarks
0

marciofs

Member
Joined
Jul 8, 2011
Messages
802
Location
Hamburg
Format
Medium Format
I am using this website to do the maths for me: http://www.mrpinhole.com/calcpinh.php

So I researched about f-stop scale and wherever I find it they only show until f/256. While the f-stop of my camera is 339. I would like to find out the nearest f-stop to the one I got or even adapt it to a full stop but I don't know to do the maths. I know the maths formula but I don't know calculate it.

Does anybody can help me on this? :smile:
 

winger

Subscriber
Joined
Jan 13, 2005
Messages
3,978
Location
southwest PA
Format
Multi Format
If you print this and put it together (I used heavier paper - cardstock - so it would last better) - http://www.ilfordphoto.com/Webfiles/2011106152612113.pdf You can take a reading (or guess based on weather) and then adapt it to whatever pinhole you have. It's not meant to be exactly exact, but neither is pinhole photography. This saves me from having to do math.
 
OP
OP
marciofs

marciofs

Member
Joined
Jul 8, 2011
Messages
802
Location
Hamburg
Format
Medium Format
Thank you.

Now I would like to talk about how to make the hole. Should I open an other topic?

I am using a knife to make a hole in a can but it is hard to mesure the mm of the aperture so maybe I should make a test before open more?
 

Klainmeister

Member
Joined
Jun 2, 2010
Messages
1,504
Location
Santa Fe, NM
Format
Medium Format
I'd recommend using a needle instead of a knife. Sand down the location till it's as thin as possible, and gently use the needle to create a hole. If you have a scanner available, you can scan the hole and use your favorite photo editing software to measure it.
 

jeffreyg

Subscriber
Joined
Jun 12, 2008
Messages
2,686
Location
florida
Format
Medium Format
I printed the Ilford dials on glossy paper, sprayed the printed surface with clear adhesive and attached them to clear acrylic (very thin) sheet that I pre-cut to match the dials. Use a hole punch if possible and connect all with stainless steel bolt/ washers and non-slip nut (with nylon interior). I take either an incident or spot meter reading as the subject calls for. Then use the dials as per their instructions. I have found the readings to be very accurate. I use Delta 100 and HP5 and so far my shortest exposure has been two seconds with most in the thirty second -
eight minutes. With longer exposures being off a few seconds probably doesn't make a noticeable difference. I'm using PMK Pyro developer and have printed in silver gelatin, pt/pd and scanned and printed digitally as well. The results have been great and pinhole shooting has been a fun experience. I posted my int'l pinhole day submission on their website and on the APUG one also. I'm on my laptop and don't have them on this computer.

http://www.jeffreyglasser.com/
 

NedL

Subscriber
Joined
Aug 23, 2012
Messages
3,398
Location
Sonoma County, California
Format
Multi Format
Regarding f-stops, another quick way to think of it is that they found by doubling these two series of numbers:

1 2 4 8 16 32 64 128 256 512 1024 2048... ( find more by doubling )

1.4, 2.8. 5.6, 11, 22, 45, 90, 180, 360, 720 ... ( find more by doubling )

So all the "standard" f-stops are found by alternating the values from these two lists.

When I make a pinhole camera, I often figure out which one of these numbers it is closest to, which gives a ballpark place to start for exposures.

But quite honestly, each camera is a little different ( internal reflections, shape of film plane, etc... ), and even though this calculation will be about right I always make a series of quick tests to get my "full sun" sunny 16 exposure by testing the camera. Then you can take that exposure and change it depending on the available light.

Have fun!

If nobody else has answered, I'll try to come back by and write how I make my pinholes. Gotta get back to work now!
 
Last edited by a moderator:

TheToadMen

Subscriber
Joined
Sep 18, 2012
Messages
3,570
Location
Netherlands, EU
Format
Pinhole

paul_c5x4

Member
Joined
Apr 22, 2009
Messages
1,942
Location
Ye Olde England
Format
Large Format
I'd recommend using a needle instead of a knife. Sand down the location till it's as thin as possible, and gently use the needle to create a holet.

But how to check that the hole is round and with a nice clean edge ?

For that, pop it on a glass carrier inserted in to an enlarger - With the column racked up high, focus a nice sharp image on the baseboard. You might be surprised at how rough the hole is.
 

Klainmeister

Member
Joined
Jun 2, 2010
Messages
1,504
Location
Santa Fe, NM
Format
Medium Format
My scanner was able to resolve quite a lot of edge for me, so I smoothed it out, and got rid of any burrs with sandpaper, and double checked. Worked fine.
 

NedL

Subscriber
Joined
Aug 23, 2012
Messages
3,398
Location
Sonoma County, California
Format
Multi Format
You can use your enlarger, if you have one, to measure the diameter too. Put a clear plastic ruler in the carrier, measure ( for example ) how many mm a projected 2cm is, and then a little math to figure the diameter of the pinhole. I've only gone to this trouble twice. Usually I just put the pinhole next to a ruler with mm markings and look through a magnifying glass. You can measure to within a few tenths of a mm that way. My favorite pinhole camera was made like this.. it's something between .25 and .3mm and it doesn't matter a bit what it actually is because it makes great pictures.

Another trick is to hold the pinhole up very close to your eye and look at something bright. You will easily be able to tell if the pinhole is round and if there are any substantial burrs.
 

TheToadMen

Subscriber
Joined
Sep 18, 2012
Messages
3,570
Location
Netherlands, EU
Format
Pinhole
I use a simple microscope to view the pinhole. You can get one cheap secondhand.
 
OP
OP
marciofs

marciofs

Member
Joined
Jul 8, 2011
Messages
802
Location
Hamburg
Format
Medium Format
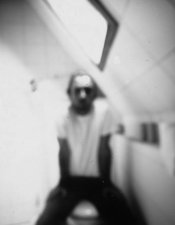
I made the first test today. 1 min exposute:

6181918_orig.jpg

But it is not in focus at all. Now I don't know if the hole is too big or too small. Or if the problem is something else. Maybe the problem is the paper going forwards?
 

NedL

Subscriber
Joined
Aug 23, 2012
Messages
3,398
Location
Sonoma County, California
Format
Multi Format
If that is full bright sunshine in a white bathroom then 1 minute might be about right. Otherwise it seems like too short an exposure for a camera that is more than f/300 and a paper negative indoors. I'm guessing the pinhole might be too big. But it seems to be too much... I think it would have to be too big by a lot to produce this level of blur. Maybe the camera moved? I advise to try again, careful not to move the camera before spending time on another pinhole.
 
OP
OP
marciofs

marciofs

Member
Joined
Jul 8, 2011
Messages
802
Location
Hamburg
Format
Medium Format
If that is full bright sunshine in a white bathroom then 1 minute might be about right. Otherwise it seems like too short an exposure for a camera that is more than f/300 and a paper negative indoors. I'm guessing the pinhole might be too big. But it seems to be too much... I think it would have to be too big by a lot to produce this level of blur. Maybe the camera moved? I advise to try again, careful not to move the camera before spending time on another pinhole.

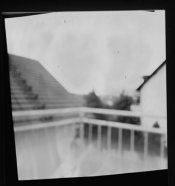
I actually calculated it again and now it seems to be f/36.

This seccond shot was 2 sec about. Bright day but clouds hiding the sun.

I am sure the camera didn't move at all. I will try make a hole smaller on a black hard paper to cover the original hole.
 

Klainmeister

Member
Joined
Jun 2, 2010
Messages
1,504
Location
Santa Fe, NM
Format
Medium Format
I'd use the pinhole calculator others have posted and find the 'optimum' pinhole size and go for that. Remember, they won't be terribly sharp no matter. I thought the first one was interesting the way it was.
 

winger

Subscriber
Joined
Jan 13, 2005
Messages
3,978
Location
southwest PA
Format
Multi Format
When I've made pinholes, I've used very small sewing needles (quilting ones are labeled by size) and not gone all the way through. I then smooth the area from each side using emery cloth (cloth based sandpaper intended for metal). I use pieces of soda cans as my material. I usually color both sides with either spray paint or Sharpie marker. To measure, I have a magnifier with a scale built in, but a magnifying glass and a metric ruler should work fine. Mine are usually around 0.5mm - 0.6mm, though I can make smaller ones if I try hard.
 

02Pilot

Member
Joined
Feb 9, 2011
Messages
321
Format
Multi Format
When I build (converted, actually) mine, I used the pinhole calculator already posted and drilled the hole in brass shim stock by hand with a tiny drill bit (#79, 0.0145") and a pin vice. For exposure times, I've had pretty good luck with two Android apps: LightMeter for the initial EV, and Pinhole to calculate the exposure for the pinhole camera. The latter app allows you to save the details of your camera so you can simply call it up and consult the exposure tables when you need them. Both are free and available through Google Play (no personal interest, just a satisfied user).
 

NedL

Subscriber
Joined
Aug 23, 2012
Messages
3,398
Location
Sonoma County, California
Format
Multi Format
By the way I agree with KS Klain that the first one is interesting the way it was. I believe you could make some very interesting photographs with that bigger pinhole.

I make mine the same way Bethe does: a square of aluminum form a soda can ( you can cut it easily with scissors ) a sewing needle, and emery paper. I use 600 grit paper. I spin the needle with light pressure until it just pokes through, then sand on both sides a lot, then repeat. The hole is always way too small to begin with. It gets bigger as I keep working on it and with some practice you'll get an eye for when it's about right.
 
Photrio.com contains affiliate links to products. We may receive a commission for purchases made through these links.
To read our full affiliate disclosure statement please click Here.

PHOTRIO PARTNERS EQUALLY FUNDING OUR COMMUNITY:


Ilford ADOX Freestyle Photographic Stearman Press Weldon Color Lab Blue Moon Camera & Machine
Top Bottom