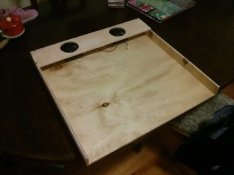
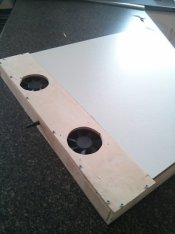
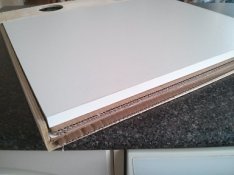
Drying rack materials and build

High st

A
High st

  • 0
  • 0
  • 0
Flap

D
Flap

  • 0
  • 0
  • 11
Chiaro o scuro?

D
Chiaro o scuro?

  • 1
  • 0
  • 224

Recent Classifieds

Forum statistics

Threads
199,211
Messages
2,787,899
Members
99,837
Latest member
eeffock
Recent bookmarks
0

grahamp

Subscriber
Joined
Mar 2, 2004
Messages
1,716
Location
Vallejo (SF Bay Area)
Format
Multi Format
That's about the amount of curl I get. Local temperature and humidity can affect the amount of curl. I usually get most of the curl out by placing the print emulsion down on a clean hard surface, and running a straight edge over the back, corner to corner while lifting the corner behind the straightedge as it moves across the print. You don't want to be too aggressive, but it stretches the emulsion enough that I can mat mount prints without adhesive. This is out to an image area of around 11x14 inches. Long term storage is best done under weight.
 

ROL

Member
Joined
Oct 27, 2005
Messages
795
Location
California
Format
Multi Format
Long term storage is best done under weight.

Really?!? Prints may be left under weight for a few weeks, to flatten them in lieu of using a heated mounting press, but I wouldn't suggest it as long term storage. I don't even see how that could be accomplished without excessive cost and great amounts of storage space and numerous weights. Once prints are flattened, even though they may exhibit a very small amount of bend in one direction, I would advise stacking loosely, preferably with appropriate interleaving tissue, in acid free media storage. Under the weight of so many stacked prints in boxes, flat files, etc., prints should relax and flatten adequately for hinge or corner mounting.

Archival%20Storage%20Box.jpg
 
Joined
Jan 17, 2005
Messages
1,355
Location
Downers Grov
Hi,

I dont use rack drying anymore because of 3 reasons, space, curl and time, instead i build a fiber based dryer designed by a fellow apug member; Reinhold

Have a look at: http://www.classicbwphoto.com/classicBWphoto/Print_Drier.html
The print drys in 1 hour and comes out very flat. I am using an archive blotting paper (which you have to change rather often but its very cheep). Have a look at the the build.

Cheers
Anders[/QUOTE

IF YOU search the archives, I have promoted this concept as being best. Salthill marketed the device in the 80`s for a hefty sum. I could not find the cash, however I would have had I realized it was the best. A neighbor found one that works on similar principle that was really old. $15 at a pro photographers retirement garage sale. I am guessing it was from the 50`s & made by the same company that made the cheap grey view cameras. Can`t remember the name.

The only other thing that worked for me was taping the print edges emulsion out to a basswood drawing board. The tape messes up the print and I could only do 2 at a time.

My advice is build the blotter stack instead. corrigated board, blotter, squeeged print, blotter, corrigated board. The fan pulls air across the blotters thru the corrigations.
 

polyglot

Member
Joined
Jun 12, 2009
Messages
3,467
Location
South Australia
Format
Medium Format
Well, I bought some corrugated cardboard (removalist boxes!) and A2 blotting paper this week. I've got some 12mm ply sitting in the shed (same as what I made the film dryer with) so if it's clear this weekend, there might be a quick bout of sawing and screwing. I might look for a cheap fan-heater tomorrow, otherwise I've got some spare 12V computer fans that would serve I think. Decisions: do I make it to fit 16x20" (my usual max print size) or 20x24"? I may have recently scored a 20x24 easel but the outer dimensions would make the dryer a real pain to store.
 

polyglot

Member
Joined
Jun 12, 2009
Messages
3,467
Location
South Australia
Format
Medium Format
I wussed out and built it for 16x20", since that's the largest paper and easel that I own. Construction is 8mm plywood, unvarnished and screwed together; weight-board is a 15mm laminated chipboard. Fans are 2x80mm 12V, with a 7812 (linear regulator) dead-bugged on the back of the socket because the plugpack I dug up produces more like 16V and the fans really howl at that voltage. Plenty of air coming out the front of the cardboard, nice and uniform across the width of the dryer.

I haven't actually dried anything with it yet, maybe I'll experiment with some FB and Selenium this weekend.
 

Attachments

  • IMG_20140714_175840_th.jpg
    IMG_20140714_175840_th.jpg
    39.1 KB · Views: 109
  • IMG_20140716_152108_th.jpg
    IMG_20140716_152108_th.jpg
    43.2 KB · Views: 112
  • IMG_20140716_152056_th.jpg
    IMG_20140716_152056_th.jpg
    45.8 KB · Views: 113
Photrio.com contains affiliate links to products. We may receive a commission for purchases made through these links.
To read our full affiliate disclosure statement please click Here.

PHOTRIO PARTNERS EQUALLY FUNDING OUR COMMUNITY:


Ilford ADOX Freestyle Photographic Stearman Press Weldon Color Lab Blue Moon Camera & Machine
Top Bottom