John51
Member
- Joined
- May 18, 2014
- Messages
- 797
- Format
- 35mm
I've been pondering how to get the most from my Ilford EM10. imo your ideas for the Pi could work well with the EM10.
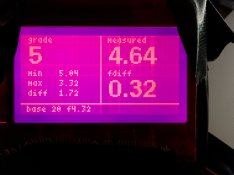
With the Pi, select what Zone is wanted for the shadows. Input the scale reading from the EM10. (It goes from 0 to 100.) Do the same for the highlights and the most important midtone. The Pi can then display the contrast grade and exposure time.
With the Pi, select what Zone is wanted for the shadows. Input the scale reading from the EM10. (It goes from 0 to 100.) Do the same for the highlights and the most important midtone. The Pi can then display the contrast grade and exposure time.

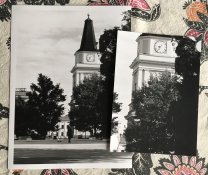
 Also sometimes the part you would need to measure is so damn small that you cannot be sure what are you measuring..