Can someone explain to me how to find out print size with DPI?

Peaceful

D
Peaceful

  • 0
  • 8
  • 44
Cycling with wife #2

D
Cycling with wife #2

  • 0
  • 0
  • 37
Time's up!

A
Time's up!

  • 0
  • 0
  • 35
Green room

A
Green room

  • 4
  • 2
  • 88
On The Mound

A
On The Mound

  • 5
  • 0
  • 90

Recent Classifieds

Forum statistics

Threads
198,238
Messages
2,771,494
Members
99,579
Latest member
Estherson
Recent bookmarks
2

Salt&Light

Member
Joined
Mar 21, 2020
Messages
43
Location
Orlando, FL
Format
Multi Format
I'm just so confused as to how big I can print a photo without losing resolution based on the DPI I scanned the negative at. The optimal resolution max without interpolation on my scanner is about 1600 dpi. So, how do I figure out how big I can print a 35mm and 120mm exposure without losing resolution?

I'm confused. Please, someone help me. I just started scanning my own negatives, so I'm new to all this still.

Thank you.
 

MattKing

Moderator
Moderator
Joined
Apr 24, 2005
Messages
52,468
Location
Delta, BC Canada
Format
Medium Format
I'll try to help.
First, it is 120 film, not 120mm film. 120mm film would be really big!
Don't worry, lots of people make that mistake.
Second, you need to separate in your mind the Pixel Per Inch (PPI) numbers for a screen or a scanner and the essentially unrelated Dots Per Inch (DPI) numbers for a printer.
Third, you need to understand what works with and looks good when you are printing if you are using a printer that lays down dots (of ink).
For moderate size prints, a number of 300 - 400 DPI will give good results. Many printers are limited to 300 DPI, so that may be a good target resolution.
For larger prints, one doesn't stand as close when viewing, so 250 DPI is often a good choice.
Now here comes the challenging part - how do you go from a source with a Pixel Per Inch (PPI) resolution, to a printing file with a Dots Per Inch (DPI) resolution?
This is a very broad simplification, but if you equate one pixel to one dot, and are working in black and white, it is fairly workable.
For an 8" x 8" print made on a 300 DPI printer, you end up with a print that is 2400 x 2400 dots. If you use one pixel for each dot, you need 2400 x 2400 pixels.
You said in another thread that you wanted to make big, 30" x 30" prints - those are challenging.
Using the same analysis as with the 8" x 8" print, a printing resolution of 300 DPI requires 9000 x 9000 pixels - a big file. Even with a 3000 ppi scanner, you still need a 3" x 3" negative.
Even if you use a printing resolution of 250 DPI it still requires 7500 x 7500 pixels - still a big file.
If you are working in colour, where each image element is made out of multiple pixels, the numbers go higher.
This is why software is necessary - to add pixels by way of interpolation.
It is much simpler in the darkroom :D:whistling::wink:.
 

shutterfinger

Member
Joined
Feb 25, 2013
Messages
5,020
Location
San Jose, Ca.
Format
4x5 Format
Pro labs print at 300 dpi. For a 8 x 10 print that will be 300*8 x 10*300 or a file that is 2400 pixels x 3000 pixels.
In editing software you can find the image size and convert from pixels to inch. Divide each dimension of your 1600ppi image file by 300 to find the maximum size for that file at 300dpi. Large prints such as 16 x 20 and larger are printed at 150ppi.
Newer image editing software incorporates genuine fractals interpolation software so you can scale your smaller files to print larger. When resizing files in editing software change the size in steps such as 1600>2400, 2400>3600, 3600> 4800 rather than 1600>4800 as the stepped version will look better to a critical eye.
 

Luckless

Member
Joined
Feb 9, 2016
Messages
1,362
Location
Canada
Format
Multi Format
http://alvyray.com/Memos/CG/Microsoft/6_pixel.pdf

An excellent paper to help better understand pixels, and in part may help with your understanding of printer dots. The math isn't the most approachable for many, but it includes some pictures that can help for those who aren't going to dive too deep into the number crunching.

As a side note, I would really love to see 120mm roll film as a thing, if for no other reason than to troll people confusing 120 format film and 120mm film... :tongue:
 

Billy Axeman

Member
Joined
Aug 18, 2017
Messages
523
Location
Netherlands
Format
Digital
Dpi means a value calculated from the division of dots/inch. So, for example when you need a print that is 10 inch wide and when you know that it is printed with a resolution of 300 dpi, you need a photo of 10 inch x 300 dpi = 3000 pixels wide.

This is how you can calculate the required size of a photo (in pixels) for example when sending it to a print service. Ask them at which resolution they print their photos (in dpi) and then send the photo with exactly the size (in pixels) as calculated above to prevent they are upscaling or downscaling the photo, which would perhaps reduce the sharpness.
 

Wallendo

Subscriber
Joined
Mar 23, 2013
Messages
1,409
Location
North Carolina
Format
35mm
If you are new to scanning negatives, I wouldn't worry too much about the arithmetic.

When printing out a large print, you don't really lose resolution (all the pixels are still there), but you will lose subjective sharpness. A light application of unsharp mask to your image can increase the subjective sharpness. In addition, you printer driver will manipulate the image, a process over which you may not have much control). Unlike zooming in on an image on your computer, large prints will not lead to blockiness, but some blurring instead. I have had 24x36" posters made from 6MP images. Although nowhere near APUG standards, the end result was actually pleasing. In the end, you should make several prints and see how large you can print while meeting your own personal standards.
 

jim10219

Member
Joined
Jun 15, 2017
Messages
1,632
Location
Oklahoma
Format
4x5 Format
1600 dpi input (what your scanner does) against a 300 dpi output (about what most inkjet printers do). 1600/300=5.333.

Take the size of a negative, and multiply it by 5.333, and you'll have your number. So, a 24mm x 36mm (.944" x 1.41") negative (35mm film) gives you about a 5" x 7.5" print at 300 dpi.

And a 6x4.5cm 120 film negative gives you about 11.7" x 8.8" print.

Now, using math I have definitively proven jack squat. Because in reality, you can't accurately predict how big you can print something without considering a lot more variables. For instance, some subjects, such as portraits, will allow you to print them at lower resolutions than things like detailed landscapes from a wide angle lens. Sometimes you can use various software algorithms to interpret missing information, and generate new pixels adjacent to your current ones, thus allowing you to blow up pictures far beyond what you could without these algorithms. At first they used simple averaging methods, then they switched to fractal geometry, and now they're using AI to predict missing pixels. Beyond that, one must consider the typical viewers distance and visual acuity, as well as the medium that the final print will be displayed on. Glossy inkjet paper can show a much sharper image, and will reveal limits quicker than uncoated watercolor paper. Also, the acuity of the camera system, original negative, and scanning equipment will also play a role. Plus there are other factors I haven't mentioned.

So basically, the only real way to know anything for sure is to try it for yourself.
 
OP
OP
Salt&Light

Salt&Light

Member
Joined
Mar 21, 2020
Messages
43
Location
Orlando, FL
Format
Multi Format
I'll try to help.
First, it is 120 film, not 120mm film. 120mm film would be really big!
Don't worry, lots of people make that mistake.
Second, you need to separate in your mind the Pixel Per Inch (PPI) numbers for a screen or a scanner and the essentially unrelated Dots Per Inch (DPI) numbers for a printer.
Third, you need to understand what works with and looks good when you are printing if you are using a printer that lays down dots (of ink).
For moderate size prints, a number of 300 - 400 DPI will give good results. Many printers are limited to 300 DPI, so that may be a good target resolution.
For larger prints, one doesn't stand as close when viewing, so 250 DPI is often a good choice.
Now here comes the challenging part - how do you go from a source with a Pixel Per Inch (PPI) resolution, to a printing file with a Dots Per Inch (DPI) resolution?
This is a very broad simplification, but if you equate one pixel to one dot, and are working in black and white, it is fairly workable.
For an 8" x 8" print made on a 300 DPI printer, you end up with a print that is 2400 x 2400 dots. If you use one pixel for each dot, you need 2400 x 2400 pixels.
You said in another thread that you wanted to make big, 30" x 30" prints - those are challenging.
Using the same analysis as with the 8" x 8" print, a printing resolution of 300 DPI requires 9000 x 9000 pixels - a big file. Even with a 3000 ppi scanner, you still need a 3" x 3" negative.
Even if you use a printing resolution of 250 DPI it still requires 7500 x 7500 pixels - still a big file.
If you are working in colour, where each image element is made out of multiple pixels, the numbers go higher.
This is why software is necessary - to add pixels by way of interpolation.
It is much simpler in the darkroom :D:whistling::wink:.

So after reading all your posts, I'm still a bit confused, but here is my thinking now:

I have a 120 negative, that's 6cm by 4.5cm, which then converting that into inches gets me: 2.36" x 1.77"
then I scan this negative at say 1600 PPI. My scan would then have more pixels in it without interpolation than a 300 PPI scan.

2.36 in. (x) 1600 PPI = 3776 pixels
1.77 in. (x) 1600 PPI = 2832 pixels
VS.
2.36 in. (x) 300 PPI = 708 pixels
1.77 in. (x) 300 PPI =531 pixels


Then say, I want a 12" x 9" print on a printer that prints at 300 DPI. that's 3600 x 2700 pixels, which doesn't exceed the pixels of my scan at 1600 PPI, so it should work just fine.
But, say I get the same 12" x 9" print on a printer that prints at 300 DPI, that's 3600 x 2700 pixels, with my scan at 300 PPI. Since the pixels needed in the print exceed that of the scan, the print will turn out badly unless I add pixels through interpolation of my 300 PPI scan.

Is my thinking about it all finally correct? I'm slamming my head here trying to figure out what PPI to scan my negatives in order to get specific sized prints before I can start editing them.
 

MattKing

Moderator
Moderator
Joined
Apr 24, 2005
Messages
52,468
Location
Delta, BC Canada
Format
Medium Format
Whoa - you are confusing PPI (pixels) with DPI (dots). The size of pixels vary widely. Pixels on a cel phone camera's sensor are extremely tiny. Pixels on a 65" TV are huge. The pixels on a scanning sensor are a lot smaller than the dots that printers make, and the size of those printer dots are essentially unchanging - a 300 DPI dot is the same size no matter which printer you look at.
You should scan your (relatively little) negatives at the largest scan resolution that your scanner uses accurately - most likely about 1600 - 2400 PPI.
Then when you make your (relatively larger) prints, you have enough little pixels to make larger dots from to make the print look good.
The only reason to do a 300 PPI scan would be to make really small files - think thumbnail images or maybe a photo on a business card.
 

shutterfinger

Member
Joined
Feb 25, 2013
Messages
5,020
Location
San Jose, Ca.
Format
4x5 Format
To get the best of your scanner scan at the manufacturers stated Optical resolution limit. If your scanner's limit is 1600dpi then scan at 1600 dpi, if its 4800 dpi then scan at 4800 dpi. The optical limit of the scanner is the max you will get from that scanner, third party max is based on testing method an to get their figures they have to use the scanners optical limit or very near it.

Next if the file is too large you can reduce it in post with image resize. Use post software to determine the print size or select the print size and ppi in the print dialog and quit worrying about it.
 

MattKing

Moderator
Moderator
Joined
Apr 24, 2005
Messages
52,468
Location
Delta, BC Canada
Format
Medium Format
If you are worried about ending up with two few pixels when scanning, there are some quite remarkable stand-alone and plug-in pieces of software that use AI to re-size up your files .....
 

Les Sarile

Member
Joined
Aug 7, 2010
Messages
3,419
Location
Santa Cruz, CA
Format
35mm
@MattKing and @shutterfinger When I resize the image in PS to be larger does it perform an interpolation?

Resizing will always interpolate.

What has not been brought up in the replies above is the fact that different types of papers have different "resolutions" - super glossy paper can show finer details then say textured paper.

For instance, if the details has been captured on a frame of good resolving 35mm film, I can scan it at 4000dpi on my Coolscan and make 20" X 30" print on super glossy paper and details clearly distinguished on-screen from the scan will still not fully resolved on even that size poster print with that type of paper. Needless to say, you will need to make even much larger prints to be able to see the details you captured when printing on textured paper.
 

Adrian Bacon

Subscriber
Joined
Oct 18, 2016
Messages
2,086
Location
Petaluma, CA.
Format
Multi Format
I'm just so confused as to how big I can print a photo without losing resolution based on the DPI I scanned the negative at. The optimal resolution max without interpolation on my scanner is about 1600 dpi. So, how do I figure out how big I can print a 35mm and 120mm exposure without losing resolution?

I'm confused. Please, someone help me. I just started scanning my own negatives, so I'm new to all this still.

Thank you.

Scanner DPI is not the same as printer DPI. Think of printer resolution as PPI (Pixels per inch). However many ink dots per inch the printer has to lay down to render pixels per inch is not under your direct control, so think of it as pixels per inch and let the printer worry about actual dots of ink.

That being said, DPI on a scanner is the same as pixels per inch, whether it's PPI on a piece of film, or PPI on a piece of paper is actually irrelevant, if you think in terms of Pixels per inch, things become waaaaaay easier.

Let's start with the scanned negative. So, you have 6x4.5 negatives on 120 film scanned in at 1600 pixels per inch. That's great! Using generic measurements, the long side of the image would be 2.25 inches, so that would be 2.25 multiplied by 1600 pixels per inch, or 3600 pixels total for the long edge of your scanned image. Not bad.

Now, lets talk printer resolution. Modern prints are generally printed at 240 to 300 pixels per inch (letting the printer put down however many dots per inch of ink it needs to in order to render that PPI number), so to determine the size you can print at without resizing your scan, you take your 3600 total pixels on the long edge of your scanned image and divide it by the printed resolution in pixels per inch, in this case, we'll use 240 pixels per inch: 3600 / 240 = 15 inches on the long side of the image.

Make sense?
 

shutterfinger

Member
Joined
Feb 25, 2013
Messages
5,020
Location
San Jose, Ca.
Format
4x5 Format
@MattKing and @shutterfinger When I resize the image in PS to be larger does it perform an interpolation?
Yes when you increase image size in post processing the resizing software uses interpolation to create the larger size.

I recently took a photo I made with a D300, saved as camera raw, converted to 16 bit Tiff, then upsized it to 4x in CS5 in steps as shown in post 3 and it retained all the detail just as sharp as the original file while the jump from original to 4x produced soft edges.
The same will hold true for scanned film as its how the software works.
 

shutterfinger

Member
Joined
Feb 25, 2013
Messages
5,020
Location
San Jose, Ca.
Format
4x5 Format
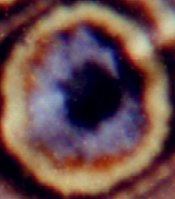
Photo 1 is a 1/3 frame crop from a full frame Kodak color film (don't remember which one) scanned at 3600 dpi, 16 bit RGB; a 866mb file. It was reduced in CS5.1 to fit this fourm in resolution steps 3600>2400>1200>600>300>150 dpi then 16 bit to 8 bit, image 4.187 inch x 2.789 inch print size.
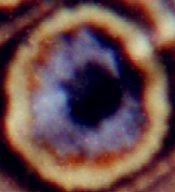
Photo 2 is photo 1 original file scaled to 10 inch wide with constrain proportions selected in steps 4.187>6>8>10 inch, butterfly cropped, resulting file resolution reduced as photo 1, final image size 2.98 inch x 3.487.
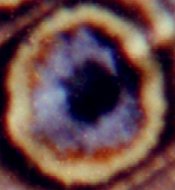
Photo 3 is photo 1 original file size scaled to 10 inch wide without steps, cropped as photo 2, reduced in resolution in steps as photo 1.

Download then zoom in 60% to 100% to see the fine detail difference of the scaling.
butterfly 1 copy.jpg butterfly copy 2.jpg butteryfly copy 3.jpg
Photo Crop 1 is the original file at 100%, changed to 8 bit then saved as jpeg max; crop 2 is photo 2 scaling at 100% changed to 8 bit and saved as jpeg; crop 3 is photo 3 scaling changed to 8 bit and saved as jpeg.
crop 1.jpg crop 2.jpg crop 3.jpg
 
Last edited:

138S

Member
Joined
Dec 4, 2019
Messages
1,776
Location
Pyrenees
Format
Large Format
I'm just so confused as to how big I can print a photo without losing resolution based on the DPI I scanned the negative at. The optimal resolution max without interpolation on my scanner is about 1600 dpi. So, how do I figure out how big I can print a 35mm and 120mm exposure without losing resolution?

I'm confused. Please, someone help me. I just started scanning my own negatives, so I'm new to all this still.

Thank you.

This is very elastic :smile:

"Perfect" graphic quality is said to require 300 ppi in the printer medium, pixels per inch.

If you have 3000 pixels wide in your image, in theory, you'll print perfect quality 10".

But in practice what counts is your digital processing skills.

It is a complex workflow, your scanning dpi has to be higher than the optimal scanner resolution, 16 bit's channel, and saved in TIFF, take all histogram, (image may be dull before curve adjustments).

Sharpen, reduce size to the edition size, edit reduce/increase size to pixels in t printer image (one image pixel for each pixel in the printer), sharpen pixel level, additionally sharpen with optimal radius for print side vs viewing distance...

When you reduce image size then use "bicubic, ideal for reductions" setting in the Photoshop Image Size dialog... The last you do is converting to 8bits/channel, do all edition in 16bits/channel and perhaps converting to jpg for the internet version.

So... there is no easy recipe, you always can throw to the printer a very big image and allow the (good) optimization in the printer do the job, but for a refined job there is no easy answer, it depends on the quality in the negative and on your skills. Try to learn a lot about sharpening, we cannot provocate overshots!!! We just require a refined edition and some skills.

Sharpening skills are critical, different subjects in the scene require different sharpening setiings, so you may have toadjust sharpening locally, depending also on the gray level.

In a portrait you may sharpen different eyes than a cheek. In a landscape you may want to sharpen different a flat sky showing grain than vegetation under it...

All those operations have to conserve image quality, so you have to edit in an oversampled image sporting 16 bits per channel. The better you do that the larger you can print with good quality.
 
Last edited:

138S

Member
Joined
Dec 4, 2019
Messages
1,776
Location
Pyrenees
Format
Large Format
Wow, so much intricate reasoning for such a simple thing. I think OP is now pulling out his hair.

Yeah :smile:

But there is no easy answer... or better said, in this case an easy answer is well missleading. From 1600dpi you can enlarge the negative 1600/300 = x5 approx the negative size. But depending on digital processing you may enlarge x4 or x8 for the same perceived quality level at reading distance.


Let me add that the kind question made by OP denotes early learning stages in hybrid processing, and at this stage best advice is refining digital workflow because it's critical, there are many ways to destroy the digital enlargement potential of an image.
 
Last edited:

removed account4

Subscriber
Joined
Jun 21, 2003
Messages
29,833
Format
Hybrid
hi OP
its a confusing mess, isn't it ?
one thing you might consider is when you scan your film, always scan it at a high resolution
so when/if you dust+retouch, you will Rez-down your "master file" for whatever size you want to print.

good luck !
John
 

Billy Axeman

Member
Joined
Aug 18, 2017
Messages
523
Location
Netherlands
Format
Digital
Yeah :smile:

But there is no easy answer... or better said, in this case an easy answer is well missleading. From 1600dpi you can enlarge the negative 1600/300 = x5 approx the negative size. But depending on digital processing you may enlarge x4 or x8 for the same perceived quality level at reading distance.
Let me add that the kind question made by OP denotes early learning stages in hybrid processing, and at this stage best advice is refining digital workflow because it's critical, there are many ways to destroy the digital enlargement potential of an image.

It was a general impression I had from this thread, I wasn't especially referring to your post. So, go ahead.
 

jeffreyg

Subscriber
Joined
Jun 12, 2008
Messages
2,620
Location
florida
Format
Medium Format
While I'm good at math, I prefer to not really bother with it when doing photography. I use 120 and 4x5 film most often 400 ISO and sometimes 100 ISO. My scanner is an "ancient" Epson 4870 with SilverFast Studio 8 software. I did a test with a target I bought from them and for my equipment it came out to scan at about 2200 PPI ( imagine that) so I scan at the 2400 PPI setting just to keep it simple. I edit and size the image at that setting which creates a huge file. Somewhere I read that when downsizing the PPI it is best to do it incrementally so I go from 2400 to 1200 and depending on the size of the print often to 600. The rational being that the information is there and it is being compressed for file size. I have no idea that is correct but I get good results. My printer is an Epson Stylus Pro 3880. I usually print at what is said to be 1200DPI and sometimes 2400DPI although I really can't see much if any difference. I am getting exhibition quality prints on Hahnemuhle Glossy Fine Art Paper ( cotton Baryta). My enlargements are 16in by 16+in.
IMHO experiment with a couple ideas mentioned and when one gives you a result you can live with enjoy what you are doing..

http://www.jeffreyglasser.com/

http://www.sculptureandphotography.com/
 

Billy Axeman

Member
Joined
Aug 18, 2017
Messages
523
Location
Netherlands
Format
Digital
While I'm good at math, I prefer to not really bother with it when doing photography. I use 120 and 4x5 film most often 400 ISO and sometimes 100 ISO. My scanner is an "ancient" Epson 4870 with SilverFast Studio 8 software. I did a test with a target I bought from them and for my equipment it came out to scan at about 2200 PPI ( imagine that) so I scan at the 2400 PPI setting just to keep it simple. I edit and size the image at that setting which creates a huge file. Somewhere I read that when downsizing the PPI it is best to do it incrementally so I go from 2400 to 1200 and depending on the size of the print often to 600. The rational being that the information is there and it is being compressed for file size. I have no idea that is correct but I get good results. My printer is an Epson Stylus Pro 3880. I usually print at what is said to be 1200DPI and sometimes 2400DPI although I really can't see much if any difference. I am getting exhibition quality prints on Hahnemuhle Glossy Fine Art Paper ( cotton Baryta). My enlargements are 16in by 16+in.
IMHO experiment with a couple ideas mentioned and when one gives you a result you can live with enjoy what you are doing..

If you want to make prints that have a consistent and reproducible quality some calculations are inevitable and you must carefully make notes about all the settings of your hardware and in the software. When you are not doing this it is not possible to improve results because you don't know what you did before. This applies to your complete workflow: taking photos, development, enlarging, scanning, editing etc.
 

jtk

Member
Joined
Nov 8, 2007
Messages
4,943
Location
Albuquerque, New Mexico
Format
35mm
It's easy if you're a photographer more than math geek...a visual person. Assuming a decent/cheap monitor you can see what will happen to detail resolution at whatever magnification you can think of ...reliably.
 

Les Sarile

Member
Joined
Aug 7, 2010
Messages
3,419
Location
Santa Cruz, CA
Format
35mm
Yeah :smile:

But there is no easy answer... or better said, in this case an easy answer is well missleading.

Actually it's very simple to answer and you can't be misled.
1. Scan the image at whatever setting
2. Print a small section which has enough important detail
3. Compare detail printed to captured on screen
4. Increase the resolution of the scan, print and/or quality/size of paper and/or film as needed to meet goal
No math involved - theoretical at best, and you will know how it applies to your workflow specifically.
I went through this exercise myself to see how my scans of various films compared to optical poster prints to compare detail, color, contrast and grain.
 
Last edited:
Photrio.com contains affiliate links to products. We may receive a commission for purchases made through these links.
To read our full affiliate disclosure statement please click Here.

PHOTRIO PARTNERS EQUALLY FUNDING OUR COMMUNITY:


Ilford ADOX Freestyle Photographic Stearman Press Weldon Color Lab Blue Moon Camera & Machine
Top Bottom