Right now I'm using Fabriano Academia. It doesn't seem to require any extra sizing. In fact, I tried once to size it with 3% gelatin, thinking that I might see at least a slight improvement in sharpness and/or gloss, and I got an image that looked exactly as usual. There was no difference. So I decided not to bother with sizing anymore.
I double coat by brush. Not only do I find the brush method easier, but I also like the brush strokes to show at the edges. I found the glass rod technique too finicky and often got uneven coating with it, so I now avoid it and use the brush exclusively. When I coated with the glass rod I didn't need two coatings. One was enough. But with the brush the second coating improves D-max and evenness significantly.
I don't do anything special. I have no special tricks. My only trick is to keep everything constant. As long as I use the same paper, the same amount of sensitizer, the same coating technique, the same processing procedure, the same drying method, the same drying time, the same distance between the UV lamp and the contact printing frame, and I use fresh chemicals, I find I can make as many identical prints as I wish.
My workflow is as follows:
- Use about 1.5 ml of sensitizer for an 8x10" print if I want to cover it completely, or 0.7 ml if I want the image to fade into brush strokes toward the edges.
- Wet the brush, then shake it a few times and wipe it with a paper towel.
- Pour all the sensitizer in the middle of the paper and start brushing it quickly in all directions. Keep brushing until all sensitizer has been thoroughly absorbed into the paper, but not longer.
- Let the paper dry naturally for half an hour. No fan, no heat.
- Apply the second coating.
- Let the paper dry naturally for one hour.
- Make the exposure.
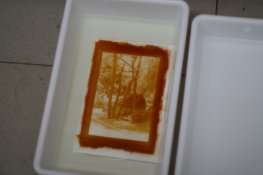
- Wash the print in distilled water with some citric acid for three minutes, twice.
- Add one tablespoon of sodium thiosulfate pentahydrate in a liter of water. Fix for five minutes.
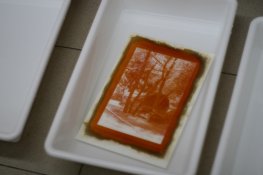
- Rinse for a couple of minutes, while preparing a 1+200 dilution of selenium toner (5 ml per liter).
- Tone until there's a visible (albeit very slight) darkening of the color. This usually takes from three to five minutes. Be careful not to tone any further, because the print will start lightening to an ugly orange.
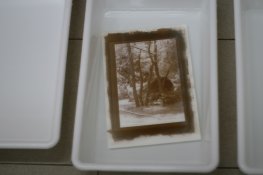
- Rinse the print for a couple of minutes, while preparing a 2% (give or take) solution of sodium sulfite.
- Wash the print in the sulfite solution for five minutes.
- Wash in tap water for half an hour.
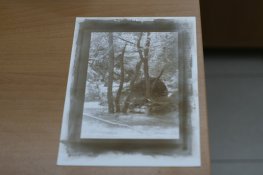
- Hang to dry.
As you can see, there's no special trick. I don't do anything that's not in the books. I just found a method that worked for me and stuck with it.
Notes:
- The dry-down effect is unbelievably strong. If the print looks great wet, it's guaranteed to be far too dark when dry. I try to aim for a lighter than normal print. I don't know if this is a characteristic of the process, or of the paper I'm using. It may be just the paper.
- Selenium toner changes the color of the print from a reddish brown to a dark chocolate brown and also improves D-max slightly. The effect is strong and beautiful after the print has dried, though it's quite subtle when the print is wet.