Split Grade Printing?

Frank Dean,  Blacksmith

A
Frank Dean, Blacksmith

  • 10
  • 5
  • 89
Woman wearing shades.

Woman wearing shades.

  • 1
  • 1
  • 87
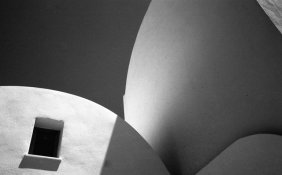
Curved Wall

A
Curved Wall

  • 6
  • 0
  • 104
Crossing beams

A
Crossing beams

  • 11
  • 1
  • 123

Recent Classifieds

Forum statistics

Threads
198,846
Messages
2,781,768
Members
99,727
Latest member
Koakashii
Recent bookmarks
0

banandrew

Member
Joined
Oct 13, 2015
Messages
84
Format
Multi Format
Wow, seems like a pretty popular topic. I'll chime in with my negative experience, since no one has mentioned it, but I've had issues with the negative shifting slightly when doing split-grade printing. I'm using a Beseler 23C II and the above condenser filters. I tried split grade for a while with only the #00 and #5 (the method in Way Beyond Monochrome) but felt the workflow didn't suit me for some reason or other I usually ended up printing with a lower contrast than I would if I'd done a single grade print. I liked being able to control local contrast, but I'm changing back to a single contrast for main exposure, and then if necessary different contrast for burning in. It just seems a lot faster and less wasteful for me to get the base exposure/contrast if I decide I'm doing single-grade for the main exposure. I'm not sure on what method I'll settle on eventually as I'm still young in my printing career.

I love reading everyone's comments though this is great for me.
 

Bob Carnie

Subscriber
Joined
Apr 18, 2004
Messages
7,735
Location
toronto
Format
Med. Format RF
two things I feel are critical for those wanting to split print.

1. your enlarger head should be braced to avoid any movement .
2. you should use a glass carrier to avoid any negative movement.


There are many good books on split printing - Ralph's book comes to mind- he is a frequent poster here on APUG

Most people consider split printing to be a balance act between 0 and 5 filters.

I have found the exact opposite to be true- you can blend any two filters with any given negative to produce looks that you require.
I find myself frequently using a 3 filter to nail the mid to highlight values and the 5 filter to bring in shadow contrast.
I also find that sometimes I am starting with a grade 4 filter and then exposing the whole print with a 00 filter using dodging to hold back areas where
I want the strong contrast.

Once you move down the wormhole of split and VC papers , you can pretty much master any negative. I started to seriously split print when Ilford introduced
what I think to be one of the best silver papers Ilford Warmtone. this was around 1995 if memory serves me - I was in a group of printers given 5 boxes of different colours and asked to pick the one I liked
the best... I think I chose the reddish box which turned out to be the paper I have continued with with split printing..

Split printing in my world is a way of attacking a negative and basically laying down the right tones where I want them, it is a method IMO much more liberating
than single filter printing(nothing wrong btw)
 

JBrunner

Moderator
Moderator
Joined
Dec 14, 2005
Messages
7,429
Location
PNdub
Format
Medium Format
It's the only way I print. It is not, however, the only way to print. It's not that I find some magic bullet in the technique, it's just easier for me to get things where I want them in two steps. With most papers I find that the 00 influences the printing of the neg overall at a low contrast, and 5 prints the shadows while ignoring the highlights. When I recognize that effect rather than thinking of printing highlights and shadows, it works better for me.
 

M Carter

Member
Joined
Jan 23, 2013
Messages
2,147
Location
Dallas, TX
Format
Medium Format
"Way beyond Monochrome" has several strategies for split grade, with excellent examples and descriptions.

For things like that hot air balloon shot (SWEET composition, difficult contrast range), the next step is all the various masking techniques - most of which require a stable enlarger with pin-registered neg carrier and negs. I think you'd be hard pressed to perfect that print without some masking.

While - far as I know - you need to get a 4x5 enlarger and a $500 pin registration setup - you can DIY it. I converted a 6x7cm holder to pin register in my Beseler 67, and made a registered glass carrier that uses silkscreen pins and a regular paper punch.

You can also do many of the standard masking strategies on the paper plane, but (unless everything's a contact print) it's a one-time process; you have to make paper (or large litho film) masks, and then make your prints, without touching the enlarger. Once you take the setup down, you'll never get it to line up with your masks again.

But yeah, I'm looking for a 4x5 now...
 

Bob Carnie

Subscriber
Joined
Apr 18, 2004
Messages
7,735
Location
toronto
Format
Med. Format RF
We did all our complicated masking at the paper or film plane, rather than trying to use registration in the enlarger.

I can see pros and cons for both ways of doing it. The most complicated I ever did was 50 images on a 16 x20 transparency film. This required so much ortho material that it does
not make sense for the average user.

"Way beyond Monochrome" has several strategies for split grade, with excellent examples and descriptions.

For things like that hot air balloon shot (SWEET composition, difficult contrast range), the next step is all the various masking techniques - most of which require a stable enlarger with pin-registered neg carrier and negs. I think you'd be hard pressed to perfect that print without some masking.

While - far as I know - you need to get a 4x5 enlarger and a $500 pin registration setup - you can DIY it. I converted a 6x7cm holder to pin register in my Beseler 67, and made a registered glass carrier that uses silkscreen pins and a regular paper punch.

You can also do many of the standard masking strategies on the paper plane, but (unless everything's a contact print) it's a one-time process; you have to make paper (or large litho film) masks, and then make your prints, without touching the enlarger. Once you take the setup down, you'll never get it to line up with your masks again.

But yeah, I'm looking for a 4x5 now...
 

doug_morse

Member
Joined
Mar 26, 2011
Messages
6
Location
Cambridgeshi
Format
Medium Format
Split grade is the only thing that works with my brain. I am very new to printing but I get satisfactory results quickly. Registration is only a problem if I am careless. As a project I decided to automate the process. A bit nerdy but fun for me! http://remorseblog.blogspot.co.uk/2015/10/automating-darkroompart-1-concept.html
I recommend it to people starting out as it helps isolate contrast variables which to my brain is easier to judge.


Sent from my iPad using Tapatalk
 
Joined
Jan 21, 2003
Messages
15,708
Location
Switzerland
Format
Multi Format
This sums it up perfectly, and is the essence of why split grade printing can be so powerful, but potentially also misunderstood.


Here are some quick notes about "split grade" (referring specifically to the approach using min and max contrast filters) printing which should be kept in mind. And yes, it is a perfectly good technique.

1. "Split grade" (where the base exposure is split into two pieces, one at min contrast, one at max contrast) is one form of a broader variable contrast or multiple filter technique.

2. Multiple filter printing with VC papers is an exceedingly powerful tool - provided it is combined with selective exposure (ie burning and dodging).

3. Further to (2) above, note that unless you are dodging/burning during each of the exposures, the value of multiple filter printing is much more limited. The reason is that if you are simply splitting a full print exposure into two pieces (one high contrast, one low contrast), all you are really doing is duplicating a single exposure at a contrast grade somewhere in between max and min. This can still potentially be of some value (depending on the paper) if grade spacing is uneven and/or you need a grade in between two filter numbers (eg something in between say grade 2.5 and 3). With VC or colour heads which are infinitely variable between min and max contrast, this advantage goes away.
 

DREW WILEY

Member
Joined
Jul 14, 2011
Messages
13,936
Format
8x10 Format
Like anything else it just requires a bit of practice. Take a rainy afternoon and fuss around with some test strips. I do split printing with hard green and blue filtration, cause that is actually what the respective emulsions see. But this means you need a strong enough light source to see the projected image as you dodge and burn. Otherwise a strong yellow versus magenta setting on the colorhead instead, or equivalent gels above the neg carrier. Combining these filters at the same time merely creates neutral density - good only if you're trying to slow the exposure rather than optimally see it. Easier to forget all the grade nonsense in the first place. That was relevant back in the days of predominantly graded papers, but is redundant when working with variable-contrast options.
 

Steve Sherman

Subscriber
Joined
Sep 14, 2003
Messages
548
Location
Connecticut
Format
ULarge Format
Ideally you want the combination of Soft and Hard contrast exposures to effect the final micor-contrast in the most difficult area of the print to alter or manipulate. The rest of the printing sequence becomes corrective and usually in smaller areas, in other words changing the local contrast to your own aesthetic. Again, in an ideal working scenario the corrections in local areas would be dodging of one light source while burning with the other light source in a somewhat 50 - 50 relationship to avoid any tell tale signs of manipulation.
It's a bit of trial and error but once comfortable with the technique the possibilities are more limited by your imagination than the process itself.
 

Sirius Glass

Subscriber
Joined
Jan 18, 2007
Messages
50,364
Location
Southern California
Format
Multi Format
I found that I did not have to stick to 0-5 filters and other combinations worked better on some negatives.
 

Kilgallb

Subscriber
Joined
Oct 14, 2005
Messages
813
Location
Calgary AB C
Format
4x5 Format
When you burn the sky with 00 you can be less precise with the dodging mask. The 00 exposure will not have too much effect on the dark edges of a tree line. The same can be said when burning a darker tree line or mountain at grade 5. The exposure will not have great effect on the sky. This means your dodging and burning manipulation a are harder to see.
 
Joined
Jul 31, 2012
Messages
3,352
Format
35mm RF
Split printing is the easiest way to make most prints because once you are used to it, it is pretty fast. One thing I do that I feel is important is to start at the end of the scale that is the most critical to the image. If it is a heavy image, start with the shadows. I use 00 and 5 since I use a Saunders 4550 VCCE and unless the enlarger is on, I can't see the filter grades, but it is easy to just turn the knob all the way. One of these days I would like to wire a red LED to the fan circuit, but I digress. When I have printed with below the lens filters I like to use blue and green just because it looks cool. I always focus through the 5 filter too. Split printing is all I need with probably 90% of images. YMMV.

If you think of a print as a voluminous three dimensional object then visualizing a print is much easier. You are adding layers of light to the paper., building the image. You can't subtract it though, although there are ways to bleach it back before (shadows) and after (highlights) developing if for some reason a print needs it. That is the best way to describe what I think of a print, but maybe I have sniffed too much fixer in my life....

I hope that helps someone.
 
OP
OP

ToddB

Member
Joined
Jul 10, 2012
Messages
1,134
Format
Medium Format
If you have good neg then obviously this treatment is not always used?

Todd
 

DREW WILEY

Member
Joined
Jul 14, 2011
Messages
13,936
Format
8x10 Format
It's like any other printing tool. It's in your toolbox for when you need it. I have dozens of tricks in my toolbox. Some of them I might use only once at year at most. I might use some aspect of split printing in a typical long session. Less often I fully split print, meaning using only hard
filters for both total exposure. Sometimes I use unsharp masking, always dodging and burning. In real life, every single neg could hypothetically be correctly exposed and developed, but that doesn't mean there aren't infinite numbers of ways a given neg can be printed
for a particular suite of aesthetic renditions. The fact is, I never know precisely until the dance with a specific paper begins. Then I might use
a different tactic or tool set printing the same neg on a different paper or with a different developer. It's all fun.
 

MattKing

Moderator
Moderator
Joined
Apr 24, 2005
Messages
52,949
Location
Delta, BC Canada
Format
Medium Format
If you have good neg then obviously this treatment is not always used?

Todd

Some people use it for everything. It is a perfectly acceptable way to obtain fine control over contrast choices - even for negatives that would also print well with a single contrast filter.

It depends a lot on you - what approach feels comfortable to you?
 
OP
OP

ToddB

Member
Joined
Jul 10, 2012
Messages
1,134
Format
Medium Format
I tried it on a particularly tricky neg from my Trip this summer. I was blown away how beautifully it printed. Here is the digital scan.. Should mention that the print came out nearly the same using split technique.
attachment.php
 

Attachments

  • Santorini BW.JPG
    Santorini BW.JPG
    57.2 KB · Views: 519
Last edited by a moderator:

eddie

Member
Joined
Jul 24, 2005
Messages
3,258
Location
Northern Vir
Format
Multi Format
I use it for everything I print. One reason is I like to keep my technique consistent. Changing my work habits for different negatives slows me down. Approaching each negative the same way allows me to concentrate on what's important. Another epiphany was getting the Heiland Split Grade System/Controller, which makes it a breeze, no need to worry about vibration/focus, and allows grade separation of 1/10 of a grade.
 
OP
OP

ToddB

Member
Joined
Jul 10, 2012
Messages
1,134
Format
Medium Format
Heiland Split Grade System/Controller sounds like cool gadget. I was worried about vibration, but had no issues.
 

eddie

Member
Joined
Jul 24, 2005
Messages
3,258
Location
Northern Vir
Format
Multi Format
What Rob said, and linked to. They also have a manual version, but I'm not familiar with it (I have the LPL version).
 

M Carter

Member
Joined
Jan 23, 2013
Messages
2,147
Location
Dallas, TX
Format
Medium Format
If you worry about enlarger wobble… I use 52mm glass camera filters that sit nicely in the red-filter (under lens) holder. I just found colors that match the split grade filters.

BTW, "Way Beyond Monochrome" has step by step on this technique with photo examples. If your darkroom work is at the point where you're asking what split-grade is, that one book would be an excellent investment, and it's still in print (not like trying to buy Rudman's toning book!)
 

Andrew O'Neill

Moderator
Moderator
Joined
Jan 16, 2004
Messages
11,985
Location
Coquitlam,BC Canada
Format
Multi Format
Split grade printing is how I print when I use my 8x10 enlarger, as I have no choice. I have two large Roscoe filters (green, blue) which slide in between the negative and the light source (1212 Aristo). Even though it's a bit more work, I have really enjoyed printing this way.
 

John Layton

Member
Joined
May 24, 2005
Messages
36
Location
Newbury, Ver
Format
Multi Format
I started to do split grade printing about a year ago...shortly after I acquired a complete Zone VI enlarger setup with VC cold light head.

So far so good...and yes, this is indeed a powerful tool in controlling local contrast levels.

But I think my initial approach to testing may be changing. While "conventional" wisdom had suggested I first test to establish highs with the green channel, I sometimes find results a bit difficult to evaluate effectively. So more recently I've begun to test first for shadows with the blue channel - getting to something which feels good intuitively, then layering on with the green channel to "fill in the blanks" as it were.

Yet another suggested testing technique - that of printing an area in a perpendicular grid pattern using each channel for the first (and hypothetically only) test sequence...I find either limiting or wasteful, in that for me this requires a large sheet of paper to get any sense of relativity to the entirety of the image. Thus I'm still starting by establishing a base using one channel, then adding the other to this with a new sequence to get a good baseline exposure.

At any rate...I'd be very curious to have others chime in a bit further regarding their initial testing procedures. As for what seems to be a general consensus that split grade printing saves time...I have yet to find this to be true for me, but I probably just need a bit more practice.

Finally, while the the VC cold light head on my Zone VI seems OK for now, the blue channel does seem to flicker a bit when fully powered up (I thus use this channel at a lower setting) I'm a bit nervous about its working consistently down the road...and am starting to think about alternative light sources.

The Heiland LED heads look amazing - but also very expensive. But I do wonder about the actual contrast range of these led heads. A good friend has been using the Zone VI LED VC head, which was produced very briefly before Zone VI folded. He relates that while generally more even and "flicker-free," his Z-VI LED head does not offer the contrast range (especially in the higher contrasts) when compared to his older cold light version. My hope would be that the Heiland head would offer an improvement here, especially given its cost...but I would like to hear more from others regarding experiences with Heiland heads. Thanks!
 
Photrio.com contains affiliate links to products. We may receive a commission for purchases made through these links.
To read our full affiliate disclosure statement please click Here.

PHOTRIO PARTNERS EQUALLY FUNDING OUR COMMUNITY:


Ilford ADOX Freestyle Photographic Stearman Press Weldon Color Lab Blue Moon Camera & Machine
Top Bottom