Really discouraged about scanning with my Epson v500 - color/grain problems.

In the Vondelpark

A
In the Vondelpark

  • 0
  • 1
  • 27
Cascade

A
Cascade

  • sly
  • May 22, 2025
  • 3
  • 1
  • 24
submini house

A
submini house

  • 0
  • 0
  • 51
Diner

A
Diner

  • 5
  • 0
  • 95
Gulf Nonox

A
Gulf Nonox

  • 10
  • 3
  • 119

Forum statistics

Threads
197,819
Messages
2,764,948
Members
99,481
Latest member
chopfalne
Recent bookmarks
0

artobest

Member
Joined
Oct 19, 2011
Messages
165
Location
South Wales
Format
Medium Format
Just using 48-bit won't in itself give you a dark image. I use it all the time - in fact, you'd be crazy to use anything else. In short, '48-bit' is the same as 16-bit (16-bits x 3 channels = 48 bits). The difference between that and 24-bits (otherwise known as 8-bits) is that with 8-bits you have 256 tonal values per channel to work with, and with 16-bits you have approx. 65,536 values, meaning you can make adjustments with a much finer degree of precision. In an 8-bit image, major tonal or colour adjustments can introduce artifacts such as posterization. Also, 8-bit editing in a wide-gamut colour space such as ProPhotoRGB can cause banding or posterization.
 

StoneNYC

Member
Joined
Aug 5, 2012
Messages
8,345
Location
Antarctica
Format
8x10 Format
Just using 48-bit won't in itself give you a dark image. I use it all the time - in fact, you'd be crazy to use anything else. In short, '48-bit' is the same as 16-bit (16-bits x 3 channels = 48 bits). The difference between that and 24-bits (otherwise known as 8-bits) is that with 8-bits you have 256 tonal values per channel to work with, and with 16-bits you have approx. 65,536 values, meaning you can make adjustments with a much finer degree of precision. In an 8-bit image, major tonal or colour adjustments can introduce artifacts such as posterization. Also, 8-bit editing in a wide-gamut colour space such as ProPhotoRGB can cause banding or posterization.

So then do you know why it's so dark?


~Stone

The Noteworthy Ones - Mamiya: 7 II, RZ67 Pro II / Canon: 1V, AE-1 / Kodak: No 1 Pocket Autographic, No 1A Pocket Autographic

Sent from my iPhone using Tapatalk
 

chuck94022

Member
Joined
Jan 11, 2005
Messages
869
Location
Los Altos, C
Format
Multi Format
Artobest, from my experience (I do this as well) Preview is not going to display it correctly. It will show them as dark. This is even documented somewhere, I'll have to dig it up... The right thing for Stone to do is to bring it on into Lightroom (or PS or Aperture or whatever can handle a 48 bit image) and edit it. Note that not all editors (or viewers) handle 48 bit. On the Mac, for example, Pixelmator, an otherwise good editor, doesn't handle them (and also doesn't have separate channels for RGB in its levels tool) so it sucks for scanned negatives.
 

StoneNYC

Member
Joined
Aug 5, 2012
Messages
8,345
Location
Antarctica
Format
8x10 Format
Artobest, from my experience (I do this as well) Preview is not going to display it correctly. It will show them as dark. This is even documented somewhere, I'll have to dig it up... The right thing for Stone to do is to bring it on into Lightroom (or PS or Aperture or whatever can handle a 48 bit image) and edit it. Note that not all editors (or viewers) handle 48 bit. On the Mac, for example, Pixelmator, an otherwise good editor, doesn't handle them (and also doesn't have separate channels for RGB in its levels tool) so it sucks for scanned negatives.

But they are even dark IN SILVERFAST that doesn't make sense, I find it hard to find the actual frame lines when selecting the slides because some images are dark to begin with.

And I have a BRAND NEW MacBook Pro with Mountain Lion, it should be able to handle whatever the newest "bit" is, they are designed for photographs as videographers :smile:

Anyway I swear I will scan again and open up in LR and let you know the results soon.


~Stone

The Noteworthy Ones - Mamiya: 7 II, RZ67 Pro II / Canon: 1V, AE-1 / Kodak: No 1 Pocket Autographic, No 1A Pocket Autographic

Sent from my iPhone using Tapatalk
 

pschwart

Subscriber
Joined
Jul 15, 2005
Messages
1,143
Location
San Francisco, CA
Format
Multi Format
Epson Scan: turn on professional mode (no auto anything), turn off thumbnails. Preview->set your images borders-> make tonal corrections->scan. The scanner software is WYSIWYG; it would be pretty useless if it wasn't. If your scans are too dark, there is a problem in your workflow.
 

StoneNYC

Member
Joined
Aug 5, 2012
Messages
8,345
Location
Antarctica
Format
8x10 Format
Epson Scan: turn on professional mode (no auto anything), turn off thumbnails. Preview->set your images borders-> make tonal corrections->scan. The scanner software is WYSIWYG; it would be pretty useless if it wasn't. If your scans are too dark, there is a problem in your workflow.

Thanks ill try it!


~Stone

The Noteworthy Ones - Mamiya: 7 II, RZ67 Pro II / Canon: 1V, AE-1 / Kodak: No 1 Pocket Autographic, No 1A Pocket Autographic

Sent from my iPhone using Tapatalk
 

chuck94022

Member
Joined
Jan 11, 2005
Messages
869
Location
Los Altos, C
Format
Multi Format
OK, I just tried all this again and... I was wrong! I did a 48 bit HDR scan, of a positive. Preview had no problem with it. art2best, pschwart, you were right. Just been a while since I've done slide... :-(

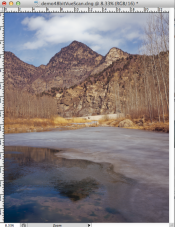
Here is the slide, freshly scanned, being previewed:

Screen Shot 2012-12-09 at 11.44.04 PM.jpg

It is a little darker than the actual slide, but not DARK dark...
 

chuck94022

Member
Joined
Jan 11, 2005
Messages
869
Location
Los Altos, C
Format
Multi Format
I got the same result with VueScan, although the result is not as dark as the above - looks more like the slide on the scanner. VueScan is always more predictable for me.
 

chuck94022

Member
Joined
Jan 11, 2005
Messages
869
Location
Los Altos, C
Format
Multi Format
Screen Shot 2012-12-10 at 12.01.05 AM.png This is the one from VueScan, after the DNG passed through ACR into PhotoShop. As you can see, brighter, more like the slide itself.
 

StoneNYC

Member
Joined
Aug 5, 2012
Messages
8,345
Location
Antarctica
Format
8x10 Format
View attachment 832 This is the one from VueScan, after the DNG passed through ACR into PhotoShop. As you can see, brighter, more like the slide itself.

Still haven't tried it, but I will I've just been super busy and sick. I plan to try again Wednesday.

But how did you get the ruler lines on that image? Is that preview? Looks like its showing you what the full size image size would be, that's handy I'd like to show that option can you tell me how? Thanks.


~Stone

The Noteworthy Ones - Mamiya: 7 II, RZ67 Pro II / Canon: 1V, AE-1 / Kodak: No 1 Pocket Autographic, No 1A Pocket Autographic

Sent from my iPhone using Tapatalk
 

chuck94022

Member
Joined
Jan 11, 2005
Messages
869
Location
Los Altos, C
Format
Multi Format
Still haven't tried it, but I will I've just been super busy and sick. I plan to try again Wednesday.

But how did you get the ruler lines on that image? Is that preview? Looks like its showing you what the full size image size would be, that's handy I'd like to show that option can you tell me how? Thanks.


~Stone

The Noteworthy Ones - Mamiya: 7 II, RZ67 Pro II / Canon: 1V, AE-1 / Kodak: No 1 Pocket Autographic, No 1A Pocket Autographic

Sent from my iPhone using Tapatalk

That's PhotoShop.
 

pukalo

Member
Joined
Nov 30, 2006
Messages
159
Format
35mm
Holly, your problem is rooted in the fact that you are using negative film. It accentuates grain, and getting the colors correct on an amateur scanner is very difficult and aggravating. If you had a $25,000-$40,ooo professional Kodak or Fuji dedicated film scanner, with built in profiles for ndifferent negative films, it would be another matter...
The easiest and least expensive solution iis to order 5 rolls of Provia 100F slide film, and watch your problems dissapear. Your scans will have virtually NO grain, will be sharper, and have perfect colors! Yes, you will have to be careful about exposure when shooting, but I assume your camera has a built in light meter. Just use it.
The great myth is that negative film is easier to scan - you have now experienced yourself this often repeated falsehood. Slide scans massively better, give it 5 rolls and you will see !

ps - it will set you back around $25 from BH Photo or Adorama. And dont spend anything for Photoshop yet, you will find you dont really need it. And vuescan, ee gads, stay away....a great program, but expensive and with a huge learning curve. With slide film, you will get great results using the much more friendfly Epson scan.


pps - I have the Epson 4870 scanner, I too have experienced your problems...and their resolution shooting slide film.
 

jd callow

Moderator
Moderator
Joined
Jan 31, 2003
Messages
8,466
Location
Milan
Format
Multi Format
pukalo,
I agree that grain can be a bigger issue with neg film over slide and b/w over both, but you don't need a 25-40k scanner to get a good scan from a neg. And having used professional film profiles for both scanners and image setters I can tell you that the best I've seen them do is get you about half way there and then generally only under perfect conditions. Perfect generally being studio shots. If the film is shot in overcast or cloudy skies, mixed lighting, improper or imperfect on camera filtration and or over or under exposed you can all but throw the profile away.

Profiles in my mind are the big internet falsehood. Unless you create them yourself for the way you shoot and develop.

I do agree that this may be a case of having expectations exceed the product and it may be that scanning slides might set the world right. I am of the opinion that in the digital workflow anything a slide can do a neg can do and then some. It may just take some time to learn. I am currently using vuescan, and it is not the easiest program to learn, but now that I have a pretty good handle on how to use it I'm getting some of the best scans I've ever made. FWIW I scan on a Nikon 8000, E6 film that has been crossproccessed to be neg film.
 

Attachments

  • bulldog_small.jpg
    bulldog_small.jpg
    177.3 KB · Views: 58

jd callow

Moderator
Moderator
Joined
Jan 31, 2003
Messages
8,466
Location
Milan
Format
Multi Format
I bought an Epson v500 almost two years ago because I wanted to have more control over how my negatives came out by scanning them myself. I use the Epson Scan software.

I've always used it on Professional setting at 6400dpi (I know that's unnecessarily high. Someone in another forum said that might be the problem?), with the Thumbnail box checked, and with automatic exposure adjustment. I am somewhat satisfied with these results but I always noticed that there was a lot more grain than what I see in other peoples' pictures (even people with the exact same camera/film/scanner, such as this picture: http://www.flickr.com/photos/sealegs...ts/4946605824/). So recently I finally got fed up with what I perceieved as an unusual amount of grain so I started experiementing with different settings on my camera. Lo and behold, I found out what a different experience it is when you DON'T check the Thumbnail. Mostly it is a lot more work, but I noticed that the grain is a lot finer and the picture's texture is just smoother overall.
Example:
With thumbnail checked: http://i46.tinypic.com/mimp1.jpg
Without thumbnail checked: http://i47.tinypic.com/14436l0.jpg

So, at first I got excited, but there was another problem - the colors are way off, as you can see. I know the process should be: select inside the picture and press the auto exposure, and then increase the selection if you want to get the black borders (which I do). But I always end up with bad colors, no matter what.
Example:
With thumbnail: http://i49.tinypic.com/2l9ii4p.jpg
With thumbnail (post-processed in Lightroom): http://i45.tinypic.com/11t1pg2.jpg
Without thumbnail: http://i50.tinypic.com/2yn5xna.jpg
Without thumbnail (post-processed in Lightroom): http://i45.tinypic.com/ivbneb.jpg

As you can see, even if a post-process the crap out of the "without thumbnail" image, it still doesn't look quite right, color-wise.

So, my question is, what is your procedure for scanning? Any advice you could offer I would be really grateful for, I am very lost and discouraged about scanning my own negatives... it seems that no matter what I do, I can't get them to both have less grain and correct colors.

Holly,
I haven't read this whole thread and I do not know if your question has been answered to your satisfaction since it was sent in a different direction, but I'll give you my answer.

Its my opinion that...
Your first two scans have noise in the under exposed areas due to the under exposure and the scanner is noisy. It is also likely that the scanner was sharpening the noise. Flat bed scanners and less expensive scanners in general produce noise (higher signal to noise -- don't know, but maybe) and it is most notable in dense and thin areas of the film.

The color is off in the next group because you are trying to do color/contrast and density correction via the auto setting of the scanner. The auto settings will clip the highs and lows and leave you very little to play with post scan. If the auto setting worked for a given neg then you have no worries, but if it didn't then you are left to fight two problems an incorrect color and density along with an image that no longer allows you as much leeway as it could have or might need to have to be properly color corrected.

Overall I think the scans show promise.
My approach would be:
  1. Turn all the auto and sharpen options off.
  2. Select some of the rebate of the frame when scanning
  3. set the scanner to 48bit or whatever its highest setting is.

The scanner might have its own profile or allow you to choose from a series of profiles or better still it may have process to create its own profile.
Either create a scanner profile (this will remove some scanner bias) or choose the most generic sounding profile (e.g. "color neg" ) do not use anything that is specific such as "portra160"

Initially do not scan at the scanners highest resolution (scan at one half or one quarter the max res). Flatbeds don't resolve anywhere near the stated resolution and resolution isn't your first concern (I know it looks like grain, but I think what you are seeing is noise and sharpening). Later choose a very detailed sharp neg and runs some tests to see where the scanner stops collecting more information. Do not be surprised if your scanner stops collecting deatail at 1800ppi even though epson claims 6400.

The scan you get from the above recommendations will look flat a little light and probably have a cyan cast.
  1. Open the scan up in your favorite image editing program.
  2. In the image editing program try auto correct and see what it looks like. A better alternative to "Auto" is as follows:
  3. Try selecting the rebate that you scaned and use it for your black point. Find something that should be white and use that as your white point. Look for something that should be a neutral grey and select that as your mid point. Play with these three points and see if you can get closer to what you want.

In the end you are going to need to learn the curve tool to do color correction, density and contrast. If you care about how your images look you cannot expect it to be done automagically by the scanner software or even by photoshop. Proper color correction is too big a topic to cover in this thread, but take heart once you learn you'll be able to correct the color contrast and density in a given scan in minutes if not under a min.
 

artobest

Member
Joined
Oct 19, 2011
Messages
165
Location
South Wales
Format
Medium Format
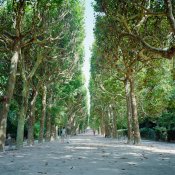
Pukalo, I would take issue with what you said. I shoot slide and negative film and get good results scanning both on consumer scanners by Konica-Minolta and Epson. The nicest colours are from Kodak Portra. In fact, this is in my opinion the sweetest colour film I've ever seen, and I've seen a few. Grain is not a problem, and getting good colour is easy when you know how. It just takes care in setting up the levels at the start of the scanning process, and a simple curves adjustment in Photoshop afterwards. I'd hate to discourage anybody from using colour negative film - it really is a different beast from slide film.

Jardin des Plantes.jpg
 

StoneNYC

Member
Joined
Aug 5, 2012
Messages
8,345
Location
Antarctica
Format
8x10 Format
Pukalo, I would take issue with what you said. I shoot slide and negative film and get good results scanning both on consumer scanners by Konica-Minolta and Epson. The nicest colours are from Kodak Portra. In fact, this is in my opinion the sweetest colour film I've ever seen, and I've seen a few. Grain is not a problem, and getting good colour is easy when you know how. It just takes care in setting up the levels at the start of the scanning process, and a simple curves adjustment in Photoshop afterwards. I'd hate to discourage anybody from using colour negative film - it really is a different beast from slide film.

View attachment 834

That's portra? I always found portra to be sort of dull and preferred Ektar, but the green is pretty striking, has it been pumped up a all?


~Stone

The Noteworthy Ones - Mamiya: 7 II, RZ67 Pro II / Canon: 1V, AE-1 / Kodak: No 1 Pocket Autographic, No 1A Pocket Autographic

Sent from my iPhone using Tapatalk
 
Photrio.com contains affiliate links to products. We may receive a commission for purchases made through these links.
To read our full affiliate disclosure statement please click Here.

PHOTRIO PARTNERS EQUALLY FUNDING OUR COMMUNITY:


Ilford ADOX Freestyle Photographic Stearman Press Weldon Color Lab Blue Moon Camera & Machine
Top Bottom