First let me brush over the details of how I make cyanotypes. I've very new to this art form. I am using MW's "New Cyanotype" Formula and for Chiba, I am using ferric ammonium oxalate as sensitizers. A while back this year I started this as my kid's science experiment, but then I wanted to experiment and see if I could use a projector to make cyanotypes work. Indeed you can use either an old LED projector or a DLP projector. I have one that is 1000 lumens and the dlp that is 3000 lumens. this weekend I was toying with the idea of calibrating to a python based digital sheet. forgive me for not knowing the exact name of such thing, but basically the normal way is to expose little rectangles of a sensitized sheet a few minutes or seconds at a time to get an idea of how long it should take to expose a cyanotype. So I was able to use Chat-GPT to make such a thing for a projector image. You click on this thing and the image goes completely black except for an initial square in the corner. The, slowly depending on how much time to told the program, it will expose another white square, then another and so on. each square has the time stamp on it. So I tried this last Sunday and it totally worked! I'll post the code below. So then yesterday I was thinkin, hmmm could it work by threshold an image and starting from a fully white screen, slowly transitioning thru an image from fully white to full black. I went on Mr. GPT and I was to able to come up with such a thing. This time I added some menus. One to pick the image you want to expose and the next to select the time you want to expose it for. I think then I can also change the way it exposes. like maybe add curves to make it linger more on the white and less on the black. I am not 100% sure if this is not something that can be done by just making a proper negative. Basically it is a time based negative or an exposure sweep. Let me know what you think!
-
Welcome to Photrio!Registration is fast and free. Join today to unlock search, see fewer ads, and access all forum features.Click here to sign up
You are using an out of date browser. It may not display this or other websites correctly.
You should upgrade or use an alternative browser.
You should upgrade or use an alternative browser.
Projector Cyanotype and Chiba python digital negative.
-
AH
- Thread starter imgprojts
- Start date


Recent Classifieds
-
For Sale Canon Strap and Canon battery magazine BGM-E2(unused)
- Started by absalom1951
-
For Sale Beseler Enlarger Lens Boards
- Started by absalom1951
-
For Sale Yashica LM
- Started by absalom1951
-
For Sale Schneider Kreuznach Super Symmar HM 120mm lens
- Started by Guivd
-
For Sale Linhof Master Technika '50 Jahre' Edition 4x5 Large Format Camera
- Started by jbprichard
Forum statistics
- Threads
- 203,534
- Messages
- 2,856,170
- Members
- 101,890
- Latest member
- Lucky Barn Studios
- Recent bookmarks
- 0
Here is my first exposed calibration sheet. each square is 5 seconds I think:

Its soo cool to see it actually expose. Well sort of cool. At least a little cool: https://mastodon.social/@werefreeatlast/113122431812189522
Basically you see a row above that is slightly darker than your current row. Ok, its mildly interesting.
Basically you see a row above that is slightly darker than your current row. Ok, its mildly interesting.
Welcome aboard @imgprojcts and thanks for sharing your innovative way of making cyanotypes! Interestingly, this relates to some other things that have been happening lately on here (and elsewhere) as well. I'm alerting in particular @AndrewBurns who has been working (successfully!) on getting 3D printer LCD's to work for alt. process printing, using a UV LED array light source: https://www.photrio.com/forum/threa...egative-in-alt-process-contact-prints.207526/
Andrew was also the one who reminded me of the potential for using a DLP/projector for alt. process printmaking and I've included it in my recent blog on this topic: https://tinker.koraks.nl/photograph...e-of-digital-output-for-alternative-printing/
However, you're the first I hear of who is actually doing this - awesome!
Welcome aboard @imgprojcts and thanks for sharing your innovative way of making cyanotypes! Interestingly, this relates to some other things that have been happening lately on here (and elsewhere) as well. I'm alerting in particular @AndrewBurns who has been working (successfully!) on getting 3D printer LCD's to work for alt. process printing, using a UV LED array light source: https://www.photrio.com/forum/threa...egative-in-alt-process-contact-prints.207526/
Andrew was also the one who reminded me of the potential for using a DLP/projector for alt. process printmaking and I've included it in my recent blog on this topic: https://tinker.koraks.nl/photograph...e-of-digital-output-for-alternative-printing/
However, you're the first I hear of who is actually doing this - awesome!
Thanks, but I did get this idea from a couple of videos on you tube. I think there is quite a bit of improvement but as is, anyone can do this. I've already made large prints 11x15" and the thing just works. I bought two of the same old projectors 1080P resolution and you can see pixels at 300" wide if you're like 3 ft from the screen. So in other words, the resolution is pretty good specially since Cyanotype is not that high resolution on paper. That UV screen idea is probably much better to get higher resolution. it looks really neat.
Here's the link to the video that inspired me:
You'll hear the the guy exposed the stuff for hours. But it depends on how big the print is and also what formula you're using. The New Cyanotype formula is much faster than the old one. For a big-ish 11x15, I expose usually for 20 minutes.
In parallel I'm working on several things about my projector. The first thing is or was the light bulb. I got ADHD about it and I can feel the bulb dying in hours lol. So I figured out a way to bypass the ballast and use an LED. I haven't switched to that yet, but thanks to another YouTube video I guess that I can do it and still get an ok image? I already tried a UV LED 50w and it's pretty much as strong an output as the 3000L projector on its own without any optics between it and the paper. So I'll try a stronger LED, maybe 200W. The LED has to be around 20mm square or round for optical stuff to work out. Don't know about Colimation but I got another trick up my sleeve. Anyway I tried just a powerful LED flashlight and it got me Prussian white as quick as the UV lamp. So the chemistry is definitely sensitive to more than just UV light. In fact my sheets do change color slowly with just the room LED light in the ceiling. So the light will be a 200W near 6000k bright LED.
Finally to focus the light, I'm going to use mirrors instead of lenses. That's where the very...ohh very complicated python+ rpi2040 bypass scheme comes into play. And I mean this was complicated. I spent several weekends on just trying to get the thing to run without the lightbulb. But the final piece of the puzzle is the mirror system. I will have two cylindrical mirrors bouncing the light right into the DMD chip. I possibly need to have a short integrator tube, which is just a fancy tube with all the walls being mirrors. What it does is to homogenize the light to prevent vignetting. You can also use a diffuser but that absorbs light. Specially UV. All of these hopes and dreams are to remove optical elements that absorb UV. And that's it. Like if I achieve any of this I'll be pretty impressed with myself. Mind you I can already run the projector without the bulb but it's pretty sketchy and I gotta time it right. I'm on a sort of break from that right now to clear my mind and bring it back to the other real problems like focusing.
I got no clue really what sort of light the chemistry is sensitive to. My guess is that most of it is in the blue or higher frequency. I suppose I could actually figure it out actually just by creating exposure sheets for various colors and letting the color wheel in the projector actually change the color. Single color means I don't have to have special lenses due to color fringing which might ruin the focus. But hey if nothing here actually gets to be, the least I can do is to remove the color wheel. According to a web report, removing the color wheel and letting the projector be basically black and white will double the light power output. That could be all I really need.
Finally the single mod I've done so far is to add very thin rubber spacers to the lens so I can achieve close focus for small very quick prints. 3x5"s can be exposed in just 20 to 40 seconds. You basically focus the image to the board, block the light, place the paper and shutter the light for 20 to 40 seconds. It's amazing . The cool thing is that there are hundreds of thousands of very cheap projectors online and you don't need high rez to get something decent.
You'll hear the the guy exposed the stuff for hours. But it depends on how big the print is and also what formula you're using. The New Cyanotype formula is much faster than the old one. For a big-ish 11x15, I expose usually for 20 minutes.
In parallel I'm working on several things about my projector. The first thing is or was the light bulb. I got ADHD about it and I can feel the bulb dying in hours lol. So I figured out a way to bypass the ballast and use an LED. I haven't switched to that yet, but thanks to another YouTube video I guess that I can do it and still get an ok image? I already tried a UV LED 50w and it's pretty much as strong an output as the 3000L projector on its own without any optics between it and the paper. So I'll try a stronger LED, maybe 200W. The LED has to be around 20mm square or round for optical stuff to work out. Don't know about Colimation but I got another trick up my sleeve. Anyway I tried just a powerful LED flashlight and it got me Prussian white as quick as the UV lamp. So the chemistry is definitely sensitive to more than just UV light. In fact my sheets do change color slowly with just the room LED light in the ceiling. So the light will be a 200W near 6000k bright LED.
Finally to focus the light, I'm going to use mirrors instead of lenses. That's where the very...ohh very complicated python+ rpi2040 bypass scheme comes into play. And I mean this was complicated. I spent several weekends on just trying to get the thing to run without the lightbulb. But the final piece of the puzzle is the mirror system. I will have two cylindrical mirrors bouncing the light right into the DMD chip. I possibly need to have a short integrator tube, which is just a fancy tube with all the walls being mirrors. What it does is to homogenize the light to prevent vignetting. You can also use a diffuser but that absorbs light. Specially UV. All of these hopes and dreams are to remove optical elements that absorb UV. And that's it. Like if I achieve any of this I'll be pretty impressed with myself. Mind you I can already run the projector without the bulb but it's pretty sketchy and I gotta time it right. I'm on a sort of break from that right now to clear my mind and bring it back to the other real problems like focusing.
I got no clue really what sort of light the chemistry is sensitive to. My guess is that most of it is in the blue or higher frequency. I suppose I could actually figure it out actually just by creating exposure sheets for various colors and letting the color wheel in the projector actually change the color. Single color means I don't have to have special lenses due to color fringing which might ruin the focus. But hey if nothing here actually gets to be, the least I can do is to remove the color wheel. According to a web report, removing the color wheel and letting the projector be basically black and white will double the light power output. That could be all I really need.
Finally the single mod I've done so far is to add very thin rubber spacers to the lens so I can achieve close focus for small very quick prints. 3x5"s can be exposed in just 20 to 40 seconds. You basically focus the image to the board, block the light, place the paper and shutter the light for 20 to 40 seconds. It's amazing
. The cool thing is that there are hundreds of thousands of very cheap projectors online and you don't need high rez to get something decent.calebarchie
Member
Can you post a simple picture of this contraption? I have a hard time picturing it.
Any projector will work. The setup is simple, there is a projector on a table and a screen. And Holyshishkabob! my first print looked like a negative when I took it off the screen. I was disillusioned. I thought it was really going to suck when I developed it. But boy was I wrong! I was sooooo wrong. This is truly the very best cyanotype I have ever made. it looks like a darn picture developed at walmart.Can you post a simple picture of this contraption? I have a hard time picturing it.
The image as it is being developed is just shadows like this. Pardon the colorwheel rainbow, it looks nothing like this in real reality except for the shadow


A ball point pen for reference. I will do a photo I can share next just for fun.

I swear I was going to give up on the newcyanotype formula. but these results are crazy good. I was getting results with much more lighter depth. Too much time and they turned dark, too little exposure and they washed away. But with this progressive image scan you can burn in the low lights and shade the highlights. I literally did nothing to the negative just made it negative and put it in the folder for the program to scan thru.
OK here is the next picture I am going to try. This is going on canson XL mixed media paper with no acid pre-treatment.

I think that because the image is exposed intensely on the entire surface with completely white/UV light vs shaded by a negative, I think that is causing the finished image to have a good order of magnitude better sharpness in my riggidy exposure setup. I can literally walk next to it and the image shifts around. I'm taking several pictures of better quality as this image exposes. its almost done. Too bad I can't just share images from my phone as they are too large. I gotta crop and paste. I'm really excited about this one. It has lots of lines and a homogeneous sky so if there are artifacts we're bound to see them here.
Ok here is some detail on the process. first the exposure, then the result, then the developed image:


Here is a better view of the fully exposed image.

And the developed image:

fgorga
Member
Regarding the spectral sensitivity of cyanotype:

This data is for traditional cyanotype, but given that the photo-active component is the same as the new cyanotype and the very broad 'peak', I don't think that this matters.
This data is for traditional cyanotype, but given that the photo-active component is the same as the new cyanotype and the very broad 'peak', I don't think that this matters.
Here is a zoom into the little sign towards the center. That's 5mm wide by 3.8mm tall

I overcooked this photo. but if you look at the fully exposed one, check out the details in the shadow areas. I think this is a game changer. Its "sharp enough".
AndrewBurns
Member
Interesting, I assume the colour bands in the photos you've taken of the exposure being performed are because the projector hasn't been modified and so it's still trying to project an image with RGB channels, you wouldn't normally see them by eye due to persistence of vision but the camera does as it's running at a fairly high shutter speed.
As the spectral sensitivity curve for cyanotype shows, it's basically only sensitive to 'royal blue' and shorter wavelengths, meaning that if you're projecting a 'white light' image with distinct RGB channels the majority of your light power is being wasted. The reason that a conventional white LED light source slowly fogs the paper is because white LEDs are actually blue LEDs with some phosphor to re-radiate the light energy at longer wavelengths, but there is always some blue component of the base LED that makes its way through as well (just a small fraction of the overall power).
If you're getting ~20 minute exposures with the new cyanotype formula it would probably be hours with traditional cyanotype. I'm using traditional cyanotype in my contact printing and my exposure time is 4 minutes, but I'm also using a very powerful 405nm light source, so even though a lot of my energy is wasted to the poor transmission of the LCD screen it's still better optimised for the cyanotype chemical reaction.
In theory with a DLP projector if you replaced the light source (I suppose ideally all three of them) with a 405nm LED you could get much shorter exposure times.
If you want to go a step further with calibrating your setup such that how you image looks on the computer matches how the print looks (almost) perfectly, you should look at using 'Easy digital negatives' (http://www.easydigitalnegatives.com/) to produce a calibration curve which you can apply to your original image before printing it. The calibration curve will make your image look very bad and flat/low-contrast but once printed the print should very closely match the original image before the curve was applied. It's basically compensating for the non-linear relationship between exposure and density (or darkness) you get when printing cyanotypes, which generally results in the final print being much higher contrast than the original image.
Interesting, I assume the colour bands in the photos you've taken of the exposure being performed are because the projector hasn't been modified and so it's still trying to project an image with RGB channels, you wouldn't normally see them by eye due to persistence of vision but the camera does as it's running at a fairly high shutter speed.
As the spectral sensitivity curve for cyanotype shows, it's basically only sensitive to 'royal blue' and shorter wavelengths, meaning that if you're projecting a 'white light' image with distinct RGB channels the majority of your light power is being wasted. The reason that a conventional white LED light source slowly fogs the paper is because white LEDs are actually blue LEDs with some phosphor to re-radiate the light energy at longer wavelengths, but there is always some blue component of the base LED that makes its way through as well (just a small fraction of the overall power).
If you're getting ~20 minute exposures with the new cyanotype formula it would probably be hours with traditional cyanotype. I'm using traditional cyanotype in my contact printing and my exposure time is 4 minutes, but I'm also using a very powerful 405nm light source, so even though a lot of my energy is wasted to the poor transmission of the LCD screen it's still better optimised for the cyanotype chemical reaction.
In theory with a DLP projector if you replaced the light source (I suppose ideally all three of them) with a 405nm LED you could get much shorter exposure times.
If you want to go a step further with calibrating your setup such that how you image looks on the computer matches how the print looks (almost) perfectly, you should look at using 'Easy digital negatives' (http://www.easydigitalnegatives.com/) to produce a calibration curve which you can apply to your original image before printing it. The calibration curve will make your image look very bad and flat/low-contrast but once printed the print should very closely match the original image before the curve was applied. It's basically compensating for the non-linear relationship between exposure and density (or darkness) you get when printing cyanotypes, which generally results in the final print being much higher contrast than the original image.
Thanks for the pointers. The LED I got for this is a 380nm. 365 is somehow more expensive. I've looked into decaping or removing the phosphor but that's a thing to try only if things don't work out as planned. For now I figure a 200w white LED has enough blue light in it as you mentioned. Another part of this project is to make an exposure unit. I haven't decided yet what size I want. The 11x15" is not bad, but I could go 24" tall with a 1hr exposure probably.
In fact my sheets do change color slowly with just the room LED light in the ceiling.
Do they also produce density in the dark? This really sounds like the paper is not compatible with the sensitizer and it just fogs. New Cyanotype is quite picky when it comes to paper. The Canson XL you mentioned further on does work with New Cyanotype as I recall without modification; I used to get good results with it, but I also ensured to expose the paper when it was just coated and never kept sensitized paper around.
Its "sharp enough".
Yeah, it looks OK; not super sharp evidently, but should be good for casual viewing. You get a little fuzziness due to everything not being entirely in focus, but that's good because you don't get to see the individual pixels in the final print.
For now I figure a 200w white LED has enough blue light in it as you mentioned.
You're better off with a 100W 395nm COB LED. You'll get more density per time and cost unit than with a 200W white LED and the power dissipation challenge will only be about half as big.
There's no added value in the higher wavelengths and all the losses incurred with the conversions and blockage in the phosphor; see @fgorga's post above. The nice thing about DLP is that the mirrors bounce UV just fine, so you're not bound to visible light. This technology is even used in D-UV lithography exposure systems (although not for primary image formation).
Nice experiments; keep it up!
Maybe @Carnie Bob is also interested in this; he's quite enthusiastic about the marriage of contemporary digital technology and alt. process printmaking. Maybe he can share some words of encouragement/inspiration if/when he passes by this thread.
I usually make the sheets on Saturday and use them Sunday. Sometimes I use them a week later. It's a weekend hobby. If I leave the sheets exposed to the room light they self expose a little. Otherwise like if I leave them between a couple of books they're alright, just slightly darker. I left one go completely blue and it still did develop with a little blue in the background. These initial experiments I ran on fresh sheets. I have a few mini sheets that are a week old to try today. I want to do at least one chiba sheet today.
I guessed that if I made the screen go black, then the sheet would stop developing. It seems to work. The last sheet I ran was supposed to be there for 9 minutes but the script got stuck at a late stage. Everything was black except for a silhouette. When I developed it, the image was just fine except for the much darker silhouette.
That's why I called it auto exposure. My initial idea was...hmm project an image, use dry erase markers to locate features, place the sensitized sheet and then turn on the LED (assuming I had that ballast bypass scheme working), then have the script automatically turn off the LED after the exposure was done. But with this threshold sweep, I can just program the exposure time into the sweep. It will the light up the surfaces that need exposure and shade the surfaces where the exposure is complete until the entire exposure is complete.
I've worked really hard on this today, putting up with incredible chat GPT ineptitude to write the program that it wrote for me in excruciatingly painful repetitious prompts. I changed from TKinter to PQt because pqt offered more flexibility in its GUI creation. I also changed from CV2 to just PQt because cv2 was not playing along and then I realized that I am not doing anything more than what PQt can offer. If you want to run this on your linux box you will need to install the prereqs:
# Update package list sudo apt update
# Install Python 3 sudo apt install python3
# Install pip for Python 3 sudo apt install python3-pip
# Install PyQt5 and Pillow using pip pip3 install PyQt5 Pillow
# (Optional) Install additional development libraries sudo apt install python3-dev
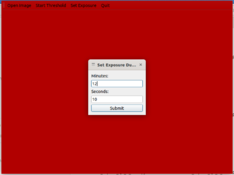
The program opens a window which is red by default such that you can place a sensitized paper under its projection and not have it develop yet. Then you go to file open an image, you can resize it as needed and place it as needed. Finally you can check the exposure and input the number of minutes and seconds you would like to run this for. finally hit the exposure button and go get a coffee. I don't drink coffee but its what is normally suggested.


When you are done it returns to red. then you can go find another image or you can re-run the image. Press the s key to start the exposure. Press the q key to close the program or you can go to the quit menu.
# Update package list sudo apt update
# Install Python 3 sudo apt install python3
# Install pip for Python 3 sudo apt install python3-pip
# Install PyQt5 and Pillow using pip pip3 install PyQt5 Pillow
# (Optional) Install additional development libraries sudo apt install python3-dev
The program opens a window which is red by default such that you can place a sensitized paper under its projection and not have it develop yet. Then you go to file open an image, you can resize it as needed and place it as needed. Finally you can check the exposure and input the number of minutes and seconds you would like to run this for. finally hit the exposure button and go get a coffee. I don't drink coffee but its what is normally suggested.
When you are done it returns to red. then you can go find another image or you can re-run the image. Press the s key to start the exposure. Press the q key to close the program or you can go to the quit menu.
Attachments
Well, I rewrote the app from python CV2 to QT5 and now C++ QT5 and the best thing that I found to make the app work best is to reduce the image size to 1920x1280 which is the projector's native format. that seems to make the ThinkCentre 2 core processor work OK just divide the total exposure by 2.2 in my case and it works. I'm getting exposures of 12 minutes. at 19" from the screen I am doing 5.5x8.5 Canson XL, but the screen is a little larger at that distance. The GUI got a rando ChatGPT update. what ever it wants, you gets:

| Photrio.com contains affiliate links to products. We may receive a commission for purchases made through these links. To read our full affiliate disclosure statement please click Here. |
PHOTRIO PARTNERS EQUALLY FUNDING OUR COMMUNITY:  |