Printing challenging (thin) negatives

Recent Classifieds

Forum statistics

Threads
198,508
Messages
2,776,357
Members
99,636
Latest member
Johan Siggesson
Recent bookmarks
1

Bosaiya

Member
Joined
Apr 6, 2005
Messages
396
Location
Sumner, Wash
Format
4x5 Format
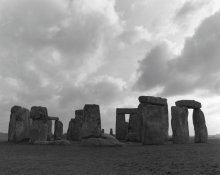
I have been making a lot of exposures under difficult circumstances lately. The existing light is very low overall with patches of bright light (similar to theater lighting). Flash isn't an option so I've been doing my best under the conditions.

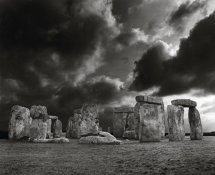
I scan the negatives in order to proof digitally, and when I view them both on the monitor and held to the light I can see that there is plenty of detail in the shadows, even though the shadows are still thin. I'm having a heck of a time getting my prints to show as much shadow detail as I'd like. I'm using a condensing enlarger and Kentmere VC paper, the combination works great for brighter scenes.

At Grade 2 the blacks and whites are muddy as expected.
At Grade 3 the blacks are okay but there's not much separation of hilights.
At Grade 4 the blacks are rich but the lights are barely visible.

Any ideas on ways to increase the contrast between the lights and darks to give better detail?
 

memorris

Member
Joined
Jun 30, 2009
Messages
15
Format
4x5 Format
Not a printing solution but if you have too much contrast, make sure you have the shadows placed correctly then do a N01 or N-2 development. That will compress the dynamic range to make it practical to print.
 
OP
OP
Bosaiya

Bosaiya

Member
Joined
Apr 6, 2005
Messages
396
Location
Sumner, Wash
Format
4x5 Format
Not a printing solution but if you have too much contrast, make sure you have the shadows placed correctly then do a N01 or N-2 development. That will compress the dynamic range to make it practical to print.

I've looked at doing that but ran into the problem of not being able to keep track of which shots are which. Some are taken under good conditions and some under difficult, some on rolls and some on sheets. I use a lot of film and trying to keep track of it all proved too exhausting. I do stand development for all of them as a compromise.
 

Anon Ymous

Member
Joined
Feb 7, 2008
Messages
3,661
Location
Greece
Format
35mm
I had a keeper to print lately and I have to admit that I goofed badly. I underdeveloped and underexposed, so the scenario was quite similar. I got acceptable results using split grade printing and did lots of tests to see what needed to be dodged/burned with the #0, or #5 filters. The final print was not really good. The thin shadows had very low contrast, so when I reached real black, things looked bad. Selenium toning made things much better. You see, I made the same print twice and the comparison was easy. Additionally, a less dilute print developer may bump contrast a bit.
 

RalphLambrecht

Subscriber
Joined
Sep 19, 2003
Messages
14,635
Location
K,Germany
Format
Medium Format
...Any ideas on ways to increase the contrast between the lights and darks to give better detail?

Not trying to be funny, but increase the contrast to increase the contrast. Here is what I mean:

Sometimes you need to look at your picture as two in one. You may have two areas of your image who need different treatment. They may both need high contrast, but at different exposures. In that case, you may need to doge one area while you work on the other.

Attached is an example of before and after. The first image was treated as one, exposed for the highlights and contrast to catch the tonal range of the entire negative. It's rather dull. For the next image, I took a different approach. Exposure and contrast for the stones and foreground first. Then do the same, but at different settings, for the sky. Two images in one. It's the difference between, what I call, global and local contrast and exposure.
 

Attachments

  • straight.jpg
    straight.jpg
    44.8 KB · Views: 414
  • final.jpg
    final.jpg
    73.4 KB · Views: 428
OP
OP
Bosaiya

Bosaiya

Member
Joined
Apr 6, 2005
Messages
396
Location
Sumner, Wash
Format
4x5 Format
I used to do a lot of split-grade printing, I may have to try that again.

There's not going to be any great solution, anything I end up with is going to be a compromise. This is a documentary project involving hundreds of photos a day so I have to keep my time-per-print as low as possible as well. I'm just hoping to try out a few different ideas to get the best possible compromise I can.
 

RalphLambrecht

Subscriber
Joined
Sep 19, 2003
Messages
14,635
Location
K,Germany
Format
Medium Format
I used to do a lot of split-grade printing, I may have to try that again.

There's not going to be any great solution, anything I end up with is going to be a compromise. This is a documentary project involving hundreds of photos a day so I have to keep my time-per-print as low as possible as well. I'm just hoping to try out a few different ideas to get the best possible compromise I can.

Post a sample!
 

dpurdy

Member
Joined
Jun 24, 2006
Messages
2,673
Location
Portland OR
Format
8x10 Format
wow Ralph, that is pretty impressive. Hard to believe it is the same neg.
Dennis
 
Joined
Jun 11, 2005
Messages
1,807
Location
Plymouth. UK
Format
Multi Format
Not trying to be funny, but increase the contrast to increase the contrast. Here is what I mean.

Attached is an example of before and after. The first image was treated as one, exposed for the highlights and contrast to catch the tonal range of the entire negative. It's rather dull. For the next image, I took a different approach. Exposure and contrast for the stones and foreground first. Then do the same, but at different settings, for the sky. Two images in one. It's the difference between, what I call, global and local contrast and exposure.
That`s a good example Ralph.
 

RalphLambrecht

Subscriber
Joined
Sep 19, 2003
Messages
14,635
Location
K,Germany
Format
Medium Format
wow Ralph, that is pretty impressive. Hard to believe it is the same neg.
Dennis

It certainly is, as you can tell by the clouds. This effect is made possible by a mask. The mask allows you to treat sky and everything else differently.
 
OP
OP
Bosaiya

Bosaiya

Member
Joined
Apr 6, 2005
Messages
396
Location
Sumner, Wash
Format
4x5 Format
Not trying to be funny, but increase the contrast to increase the contrast. Here is what I mean:

Sometimes you need to look at your picture as two in one. You may have two areas of your image who need different treatment. They may both need high contrast, but at different exposures. In that case, you may need to doge one area while you work on the other.

Attached is an example of before and after. The first image was treated as one, exposed for the highlights and contrast to catch the tonal range of the entire negative. It's rather dull. For the next image, I took a different approach. Exposure and contrast for the stones and foreground first. Then do the same, but at different settings, for the sky. Two images in one. It's the difference between, what I call, global and local contrast and exposure.


I know what you mean, that's why I was trying to use a higher grade.

The bright areas are fine, I've got those handled no problem. I'm mostly just trying to get more detail out of the shadows. I think I probably stated my problem wrong initially. For the thin areas I am trying to increase the contrast but it's not working.

Does that make more sense?
 

glbeas

Member
Joined
Sep 25, 2002
Messages
3,924
Location
Marietta, Ga. USA
Format
Multi Format
When printing thin negs with high contrast paper you have a very narrow exposure latitude. It might take a change of a few percent to get the midranges to break out and look right. I usually try to find the point at which the paper just goes black and use that as a base exposure. Metering under the enlarger is a great help here if you don't already do it. Even then you need to choose the detail you meter carefully to be sure it will look the way you desire. Single grade 4 or 5 paper will get better results generally in this situation than multigrade.
 
OP
OP
Bosaiya

Bosaiya

Member
Joined
Apr 6, 2005
Messages
396
Location
Sumner, Wash
Format
4x5 Format
When printing thin negs with high contrast paper you have a very narrow exposure latitude. It might take a change of a few percent to get the midranges to break out and look right. I usually try to find the point at which the paper just goes black and use that as a base exposure. Metering under the enlarger is a great help here if you don't already do it. Even then you need to choose the detail you meter carefully to be sure it will look the way you desire. Single grade 4 or 5 paper will get better results generally in this situation than multigrade.

I'm doing test strips in one-second increments but still not having the kind of results I think are possible. I was wondering if graded paper might help, that may be my next test.
 

glbeas

Member
Joined
Sep 25, 2002
Messages
3,924
Location
Marietta, Ga. USA
Format
Multi Format
You will probably still need to do some dodging and burning to get your local contrast right even after getting a good graded paper.
 
OP
OP
Bosaiya

Bosaiya

Member
Joined
Apr 6, 2005
Messages
396
Location
Sumner, Wash
Format
4x5 Format
You will probably still need to do some dodging and burning to get your local contrast right even after getting a good graded paper.

I would think that there is a certain point where, for example in the photo above, the face on the right looked good. Regardless of the rest of the photo, that one area should show good detail on the print. And then if I found that I could find the right combination for the face on the left, and then adjust the exposure through dodging and burning to get them both to their happy place. The problem is I'm not even getting to the happy place for either area. I do a decent job of dodging and burning, but for these I'm not even at square one.
 
OP
OP
Bosaiya

Bosaiya

Member
Joined
Apr 6, 2005
Messages
396
Location
Sumner, Wash
Format
4x5 Format
Oh jeez, the answer was literally staring me in the face the whole time: too much diffusion. It was too much for the low-contrast shadows. I figured it had to be something simple! I'm so used to using a certain amount that I wasn't even thinking about it.
 

dancqu

Member
Joined
Sep 7, 2002
Messages
3,649
Location
Willamette V
Format
Medium Format
Graded Paper for Highlight Contrast

I was wondering if graded paper might help,
that may be my next test.

As has been suggested Graded should help.
As Phil Davis has pointed out VC papers in
general do not deliver the higher contrasts
in the high light areas. Grades 5, 4, and
even 3 simply do not materialize.

Your problem with VC is not unusual. Split
print or not, the grades mentioned simply
do not exist save for the more dense
areas. Dan
 
OP
OP
Bosaiya

Bosaiya

Member
Joined
Apr 6, 2005
Messages
396
Location
Sumner, Wash
Format
4x5 Format
As has been suggested Graded should help.
As Phil Davis has pointed out VC papers in
general do not deliver the higher contrasts
in the high light areas. Grades 5, 4, and
even 3 simply do not materialize.

Your problem with VC is not unusual. Split
print or not, the grades mentioned simply
do not exist save for the more dense
areas. Dan

I used to use graded paper exclusively but switched after my favorite was discontinued. I'm going to have to try another round of paper tests, thanks!
 

BetterSense

Member
Joined
Aug 16, 2008
Messages
3,151
Location
North Caroli
Format
35mm
This effect is made possible by a mask. The mask allows you to treat sky and everything else differently.

I was going to ask you if you used a mask; such elaborate dodging would seem to require it. How do you make such a mask? Do you make a mask with film and sandwich it with the negative, or do you make a mask with film or paper and sandwich it with the print? I have made simple masks by cutting things out of RC paper but I'm sure there more to learn.
 

AmandaTom

Member
Joined
Dec 31, 2008
Messages
67
Location
Novato, Cali
Format
8x10 Format
Many of my negatives are also very thin, as I photograph a lot at night. I am working on compressing the zones to make printing easier but in the meantime I have plenty of negs I like that I find difficult to print. One thing I do do, is shut the lens almost all the way down. With the easier daytime negs I may use f8 or f11, whereas the thin ones seem to be more manageable at f22. I use a combination of f-stop and split contrast printing but even with that I often have to dodge and burn quite a bit. As was mentioned, the thinner the neg, the less latitude you have to play with and a half a second can make a noticeable difference if the lens is open too wide.
 

Marco B

Subscriber
Joined
Jan 13, 2005
Messages
2,736
Location
The Netherla
Format
Multi Format
I would recommend trying pre-flashing your paper before printing any of these contrasty-but-thin negatives on it. Actually, looking at the results and reading your story, I don't know if they actually should qualify as "thin", merely contrasty.

Pre-flashing your paper will help in getting highlight detail, while still obtaining good black, as it reduces the overall contrast of the print.

Pre-flashing your paper means giving it a very short exposure overall (without a negative in your enlarger!) without visibly fogging the paper... You should be able to find plenty of info on the exact method here on APUG. Having a second enlarger, as I luckily do, is a great help for this, but it can be done with one.

Marco
 

Neal

Subscriber
Joined
Dec 3, 2004
Messages
2,018
Location
Chicago, West Suburbs
Format
Multi Format
Dear Bosayia,

Consider using a contrast reducing mask. It will save you a significant amount of dodging and burning. These masks are not hard to make and can really make a huge difference. There are many sources of instructions. "Post Exposure" has a good one. It can be purchased from the author (ctein.com), any of the online book houses, or one of the used book sites like alibris.com.

Neal Wydra
 
Photrio.com contains affiliate links to products. We may receive a commission for purchases made through these links.
To read our full affiliate disclosure statement please click Here.

PHOTRIO PARTNERS EQUALLY FUNDING OUR COMMUNITY:


Ilford ADOX Freestyle Photographic Stearman Press Weldon Color Lab Blue Moon Camera & Machine
Top Bottom