• Welcome to Photrio!
    Registration is fast and free. Join today to unlock search, see fewer ads, and access all forum features.
    Click here to sign up

Omega B8 - condensers? DIY Diffusion Head?

feeling grey

A
feeling grey

  • 0
  • 0
  • 16
Inconsequential

H
Inconsequential

  • 2
  • 0
  • 31

Recent Classifieds

Forum statistics

Threads
201,798
Messages
2,830,383
Members
100,961
Latest member
pisimimail
Recent bookmarks
0

hospadar

Member
Allowing Ads
Joined
Jun 24, 2024
Messages
57
Location
Michigan, USA
Format
35mm
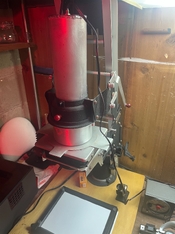
FINALLY getting back into a darkroom (in the basement) after a 20 year hiatus. Picked up a good looking omega B8 for pretty cheap which is apparently set up for 35mm (came with a 50mm EL-nikor and a 35mm neg carrier). I have an 80mm lens coming in the mail that's mounted to the 1-1/2" cone lens board that I think is the "correct" cone for that focal length.

Question 1:
The manual discusses using supplementary/different condensers for 35mm/120 (in my case 6x6). I don't have any other condensers and it seems unlikely that I'm going to find them. I'm just printing for fun, and probably nothing bigger than an 8x10 in the near future - am I going to have a bad time printing medium format without the other condensers? Will I just be losing some brightness at the edges?

Question 2:
Long-term, I'm interested in making a VC LED diffusion light source for my enlarger. I've done some reading about this (i.e. this one) and the color control and LED electronics seem like something I can handle, but I've never actually seen the inside of a diffusion head (only ever printed on/handled beseler condensers before) so I don't feel like I have a great grasp of how I would go about building one. Any links to builds that show the innards and talk about spacing (negative-diffuser-light) and sizing things (how big should the light source/diffuser be relative to the negative)? Would I be fine if I build a stack that's like [negative]-[an inch or two]-[diffusion material]-[an inch or two]-[a bunch of LEDs]?

Thanks! So excited to print!
 

DWThomas

Subscriber
Joined
Jun 13, 2006
Messages
4,623
Location
SE Pennsylvania
Format
Multi Format
Hmm, I have a B8 and El-Nikor lenses in 50, 80 and 105 mm. I also secured a supplemental condenser lens after quite a few months monitoring ePrey. The extension cones I ended up making. Can't say I've done any serious testing, but my impression is the supplemental lens probably improves the brightness, but I think you can get by without it as far as even illumination goes. It's a small lens that plunks down below the big plano-convex lenses. I would suggest just trying what you've got.

I actually grabbed a second lamp housing being sold as a part off ePrey to allow playing with alternate illumination methods, but in several years have yet to do so. Given my age and the rate I print, the handful of bulbs on hand may see me through! I'll also toss in that on a 6x9 negative it appears the factory setup barely makes it for the corners. Don't know if that is just how it is, or I did something wrong. From a few measurements I've made, the actual image size on 6x9 seems to vary quite a lot between makers.

I did have the good fortune to acquire a substantial collection of negative carriers some guy was unloading. Anyway, the B8 has been doing well for me.
 
Last edited:

MattKing

Moderator
Moderator
Allowing Ads
Joined
Apr 24, 2005
Messages
55,167
Location
Delta, BC Canada
Format
Medium Format
If the condenser setup is appropriate for 6x9, it should function with smaller formats.
But if you are setup for 35mm format, you may not be able to get satisfactory results with larger formats without changing the condenser arrangement.
It looks like there were two supplementary condensers - one for 35mm, and another for 6x6.
If the 35mm supplementary condenser is installed, you may be able to print 6x6 by just removing the 35mm condenser.
Or it may already have the 6x6 condenser installed.
 

koraks

Moderator
Moderator
Joined
Nov 29, 2018
Messages
26,867
Location
Europe
Format
Multi Format
I don't have any other condensers

Which ones does your enlarger come with? As @MattKing says above, compatibility goes downward. So condensors that fit a longer lens and larger film format will also cover for a shorter lens and smaller format. The opposite is not true. So if your enlarger came with condensers for e.g. 80mm or 105mm lenses, then they'll work OK with 50mm lenses for 35mm just as well. But if it came with the condensers for 50mm, you won't be able to get good coverage for 6x6cm.

Any links to builds that show the innards and talk about spacing (negative-diffuser-light) and sizing things (how big should the light source/diffuser be relative to the negative)?

Not really, but in my experience, the only approach that works is to just try, test and see what works. I've done several versions of a LED light source for my Durst 138 and beam shaping is probably one of the more critical and demanding issues. One of the choices you'll have to make is whether you'll keep using the condensers, so effectively working with a diffuser/condenser setup (diffuse light source projecting through the condensers) or whether you're going to replace the condensers with a diffuse light source altogether. Either can work; the latter is generally easier. I like to use milky plexiglass as a diffusion material because it's quite effective, cheap, easily available and easy to work with. The bigger the distance between the light source and the diffuser, the larger the degree of diffusion. LEDs are generally (quasi) point sources, so you either need a large array of LEDs, or lots of distance. You can compromise between the two, which is what happened in the pdf you linked to a well. What works best depends on how much space you have available to work with etc. Be prepared to experiment a little with e.g. cardboard prototypes before committing to a more final build.
From an electrical viewpoint, the setup in the pdf you linked to is rather rudimentary - but it evidently works. I'd never build it that way, but it is easy and intuitive; it has that much going for it.
 
OP
OP
hospadar

hospadar

Member
Allowing Ads
Joined
Jun 24, 2024
Messages
57
Location
Michigan, USA
Format
35mm
RE condensers:

Per this manual page:
Screenshot 2025-01-03 at 10.00.48 AM.png

I believe I have only the standard condensers. Where it looks like a supplementary condenser should go (between the filter drawer and the lamphouse) - I got nuthin
signal-2025-01-03-100153.jpeg


As @MattKing says above, compatibility goes downward. So condensors that fit a longer lens and larger film format will also cover for a shorter lens and smaller format.

The manual suggests that using the enlarger without any supplementary condensers is appropriate for the largest negative sizes, so maybe it's fine and I'll just loose some brightness when printing smaller formats?
Screenshot 2025-01-03 at 4.11.59 PM.png
 

Paul Howell

Subscriber
Allowing Ads
Joined
Dec 23, 2004
Messages
10,100
Location
Scottsdale Az
Format
Multi Format
I agree that you not lose any sharpness, but slow printing time. I have a copule of enlarges that are set up for MF, Axiom 6 with single condenser for 6X6 and a very old Federal Stowaway 6X9 with a diffusion layer and bear buld. In terms of sharpness both are fine with 35mm, but printing times are slow with 35mm the Federal is painfully slow. Even with 6X6 times are slow.
 
OP
OP
hospadar

hospadar

Member
Allowing Ads
Joined
Jun 24, 2024
Messages
57
Location
Michigan, USA
Format
35mm
I agree that you not lose any sharpness, but slow printing time. I have a copule of enlarges that are set up for MF, Axiom 6 with single condenser for 6X6 and a very old Federal Stowaway 6X9 with a diffusion layer and bear buld. In terms of sharpness both are fine with 35mm, but printing times are slow with 35mm the Federal is painfully slow. Even with 6X6 times are slow.
Good to know, at least I'll be printing!
 
OP
OP
hospadar

hospadar

Member
Allowing Ads
Joined
Jun 24, 2024
Messages
57
Location
Michigan, USA
Format
35mm
RE a VC diffusion head - I spose I'll just go ahead and give it a try. Should be easy enough to fiddle around with the LED placement and array/diffuser/negative spacing. Seems like I could pretty easily fabricate a box that would let me play with all of those dimensions pretty easily.
 

Sundowner

Subscriber
Allowing Ads
Joined
Dec 28, 2011
Messages
507
Location
Virgo Supercluster
Format
Multi Format
Long-term, I'm interested in making a VC LED diffusion light source for my enlarger. I've done some reading about this (i.e. this one) and the color control and LED electronics seem like something I can handle, but I've never actually seen the inside of a diffusion head (only ever printed on/handled beseler condensers before) so I don't feel like I have a great grasp of how I would go about building one.

Short answer: balance the light output between an array of ~475nm blue and ~535nm green LEDs, and then bias towards one end or the other for contrast control. In and out itself, that's not very difficult; knowing exactly what grade you're currently on, however, gets a bit more involved. Or, you can split-grade the entire thing and do the calculations that way; a StopClock makes that pretty easy to handle, but other options are available.

Any links to builds that show the innards and talk about spacing (negative-diffuser-light) and sizing things (how big should the light source/diffuser be relative to the negative)?

Give it a month or two and I'll be working on that exact thread.

Would I be fine if I build a stack that's like [negative]-[an inch or two]-[diffusion material]-[an inch or two]-[a bunch of LEDs]?

In general: place the LEDs as far above the diffuser as you can get away with, without losing a ton of light before it even reaches the diffusion material. That latter surface - the diffuser itself - can ride directly over the negative, if you like; given proper construction, the lens won't see any artifacts or patterns that may be present.
 

albada

Member
Allowing Ads
Joined
Apr 10, 2008
Messages
2,177
Location
Escondido, C
Format
35mm RF
Question 2:
Long-term, I'm interested in making a VC LED diffusion light source for my enlarger. I've done some reading about this (i.e. this one) and the color control and LED electronics seem like something I can handle, but I've never actually seen the inside of a diffusion head (only ever printed on/handled beseler condensers before) so I don't feel like I have a great grasp of how I would go about building one. Any links to builds that show the innards and talk about spacing (negative-diffuser-light) and sizing things (how big should the light source/diffuser be relative to the negative)? Would I be fine if I build a stack that's like [negative]-[an inch or two]-[diffusion material]-[an inch or two]-[a bunch of LEDs]?

Here's another thread about a VC LED made by our @Mal Paso : https://www.photrio.com/forum/threads/led-split-printing-enlarger-lamphouse.173834/
I copied his work, but ended up with a microcontroller-based timer/controller for the LEDs. Some remarks:
If you choose to use a few high-power LEDs, as Mal Paso and I did, I suggest using the Cree XE-G series of LEDs, as they are the latest and highest power. Although they are rated to handle 3 amps, I suggest not running them over 1.5 amps as efficiency drops too much for most colors. Use royal blue (or even violet), non-PC green, and normal red. I tried "photo red" at 660 nm, but I find it's too hard to see the image when positioning dodging/burning tools. Ledsupply.com does not yet offer XE-G in all the colors we need, so I bought those LED-stars from Cutter Electronics in Australia.
If you control everything with a microcontroller, I suggest using Mean Well LED-drivers instead of BuckBlocks. They are designed for use on circuit boards, and can handle far higher PWM frequencies than the BuckBlocks. I'll dig up the model numbers if you're interested.

Mark
 

Sundowner

Subscriber
Allowing Ads
Joined
Dec 28, 2011
Messages
507
Location
Virgo Supercluster
Format
Multi Format
If you control everything with a microcontroller, I suggest using Mean Well LED-drivers instead of BuckBlocks. They are designed for use on circuit boards, and can handle far higher PWM frequencies than the BuckBlocks. I'll dig up the model numbers if you're interested.

I'm interested; please share that if you have a spare moment.
 

albada

Member
Allowing Ads
Joined
Apr 10, 2008
Messages
2,177
Location
Escondido, C
Format
35mm RF
I'm interested; please share that if you have a spare moment.

I found it: The Mean Well LED-drivers are the NLDD-H series, and come in the following models:
NLDD-350H, NLDD-500H, NLDD-700H, NLDD-1050H, NLDD-1200H, and NLDD-1400H.
The numbers are the number of milliamps they supply. I am using model NLDD-1400H to supply 1.4 amps to each string of five Cree XE-G LEDs.

LedSupply.com has all our colors in the Cree XPE2 series of LEDs, and Cree XTE for royal blue, all mounted on stars. But these early models of LEDs are limited to 1000 mA, so you would use the Mean Well model NLDD-700H for those. The advantage of using the Cree XE-G LEDs (plus Mean Well NLDD-1400H) is that the light is about twice as bright.

About half the wattage going into LEDs is wasted as heat, so you'll need to mount stars on a heat sink.

Mark
 
OP
OP
hospadar

hospadar

Member
Allowing Ads
Joined
Jun 24, 2024
Messages
57
Location
Michigan, USA
Format
35mm
Update:

Still haven't built a VC head yet, but I did make a new lamphouse so I could put in an ultrabright LED bulb and swapped out the condenser for a diffuser. Still need to get around to making some prints but eyeballing it things seem decent, illumination is even and brightness is not awful.

Writeup on my website: https://hospadaruk.org/camera/omega_b8/2025/02/18/omega-b8-diffuser.html
 

Attachments

  • 2025-02-18 12.50.04.jpg
    2025-02-18 12.50.04.jpg
    373.2 KB · Views: 63

darkroommike

Subscriber
Allowing Ads
Joined
Mar 22, 2007
Messages
1,738
Location
Iowa
Format
Multi Format
I agree that you not lose any sharpness, but slow printing time. I have a copule of enlarges that are set up for MF, Axiom 6 with single condenser for 6X6 and a very old Federal Stowaway 6X9 with a diffusion layer and bear buld. In terms of sharpness both are fine with 35mm, but printing times are slow with 35mm the Federal is painfully slow. Even with 6X6 times are slow.

Printing speeds with new papers are so darned short that the extra time might be welcome. The Beseler 23C crowd is always asking how to get more time for burning and dodging. Unless you are printing on a hoard of classic slow papers like Portriga or Ektalure I don't think it will not be an issue.
 
OP
OP
hospadar

hospadar

Member
Allowing Ads
Joined
Jun 24, 2024
Messages
57
Location
Michigan, USA
Format
35mm
Printing update: printed first pics on the new setup and times seem within the realm of sanity. A thin negative printed in about 12 sec and a well exposed neg printed in about 30 (actually 60 because I printed it with a #4 filter, but the uncompensated time was 30). These were 4x5 prints from a 35mm negative with an 80mm enlarging lens at f/5.6. Paper is arista RC pearl multigrade.

These are actually my first darkroom prints in about 20 years so I truly have no idea if these kind of times are particularly slow/fast?

Also seems worth noting, the bulb I'm using right now is a GE ultrabright soft white LED ~3000 lumen bulb (200w incandescent equiv). Contrast maybe seemed a little low unfiltered (only saw a couple test strips, also - haven't printed in 20 years so tbh no idea), but definitely things looked a lot better/pretty good with the #4. I think the negative was probably not super high contrast to start with - pretty sure it was from an overcast fall day.

Also Also - not really related to the enlarger, but just wanted to note that I'm using a red LED bulb as a safelight and that is working GREAT (not specifically marketed as a safelight - mine is branded "luxrite"). Saw some differing opinions online about whether or not that was going to work/be safe and I can confirm that it works great. MUCH brighter than the old red incandescent I had that it replaced.
 

koraks

Moderator
Moderator
Joined
Nov 29, 2018
Messages
26,867
Location
Europe
Format
Multi Format
These are actually my first darkroom prints in about 20 years so I truly have no idea if these kind of times are particularly slow/fast?

Slow for a LED source. For these kinds of enlargements to this size and paper and working at f/5.6, my printing times are around one second or so. It doesn't matter though as long as you get what you're after!

Also Also - not really related to the enlarger, but just wanted to note that I'm using a red LED bulb as a safelight and that is working GREAT (not specifically marketed as a safelight - mine is branded "luxrite"). Saw some differing opinions online about whether or not that was going to work/be safe and I can confirm that it works great. MUCH brighter than the old red incandescent I had that it replaced.

It's awesome, isn't it? It's literally like stepping out of the dark ages!
 
OP
OP
hospadar

hospadar

Member
Allowing Ads
Joined
Jun 24, 2024
Messages
57
Location
Michigan, USA
Format
35mm
Slow for a LED source. For these kinds of enlargements to this size and paper and working at f/5.6, my printing times are around one second or so. It doesn't matter though as long as you get what you're after!


It's awesome, isn't it? It's literally like stepping out of the dark ages!

Good to know, I think I'm going to be on the hunt for a more transmissive diffuser and/or brighter light.
 

MattKing

Moderator
Moderator
Allowing Ads
Joined
Apr 24, 2005
Messages
55,167
Location
Delta, BC Canada
Format
Medium Format
Also Also - not really related to the enlarger, but just wanted to note that I'm using a red LED bulb as a safelight and that is working GREAT (not specifically marketed as a safelight - mine is branded "luxrite"). Saw some differing opinions online about whether or not that was going to work/be safe and I can confirm that it works great. MUCH brighter than the old red incandescent I had that it replaced.

I'd recommend doing the rather boring and comprehensive test set out here: Kodak Safelight Test
This helps ensure that your safelight doesn't fog your paper - neither to the extent that the fogging is visible, nor to the extent that it affects the contrast behavior.
FWIW, I use an LED rope light that passes the Kodak Safelight Test for me.
 

koraks

Moderator
Moderator
Joined
Nov 29, 2018
Messages
26,867
Location
Europe
Format
Multi Format
Good to know, I think I'm going to be on the hunt for a more transmissive diffuser and/or brighter light.

If you want to cut printing times, then yes, those would be the way to go - and you could consider making the lamp housing as short as possible. You don't need an awful lot of height if you have a big bulb and an effective diffuser. It depends also on how big of an area you need to evenly illuminate.

I just did some printing; this was from 35mm negs to an image size of 10x16cm (so roughly 4x5") but on Fomatone MG paper, which is about 2 stops slower than the paper you used. My times were 8-11 seconds. On something like Fomabrom/Fomaspeed this would have been around 2 seconds.
 
OP
OP
hospadar

hospadar

Member
Allowing Ads
Joined
Jun 24, 2024
Messages
57
Location
Michigan, USA
Format
35mm
If you want to cut printing times, then yes, those would be the way to go - and you could consider making the lamp housing as short as possible. You don't need an awful lot of height if you have a big bulb and an effective diffuser. It depends also on how big of an area you need to evenly illuminate.

I just did some printing; this was from 35mm negs to an image size of 10x16cm (so roughly 4x5") but on Fomatone MG paper, which is about 2 stops slower than the paper you used. My times were 8-11 seconds. On something like Fomabrom/Fomaspeed this would have been around 2 seconds.

Oh good to know - more experimentation is needed but I think I'll probably be wanting to have the option for shorter times? I imagine if I printed an 8x10 from a denser negative I might be pushing close to 60 sec (which honestly is not a big deal, but it'd be nice if I could just run the timer one time).

I ordered a thinner sheet of white acrylic to make another diffuser (it was $5, I figured why not). shortening the housing is a good idea too, there's more than I need in there.

Another wondering is how worried I should be about light leaking out around the filter drawer during printing. It's more more evident with the super ultra bright LED in there than the puny 75w incandescent enlarger bulb, but none of that light is really directed at/visible from the easel while actually printing. Wouldn't be a problem to drape a piece of blackout cloth over the drawer but don't know if I should bother.
 

koraks

Moderator
Moderator
Joined
Nov 29, 2018
Messages
26,867
Location
Europe
Format
Multi Format
I imagine if I printed an 8x10 from a denser negative I might be pushing close to 60 sec (which honestly is not a big deal, but it'd be nice if I could just run the timer one time).

If you're currently at 4x5 and already at 30-60 seconds, then 8x10 will get you to 120-240 seconds. I know I'm not that patient!

Another wondering is how worried I should be about light leaking out around the filter drawer during printing.

Yes, that's a problem. It'll reflect around your darkroom (and you!) and reduce print contrast. This can be a real head-scratcher to resolve. Usually, this issue is relatively easily resolved with some tape, some form of curtain that falls over the cracks etc.

Wouldn't be a problem to drape a piece of blackout cloth over the drawer but don't know if I should bother.

There you go. And yes - bother with it.
 
OP
OP
hospadar

hospadar

Member
Allowing Ads
Joined
Jun 24, 2024
Messages
57
Location
Michigan, USA
Format
35mm
Some updates:

Changed out the diffuser to a thinner plastic (white acrylic) - 1/8" instead of 1/4" - no meaningful effect.

Cut all the extraneous length off my lamp housing - no meaningful effect.

Also took some various brightness measurements to try and get a better idea what's going on:

If the stock 75w incandescent setup w/ condensers is our zero point:

  • 3000 lumen LED bulb w/ condensers: +1EV
  • 3000 lumen LED bulb w/ diffuser: -3 (2/3) EV
  • 3000 lumen LED bulb w/ diffuser placed directly between condensers and negative carrier: -3 (1/3) EV
    I was curious if the condensers being in place would still focus a lot more light but I'd also get the bonus effect of diffuse printing, not so much, it seems like the diffuser itself is the main reason for the brightness dropoff.
Given that I presume I'm going to need a MUCH more powerful light source (or maybe a way more transmissive diffuser?) if I want to get print times into an even vaguely similar ballpark. Meter readings (light meter pointed at a frosted window on a sunny day, with and without the diffusion plastic) suggest that the diffusion material itself is cutting about 3 stops, presumably the condenser lenses themselves are responsible for the remaining difference in measured brightness in the enlarger. Maybe a glass diffuser would be a better time for me?
 
Photrio.com contains affiliate links to products. We may receive a commission for purchases made through these links.
To read our full affiliate disclosure statement please click Here.

PHOTRIO PARTNERS EQUALLY FUNDING OUR COMMUNITY:


Ilford ADOX Freestyle Photographic Stearman Press Weldon Color Lab Blue Moon Camera & Machine
Top Bottom