Robin Guymer
Member
Yer I know, that title is a bit deceiving. But I thought I could use my enlarger as a light box for scanning negatives so I could see if the results were better than using the old OpticFilm 7400 scanner that cost me a $100. Well now that I have sorted out how to reverse the negs to positive without having PhotoShop, I am fairly happy with the results.
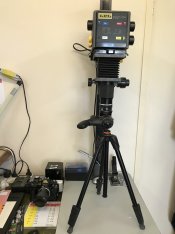
I used a 16mp Sony Nex 3N with a macro extension on a Nikkor 35-135. I set the lens to F11 and the Nex to ISO 200 Auto WB and 10 second delay timer. For focus I used the yellow focus peaking so it hit the negative spot on and F11 helped I guess. It was possible to lower the bellows down over the Nikkor to block out the light so I did this with the lights in the room still on. The macro was still not big enough as I still had to digital zoom a bit on the Nex.
Once I had the negative image I opened it in Gimp 2.8. First I inverted then used Colours/Auto/White Balance followed by Colours/Auto/Normalize. I then overwrited the image/exported as JBG. The end result was a 12.5mb image where as the OpticFilm scan was 1.5mb. Bit of a process with the Enlarger setup but once started it would be a lot quicker to photograph all the film strips than it is with the scanner. However the Gimp inversion correction is a bit slow but maybe this can be made quicker via the Mac Automator program. I am dead set trying to not have to buy PhotoShop, but maybe it is quicker than Gimp.
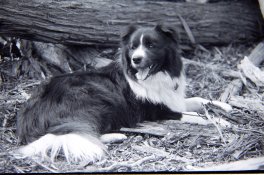
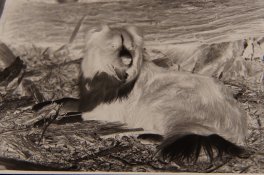
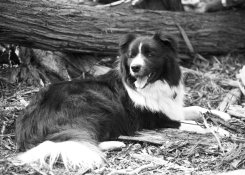
Anyway what do you think of the method and the results? Don't be put off by the size difference of the scans of Rafa as it was difficult resizing down from 12.5mb to under 1mb. Camera was a Nikon F2 + Nikkor 35-135 with FP4 125 @ 250ASA.
Robin
The Setup


Enlarger / Sony Nex Method


OpticFilm 7400 Scanner

I used a 16mp Sony Nex 3N with a macro extension on a Nikkor 35-135. I set the lens to F11 and the Nex to ISO 200 Auto WB and 10 second delay timer. For focus I used the yellow focus peaking so it hit the negative spot on and F11 helped I guess. It was possible to lower the bellows down over the Nikkor to block out the light so I did this with the lights in the room still on. The macro was still not big enough as I still had to digital zoom a bit on the Nex.
Once I had the negative image I opened it in Gimp 2.8. First I inverted then used Colours/Auto/White Balance followed by Colours/Auto/Normalize. I then overwrited the image/exported as JBG. The end result was a 12.5mb image where as the OpticFilm scan was 1.5mb. Bit of a process with the Enlarger setup but once started it would be a lot quicker to photograph all the film strips than it is with the scanner. However the Gimp inversion correction is a bit slow but maybe this can be made quicker via the Mac Automator program. I am dead set trying to not have to buy PhotoShop, but maybe it is quicker than Gimp.
Anyway what do you think of the method and the results? Don't be put off by the size difference of the scans of Rafa as it was difficult resizing down from 12.5mb to under 1mb. Camera was a Nikon F2 + Nikkor 35-135 with FP4 125 @ 250ASA.
Robin
The Setup


Enlarger / Sony Nex Method


OpticFilm 7400 Scanner

Last edited:


