Lack of contrast: How to avoid?

Recent Classifieds

Forum statistics

Threads
199,242
Messages
2,788,436
Members
99,841
Latest member
Neilnewby
Recent bookmarks
0

TPPhotog

Member
Joined
Jul 15, 2004
Messages
3,041
Format
Multi Format
modafoto said:
Don't misunderstand me, but Some (myself included) spend too much time testing films and developers instead of taking pictures.
But I worry, too when the film is important to me, and I experiment a lot still. But not as much as I have up until a few month ago. I have tried almost all films on the market and 10 developers...now settling on Rodinal, HC-110 and XTOL (that beast).

Morten
Sorry Morten, I didn't mean to intamate that there is anything wrong with your posting :confused: I was just musing and it was more aimed in Grahams direction in a friendly way as a passing comment :smile:
 

rbarker

Member
Joined
Oct 31, 2004
Messages
2,218
Location
Rio Rancho,
Format
Multi Format
Add me to the "fill-the-tank brigade". Using stainless reels and tanks, I fill the tank to the brim to avoid the creation of bubbles during aggitation. But, if developing only one roll in a two-reel tank, I put that reel at the bottom, and then add an empty reel as a spacer. Aggitation for me is 180° inversion, combined with a 1/4-turn rotation at each inversion, using two hands. Each inversion takes a bit over a second, so I get about 4 inversions per 5 seconds of aggitation time.

Although many good suggestions have already been posted, allow me to add my 2¢.

In general, I see negative contrast as being a combination of the inherent contrast of the original scene, modified by exposure and development (including aggitation technique). The ideal, I believe, is to achieve fairly consistent density in one's negatives, along with appropriate contrast. Procedurally, it's helpful to keep development and aggitation techniques consistent, so the results can be predictable. If the procedure needs to be changed to achieve good negatives, change (fine-tune) only one element at a time.

Additional development time (or extra aggitation, or higher developer temp) will increase contrast. To compensate for what would appear to be additional density in the negative, a corresponding decrease in exposure can be used up front. Decreasing the exposure, however, also risks loss of shadow detail, but that's a metering-related issue.

If, for example, one was shooting an entire roll under somewhat dreary conditions, you might choose to under-expose by one stop in anticipation of increasing development by 15% or so to boost contrast in the negatives. If, however, the roll contains mixed scenes with both dreary and brightly lit scenes, it's probably better to keep both exposure and development "normal".

Another way to boost contrast in the print (or, scan) is to increase the contrast grade of the paper or VC filter (or adjust contrast curves in the scan, along with adjusting "Levels" such that the scan includes a true black).

Bottom line, I think it is best to examine each element in the overall process separately, and then together. That is, check the negs to be sure they are of the proper density and contrast, adjusting processing to get there. Then, examing scanning or printing techniques to ensure the presentation matches the neg, adjusting contrast and print exposure as needed (or curves and levels in the scan).
 

Ole

Moderator
Moderator
Joined
Sep 9, 2002
Messages
9,245
Location
Bergen, Norway
Format
Large Format
I'm in the "Never Fill A Paterson Tank Completely" camp. For one roll of film I use 150% of minimum volume, but that's because I've lost the little clip that holds the reel in place. If I use the minimum, the top edge of the film WILL be dry at some point. For 35mm film I put the second reel in too, unless I want to develop a third film that day.
 

Will S

Member
Joined
Nov 30, 2004
Messages
716
Location
Madison, Wis
Format
8x10 Format
Andy K said:
Graham,

Look at the difference in these two attachments. I get the muddy look of the first 75% of the time. I want the look of the second all the time! Not that I use any real system other than my own judgement, if the zone system helps me do that (and I am not aware of having used it yet), so be it.

I know this is digital, but you might try looking at the histogram when you scan the negative to see where most of the data is. If you have silverfast there is a densitometer built in to that can also provide some insight.

Using the method for determining film speed outlined in Les McClean's book or in Barry Thornton's articles might be helpful. I think that most people find that their film is over-rated at the manufacturer's ISO. I shoot HP5+ at EI200 and TMAX400 at EI320 for example. Thornton says that most people underexpose and overdevelop.

See:

http://web.archive.org/web/20040216210257/www.barry-thornton.co.uk/unzone.htm
http://web.archive.org/web/20040216211511/www.barry-thornton.co.uk/pfs.htm
http://web.archive.org/web/20040202094533/www.barry-thornton.co.uk/devtime.htm
 
OP
OP
Andy K

Andy K

Member
Joined
Jul 3, 2004
Messages
9,420
Location
Sunny Southe
Format
Multi Format
Will S said:
I know this is digital, but you might try looking at the histogram when you scan the negative to see where most of the data is. If you have silverfast there is a densitometer built in to that can also provide some insight.
This is where you've lost me, lol! All I know how to do is scan, rotate and resize the negs! I have no idea what a histogram etc. is! :smile:

Thanks for the links though!
 

Nige

Member
Joined
Sep 8, 2002
Messages
2,317
Format
Multi Format
Andy, a histogram shows a ratio and spread of the "colours" in an image. From it you can see if your scanner is doing a reasonable job.

Here's a couple of examples from different images. I tried writing explanations for each but I think they we more confusing than helpful. Maybe someone can nominate a site with a good explantion. www.scantips.com used to be a good read for these things (I haven't looked at that site for ages)
 

Attachments

  • hist1.gif
    hist1.gif
    8.9 KB · Views: 112
  • hist2.gif
    hist2.gif
    9 KB · Views: 101
  • hist3.gif
    hist3.gif
    9.1 KB · Views: 99
OP
OP
Andy K

Andy K

Member
Joined
Jul 3, 2004
Messages
9,420
Location
Sunny Southe
Format
Multi Format
Thanks for the info guys, I will check out all your links but it is not the scanning at fault. Honestly, scanning is of little importance to me, and even if I knew how to correct the scans it would not resolve the problem of muddy negs...
 

TPPhotog

Member
Joined
Jul 15, 2004
Messages
3,041
Format
Multi Format
Andy the one thing I have noticed is you use a chemical stop bath and I use water. Shouldn't make much difference but it does mean my negs carry on souping until the water washes off the dev. Might be something or might be nothing, I'm sure someone here will know for sure. That's one of the things I love about this site :smile:
 

glbeas

Member
Joined
Sep 25, 2002
Messages
3,937
Location
Marietta, Ga. USA
Format
Multi Format
Andy I went through something similar with my negs, then I found out that in general Rodinal will cause about a half stop loss of effective film speed. I started derating the EI a bit and things improved considerably. A bit of tinkering with the dev times and things got better yet. Good luck with yours!
 

rbarker

Member
Joined
Oct 31, 2004
Messages
2,218
Location
Rio Rancho,
Format
Multi Format
Using a water bath, rather than an acid or non-acid stop bath, Tony would result in some residual developing taking place until the film reaches the fixer, but I'd be surprised if that would be equivalent to more than a few seconds of additional developing time.

My bet, Andy, is that your low contrast probably relates to your aggitation method not being vigorous enough. Unless you have something strange in your water that is buffering the activity of the developer, that's the first thing I'd suspect. Try doing the full 180 inversions quickly enough to get 4-5 inversions in 5 seconds, repeated every 30 seconds for most developers, and see what that does for you.
 

TPPhotog

Member
Joined
Jul 15, 2004
Messages
3,041
Format
Multi Format
Ralph, thank you for putting that one to rest, I knew someone here would have the answer to that bit :smile: You could test if it's the water Andy by using bottled from Sainbury or another supermarket, I've used theirs before and had no problems.
 
OP
OP
Andy K

Andy K

Member
Joined
Jul 3, 2004
Messages
9,420
Location
Sunny Southe
Format
Multi Format
Well, I shot a test roll this afternoon whilst out visiting the local beach with my nephew. With this roll I reduced the exposure as suggested earlier in the thread... with pretty poor results, see the attached files.

In TR1 things seem pretty much ok, but TR2 and TR3 are appalling.
 

rbarker

Member
Joined
Oct 31, 2004
Messages
2,218
Location
Rio Rancho,
Format
Multi Format
Did you increase development to compensate for the reduced exposure, Andy?
 
OP
OP
Andy K

Andy K

Member
Joined
Jul 3, 2004
Messages
9,420
Location
Sunny Southe
Format
Multi Format
Yes I did, recommended dev time was 15 minutes, and I increased it to 18 minutes. The agitation method used was pretty much exactly as you described above.
 

rbarker

Member
Joined
Oct 31, 2004
Messages
2,218
Location
Rio Rancho,
Format
Multi Format
Well, I guess I'm a bit perplexed, then. I assume that the walls of the shop and the peeling paint around the door are both white? If so, those areas on the negative should be quite dark. Something on the order of the 70% or 80% blocks in this grayscale:

grayscale.gif


While the dark areas of the shop window and the far beam of the stair structure should be clear or almost clear to produce a deep black in scans or prints.

Question - how do these last areas (that should be black in the print) compare to the edge of the film, and where would you place those areas compared to the above grayscale? They should be about the same, and be almost clear. If they are more like the 10% block, or a bit darker, you might have a fogging problem.
 
OP
OP
Andy K

Andy K

Member
Joined
Jul 3, 2004
Messages
9,420
Location
Sunny Southe
Format
Multi Format
I just held the negs up to the screen and the film edges are about the same as the 20% block. The dark areas in the frames, the far underside of the stairs are, as you say, the same shade as the 10% block.
 

rbarker

Member
Joined
Oct 31, 2004
Messages
2,218
Location
Rio Rancho,
Format
Multi Format
Hmmmm. Now I'm really confused. The edges of the film should represent the film base plus fog value - essentially unexposed, and maximum-maximum black. Any portion of the film receiving more exposure (e.g. some light, even if just a little) should be darker than that.

Have you tried printing any of these negatives, Andy? It is possible to have a fairly high film base + fog value, which would make the negative appear to be muddy, but still get reasonable prints. Thus, I'm wondering if the (apparently) high FB+F level, combined with the scanning process, might be skewing your assessment of the negs.

If you would e-mail me one of the scans (I'll PM you with my regular e-mail address), I'll take a look at it, and see if adjustments might work.
 

Nige

Member
Joined
Sep 8, 2002
Messages
2,317
Format
Multi Format
Andy K said:
At the moment these are negative scans (using an Epson Perfection 2480) with zero correction except resized for upload

When you say 'zero correction', do you mean at scanning time, or once it's in your image editor? Being a anologue->digital device, it's doing some adjustment and equalisation no matter how many options you turn off. Maybe the scanner interprets your night shots. more by fluke than anything!

I have a 1640, an ancestor of your scanner, and I find I have to tweak the scanning parameters for just about every individual negative to get a decent result.

Here's what I do...

-Ensure 'Sharpening' is not selected.
-Set the scanning resolution to 1600 (I drop that to 600 for 4x5 negs as I'm only ever scanning for the screen)
-Select the Greyscale option (I don't bother with the 14bit version)
-Do a preview scan
-Highlight a section of the intended neg and hit auto levels
-Change the 'curves' option to 'open shadows' (probably 90% time)
-Look at preview and decide if that looks ok. Here I'm looking to make sure I haven't any blown out white areas, or featureless blacks (it does depend on the pic of course). Sometime doing a prescano of just the neg area helps as you get a bit bigger look at it.
-If I'm not happy, I then alter the shadow and highlights sliders to fine tune.
-Hit the scan button...

Once the image is in Photoshop, I

- crop edges (I usually scan more than jus tthe neg)
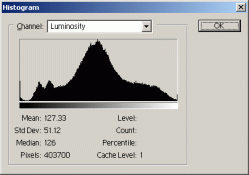
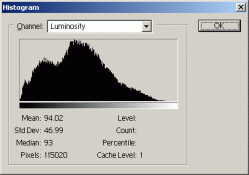
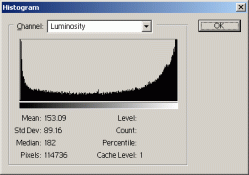
- Ctrl L, to bring up the Levels, which shows a histogram of the image and allows you to alter the black, white and midpoints. I usually will move the mid-point slightly left to open up the lower tones a fraction, and maybe slide the end points closer to the histogram making sure not to go into where the image has values.
- mild unsharp mask
- resize
- mild unsharp mask
- add a 1 pixel black border
- save as jpg around 100kb

I wonder if you shouldn't contact Les and ask if you can send him a neg to eyeball. When I use Rodinal, I usually develop for 18-20mins in 1:100 dilution at 20C (68F), and I'd usually have exposed more than normal to maintain shadow detail. The other thing I'll add is, I gave up trying to preview negs on screen prior to printing in the darkroom, I found it the 'look' different enough that it meant little.

All my scans on my webpage ( http://unite.com.au/~u3819a/gallery/gallery.html ) have been done using these steps, and I can say I'm not real particular... each one takes minutes not hours!

Cheers, Nige
 
OP
OP
Andy K

Andy K

Member
Joined
Jul 3, 2004
Messages
9,420
Location
Sunny Southe
Format
Multi Format
Nige I don't have Photoshop. There is no obvious 'auto levels' option in the Epson Scanning control panel.
There are three user settings:
Full Auto,
Home,
Professional.

I use professional because thats where all the controls are visible. Visible controls are:
Document Type, Set to Film
Film Type, Set to B&W Negative Film
Image Type, Set to 16 Bit Greyscale
Resolution, Set to 1200 dpi
Target Size, Set to Original
Scale,Set to 100%
Trimming, set to On

Then we have the Adjustments Panel:

Auto Exposure this seems to be On or Off only.
Histogram another window opens with lots of slide bars and graphs which mean nothing to me
Tone Correction window opens with graph and lots of drop down menu options (ah! theres open shadow!)
Image Adjustment with brightness contrast saturation etc.
Unsharp Mask Filter with Low medium High options
Grain Reduction Level with Low medium High options
Color Restoration with On or Off options
Dust Removal with On or Off options

The nearest res to 1600 it has is 1200.
Ralph do you have a dpi and file type preference for the file?
 

djklmnop

Member
Joined
Jan 28, 2004
Messages
230
Format
4x5 Format
AndyK. There are too many variables to determine what you're doing wrong here at this point.. For all we know, your development may be spot on, when it is really the manner in which you meter and how you interpret those meter readings. There is really no way around the Zone Testing if you wish to apply proper technique to your photos, otherwise it's all guesswork and intuition.

Who cares how other people agitate.. The key element is, as long as it's consistant.. If there are inconsistancies on your agitation method and development schedule, then you're guaranteed inconsistant results. Make the steps repeatable!

As for scanning, dont do it.. Your results are telling us more about your scanner's capability than it is telling us about your negative. Go into the darkroom and make a test strip off of grade 2 using the film base. Examine it and look for the Maximum black before it doesn't get any blacker. Say that strip is 12 seconds. Now insert one of the photos from that same roll and print it for 12 seconds. THAT is exactly how your negative looks in reverse. How does it look? Blacks look empty with no detail? Then you've underexposed. Blacks look weak with no strong values? Then you've overexposed. Don't even look at your highlights until your blacks are perfect. Otherwise you confine yourself with two variables at once, and when you do fix it, you won't know which one it was that did it. When shadows look pefect, then you can judge your highlights.. How do they look? Too white? Overdeveloped! Too muddy and flat? Underdeveloped.

Don't take our advice based on what you're showing us "online". Follow the instructions and see for yourself.

AndyLy :smile:
 
OP
OP
Andy K

Andy K

Member
Joined
Jul 3, 2004
Messages
9,420
Location
Sunny Southe
Format
Multi Format
Thanks Andy, Maybe you missed it in among everything else on this thread, but I am currently not set up for printing.
 

Nige

Member
Joined
Sep 8, 2002
Messages
2,317
Format
Multi Format
Andy K said:
I use professional because thats where all the controls are visible. Visible controls are:
Document Type, Set to Film
Film Type, Set to B&W Negative Film
Image Type, Set to 16 Bit Greyscale
Resolution, Set to 1200 dpi
Target Size, Set to Original
Scale,Set to 100%
Trimming, set to On
all look fine, maybe set Trimming to off, whatever that does. What image editing program do you use?


Then we have the Adjustments Panel:

Auto Exposure this seems to be On or Off only.
Histogram another window opens with lots of slide bars and graphs which mean nothing to me
Tone Correction window opens with graph and lots of drop down menu options (ah! theres open shadow!)
Image Adjustment with brightness contrast saturation etc.
Play with these (you might have to have Auto Exposure off, but on mine that means for the inital preview scan only, once I make adjustments, they stick until I do another preview scan. Sounds like they (Epson) changed the interface a bit.


Unsharp Mask Filter with Low medium High options
Grain Reduction Level with Low medium High options
Color Restoration with On or Off options
Dust Removal with On or Off options
set all to Low or Off


The nearest res to 1600 it has is 1200.
1200 will be fine for web display. You'll still have to reduce the image size to post.

I agree with the comment that your negs might be fine. Maybe wait until the enlarger turns up before getting to worried and fixing something that may not be broken. Once you have great prints you can scan those and post :smile:
 

rbarker

Member
Joined
Oct 31, 2004
Messages
2,218
Location
Rio Rancho,
Format
Multi Format
AndyK - I've e-mailed the analysis of the two image files you sent me. In both cases, the scans look pretty reasonable, suggesting exposure that was close to being spot-on, and reasonable development. Only minor adjustments were needed to the scans, suggesting that the B&W negative should be quite printable (when you have that capability). If you print digitally in the interim, a reasonable image editing program will allow you to make the slight adjustments needed.

So, short of actually seeing your B&W negatives, I'd tend to agree with AndyLy and Nige - you may be misinterpreting the negs and the scans, and worrying about a problem that doesn't really exist. Note, too, that your interpretation of the scans is highly dependant on the calibration of your monitor. If the monitor calibration is off, what you see on the screen won't accurately reflect what's actually in the negatives.
 
OP
OP
Andy K

Andy K

Member
Joined
Jul 3, 2004
Messages
9,420
Location
Sunny Southe
Format
Multi Format
Thanks Ralph, I was just about to email you thanking you for your help. I sincerely hope it is just me misinterpreting the scans! Many thanks for taking the time to analyse the files I sent and sending such a comprehensive explanation of what's what!
 
Photrio.com contains affiliate links to products. We may receive a commission for purchases made through these links.
To read our full affiliate disclosure statement please click Here.

PHOTRIO PARTNERS EQUALLY FUNDING OUR COMMUNITY:


Ilford ADOX Freestyle Photographic Stearman Press Weldon Color Lab Blue Moon Camera & Machine
Top Bottom