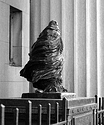
Before anything else the first step is exposure if you are looking for gorgeous tonality.
I have recently set up a darkroom for the first time in decades. For me, the first roadblock I had to overcome was getting my exposures in line. I'm shooting mostly medium format, 6x7 (and some LF too) and 6x7 negs can handle a beefy exposure pretty well. LF can handle very beefy negs. Years ago, I didn't even know what a good neg looked like and I underexposed everything. There was a time when all the photo mags were enamored of street shooting and everyone seemed to be shooting at ei 64,000,000 or thereabouts. So I thought that minimal exposure was a key. I was shooting 35 at the time and didn't know better.
Anyway, I'm now shooting black and white, processing myself, using 6x7 up to 8x10 LF, and packing as much light as I can into my negs ( but just up to the point that it's too much). I've sorted out how to keep the highlights under control by not overdeveloping them. The result is far - far - better negs.
The other half of the equation is learning to print better. Years ago I did commercial photography, did my own lab work, and thought I was pretty good. I can see now that I was barely passable if your standards were low enough. Given a more patient and methodical approach, everything I'm printing now is markedly better. I'm too slow a typist to spell out every step I am doing now to be a better printer, but suffice it to say good negs are only the first half. A couple of the more important printing items as I see them:
1. I don't worry about wasted paper now. Get to full size prints sooner than later. Better to under and overshoot the perfect exposure, and in the process truly see what the whole negative looks like when given over and underexposures. A little test strip only tells so much, and only about a small portion of the print. If in the end, through cheapness, I don't get a good print at all, I have wasted everything I have used, whereas if I do get a really good print I have only wasted some of my paper. And what looks like waste may not be. That too dark or too light print may tell me I like a more interpretive rendition. And I never would have found that out if I am too miserly with paper.
2. I'm wayyyy more methodical when printing so I really have a chance to know what I am doing. I keep detailed notes of all exposures. all burns and all dodges etc. Each test print (not test strip) gets ID'd on the back, in fine Sherpie, with roll, and negative number, the type of paper, the work print number, and any other data I may need during the session, and for toning, and for future reference. I use very wide borders so that my writing on the edge of the back is not under the image. It is so much easier to really tune up a print if I can compare all the variations on the way against the exact steps it took to make them. I usually make something like seven to eleven full size prints before I feel like I am getting to where I don't see any clear way to improve it.
3. I start with a full size print plain vanilla uncreative representation of the scene, and then move toward a more satisfying interpretation. That first plain print is there to remind me that the scene might be best served by a simple rendition. In truth, it rarely is. But I keep a complete unmanipulated record of the scene. It keeps me honest. Most times though, I end up with local control of almost every area in the image; some sort of burning or dodging everywhere.
4. Where the scene demands I also plan for local reduction with a brush to adjust items too small for dodging. I use a ferricyanide reducer with bromide and no thiosulfate in it in it so that I can also selectively redevelop reduced areas or correct over-reduced areas.
5. The pile of not quite right exposures is not a total loss. I keep in mind that the slightly light print may be just right if heavily toned in selenium, and that somewhat dark prints may be perfect for Viradon toning which lightens prints somewhat. Really dark prints may be perfect for bleach and Viradon toning which dramatically lightens prints.
6. Make big exposure jumps when trying to zoom in on the "perfect" exposure. There is an article online somewhere - I don't recall where - that advocates straddling printing exposures. If you are at 20 seconds and you thing the perfect exposure may be at 23 seconds, try 27 or so. You'll see where things lie in the middle, or once in a while, that it should have been 30 sec. But if you do 20 sec, then 22, then 24, the 26... you'll be tired and broke before you get to the right exposure. Use bigger jumps and you will arrive sooner and cheaper.


 If I had to guess, I'd say these scenes were printed with some contrast masking, but why not ask Ralph.
