Hair in print

Recent Classifieds

Forum statistics

Threads
198,508
Messages
2,776,328
Members
99,635
Latest member
Johan Siggesson
Recent bookmarks
0

Jcat

Member
Joined
Apr 5, 2019
Messages
11
Location
Texas
Format
Multi Format
I recently got a Besler 23c iii with color head. I’ve made a couple of test prints and a few work prints. All of them have what I’m pretty sure is a hair through them. I first used the lens(35mm) that came with it and made a couple of test prints when I noticed the hair. It seems to be somewhere that it can move somewhat since it’s never quite in the same spot print to print. Bought another lens(75mm) and made sure to give it a good wipe down before setting it up. Tried a test print and still that hair showed up. Looked around and wiped off the diffusion panel(not sure if that’s what it’s actually called.)Then I made a larger work print which also has that hair.

Any idea of somewhere else this hair might be hiding other than the lens, negative, negative carrier, and diffusion panel? I'm guessing it's somewhere between the negative and the light source otherwise I'd probably see it. Don't really want to crack the head open searching for a hair. I am also open to the idea that it's not a hair since I am new to enlarging/printing.
Hair 1.JPG
Hair 2.JPG
 

KN4SMF

Member
Joined
Mar 7, 2019
Messages
334
Location
US
Format
Traditional
If you suspect a hair, then assume that it is indeed a hair. Armed with that steadfast belief, then take apart any and everything till you found it. If you don't want to "crack the head open" and have looked everywhere else, then you KNOW where it is. Crack the head open, whatever you mean by that. I suspect that you are probably stopping your lens down to 8 or 11, which would give enough depth of field to focus on a piece of trash well above the negative plane. Just do it. That's the rules. Problems are alway in places where you'd like to avoid going.
 
Joined
Apr 14, 2016
Messages
814
Location
Bavaria, Germany
Format
Medium Format
Have you made a print with the lens wide open? If the hair also appears sharp on that print, it must be very close to the negative carrier. If it only appears sharp if the lens is stopped down, it might be somewhere around the lower part of the condensor / mixing chamber.
I´ve once had a hair stuck in the opening for the negative carrier. Drove me nuts, I cleaned the carrier 10 times, and never saw something when the carrier was not in place, but when pushing the carrier in, the hair got in the way again.
Give everything a good clean, look out for dirt that might move in and out of the light path, brush / vaccuum everything off, and you should get rid of the culprit.
 

koraks

Moderator
Moderator
Joined
Nov 29, 2018
Messages
22,300
Location
Europe
Format
Multi Format
Given its degree of sharpness, the hair should be fairly close to the negative, I'd say.
It's fortunately too wavy for the typical scratch, as scratched glass (assuming one uses glassed negative holders) can give quite nasty artefacts as well.
 

MattKing

Moderator
Moderator
Joined
Apr 24, 2005
Messages
52,685
Location
Delta, BC Canada
Format
Medium Format
That looks more like a crack then a hair. And it must be very close to the negative, so I would suspect the bottom diffusion panel on the colour head.
 

MattKing

Moderator
Moderator
Joined
Apr 24, 2005
Messages
52,685
Location
Delta, BC Canada
Format
Medium Format
Take the lens off and put the negative carrier in without a negative. Shine a flashlight up from the baseboard and look up into the turned off enlarger to see if you see anything. Then, with the empty carrier still in and the lens off, turn the enlarger on and look up to see if you can see anything.
A mirror may make it easier to see up into the enlarger.
 

jvo

Subscriber
Joined
Dec 6, 2008
Messages
1,750
Location
left coast of east coast
Format
Digital
canned air with a "small straw plastic thingy attached" may be of help here. spray a small area, a brief burst, see if the hair relocates, if so you might have a clue as to what area to attack.
 
Last edited:

Huub

Member
Joined
Dec 4, 2007
Messages
250
Format
4x5 Format
I am not sure if this is a hair, it looks more like a drying artifact on the film. Please have a look at your negatives and check if you can see the patern appear. If so, do a rinse with demi-water with a drop of photoflo or something similar and it might disappear.
 
OP
OP

Jcat

Member
Joined
Apr 5, 2019
Messages
11
Location
Texas
Format
Multi Format
Thanks for all the responses. After removing the lamp housing and wiping down the few surfaces that were there that looked kind of dusty, I made another print. This time however I noticed while the print was in the developer one part started to show while the other stayed white. Eventually the image started to emerge, and I'm pretty sure that's where the squiggly line comes from. I'm quite new to printing so I assume I must be doing something wrong when it's in the developer. Any advice there would be appreciated.

To answer the question it does move, which is why I'm starting to lean on something happening between me transferring it from the enlarger to the developer. It's a glass-less carrier and I gave that a good cleaning when I pulled off the lamp housing.
 

MattKing

Moderator
Moderator
Joined
Apr 24, 2005
Messages
52,685
Location
Delta, BC Canada
Format
Medium Format
I also think your prints were strangely coloured.
A few questions:
1) which paper are you using?
2) which developer are you using and at what dilution, what size of tray and how much are you putting into the tray?
3) how are you inserting the paper into the developer, how are you ensuring it stays submerged, how are you agitating the tray or the paper and how long are you developing for?
It is normal for parts of the image to appear at slightly different rates, but that usually evens out.
 

mshchem

Subscriber
Joined
Nov 26, 2007
Messages
14,537
Location
Iowa City, Iowa USA
Format
Medium Format
Make sure there's nothing stuck in your easel. I have old guy dandruff and hair falling out . I should buy a hair net. I have filtered air from a compressor, I set the regulator to about 10 psig, when I'm making final prints, I gently, emphasis on gently, blow off the paper once it's in the easel.
The static from Ilford plastic bags and RC paper is really bad in winter. Crud is attracted to the paper.

Once again clean area is super important.
 
OP
OP

Jcat

Member
Joined
Apr 5, 2019
Messages
11
Location
Texas
Format
Multi Format
I also think your prints were strangely coloured.
A few questions:
1) which paper are you using?
2) which developer are you using and at what dilution, what size of tray and how much are you putting into the tray?
3) how are you inserting the paper into the developer, how are you ensuring it stays submerged, how are you agitating the tray or the paper and how long are you developing for?
It is normal for parts of the image to appear at slightly different rates, but that usually evens out.

1) Ilford MULTIGRADE IV RC DELUXE PEARL SHEETS and the glossy too
2) Ilford Multigrade I've used it in both 5x7 and 8x10 trays. It's diluted 1+9 and 750ml in the 8x10 then I filled the 5x7 so it was a little bit deeper.
3) I've been slipping it under the surface of the developer and agitate it by tilting the long side and rocking it back and forth. I develop for a minute based on the developer data sheet.

The colors just off cause of bad lighting. I also just realized I made contact prints that came out fine with the same chemistry and paper. Guess I'll be giving the enlarger another look over.
 

MattKing

Moderator
Moderator
Joined
Apr 24, 2005
Messages
52,685
Location
Delta, BC Canada
Format
Medium Format
Take the lens off and put the negative carrier in without a negative. Shine a flashlight up from the baseboard and look up into the turned off enlarger to see if you see anything. Then, with the empty carrier still in and the lens off, turn the enlarger on and look up to see if you can see anything.
A mirror may make it easier to see up into the enlarger.
Have you tried these tests?
 
OP
OP

Jcat

Member
Joined
Apr 5, 2019
Messages
11
Location
Texas
Format
Multi Format
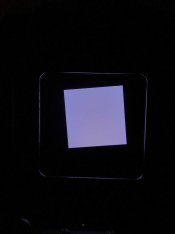
Gave that a try and didn't see anything. Not sure if this picture is worth much.
enlarger.JPG
 

MattKing

Moderator
Moderator
Joined
Apr 24, 2005
Messages
52,685
Location
Delta, BC Canada
Format
Medium Format
I'm tempted to say that I do see something - and therefore drive you crazy!
Is the fact that the light area is not square to the rest due to the fact that you haven't lined up the carrier squarely?
A further test is to put the lens back in but don't put a negative back in. Now turn on the light source (maybe with less magenta) and observe the easel as you move the focus up and down. Do you see any sign of the line appearing at any spot during the focus travel?
A further test to try when you are next printing is to do a print with the lens aperture set to its largest opening - f/2.8 or 3.5 or 4 or whatever applies.
If the line isn't visible in the print, that would be an indication that it is due to something which is not at or near the position of the film - it isn't within the depth of focus.
 
OP
OP

Jcat

Member
Joined
Apr 5, 2019
Messages
11
Location
Texas
Format
Multi Format
Yeah I didn’t quite get it centered.

Gave the focus travel a try and still didn’t see anything.

The prints actually are at the largest aperture and with everything set to zero.

Would there be much point in seeing what happens without the easel?
 

Attachments

  • C3B692C7-5E77-4EE1-B684-9FAAB7F8F511.jpeg
    C3B692C7-5E77-4EE1-B684-9FAAB7F8F511.jpeg
    357.2 KB · Views: 88
  • 06618EE8-156F-4EA9-AA3F-AA2FC6B46178.jpeg
    06618EE8-156F-4EA9-AA3F-AA2FC6B46178.jpeg
    454.9 KB · Views: 79
  • 35A47728-AA65-49D8-826F-CFEC2A01243C.jpeg
    35A47728-AA65-49D8-826F-CFEC2A01243C.jpeg
    482.3 KB · Views: 66

MattKing

Moderator
Moderator
Joined
Apr 24, 2005
Messages
52,685
Location
Delta, BC Canada
Format
Medium Format
I'm starting to think that it must be on the negatives.
 
OP
OP

Jcat

Member
Joined
Apr 5, 2019
Messages
11
Location
Texas
Format
Multi Format
Wouldn’t it be in the exact same place if it was the negative?
 

MattKing

Moderator
Moderator
Joined
Apr 24, 2005
Messages
52,685
Location
Delta, BC Canada
Format
Medium Format
It wasn't clear to me. Does it move when you print another negative, or does it move when you reprint the same negative?
 
OP
OP

Jcat

Member
Joined
Apr 5, 2019
Messages
11
Location
Texas
Format
Multi Format
It’s showed up in all prints I’ve done regardless of negative. Some contact prints I did, without the enlarger, came out without such issue. It does move around even when it’s left at the same focus. The 5x7 it tends to be closer to the middle but when I did one 8x10(though it’s not really that size) it ended up closer to one end as in the original post. The first ones I did were 35mm with different lens board, lens, and carrier. They had the “hair” and then the recent 6x6 which are pictured.
 

MattKing

Moderator
Moderator
Joined
Apr 24, 2005
Messages
52,685
Location
Delta, BC Canada
Format
Medium Format
I'm guessing then it is somewhere in the channel/slot/tray where the negative carrier sits
 
OP
OP

Jcat

Member
Joined
Apr 5, 2019
Messages
11
Location
Texas
Format
Multi Format
I’ll try cleaning that area and do another test print.
 
OP
OP

Jcat

Member
Joined
Apr 5, 2019
Messages
11
Location
Texas
Format
Multi Format
So I think the issue has been solved. I removed the lens board and looked at the bellows which I didn’t see much at first. Then extending them a bit I found a white fiber poking out. Wiped that away then found a few more bits of stuff hanging out there that shouldn’t have been. Once I felt satisfied with that cleaning I made another test print and there was no more “hair.”

Thanks everyone that gave advice I really appreciate it, especially Matt who kept things up till I got it sorted out.
 
Photrio.com contains affiliate links to products. We may receive a commission for purchases made through these links.
To read our full affiliate disclosure statement please click Here.

PHOTRIO PARTNERS EQUALLY FUNDING OUR COMMUNITY:


Ilford ADOX Freestyle Photographic Stearman Press Weldon Color Lab Blue Moon Camera & Machine
Top Bottom