So this is an idea I've had in the back of my mind for quite a while now. There's a fairly good chance that I'm going to build one (or more) of the options below at some point for myself. What I'm interested in knowing is who else here would want one, what would you want, and what would you pay for it?
I know this kind of thing has been done before, and a lot of people have hacked LED light-panels into enlargers, but this would be a dedicated-design and hopefully work and look a bit better, especially if I can incorporate some of the 'fancy' things listed below.
The Concept
In short, it's a back to turn your camera into a diffusion enlarger. You take the back off your camera, mount your negative into this back, stick that on your camera, turn it on, and you've got an enlarger.
Another use would be as a projector, so all us LF chrome shooters could really project them huge. That includes Travelwides (I'd make sure it fit them), imagine taking 4x5 chromes and projecting them on a wall almost anywhere (does anyone want a battery-powered option?)
The Hardware
Basically, starting from the lens-end, there'd be a piece of optical glass, then any cardboard masks you want, then the negative, then ANR glass. A bit of space, then a diffusion plate, maybe more space to the bank of LEDs on a huge PCB, then controls/drivers behind that.
It's possible to do without the first bit of glass and masks and use clips, but then you're stuck with one format, ie 4x5 on 4x5 only. With masks and glass you can do 4x5, 9x12, 6x12, 6x9, 6x7, etc all in one 4x5 unit.
The Size
Originally, I was only going to aim this at 8x10". Reasons being that 4x5 enlargers are a lot easier to come by and a lot more common than 8x10 enlargers. But then, so are 4x5 shooters, so there might be more of a market there. If there's interest, I'll do both.
For 8x10, the entire back would come off. That means that there would be a Calumet/Cambo version (like I've got), a Calumet 'Monster' version, a Deardorff version, a Toyo 810 version, a Sinar version, etc etc. Lots of design work (for me) in getting a sample of each back to make sure it fits properly (any donations/loans/CAD-models would be appreciated). The PCB would be the same, only difference is the mechanical housing to fit into the camera.
For 4x5 it's easy. Graflok-mount and be done with it, one version.
Either way, I will endeavour to make sure that the film plane on the enlarger-back is in exactly the same spot as when taking. So you can even focus on your easel using the Ground Glass with the lights on, then swap to enlarging back and it will project exactly as focussed.
5x7" and Plate sizes are also possible (as are ULF, depending on how big a PCB I can get made), but again I can't make anything without having a back in front of me or an accurate CAD model. So they're probably not possible unless you're willing to lend me your camera to test (or make your own mechanical mounting bits) plus probably pay extra for the lower economies of scale.
Pros/Cons
Mostly the same as any other horizontal camera-cum-enlarger vs a dedicated unit.
Pros:
- It's smaller. This wouldn't be much bigger than 3-4 film-holders stacked up. No huge floor-standing 8x10 enlarger the size of a fridge taking up precious darkroom space that could be better used for a fridge full of film instead.
- If you can shoot it, you can enlarge and/or project it (except 617s on a 4x5 extension-back, but I'm putting them in my 8x10).
- Movements: Camera-dependent of course, but you can tilt and shift to correct perspectives at print-time if you want.
Lenses may be a pro or con depending on how you look at it. Enlarger lenses do come in shutters but are rarer than screw-mounts, so if you can't get one in shutter you'll have to hack one into a lensboard. Or just use your taking lens as enlarging lens, it may not be optimised for 2x-10x enlargements but you're still probably better off than taking on a smaller format (like 6x7) and enlarging more. LF enlarging lenses are rarely faster than f/5.6 so the speed is about the same as your taking lens.
Cons:
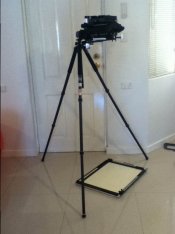
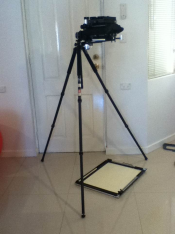
- It's horizontal, so you'd need a vertical easel. Or get a good stable tripod with head that moves 90-degrees and shoot at an easel on the ground.
- It'd be harder to ensure the film is absolutely parallel to the paper, but again you can compensate with tilts etc, and GG focussing should help with that too.
- I wouldn't be able to give definite 'Grade 1', 'Grade 2' settings with the RGB LED option. It'd be more of 'softest' and 'hardest' for split-grade, and 'teststrip and see' for anything in between. For dedicated worshippers of calibrated workflows who want (and can actually tell the difference between) 1/4-grades, you'll either have to spend a lot of time calibrating this too, or get the white LED option and use your own filters.
- Just on the colour of LEDs, yes I realise that there are different ways of making a 'white' LED and that RGB LEDs also have different colour-spectra and peak wavelengths. All of this will be teased out and tested in prototyping.
The Light and Colour
There are a few options here, and this is where I'd want the most help deciding what to invest time in (porque no las dos?)
- Single Colour White: All the LEDs will be the same, either warm-white or cool-white. Easy enough to make both from the same PCB design by just mounting different LEDs before manufacture. So you can have either, but if you want both you have to buy two. On the plus side, it'll be a lot brighter than the other versions, but to use as an enlarger you'll need CMY and/or MG Filters.
- RGB: This is where it gets tricky, and my inner-nerd comes out. By mounting RGB LEDs, you can get any colour you want by fiddling with sliders. No filters needed. Lots of other possibilities listed below in the 'fancy controls' section.
The Controls
One thing I hate about my current (LPL6700) enlarger is that when I adjust the CMY dials (esp for split-grade B+W), the head invariably moves and/or wobbles. So I plan on having a separate control-pad with a cable (wireless if I really want to nerd it up), with the switches, dials and sliders, maybe even a separate start/stop foot-switch if there's interest in one.
- Basic: Controls for the White-LED option would be just an on/off switch, and an intensity dial. A timer wouldn't be that hard to implement either, so no more metronomes for me, and a lot more accurate and repeatable.
- Intermediate: Controls for the RGB option would be the same as above, plus a slider for each of the RGB channels. A few saveable 'presets' would be handy, ie one would be pure red for focussing, pure Blue and pure Green for Split grade, etc. Being able to set times on each colour will be great for split grade, eg set 12 seconds soft grade, 5 seconds hard grade, press start and it just does it automagically. Or press start, it does soft grade once, beeps and turns the lights off, then you get your dodge/burning tools in place, press start again and you get to dodge/burn for a set time, then press start again and it goes to hard grade, etc, program it how you want. UI for this might get harder to make user-friendly, especially trying to make it all dark red so it doesn't fog paper.
- Fancy: There are a whole lof of options I can put in fancy, but it'll get expensive.
- For one, bluetooth and a phone app with no control pad. It's a bit out of my current capability but it'd be a good way to learn skills that would be very useful to my future career prospects so I wouldn't mind trying.
- Individual LED controls, so you can graduate the intensity, or turn some LEDs off. eg in a recent photo of mine, I burnt the sky (almost exactly half the photo) for a minute after the initial whole-image exposure. Instead, if I could just turn off half the LEDs for that second exposure then I wouldn't need to dodge with a piece of card. Of course this will be very 'soft-edge grad' because of the diffuser, but it would be useful especially for landscapes (or even introducing vignetting in the final print of a portrait). For this I'd need one LED-Driver per LED, so it would get rather expensive and complicated, don't hold your breath on these ones.
- Closed-loop like one of those Ilford heads. I don't even know how they work exactly but if people want one, I'll investigate.
The Deliverables
There are again a few options of how to sell this thing. Funding would be via kickstarter, that's the easy part. But would you want to buy the PCBs, LEDs, and sliders etc and solder it yourself? (there could be a few hundred LEDs 1x2mm so don't say yes unless you're a masochist or very very poor).
The drivers also have very small pins, so it's probably best if I get the camera-mount bits reflowed professionally.
But what about the controls? I could make it controllable via arduino and open-source the code, I'm sure a lot more people could code in functions that I haven't thought of, then you can wire in extra bits if you want.
Or I could get the whole thing into a semi-professional-looking enclosure, all you have to do is plug it in and turn it on. Cheaper than buying your own arduino, but less expandable.
The Cost
This is the big unknown so far, and I've only done preliminary digging. Just on the LEDs, if I use 0603 (that's 0.06" x 0.03" or 1.5mm x 0.75mm) LEDs, I can get between 1000-1500 LEDs on one 8x10" board, and that would cost anywhere up to $500 (at element14 prices). Just for the LEDs, no PCB or controls. But that's at maximum-density (which would be the most even illumination, of course) and still probably very-much overkill. I haven't done any prototyping yet to see how many LEDs I'd need to get the brightness and evenness that I'd like (depends on the diffusion-material used and distance to LEDs), but I'm fairly confident I could get the single-white camera-mount board in at maybe $500. Could be as low as $2-300 if I can use less LEDs and get a good deal on reflowing and manufacture the rest myself. Or it could be $600, but I don't think it'd go much above that. RGB LEDs aren't that much more expensive so maybe an extra $100 more. Of course it'd be a lot cheaper (maybe 1/3rd to 1/2 the price) for the 4x5" version.
Control pad could be $1-200 for basic-white or $2-300 for RGB, or $0 to make-your-own from an arduino design I supply. I'd probably use the same controls no matter the size of the camera.
My question is at what price-point would this not be worthwhile to you, and you'd rather just get a regular enlarger? (if you can find one)
In general, this is a very long-term project I'm looking at, if I do decide to turn it into a kickstarter don't expect it to be up before early 2016, or in your hands before Dec 2016. Or if somehow 100 people like the idea I might put a bit more effort into making it happen sooner. And if noone likes it, well, I'll build one for myself anyway.
I know this kind of thing has been done before, and a lot of people have hacked LED light-panels into enlargers, but this would be a dedicated-design and hopefully work and look a bit better, especially if I can incorporate some of the 'fancy' things listed below.
The Concept
In short, it's a back to turn your camera into a diffusion enlarger. You take the back off your camera, mount your negative into this back, stick that on your camera, turn it on, and you've got an enlarger.
Another use would be as a projector, so all us LF chrome shooters could really project them huge. That includes Travelwides (I'd make sure it fit them), imagine taking 4x5 chromes and projecting them on a wall almost anywhere (does anyone want a battery-powered option?)
The Hardware
Basically, starting from the lens-end, there'd be a piece of optical glass, then any cardboard masks you want, then the negative, then ANR glass. A bit of space, then a diffusion plate, maybe more space to the bank of LEDs on a huge PCB, then controls/drivers behind that.
It's possible to do without the first bit of glass and masks and use clips, but then you're stuck with one format, ie 4x5 on 4x5 only. With masks and glass you can do 4x5, 9x12, 6x12, 6x9, 6x7, etc all in one 4x5 unit.
The Size
Originally, I was only going to aim this at 8x10". Reasons being that 4x5 enlargers are a lot easier to come by and a lot more common than 8x10 enlargers. But then, so are 4x5 shooters, so there might be more of a market there. If there's interest, I'll do both.
For 8x10, the entire back would come off. That means that there would be a Calumet/Cambo version (like I've got), a Calumet 'Monster' version, a Deardorff version, a Toyo 810 version, a Sinar version, etc etc. Lots of design work (for me) in getting a sample of each back to make sure it fits properly (any donations/loans/CAD-models would be appreciated). The PCB would be the same, only difference is the mechanical housing to fit into the camera.
For 4x5 it's easy. Graflok-mount and be done with it, one version.
Either way, I will endeavour to make sure that the film plane on the enlarger-back is in exactly the same spot as when taking. So you can even focus on your easel using the Ground Glass with the lights on, then swap to enlarging back and it will project exactly as focussed.
5x7" and Plate sizes are also possible (as are ULF, depending on how big a PCB I can get made), but again I can't make anything without having a back in front of me or an accurate CAD model. So they're probably not possible unless you're willing to lend me your camera to test (or make your own mechanical mounting bits) plus probably pay extra for the lower economies of scale.
Pros/Cons
Mostly the same as any other horizontal camera-cum-enlarger vs a dedicated unit.
Pros:
- It's smaller. This wouldn't be much bigger than 3-4 film-holders stacked up. No huge floor-standing 8x10 enlarger the size of a fridge taking up precious darkroom space that could be better used for a fridge full of film instead.
- If you can shoot it, you can enlarge and/or project it (except 617s on a 4x5 extension-back, but I'm putting them in my 8x10).
- Movements: Camera-dependent of course, but you can tilt and shift to correct perspectives at print-time if you want.
Lenses may be a pro or con depending on how you look at it. Enlarger lenses do come in shutters but are rarer than screw-mounts, so if you can't get one in shutter you'll have to hack one into a lensboard. Or just use your taking lens as enlarging lens, it may not be optimised for 2x-10x enlargements but you're still probably better off than taking on a smaller format (like 6x7) and enlarging more. LF enlarging lenses are rarely faster than f/5.6 so the speed is about the same as your taking lens.
Cons:
- It's horizontal, so you'd need a vertical easel. Or get a good stable tripod with head that moves 90-degrees and shoot at an easel on the ground.
- It'd be harder to ensure the film is absolutely parallel to the paper, but again you can compensate with tilts etc, and GG focussing should help with that too.
- I wouldn't be able to give definite 'Grade 1', 'Grade 2' settings with the RGB LED option. It'd be more of 'softest' and 'hardest' for split-grade, and 'teststrip and see' for anything in between. For dedicated worshippers of calibrated workflows who want (and can actually tell the difference between) 1/4-grades, you'll either have to spend a lot of time calibrating this too, or get the white LED option and use your own filters.
- Just on the colour of LEDs, yes I realise that there are different ways of making a 'white' LED and that RGB LEDs also have different colour-spectra and peak wavelengths. All of this will be teased out and tested in prototyping.
The Light and Colour
There are a few options here, and this is where I'd want the most help deciding what to invest time in (porque no las dos?)
- Single Colour White: All the LEDs will be the same, either warm-white or cool-white. Easy enough to make both from the same PCB design by just mounting different LEDs before manufacture. So you can have either, but if you want both you have to buy two. On the plus side, it'll be a lot brighter than the other versions, but to use as an enlarger you'll need CMY and/or MG Filters.
- RGB: This is where it gets tricky, and my inner-nerd comes out. By mounting RGB LEDs, you can get any colour you want by fiddling with sliders. No filters needed. Lots of other possibilities listed below in the 'fancy controls' section.
The Controls
One thing I hate about my current (LPL6700) enlarger is that when I adjust the CMY dials (esp for split-grade B+W), the head invariably moves and/or wobbles. So I plan on having a separate control-pad with a cable (wireless if I really want to nerd it up), with the switches, dials and sliders, maybe even a separate start/stop foot-switch if there's interest in one.
- Basic: Controls for the White-LED option would be just an on/off switch, and an intensity dial. A timer wouldn't be that hard to implement either, so no more metronomes for me, and a lot more accurate and repeatable.
- Intermediate: Controls for the RGB option would be the same as above, plus a slider for each of the RGB channels. A few saveable 'presets' would be handy, ie one would be pure red for focussing, pure Blue and pure Green for Split grade, etc. Being able to set times on each colour will be great for split grade, eg set 12 seconds soft grade, 5 seconds hard grade, press start and it just does it automagically. Or press start, it does soft grade once, beeps and turns the lights off, then you get your dodge/burning tools in place, press start again and you get to dodge/burn for a set time, then press start again and it goes to hard grade, etc, program it how you want. UI for this might get harder to make user-friendly, especially trying to make it all dark red so it doesn't fog paper.
- Fancy: There are a whole lof of options I can put in fancy, but it'll get expensive.
- For one, bluetooth and a phone app with no control pad. It's a bit out of my current capability but it'd be a good way to learn skills that would be very useful to my future career prospects so I wouldn't mind trying.
- Individual LED controls, so you can graduate the intensity, or turn some LEDs off. eg in a recent photo of mine, I burnt the sky (almost exactly half the photo) for a minute after the initial whole-image exposure. Instead, if I could just turn off half the LEDs for that second exposure then I wouldn't need to dodge with a piece of card. Of course this will be very 'soft-edge grad' because of the diffuser, but it would be useful especially for landscapes (or even introducing vignetting in the final print of a portrait). For this I'd need one LED-Driver per LED, so it would get rather expensive and complicated, don't hold your breath on these ones.
- Closed-loop like one of those Ilford heads. I don't even know how they work exactly but if people want one, I'll investigate.
The Deliverables
There are again a few options of how to sell this thing. Funding would be via kickstarter, that's the easy part. But would you want to buy the PCBs, LEDs, and sliders etc and solder it yourself? (there could be a few hundred LEDs 1x2mm so don't say yes unless you're a masochist or very very poor).
The drivers also have very small pins, so it's probably best if I get the camera-mount bits reflowed professionally.
But what about the controls? I could make it controllable via arduino and open-source the code, I'm sure a lot more people could code in functions that I haven't thought of, then you can wire in extra bits if you want.
Or I could get the whole thing into a semi-professional-looking enclosure, all you have to do is plug it in and turn it on. Cheaper than buying your own arduino, but less expandable.
The Cost
This is the big unknown so far, and I've only done preliminary digging. Just on the LEDs, if I use 0603 (that's 0.06" x 0.03" or 1.5mm x 0.75mm) LEDs, I can get between 1000-1500 LEDs on one 8x10" board, and that would cost anywhere up to $500 (at element14 prices). Just for the LEDs, no PCB or controls. But that's at maximum-density (which would be the most even illumination, of course) and still probably very-much overkill. I haven't done any prototyping yet to see how many LEDs I'd need to get the brightness and evenness that I'd like (depends on the diffusion-material used and distance to LEDs), but I'm fairly confident I could get the single-white camera-mount board in at maybe $500. Could be as low as $2-300 if I can use less LEDs and get a good deal on reflowing and manufacture the rest myself. Or it could be $600, but I don't think it'd go much above that. RGB LEDs aren't that much more expensive so maybe an extra $100 more. Of course it'd be a lot cheaper (maybe 1/3rd to 1/2 the price) for the 4x5" version.
Control pad could be $1-200 for basic-white or $2-300 for RGB, or $0 to make-your-own from an arduino design I supply. I'd probably use the same controls no matter the size of the camera.
My question is at what price-point would this not be worthwhile to you, and you'd rather just get a regular enlarger? (if you can find one)
In general, this is a very long-term project I'm looking at, if I do decide to turn it into a kickstarter don't expect it to be up before early 2016, or in your hands before Dec 2016. Or if somehow 100 people like the idea I might put a bit more effort into making it happen sooner. And if noone likes it, well, I'll build one for myself anyway.