First SLR

submini house

A
submini house

  • 0
  • 0
  • 9
Diner

A
Diner

  • 3
  • 0
  • 72
Gulf Nonox

A
Gulf Nonox

  • 9
  • 3
  • 95
Druidstone

A
Druidstone

  • 8
  • 3
  • 131
On The Mound.

A
On The Mound.

  • 1
  • 0
  • 76

Forum statistics

Threads
197,811
Messages
2,764,802
Members
99,480
Latest member
815 Photo
Recent bookmarks
0

KerrKid

Member
Joined
Feb 5, 2022
Messages
1,512
Location
Kerrville, TX
Format
35mm
Don't waste your time screwing around with the guts of the camera. If you accomplish anything, it will probably make matters worse.

Either return the dud camera, get a refund, or sell it for what it's worth -- next to nothing. You can probably get some $$ for the lens -- or since it's a screw-mount, you could buy an adapter for your Minolta, but I would not advise that since the aperture will not connect with the camera.

On the other hand....nothing ventured nothing gained. If the camera is dead, trying to fix it won't make it any worse. Besides, just taking the bottom off and gently poking around gives a person a good idea of how things work. Of course, I'm mechanically-inclined, so that may not apply here. Plus, I have the tiny screwdrivers the OP might not have. Still, I'd give it a go if I was her.

The jury is still out on the Minolta Super. Do we even know that camera works, yet?
 

xkaes

Subscriber
Joined
Mar 25, 2006
Messages
4,555
Location
Colorado
Format
Multi Format
Some of us love rabbit holes. Me? I'm not much of a Leporidae. I just don't have the time.

rabbit.jpg


OP
OP
138bb

138bb

Member
Joined
Mar 23, 2023
Messages
27
Location
Spain
Format
35mm
If it was mine, I'd remove the bottom of the camera and carefully poke around with a toothpick or something to find whatever little part is keeping the shutter from firing. I wouldn't force anything. Could be it just needs lube. Is there a film rewind button on the bottom of the camera that is depressed and not sticking out? Those have gotten stuck in the depressed position on mine. I've done the above to release them. Sometimes, juts some firm taps on the film takeup reel inside the body releases that button. That could be related to the shutter not firing. Of course, this is a WAG (wild-ass guess).

In addition to Mr. Kid's suggestions, above -

If the self timer doesn't unwind all the way then on most cameras this will keep the shutter from firing.

It is normal for self-timers to gum-up over the years and either run slowly, run erratically or not run at all. Sometimes nudging the self timer lever will help the mechanism along. Sometimes not, it all depends on the design of the camera.

If, as suggested, you can find the link between the self timer and the firing mechanism then it may unjam the camera. However, there is the chance the camera will lock again after an exposure and will have to have another 'toothpick' reset. Here's hoping this isn't the case.

On some cameras the self timer is a standalone mechanism that can be accessed by removing the self-timer lever and peeling back the leatherette. There will be a few screws around the self timer, and after these are removed the self timer will lift out. A good flush with cigarette lighter fluid or the solvent of your choice will usually get the timer working again. In my case, after I clean them off and get them running again, I do not oil them and instead let them run dry; I use a self timer so infrequently that it isn't going to wear out if it isn't oiled.

I tried to nudge the self timer but nothing happened :sad: and I don't have the tools to open the camera


Don't waste your time screwing around with the guts of the camera. If you accomplish anything, it will probably make matters worse.

Either return the dud camera, get a refund, or sell it for what it's worth -- next to nothing. You can probably get some $$ for the lens -- or since it's a screw-mount, you could buy an adapter for your Minolta, but I would not advise that since the aperture will not connect with the camera.

Returning it's not an option. Sending it back to the seller it's expensive as he's in the UK. However, the camera was cheap. I'm sad it doesn't work but I can sell it for parts or maybe just have it as decoration!

On the other hand....nothing ventured nothing gained. If the camera is dead, trying to fix it won't make it any worse. Besides, just taking the bottom off and gently poking around gives a person a good idea of how things work. Of course, I'm mechanically-inclined, so that may not apply here. Plus, I have the tiny screwdrivers the OP might not have. Still, I'd give it a go if I was her.

The jury is still out on the Minolta Super. Do we even know that camera works, yet?

I still don't know if the Minolta works. It seems to work fine but I'm waiting to receive a lens so I can try. I'm waiting for the seller to send it! :smile:

Also, I'm thinking of going to a camera repair shop that I found online. I read good opinions about it. If it's not too expensive I might consider to repair the Fujica... if it's expensive, I might just buy an adapter and use the lens on the Minolta. Or sell the lens and get a prime lens for the Minolta. I don't know yet.
 

KerrKid

Member
Joined
Feb 5, 2022
Messages
1,512
Location
Kerrville, TX
Format
35mm
IF the Minolta works, I'd just get a prime lens for it. You have to figure in shipping costs in addition to repair costs for the Fujica. You could be talking about $80-100. That's a fifty dollar saddle on a five dollar horse, so to speak. Adapters? I would take the advice given above on that.

How do you know the Minolta seems to work fine? Do you have the proper battery to test the meter or does the meter not matter to you? What condition are the light seals in?
 

xkaes

Subscriber
Joined
Mar 25, 2006
Messages
4,555
Location
Colorado
Format
Multi Format
How do you know the Minolta seems to work fine? Do you have the proper battery to test the meter or does the meter not matter to you? What condition are the light seals in?

It's pretty easy to tell if the Minolta works -- except the meter without a battery. Set the shutter speed to 1,100. Advance the film lever. Looking into the camera, press the shutter release. You should see the shutter open and close and on the bottom of the lens opening, a lever should quickly move from left to right.

Next, set the shutter speed to 1. Advance the film lever. Looking into the camera, press the shutter release. You should see the shutter open and close and on the bottom of the lens opening, a lever should move from left to right. Since the shutter will be open for 1 second, you should clearly see the back door / film plate of the camera.

No battery needed. If it passes that test, you are 90% home.
 

Nicholas Lindan

Advertiser
Advertiser
Joined
Sep 2, 2006
Messages
4,220
Location
Cleveland, Ohio
Format
Multi Format
Don't waste your time screwing around with the guts of the camera. If you accomplish anything, it will probably make matters worse.

Engineering adage: "If you fix anything for long enough you will really break it."

There is, however, nothing quite so annoying as something that is only half broke. Best to really break it so you can chuck it with a good conscience and get on with your life.
 
OP
OP
138bb

138bb

Member
Joined
Mar 23, 2023
Messages
27
Location
Spain
Format
35mm
It's pretty easy to tell if the Minolta works -- except the meter without a battery. Set the shutter speed to 1,100. Advance the film lever. Looking into the camera, press the shutter release. You should see the shutter open and close and on the bottom of the lens opening, a lever should quickly move from left to right.

Next, set the shutter speed to 1. Advance the film lever. Looking into the camera, press the shutter release. You should see the shutter open and close and on the bottom of the lens opening, a lever should move from left to right. Since the shutter will be open for 1 second, you should clearly see the back door / film plate of the camera.

No battery needed. If it passes that test, you are 90% home.

That's pretty much what I did. And it seems to work fine! I couldn't test the meter yet, I hope it works, but if it doesn't, I'll just use an app.

I still need to replace the light seals. I couldn't find the proper foam to do it this weekend. I'll probably end up ordering it from Amazon.

PS: The seller of the Minolta lens just told me he sent it today!
 

xkaes

Subscriber
Joined
Mar 25, 2006
Messages
4,555
Location
Colorado
Format
Multi Format
Just a thought. You should always run a test roll through the camera first to check out accuracy of the shutter, an other things. If you take a couple of those pictures out doors on a sunny day, you'll know immediately if you need seal replacement -- and where. There's a good chance you won't need new seals.

HOT TIP, the "guys" on this list LOVE to spend other people's money!!!

WHY, you might ask?!?!? My guess is that they either don't have enough of their own -- or have WAY TOO MUCH!!!
 
Last edited:

rickylc

Member
Joined
Jan 29, 2023
Messages
32
Location
michigan
Format
35mm
The cost of materials to replace the seals would be way less than the cost of a roll of film. Craft felt with sticky back cut on one of those rotary paper cutters, the kind that have a guide for the roller blade, works very well. the cutter might cost $10, but has a zillon other uses also, very handy. Felt is about $3 for more than you could use in a lifetime. I have had success with simple black yarn also for the door channels.
 

xkaes

Subscriber
Joined
Mar 25, 2006
Messages
4,555
Location
Colorado
Format
Multi Format
The cost of materials to replace the seals would be way less than the cost of a roll of film.

Uhhh, including shipping & handling, and taxes, and import fees & customs, and pain & suffering????

A test roll has to be done anyway. I've bought more OLD used cameras than you can imagine, and only one ever needed a seal replacement.

There is no need to put the cart before the horse.

Many suggest a CLEANING, LUBING, and ADJUSTMENT of ANY USED camera. Boulder-dash. If it ain't broke, don't fix it -- see post #256.

Test the damn thing first, and then either throw it in the trash, pay to have it fixed, try to fix it yourself, or use it as a bookend.
 
Last edited:

KerrKid

Member
Joined
Feb 5, 2022
Messages
1,512
Location
Kerrville, TX
Format
35mm
Not to argue because everyone's experience is different, but every one of my 1970's era cameras needed to be resealed. The SRT is easy to do. A Ricoh 500G is a royal PITA.

As for cost....A sheet of foam to reseal a camera is 99 cents at the craft store. I use maybe 1 cent worth of E6000 adhesive per reseal job. I can reseal dozens of cameras from one sheet of foam and maybe a thousand with one tube of adhesive. So I'm out about 5 cents and an hour of my time. Not a big deal and I have the satisfaction of knowing it's one more thing I don't have to worry about.

I agree with not getting a CLA just for the heck of it. CLA's cost real money. Wait to see if your camera needs one. (I bet it doesn't.)

What lens did you get?
 

xkaes

Subscriber
Joined
Mar 25, 2006
Messages
4,555
Location
Colorado
Format
Multi Format
Not to argue because everyone's experience is different, but every one of my 1970's era cameras needed to be resealed.

Either you are just an unlucky SOB, or I'm just a lucky SOB. I've got at least a dozen 1970's SRTs and none of them have ever needed new seals.

As they say, "YMMV".

"If it ain't broke..."

TEST is the BEST.
 
OP
OP
138bb

138bb

Member
Joined
Mar 23, 2023
Messages
27
Location
Spain
Format
35mm
Just a thought. You should always run a test roll through the camera first to check out accuracy of the shutter, an other things. If you take a couple of those pictures out doors on a sunny day, you'll know immediately if you need seal replacement -- and where. There's a good chance you won't need new seals.

HOT TIP, the "guys" on this list LOVE to spend other people's money!!!

WHY, you might ask?!?!? My guess is that they either don't have enough of their own -- or have WAY TOO MUCH!!!

Hahaha I don’t plan on spending more money! I’ve spent enough for now.

I just wanted to change the seals because they look disintrigated. And the mirror is missing the foam and I’m scared it might broke because of that?? What do you think?

IMG_2970.jpeg


The cost of materials to replace the seals would be way less than the cost of a roll of film. Craft felt with sticky back cut on one of those rotary paper cutters, the kind that have a guide for the roller blade, works very well. the cutter might cost $10, but has a zillon other uses also, very handy. Felt is about $3 for more than you could use in a lifetime. I have had success with simple black yarn also for the door channels.

I couldn’t find adhesive foam so I checked on Amazon. I found light seals for about 15€. But it seems to expensive to only use it in one camera. I’ve saw that some people used felt. I guess it will work the same? Idk. I couldn’t find adhesive foam in shops near me.


A test roll has to be done anyway. I've bought more OLD used cameras than you can imagine, and only one ever needed a seal replacement.

There is no need to put the cart before the horse.

Many suggest a CLEANING, LUBING, and ADJUSTMENT of ANY USED camera. Boulder-dash. If it ain't broke, don't fix it -- see post #256.

Test the damn thing first, and then either throw it in the trash, pay to have it fixed, try to fix it yourself, or use it as a bookend.

About cleaning, lubing and adjustment, I’m not doing that. At least not for now. I want to test the camera with film first!

Not to argue because everyone's experience is different, but every one of my 1970's era cameras needed to be resealed. The SRT is easy to do. A Ricoh 500G is a royal PITA.

As for cost....A sheet of foam to reseal a camera is 99 cents at the craft store. I use maybe 1 cent worth of E6000 adhesive per reseal job. I can reseal dozens of cameras from one sheet of foam and maybe a thousand with one tube of adhesive. So I'm out about 5 cents and an hour of my time. Not a big deal and I have the satisfaction of knowing it's one more thing I don't have to worry about.

I agree with not getting a CLA just for the heck of it. CLA's cost real money. Wait to see if your camera needs one. (I bet it doesn't.)

What lens did you get?

I got a Minolta 28-70mm for 19€. It was the cheapest I could find in good condition. Many suggested to get a prime lens but couldn’t find any THAT cheap. I wanted to expend the minimum to test the camera first.
 

Attachments

  • IMG_2970.jpeg
    IMG_2970.jpeg
    94.3 KB · Views: 56

xkaes

Subscriber
Joined
Mar 25, 2006
Messages
4,555
Location
Colorado
Format
Multi Format
That's a great deal on a 28-70mm -- assuming it is in good shape.

Those seals don't look that bad to me, but it's easy to check with a film test. As to the foam around the mirror. That's more difficult to replace, but might not be a big deal. Can you provide a better picture of the mirror foam?
 
OP
OP
138bb

138bb

Member
Joined
Mar 23, 2023
Messages
27
Location
Spain
Format
35mm
That's a great deal on a 28-70mm -- assuming it is in good shape.

Those seals don't look that bad to me, but it's easy to check with a film test. As to the foam around the mirror. That's more difficult to replace, but might not be a big deal. Can you provide a better picture of the mirror foam?

Here you go!
 

Attachments

  • IMG_2974.jpeg
    IMG_2974.jpeg
    208.6 KB · Views: 60
  • IMG_2973.jpeg
    IMG_2973.jpeg
    310.4 KB · Views: 70

KerrKid

Member
Joined
Feb 5, 2022
Messages
1,512
Location
Kerrville, TX
Format
35mm
Either you are just an unlucky SOB, or I'm just a lucky SOB. I've got at least a dozen 1970's SRTs and none of them have ever needed new seals.

As they say, "YMMV".

"If it ain't broke..."

TEST is the BEST.

More likely is that I purchased the cameras knowing that they needed new light seals and therefore got them at a better price. Plus, I will replace light seals even if they're not too bad because I'm fussy, I enjoy the process, and it's extremely cheap to do.

I'm not recommending that the OP necessarily go this route the first time around. I sure didn't. Let's just hope the camera is perfect in every way and remember....

At least it's a Minolta!
 

xkaes

Subscriber
Joined
Mar 25, 2006
Messages
4,555
Location
Colorado
Format
Multi Format
Here you go!

From what I can see, that foam does not look that bad to me. Sure, if you have the time and the money and the skills, replace them. My advise? Leave them as is, and have a good night's sleep.
 

eli griggs

Member
Joined
Nov 15, 2005
Messages
3,825
Location
NC
Format
Multi Format
Dig deep and spring for a metal Canon "F" series camera, FTb or first or second gen. "F1", all large and heavy, so you know you've got a real, manual SLR in your hand.

They have mirror lockup, depth of field preview, self timers, solid machining, sound meters, if working, even with a SR44 batterie in a diode voltage case or by addition of a Scotts diode, and an "O" ring spacer and they will give you a true, manual, learning experience.

The size and weight of the camera is greater than the Pentax k1000 and many of these cameras that were made in the years after it became available but that serves to keep you mindful of what you are doing, which is getting a good picture.

I suggest all your shots include a preview of the depth of field, which will allow you to select the setting you need and condition your mind and vision on what will be included or no, in the photo you're about to take.

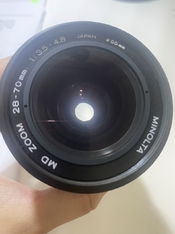
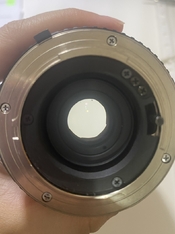
The Canon FL/FD lens system on this camera will also allow you to use other maker's lenses, such as the M42 Pentax/M42 Universal mounts and there are many, many thousands of these out there, many excellent pieces of glass, for pennies compared with more sought after Canon FD lenses (by video and digital makers) whom have driven up prices on the fine optics.

Learning on the FTbn QL will be fun and chances are good no one will knock you down for your old Canon camera, it's a dinosaur in mint folk minds and eyes now and you can bump back with a metal brick, if need be.

You should be able to find a Canon FTbn for about $50US, if you take your time and look around.

Remember also the 50mm f1.8 kit lens that came with these cameras also is a very well regarded lens by many, so you're no starting off 'deprived' of good glass, starting off.

Just remember to use that depth of field for every shot and pay attention to the basics.
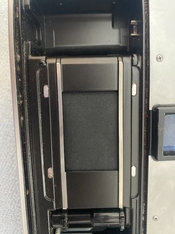
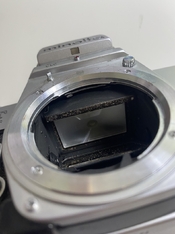
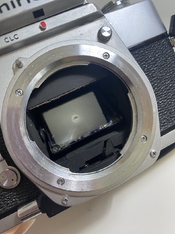
 
OP
OP
138bb

138bb

Member
Joined
Mar 23, 2023
Messages
27
Location
Spain
Format
35mm
I just received the lens! It seems to be in good condition. Any recommendations about how to test if it works?

I put it on the camera and try to focus at different mm. It’s not as clear as the one that came with the fujica. I tried to clean the mirror yesterday, but maybe it still has dust?

Also, I put new light seals! I found adhesive foam for 1€ at a store near me. However the one on the mirror doesn’t stick really well. I don’t know if I can use some kind of glue to make it stick better.
 

Attachments

  • IMG_3174.jpeg
    IMG_3174.jpeg
    164.4 KB · Views: 60
  • IMG_3175.jpeg
    IMG_3175.jpeg
    189.9 KB · Views: 59
  • IMG_3181.jpeg
    IMG_3181.jpeg
    93.7 KB · Views: 53

KerrKid

Member
Joined
Feb 5, 2022
Messages
1,512
Location
Kerrville, TX
Format
35mm
I just received the lens! It seems to be in good condition. Any recommendations about how to test if it works?

I put it on the camera and try to focus at different mm. It’s not as clear as the one that came with the fujica. I tried to clean the mirror yesterday, but maybe it still has dust?

Also, I put new light seals! I found adhesive foam for 1€ at a store near me. However the one on the mirror doesn’t stick really well. I don’t know if I can use some kind of glue to make it stick better.

Could be that the lens has haze. Hard to tell from the pictures. Could be a hazy viewfinder, too.

I use E6000 adhesive to install my foam light seals. That should work on the mirror foam even if it already has adhesive on it. Use a toothpick to apply it to the foam. The E6000 is stringy, if you know what I mean. When you put a dab on the end of the toothpick and pull it away from the tube it will leave a spider web thingy trailing it. I usually spin the toothpick like you would a fork for spaghetti to wrap that string up. You don't want adhesive on the mirror.
 

xkaes

Subscriber
Joined
Mar 25, 2006
Messages
4,555
Location
Colorado
Format
Multi Format
To test the lens, put it on the camera and see if it focuses -- not too tight, not too loose.

Then take if off of the camera and set the lens to f22. Look through the back of the lens and move the small metal lever left and right. The aperture blades should open and close very quickly.

Your camera's focusing screen looks clear enough, but I have no idea what that crud is in the corner. My advise? DON'T mess with the mirror. It is a soft, front surface mirror -- and very easily scratched.

I hope the lens is not cloudy. I can't tell from the pictures. Find something with good details, in the sun, like a bunch of flowers and focus on them. They should be nice and clear.
 
Joined
Jan 31, 2020
Messages
1,264
Location
Germany
Format
Multi Format
The zoom lens is less bright, that's expected. Hard to tell from the pictures if it's hazy.
I second the recommendation not to mess with the mirror. You won't see a little dust on it, it's not in focus. Other places in the viewfinder assembly are more likely culprits and less fragile (not the focusing screen, that's also fragile but you do see the dust on that!).
 
Photrio.com contains affiliate links to products. We may receive a commission for purchases made through these links.
To read our full affiliate disclosure statement please click Here.

PHOTRIO PARTNERS EQUALLY FUNDING OUR COMMUNITY:


Ilford ADOX Freestyle Photographic Stearman Press Weldon Color Lab Blue Moon Camera & Machine
Top Bottom