• Welcome to Photrio!
    Registration is fast and free. Join today to unlock search, see fewer ads, and access all forum features.
    Click here to sign up

F/Stop printing (I suck at maths)

2break

H
2break

  • 4
  • 2
  • 54
Autumn

A
Autumn

  • 2
  • 1
  • 52

Recent Classifieds

Forum statistics

Threads
202,577
Messages
2,842,618
Members
101,385
Latest member
Spekplant
Recent bookmarks
0

hoganlia

Member
Joined
Jan 25, 2023
Messages
149
Location
Spain
Format
Medium Format
Hi folks. I want to try my hand at F/Stop printing without buying the device (a pensioner's life demands you get things in order of priorities.... new device = less paper.... a no brainer ... ie, no device).

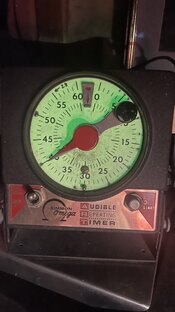
So, for €7 I have picked up a Kodak Projection Print Scale and accessed an adjustment table from Tom North's blog with his kindly calculated increments and subtractions:


All well and good. However, I use Fomaspeed Variant 312 matt paper which is quite fast and the exposure times offer little to play with. On the Kodak Scale instruction sheet it is suggested that for possible short exposures it is advised to cut the test exposure time from the standard 60 seconds to 30 seconds. Cool idea... now the science bit... I truly suck at maths and even with the formula to recalculate in hand I would have no idea how to apply it. Perhaps... just perhaps it's as simple as halving the -/+ times on North's scale, but as the Inverse Square is involved it may not be as simple as that.

Any takers?

ps I have a bad dose of the flu and I am sure I'd feel loads better if someone could help me out.
 
Step 1: use the Kodak Projection Print Scale for 30 seconds, and then pick the right segment in your test;
Step 2: use 1/2 the time indicated on the scale as your starting exposure;
Step 3: Either use the table provided by Tom North to make adjustments from that half value, or use the more comprehensive table provided by @RalphLambrecht in his excellent "Way Beyond Monochrome" book.
Ralph has shared that table here a few times. I'll see if I can attach it to this post.
 

Attachments

  • F-Stop Print Table-WBM.pdf
    68.4 KB · Views: 85
Step 1: use the Kodak Projection Print Scale for 30 seconds, and then pick the right segment in your test;
Step 2: use 1/2 the time indicated on the scale as your starting exposure;
Step 3: Either use the table provided by Tom North to make adjustments from that half value, or use the more comprehensive table provided by @RalphLambrecht in his excellent "Way Beyond Monochrome" book.
Ralph has shared that table here a few times. I'll see if I can attach it to this post.
So very much obliged Matt. A thousand thanks, and suddenly my flu seems quite a bit better.
 
I've done it for years with Ralph's table pinned to the wall next to the enlarger.
 
I'm still trying to wrap my head around this. I've watched one or two of the videos with Gene Nocon, I've read a lot of the threads, and I can't get to a place where I am confident this method would clean up or refine my printing vs just counting seconds.

In one of the threads things got diverted rather quickly to using a cmy head and adding stops that way, but it looked like one would have to completely ignore the manufacturers recommended starting filtration point. (I may have read too much into that thread, and the filtration talk may have been a solution to overly short exposure times only and not a general guideline).

I can understand the desire to work with stops in the camera and then also work with "stops" in the darkroom. I see the logic behind using the same thinking in both places, Is that what it really boils down to?
 
For me, the logic behind it is that it improves the consistency of perception of differentiation between different amounts of exposure.
A test strip usually ends up with strips that appear consistently different from the adjacent strips, as well as from the strips two or three steps away.
A 1/2 stop difference in exposure looks the same, whether that half stop is equivalent to 4 seconds different, or 22 seconds different.
And that consistency of appearance leads to consistency in printing approach, no matter the negative, the paper or the amount of enlargement.
 
I'm still trying to wrap my head around this. I've watched one or two of the videos with Gene Nocon, I've read a lot of the threads, and I can't get to a place where I am confident this method would clean up or refine my printing vs just counting seconds.

In one of the threads things got diverted rather quickly to using a cmy head and adding stops that way, but it looked like one would have to completely ignore the manufacturers recommended starting filtration point. (I may have read too much into that thread, and the filtration talk may have been a solution to overly short exposure times only and not a general guideline).

I can understand the desire to work with stops in the camera and then also work with "stops" in the darkroom. I see the logic behind using the same thinking in both places, Is that what it really boils down to?

I think Matt King's comment below your post makes a lot of sense. That's part of the problem with the test strips I suffered over... consistency and understanding where to position myself. BTW, it's nice to know someone who can get as confused as I do.
 
For me, the logic behind it is that it improves the consistency of perception of differentiation between different amounts of exposure.
A test strip usually ends up with strips that appear consistently different from the adjacent strips, as well as from the strips two or three steps away.
A 1/2 stop difference in exposure looks the same, whether that half stop is equivalent to 4 seconds different, or 22 seconds different.
And that consistency of appearance leads to consistency in printing approach, no matter the negative, the paper or the amount of enlargement.

Matt, that makes a hello of a lot of sense to me and somehow clarifies the basis concept.

Thanks a million
 
You are welcome.
And by the way, it is far more difficult to explain that, than to show it, with real test strips and real work prints, in real life!
 
Call me entrenched in my own head or mildly insane, I'm not sure which but even after Matt's explanation, when I think back to my last printing session, my test strips were exactly what I expected.
Let's say you run 3 second exposures; you do end up with gaps where you do not have a full stop at each division. 3,6,9,12,15,etc I can see the 9 second strip being a distraction between the 6 second and 12 second, but there's usually enough info for me to move to a test print base exposure or do a second test strip. I'm usually running a "zero" contrast and a high contrast test strip anyway.

I don't want to kill or diminish a thread with my misunderstanding or denial of a process, I'll do some more reading, but for now, I don't see a benefit to my own workflow. The only real benefit to any change in my printing process would be paper savings (which then trickles down to chemistry savings)

.... heading to my "technical" bookshelf.
 
Sorry for being a thread hog.
I just looked at the table, and to me, until one is making full stop increments, there almost isn't enough working time for any finesse of the print. Have any of you done a 1/3rd stop dodge from an 8 second base exposure?
8 seconds is likely a completely lame example, I myself would try and get that to 16 or 32 depending upon the need for "extras."
 
I just looked at the table, and to me, until one is making full stop increments, there almost isn't enough working time for any finesse of the print. Have any of you done a 1/3rd stop dodge from an 8 second base exposure?

I normally aim for longer base exposures.
And that applies whether I am f/stop printing or just working with simple seconds :smile:.
But I certainly could see doing a 1/3 stop burn on top of an 8 second base exposure, if I was forced to use an 8 second base exposure.
I use 1/6 of a stop burns and dodges regularly - when at the "fine tuning" stage.
 
I don't know about anyone else, but I frequently stop the lens down additional stops to increase burning-in times.
 
OK. I've consulted some literature and watched a couple of videos. I'm on board. what struck home for me was the ability to scale up to a large print with all of the same information.
The contrarian in me says "why not set everything up to print your large print and then test using small paper?" Logic dictates that one may miss a key area using that method and then waste more paper.
Am I going to order an f-stop timer today? No. I will give this stuff a try in my next printing session with my current equipment.
 
The absolute best f/stop timer is the audible repeating timer from Omega. Looks like any old Time-O-Lite but clicks on seconds.

Write dots at third-stop intervals starting at 50. Then memorize the sequence.

Intervals in this strip starting at 40 would be 8, 7, 5, 4, 3

Place test strip start time then cover up most and count those clicks and move. Doesn’t matter if a few clicks go by, you’re counting 8, 7, 5, 4, 3 and moving the card to expose more of the strip each time.

You’ll end up making a test strip that is 40, 32, 25, 20, 16, 13

Then the fun is when you print and want to dodge 1/3 stop, you can move the dodger anywhere and hold it for 8 clicks, move somewhere else for 8 clicks. Or if you want to dodge 2/3 stop move the dodger and count 15 clicks. You’ve got time to do all that.

If you want to burn something 1/3 stop, move the arm to 50 and burn 10 clicks (and do all that dodging too).

Clicks and knowing how many clicks are 1/3 stop make easy work of burning and dodging.
 

Attachments

  • IMG_4114.jpeg
    IMG_4114.jpeg
    929.9 KB · Views: 2
For me, the logic behind it is that it improves the consistency of perception of differentiation between different amounts of exposure.
A test strip usually ends up with strips that appear consistently different from the adjacent strips, as well as from the strips two or three steps away.
A 1/2 stop difference in exposure looks the same, whether that half stop is equivalent to 4 seconds different, or 22 seconds different.
And that consistency of appearance leads to consistency in printing approach, no matter the negative, the paper or the amount of enlargement.

couldn't have said it better myself
 
OK. I've consulted some literature and watched a couple of videos. I'm on board. what struck home for me was the ability to scale up to a large print with all of the same information.
The contrarian in me says "why not set everything up to print your large print and then test using small paper?" Logic dictates that one may miss a key area using that method and then waste more paper.
Am I going to order an f-stop timer today? No. I will give this stuff a try in my next printing session with my current equipment.

Yes get with it. I converted early and eventually bought a f stop timer. Once you get use to it you'll find much more intuitive.
 
It eventually becomes 2nd nature, and you wonder why everyone isn't doing it this way. More importantly, why wasn't it taught this way from the beginning? What works for film also works for paper. The main advantage is that your printing records will function the next time you print this negative, regardless of the size, scale, paper, or chemistry.
 
Photrio.com contains affiliate links to products. We may receive a commission for purchases made through these links.
To read our full affiliate disclosure statement please click Here.

PHOTRIO PARTNERS EQUALLY FUNDING OUR COMMUNITY:


Ilford ADOX Freestyle Photographic Stearman Press Weldon Color Lab Blue Moon Camera & Machine
Top Bottom