Extra large print drum

Rebel

A
Rebel

  • 0
  • 0
  • 0
Watch That First Step

A
Watch That First Step

  • 0
  • 0
  • 0
Barn Curves

A
Barn Curves

  • 0
  • 0
  • 0
img421.jpg

H
img421.jpg

  • Tel
  • Apr 26, 2025
  • 1
  • 1
  • 30

Forum statistics

Threads
197,483
Messages
2,759,781
Members
99,514
Latest member
cukon
Recent bookmarks
0

alentine

Subscriber
Joined
Nov 4, 2006
Messages
197
Format
Multi Format
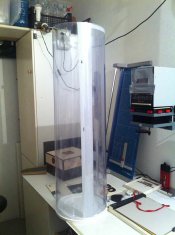
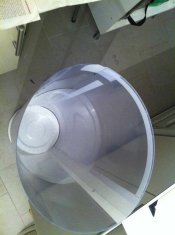
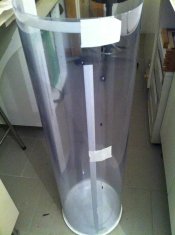
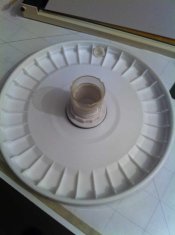
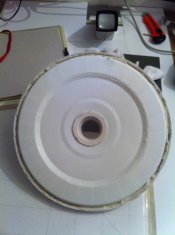
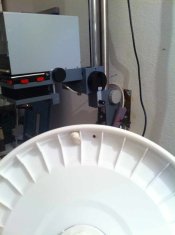
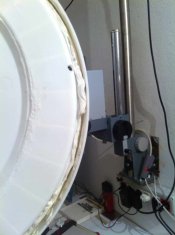
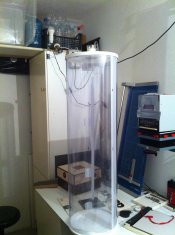
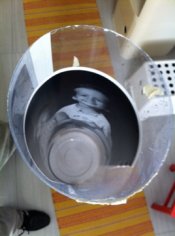
Extra large print drum.
.
Hello everybody.
Wish you all the best and thanks in advance for sharing your thoughts.
Planning to print very large, 40" long.
No enough space, the biggest print that I can develop in trays, is only 24" .
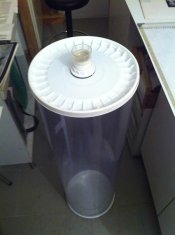
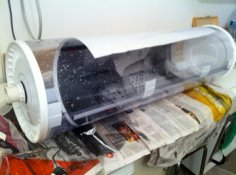
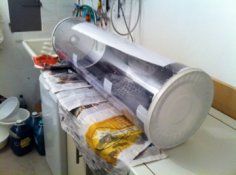
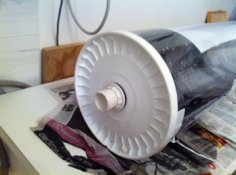
Thinking to use drums to develop 40" prints!
Wondering, how and where can I find the appropriate drums for the task.
Drum should be 13" diameter or larger to accommodate 40" print.
Is it valid idea? Alternatives if not?
Thanks for sharing your thoughts.
 

Fujicaman1957

Member
Joined
Jan 1, 2016
Messages
187
Format
35mm
You're going to need to find some very large PVC sewer pipe and have it cut so the ends are 90 degrees to the long axis and then get PVC sheet pieces cut that cover about a 1/3 of each end. Drill a hole for a rubber test tube stopper in one of then to drain it and glue the ends to the pipe. I will tell you that PVC that big is very costly.
 
OP
OP
alentine

alentine

Subscriber
Joined
Nov 4, 2006
Messages
197
Format
Multi Format
rubber test tube stopper
Hi Fujicaman,
Thanks so much for your idea.
The stopper is a step further to my usual thinking.
What's the pipe/tube diameter do you think enough for a 40" print?
Thanks.
 

ac12

Member
Joined
Apr 27, 2010
Messages
720
Location
SF Bay Area (SFO), USA
Format
Multi Format
You may want to experiment first.
I recall someone saying that when the drum is too big, the paper can collapse on itself. IOW not being able to stay attached to the sides of the drum.
 
OP
OP
alentine

alentine

Subscriber
Joined
Nov 4, 2006
Messages
197
Format
Multi Format
the paper can collapse on itself
Hi ac12,
Thanks so much.
Correct, but did not think of that before. Thanks.
As Fujicaman said, a pipe cut into halves at its longer axis,
but what's the proper diameter?
And PVC, I think is much heavier than material used for Jobo drums.
Thanks ac12.
 

GregW

Member
Joined
Dec 10, 2012
Messages
319
Location
East Coast
Format
Multi Format
If you don't want to use the seesaw method with wall paper troughs, building a tray of light plywood and sealing with fiberglass or the like to accommodate your paper might be best. Include a drainhole you can put a rubber stopper in. To calculate a tube this will help http://www.csgnetwork.com/picalc2.html
You'll need clips to secure the paper ends from falling in for a tube.
 

grahamp

Subscriber
Joined
Mar 2, 2004
Messages
1,685
Location
Vallejo (SF Bay Area)
Format
Multi Format
If you are exposing a 40" (length - what about width? That would be the drum internal circumference.) sheet and are able to load it into a drum, you must have a darkroom. If so, then I'd use a trough. It does not have to be waterproof, just line it with a sheet of heavy polythene. The print has to be rolled back and forth or see-sawed through the liquid. A good photography text will have the method.

Then you have the wash and dry challenge.

A Jobo 2830 tank (2x 8x10) has a minimum developer volume of 100ml. You'd be looking at a litre or more. It isn't too hard to calculate the suitable volume. I can't see how you would reach deep enough into a 40" drum to get the paper set. The Jobo 2850 (20x16") is awkward enough.
 
OP
OP
alentine

alentine

Subscriber
Joined
Nov 4, 2006
Messages
197
Format
Multi Format
Then you have the wash and dry challenge.
Thanks so much grahamp,
You covered all concerns about the task. Thanks.
What do you think about washing?
Will use RC papers of course. Drying, I think, no problem.
After opening this thread, I realized it should be a wallpaper tray, at least until now. Did not know it's something readymade and available:D.
Thanks so much grahamp.
 
OP
OP
alentine

alentine

Subscriber
Joined
Nov 4, 2006
Messages
197
Format
Multi Format
Wall paper trough/paint trays
Thanks sooooooo much jvo.
Brilliant really.
Did not even see a wallpaper tray before, and it did not come to my mind.
Found it in Amazon, will see how can I bring one or two?
I assume they are liquid tight, and can be managed to add tap/faucet to it, it looks like at least.
Thanks so much again.
 
OP
OP
alentine

alentine

Subscriber
Joined
Nov 4, 2006
Messages
197
Format
Multi Format
If you don't want to use the seesaw method with wall paper troughs, building a tray of light plywood and sealing with fiberglass or the like to accommodate your paper might be best. Include a drainhole you can put a rubber stopper in. To calculate a tube this will help http://www.csgnetwork.com/picalc2.html
You'll need clips to secure the paper ends from falling in for a tube.
Thanks so much Greg,
Great idea.
What I settled on so far is a wallpaper tray, due to weight of the item and no space in my darkroom.
Do not know even how the weight of the tray will do with rolling the print in? Or if the material of the tray can accept modification to add a faucet?
Thanks so much Greg.
 

MattKing

Moderator
Moderator
Joined
Apr 24, 2005
Messages
51,945
Location
Delta, BC Canada
Format
Medium Format
You could use open ended 13" PVC pipe and roll it continuously in a wide wallpaper type tray.
If 40" is the long dimension, you could use a 44" or so long tray and a pipe with a smaller diameter.
 

Old-N-Feeble

Member
Joined
Feb 22, 2012
Messages
6,809
Location
South Texas
Format
Multi Format
I saw a video of someone who sealed the ends of PVC pipe and wrapped/secured the paper to the outside of the drum and floated the drum in one tray. The tray had a fast drain on one end and a fast fill at the other. Everything from start to finish was done floating the drum in the one tray.
 

mshchem

Subscriber
Joined
Nov 26, 2007
Messages
14,236
Location
Iowa City, Iowa USA
Format
Medium Format
Get a couple of sponges, and a bucket of Developer and Fix. Tack the print to a piece of plywood and start wiping, If you develop for 10 minutes at room temp. it will probably be pretty even. It will make a god awful mess and you would have to be NUTS, but it's an Option. Look at the giant plastic trays for placing under a washing machine. Children's swimming pools?? Plastic sheeting attached to 2x4s on the floor of the basement.
Kodak made tubes for 30x40 color prints so it's possible. Maybe find a guy that works for the Sewer dept. and see if he can get you a sample:smile:
A buddy and I developed 12 x 72 inch prints by see sawing it back and forth in a dish pan. We used a cylindrical plastic bottle half full of water to keep the paper in the pan.

If you are in the dark who needs a tube?, just roll the paper emulsion side in, tape the back together and spin it in a trough.

So go buy a good used bathtub put it on a sawhorse.......................
 
Joined
Jul 31, 2012
Messages
3,285
Format
35mm RF
There used to be a horseshoe shaped tray called a Color Canoe. I have been thinking about making a large version of that. There would seem to be a few advantages to it over other methods. Agitation would be consistent. The volume of chemistry would be less, meaning less of a potential mess. You wouldn't need to get your hands wet. The "tray" would have a small footprint. Of course I could think of a few potential problems, like how stiff it would need to be, the weight of it, and draining chemistry out if it.

Just throwing that out there.
 

grahamp

Subscriber
Joined
Mar 2, 2004
Messages
1,685
Location
Vallejo (SF Bay Area)
Format
Multi Format
Once the print has been fixed and given a first rinse, washing could be as simple as taking it outside and using a child's paddling pool and a hose. Or maybe just use the bath. The drying challenge will be finding a low-dust room where you can hang it on a line or lay it flat. Handling that much wet paper is very like wallpaper. The risk of tears, creases, or pressure marks is high.
 

Fujicaman1957

Member
Joined
Jan 1, 2016
Messages
187
Format
35mm
Alentine, give me a few days and someplace I have a copy of an article on this and I'll scan it and email it to you if you give me an email address.
 

Ai Print

Subscriber
Joined
May 28, 2015
Messages
1,292
Location
Colorado
Format
Multi Format
I had at one time considered a large piece of PVC with end caps, I bought a 48" long section of the largest I could find at 11" in diameter. It was about $200 with the end caps shipped and to be honest, it super heavy. I would have to make some kind of system to prevent the paper from collapsing in on it self, all kinds of light trap and fill drain considerations as well.

I have since scrapped the idea...

Instead, I plan to build something like the Deville Bobinoir but much simpler and possibly in using spacing adjustable stainless steel mesh cylinders to accommodate different paper sizes:

https://www.fotoimpex.de/shopen/darkroom/deville-bobinoir-paper-winder-127-meter.html

The porous mesh will allow the liquid to pass through and reach the back of the print as well as the emulsion side which will make for proper washing. The aim is to possibly use up to the largest available paper width at 56" with the paper processor fitting in one of several large sections of some 32' square feet of wet side sink area.

Regardless of how it finally ends up working, the goal is a reasonably lightweight and compact roller style paper processor.
 
OP
OP
alentine

alentine

Subscriber
Joined
Nov 4, 2006
Messages
197
Format
Multi Format
Hello guys,
Really appreciate your enthusiasm to share me your experience in the subject.
Thanks so much.
.
You could use open ended 13" PVC pipe and roll it continuously in a wide wallpaper type tray.
If 40" is the long dimension, you could use a 44" or so long tray and a pipe with a smaller diameter.
Thanks MattKing,
If considering using both, tube plus tray, your idea could be the simplistic one to be used.
Thanks so much.
.
I saw a video of someone who sealed the ends of PVC pipe and wrapped/secured the paper to the outside of the drum and floated the drum in one tray. The tray had a fast drain on one end and a fast fill at the other. Everything from start to finish was done floating the drum in the one tray.
Thanks Old-N-Feeble,
That's really good idea if it's a must to use both, tray and tube.
Thanks so much Old-N-Feeble.
.
Get a couple of sponges, and a bucket of Developer and Fix. Tack the print to a piece of plywood and start wiping, If you develop for 10 minutes at room temp. it will probably be pretty even. It will make a god awful mess and you would have to be NUTS, but it's an Option. Look at the giant plastic trays for placing under a washing machine. Children's swimming pools?? Plastic sheeting attached to 2x4s on the floor of the basement.
Kodak made tubes for 30x40 color prints so it's possible. Maybe find a guy that works for the Sewer dept. and see if he can get you a sample:smile:
A buddy and I developed 12 x 72 inch prints by see sawing it back and forth in a dish pan. We used a cylindrical plastic bottle half full of water to keep the paper in the pan
If you are in the dark who needs a tube?, just roll the paper emulsion side in, tape the back together and spin it in a trough.
So go buy a good used bathtub put it on a sawhorse.......................
Thanks mshchem,
Soaking sponges idea was the very first idea came to my mind, but lots of mess and still needs space. Was really afraid of contamination in a very small darkroom.
I'm so nuts already BTW .
Already looked at pet trays, comes in 40" or even 47", that used for pets in the garden. It's shallow and needs space.
As for the Sewer tube, I found it locally new max diameter 13"-14", but it has a thick wall which will reflect in drum weight. It was the idea that will adopt before opening this thread.
Great ideas mshchem, Thanks so much.
.
There used to be a horseshoe shaped tray called a Color Canoe. I have been thinking about making a large version of that. There would seem to be a few advantages to it over other methods. Agitation would be consistent. The volume of chemistry would be less, meaning less of a potential mess. You wouldn't need to get your hands wet. The "tray" would have a small footprint. Of course I could think of a few potential problems, like how stiff it would need to be, the weight of it, and draining chemistry out if it.
Just throwing that out there.
Thanks Patrick,
Found Heath Color Canoe on ebay, but not the large ones, not available, very rare. The design when get enlarged will not safe much of space. Plus other points you mentioned which may create drawbacks to the tray like weight and drainage.
Thank you so much Patrick.
 

MattKing

Moderator
Moderator
Joined
Apr 24, 2005
Messages
51,945
Location
Delta, BC Canada
Format
Medium Format
The design when get enlarged will not safe much of space.
The advantage of the Colour Canoe is that it is one of the best approaches for single tray processing.
If you have room for one tray, it would be a good approach.
 

bunip

Member
Joined
May 13, 2012
Messages
281
Location
Parma, Italy
Format
Multi Format
Here following is how I print BIG:
bought a PVC transparent foil 0,75mm thick, 100cm high 110 cm long. Here in Italy you can buy it by meter at 10 euros/m. Bought two big paint container's lids for 2 euro (30 cm diameter allow almost 90 cm x 90cm print). Make a hole in one lid's center and fit a plastic sink drainage with some sink plaste to stop fluid leaks. You have to roll your PVC foil the right dimension of your lid, use sone biadhesive tape to stop fluid leaks along the overlaying edges, than some tape outside. Put one (no hole) lid to one end and seal with silicon. the other lid will be sealed with sink plaste after inserting the exposed paper. To this purpose it's better to heat the plaste to allow tight sealing (hair dryer in my case). if you put inside the paper after wetting the drum youll have a perfect adhesion to tube walls. You can presoak with water, then dump off from the drain, insert the developer (2000cc is more than inhalf for my 70x100cm print) and on to the wash. My washing is with a plastic water pipe inserted in the drain with a strong water pressure washing the paper in an upside down position in a way that can allow prompt water discard through the drain. The small little hole you see in the lid border is to completely empty the fluid with some ease.
I tryed this configuration several times and as far as you seale well the lid you'll have a very fast and light System.
My total bill was less than 30 euro; if you need bigger than 100X90 you can buy a longer roll. the limit is how big you can find a lid and how wide you can find the PVC roll.
some advanatges are: very light, cheap, you develop by inspection, when not in use can be dissassembled, you can have many dimensions and work with a small amount of solutions, can be rolled on a table as a common drum; if needed you can make a rolling base easy because it's very light.
disadvantages: fluid leaks if you do not seal well the removable lid (occurs with low temperatures as the plaste get harder with cold); do not know if it works with FB paper due to different consistence and threatment's times (I use RC paper in rolls 110 cm high).
I'm sorry for pictures quality; prints you see in pictures are 70x70cm and 95x65cm.
 

Attachments

  • IMG_5135w.jpg
    IMG_5135w.jpg
    51.9 KB · Views: 220
  • IMG_5138w.jpg
    IMG_5138w.jpg
    43 KB · Views: 219
  • IMG_5139w.jpg
    IMG_5139w.jpg
    48.4 KB · Views: 231
  • IMG_5140w.jpg
    IMG_5140w.jpg
    28.5 KB · Views: 217
  • IMG_5141w.jpg
    IMG_5141w.jpg
    31.5 KB · Views: 215
  • IMG_5145w.jpg
    IMG_5145w.jpg
    34.8 KB · Views: 219
  • IMG_5146w.jpg
    IMG_5146w.jpg
    36.3 KB · Views: 209
  • IMG_5147w.jpg
    IMG_5147w.jpg
    53.4 KB · Views: 206
  • IMG_5148w.jpg
    IMG_5148w.jpg
    32.1 KB · Views: 229
  • IMG_5692w.jpg
    IMG_5692w.jpg
    78.9 KB · Views: 210
  • IMG_5150.jpg
    IMG_5150.jpg
    54.2 KB · Views: 206
  • IMG_5152.jpg
    IMG_5152.jpg
    48.4 KB · Views: 219
  • IMG_5153.jpg
    IMG_5153.jpg
    48.5 KB · Views: 216
  • IMG_5156.jpg
    IMG_5156.jpg
    29.2 KB · Views: 208
  • IMG_5155.jpg
    IMG_5155.jpg
    43.8 KB · Views: 242
Last edited:
OP
OP
alentine

alentine

Subscriber
Joined
Nov 4, 2006
Messages
197
Format
Multi Format
Hello every body,
Thanks so much for your input and generosity.
It was a gentle welcoming that convinced me to subscribe immediately at that time.
I was not a frequent visitor to the cyberspace, so please accept my apologies for the delay.
All posts are most useful.
Thanks indeed.
 

Sirius Glass

Subscriber
Joined
Jan 18, 2007
Messages
50,132
Location
Southern California
Format
Multi Format
I use an Arkay drum dryer which is 32" wide.
 
Joined
Jul 31, 2012
Messages
3,285
Format
35mm RF
Another option would be to make a tube like bunip but without the ends, then get some rollers (JOBO has them) and roll the print in chemicals in a wallpaper tray, or one you built yourself. Not a lot of space would be needed and you get around the leaky caps.

If you are concerned about the print collapsing in the tube, you could use window screen material to hold the print against the tube. That should prevent the paper from collapsing.
 
Photrio.com contains affiliate links to products. We may receive a commission for purchases made through these links.
To read our full affiliate disclosure statement please click Here.

PHOTRIO PARTNERS EQUALLY FUNDING OUR COMMUNITY:


Ilford ADOX Freestyle Photographic Stearman Press Weldon Color Lab Blue Moon Camera & Machine
Top Bottom