DIY Film Drying Cabinet

Humming Around!

D
Humming Around!

  • 2
  • 0
  • 39
Pride

A
Pride

  • 2
  • 1
  • 95
Paris

A
Paris

  • 5
  • 1
  • 170
Seeing right through you

Seeing right through you

  • 4
  • 1
  • 205

Recent Classifieds

Forum statistics

Threads
198,410
Messages
2,774,469
Members
99,609
Latest member
NBW
Recent bookmarks
2

athbr

Member
Joined
Sep 4, 2017
Messages
160
Location
Brazil
Format
Medium Format
Hi there.

While messing around on the internet I came upon this custom made film drying cabinet which I thought was pretty cool.

I want to replicate it but can't for the life of me figure out what the bottom grill does.

Could it be a heating element?

Perhaps a second fan (thus an intake and outake) with a HEPA Filter?

But that would mean (I think) intake from below which wouldn't make sense.

Anyone have any ideas?

cheers.
 

Attachments

  • film_drying_cabinet2-o.jpg
    film_drying_cabinet2-o.jpg
    41.8 KB · Views: 736

jvo

Subscriber
Joined
Dec 6, 2008
Messages
1,743
Location
left coast of east coast
Format
Digital
the air intake looks to be from the fan at the top with a tray sitting on a hard surface or maybe filter at the bottom.

yes it could be a heating element at the bottom - that would mean there's a plastic tray, ( for dripping water), on top of it and there doesn't seem to be any power cord leading to the bottom, only the fan at the top. so i don't think so.

like most drying cabinets, they are simple affairs and only found the need for them when "rush" was a steady diet.

currently i have a wire across my darkroom closet and hang my 120 film there. i've never had a problem with dust in mulitple environments and many less enclosed. i feel like i've been lucky, although i am fairly rigorous about cleaning and darkroom activities.
 

Pieter12

Member
Joined
Aug 20, 2017
Messages
7,564
Location
Magrathean's computer
Format
Super8
To me, it looks like the fan at the top draws the air through the cabinet from the bottom, through a filter. There is a tray on the bottom for excess water. Only one item plugged in to the mains, so probably no heat involved.
 
OP
OP
athbr

athbr

Member
Joined
Sep 4, 2017
Messages
160
Location
Brazil
Format
Medium Format
Thanks for all the replies.

I think Pieter12 is probably right. That said, it seems like design flaw drawing in air from below where there is more dust.
 

konakoa

Member
Joined
Sep 23, 2006
Messages
186
Format
Large Format
Athbr, I built that cabinet seven years ago and imagine my surprise when I saw it pop up here! It's unchanged and I still use it even now. I'm about to go process some film in a few minutes that's going in that same cabinet too. To answer your questions, the bottom grill is an air filter. It's a allergen type so it captures very fine particles. I placed it there as I wanted no electronics of any kind on the bottom to get wet. There is a small Paterson 5x7 plastic tray sitting on a little stand that rests on top of the filter to catch drips. The fan at the top is a twelve volt computer fan so it runs quietly. And again, it's out of the path of any water. Yes, the air comes in from the bottom and is pushed out through the fan at the top. No, I've never had a dust issue with this cabinet.

Right after I built the cabinet I found out I really didn't even need the fan. I almost always leave film to dry overnight and it does that just fine without running the fan. If I turn the fan on, film dries completely in one or two hours, no heat needed. My darkroom at the time was very small and dirt was constantly getting tracked in, so the cabinet was a must to keep the film clean while wet. I've enlarged my darkroom since then but still use the film cabinet.
 
OP
OP
athbr

athbr

Member
Joined
Sep 4, 2017
Messages
160
Location
Brazil
Format
Medium Format
Oh my! This is amazing!

Thank you so much for answering Konakoa. DIYers like yourself keep film photography alive.

I've got a bunch of questions so in case you don't mind answering them I'm just going to go right ahead and vomit them out:

- What are the overall dimensions of this case?
- How does it support itself upright? Do the left and right acrylic slabs simply extend downwards creating two "feet"?
- Do you feed in the film from the top or is the front slab hinged? If so, was anything done to keep the doors shut/airtight?
- What is the make of this filter? I seem only to find filters that are made of cheap plastic materials. This seems to be made of metal and is much nicer.
- How is the filter held on to the acrylic slabs? Is it perched on some support or is it glued directly to the slabs?
- In hindsight is there anything you would have done differently on this build?

Cheers again Konakoa! When I get mine built I'll make sure to post pictures and details!
 

konakoa

Member
Joined
Sep 23, 2006
Messages
186
Format
Large Format
Athbr, send me an PM or we can go to email, I'd be glad to go in to detail with you on the cabinet!
 

Paul Verizzo

Member
Joined
Jan 20, 2008
Messages
1,643
Location
Round Rock, TX
Format
35mm
Photo Flow made with 91% isopropyl alcohol.

One minute, remove, use fingers to remove most of the moisture.

A microfiber cloth for more dehydration.

A hairdryer to finish it up.

Total time, maybe 3 minutes. Space needed, zero. Investment, close to zero.
 

mgb74

Subscriber
Joined
Jan 24, 2005
Messages
4,773
Location
MN and MA US
Format
Multi Format
I built an effective film drying cabinet for a community darkroom, using a metal office style cabinet. Closed off all air passages other than near the top. Used a computer fan (with filter) at the bottom, connected to a timer. Thought heat might be necessary but, in our situation, it wasn't. Made provisions for a second fan but again, turned out not to be necessary. If I was purchasing a cabinet, I'd seriously consider a plastic one.

What we found was that 2-3 rolls of film drying in 30-40 minutes (depending on humidity). More rolls required a bit more time, but not much. You don't want too strong an airflow, but enough to have positive air pressure inside and feel some exhaust.
 

BSP

Member
Joined
Aug 25, 2019
Messages
332
Location
The Netherlands
Format
35mm
Photo Flow made with 91% isopropyl alcohol.

One minute, remove, use fingers to remove most of the moisture.

A microfiber cloth for more dehydration.

A hairdryer to finish it up.

Total time, maybe 3 minutes. Space needed, zero. Investment, close to zero.

Hi Paul,

I just stumbled upon your posting about drying negatives.

Are you still using this interesting dryingmethod? How is it going?
How many times do you re-use the alcohol/photoflow bath?

No issues with scratching or curling?
This almost sounds too good to be true... :wink:

Regards,

Bill
 

138S

Member
Joined
Dec 4, 2019
Messages
1,776
Location
Pyrenees
Format
Large Format
Perhaps a second fan (thus an intake and outake) with a HEPA Filter?

First, use a home type HEPA purifier for the room in what you work, see I use a Honeywell HAP16200, but any cheap one with good air flow can be good.

This is a general good advice for handling dry or wet film and of course to scan and enlarge. With that you can dry your film without a cabinet without taking dust, this is an straight solution.

A cabinet can even be better for dust and to speed up drying.

For a DIY cabinet, a bit from my commercially made cabinet design, I'd suggest:

1) Use an HEPA filter in the air injection fan, preceded by an sponge prefilter to protect the HEPA from coarse particles

2) Allow a free air exit in the oposite end.

3) Air diffuser is important, use a plating with holes to spread air flow uniformly. You don't your film move like a flag !!

4) If you use a heater then better to place the intake at the bottom, as heated air tends to ascent.

5) If you are really good at DIY (beware fire/electric risk) you may hack an old home air heater to salvage thermostat, motor/fan and air heater, finding the way to lower the heater power to not rise much ait temperature.

The heating is useful when you have an extremly high air %Humidity, my drying cabinet has heating but I never use it, in normal situations (if not in a hurry) better not using heater of using it with a very mild temp increase, say +8ºC.

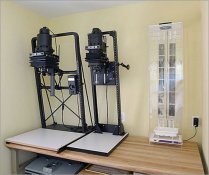
This is a regular cabinet with heated air: dryer.JPG

The heating element is waterproof or protected from water drops. You may invert the desing placing the heater in the top, for less complications.

Or for even less complications I'd totally avoid the heater, if in a high humidity day you need it then you always may use a home air heater pointing to the air intake area, from a safe distance.
 
Last edited:

RalphLambrecht

Subscriber
Joined
Sep 19, 2003
Messages
14,631
Location
K,Germany
Format
Medium Format
Hi there.

While messing around on the internet I came upon this custom made film drying cabinet which I thought was pretty cool.

I want to replicate it but can't for the life of me figure out what the bottom grill does.

Could it be a heating element?

Perhaps a second fan (thus an intake and outake) with a HEPA Filter?

But that would mean (I think) intake from below which wouldn't make sense.

Anyone have any ideas?

cheers.
IKEA sells very inexpensive bedroom wardrobes; I'd start with that.
 
Photrio.com contains affiliate links to products. We may receive a commission for purchases made through these links.
To read our full affiliate disclosure statement please click Here.

PHOTRIO PARTNERS EQUALLY FUNDING OUR COMMUNITY:


Ilford ADOX Freestyle Photographic Stearman Press Weldon Color Lab Blue Moon Camera & Machine
Top Bottom