• Welcome to Photrio!
    Registration is fast and free. Join today to unlock search, see fewer ads, and access all forum features.
    Click here to sign up

developing too fast

Grill

H
Grill

  • 1
  • 0
  • 39
Cemetery Chapel

H
Cemetery Chapel

  • 2
  • 0
  • 63

Recent Classifieds

Forum statistics

Threads
202,775
Messages
2,845,418
Members
101,517
Latest member
grant.goodes
Recent bookmarks
0

silvercloud2323

Member
Allowing Ads
Joined
Oct 4, 2018
Messages
188
Location
Europe
Format
35mm
abc5964-min.jpg
I'm pretty new to film photography. My first prints were very greyish. Then i reduced the developing from 1 minute, normally , to just 8 seconds... Then i get a more or less descent print out of it. But in only 8 seconds i have no real blacks and still bit grey. I also can't dodge and burn , because of the very limited time i get to develop my photo.

Furthermore i completely darkened my room . Even put the safelight off. What could be the reason i have to develop so short? If i do a proper exposure of 60 seconds in the enlarger with the light , i get black photos..

more settings: Aperture lens F 11 to f22. Ilford multigrade black and white paper. i 've put the filter on the enlarger. the magenta filter to 60.

I used Ilford Multigrade developer.
 
Last edited:
Just a couple of questions to clarify your situation:

1) Time under the enlarger is known as the exposure time. Is 8 seconds the exposure time? What is the size of your negative? What focal length is your enlarging lens? How high is the lens from the paper’s surface?
2) Time in the developer tray is known as the development time. What dilution are you using?
3) What happens if you develop a sheet of paper without exposing it under the enlarger?
 
hi Howardpan,

1) yes the exposure time under the enlarger is 8 seconds. A 35mm negative and 5O mm focal length my enlarging lens.
My photo paper is about 40 cm under my lens.
2) I use Ilford Multigrade developer and the dilution is 1/9
3) will try that tonight when its dark.
 
It may be possible that your negatives are thin, that is, they are not very dark/dense.

Is your safelight a known photographic safelight, or is it a coloured light globe. In some instances coloured light globes may be fogging your VC paper. Not that likely, but a possibility.

What kind of enlarger, brand and model. This will allow us to get an idea whether it is a condenser enlarger or a diffused light enlarger, shorter times for condenser, longer for diffused; although not that much of a difference.

If your prints are dark and grey, then reducing exposure times and/or adding contrast, say from grade 2½ to grade 3 or 3½ will give your image a contrast boost. Meaning greys will be far less, blacks will be more black and white or light areas, will be more white.

Mick.
 
thx Mick,

-Is possible my negatives are thin . I will let it checked in the Labo. What should i ask them to achieve more dark /dense negatives? Should i ask them to overexpose 1 stop... ?

-My safelight is an Ilford safelight, so i guess thats oke..

-Enlarger Durst M605

-
reducing exposure times and/or adding contrast, say from grade 2½ to grade 3 or 3½ will give your image a contrast boost.
What you mean by that? about the grades, where to adjust this?
 
More questions:
* How old is your paper? Old paper tends to be grey and flat and is useless for learning how to print.
* Do you stop down your enlarging lens? Typically you should focus with the lens open and then close the diafragma 2 to 3 stops for enlarging. When 3 stops delivers very short exposure times close further.
* Learn how to make a test strip: youtube is your friend here.
* Do a safelight test. Typically expose a teststrip under the enlarger until it is light grey: 2 sec with a fully closed lens often does the trick. No negative in the enlarger. Then put a few coins on the test strip and wait for 3 or 4 minutes. Then develop the test strip as usual. When you can see the shape of the coins on the test strip your safelight is not good enough. When you can't see them your ok.
* When you use a condensor enlarger: get youself a set of Ilford Multigrade filters when you don''t have them. Those filters allow you to change contrast of the paper by changing filters. They also take 2 steps of light, so your exposure times will become 4 times longer. When you use a colour enlarger: dial in equal amounts of all the colours to reduce the output of the enlarger. Do also a search here on how to change paper contrast by changing the colour of the light.
 
I'm guessing that maybe you're not stopping down your enlarger lens. It should be stopped down to maybe f11 or f8 or so.
 
Welcome to the world of analogue photography! Don't be disheartened by this, it's just part of the learning curve and you will very soon be making good prints.

The time the paper is in the developer should be constant, for your developer 2 minutes is fine. You should not "snatch" the paper out of the developer because the print is getting too dark. If this happens it means you exposed the paper for too long (or the light was too bright because the enlarging lens aperture was too big). You can either, stop down the enlarger lens aperture or reduce the exposure time. Usually it is recommended to focus your picture on the easel with the lens wide open and then stop down to about f8 to make the print (but it depends on your setup and what will give a reasonable exposure time). You don't want exposures that are too fast as you have no time to burn or dodge but equally very long exposures are not a good idea either so (personally) somewhere around 20 seconds is ideal.

Make a test strip to determine the best exposure time. This is absolutely essential. As you are just starting out I would strongly advise learning to use f-stop printing. This is the concept of using printing exposures based on f-stops which is after all how we take photographs with our cameras (e.g. exposure times of 2, 4, 8, 16 seconds and so on but of course you can and will want to use fractions of stops). Be aware that photographic paper is much more fussy than film in getting the exposure right. Half a stop of over or under exposure is easy to get away with on film but is a lot for paper.

As you are using multigrade paper you will in time wish to print using different contrasts but for now I would suggest learning to get the correct exposure.

See this guide to get you started:
https://www.ilfordphoto.com/wp/wp-content/uploads/2017/04/Making-your-first-print.pdf

Have fun!
 
Last edited:
If I have understood you correctly. You have an outside lab develop your films but you do your own prints. As you have a proper darkroom then processing film is probably easier than printing. I'd urge you to consider doing your own developing as well. That way you have charge of everything.This reduces the number of variables that you have no control over to zero.

pentaxuser
 
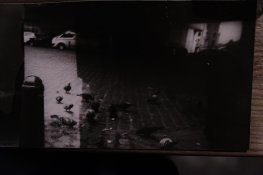
nice photograph ! ( i love the mood, its like a hitchcock film still :smile: )

how did you meter the scene ?
i ask because sometimes in camera light meters are "off" ...
so it seems like the right exposure but it isn't ... and sometimes people use
reflected metering instead of straight up ambient light meter reading and their exposures are a little off too...

if i can suggest doing a film test for your next roll with that camera...
bracket your exposures all by 1 full f-stop
so lets say your light meter says 60thS at f 8 ... expose 3 frames one at f8, one at f 5.6 and one at f 11
do this for the whole roll, and then see which frames are easier for you to print. it will make your life a lot easier
than dealing with thin negatives ( im guessing your film is sort of thin )

this bracket test is probably the first thing anyone should do when using a film / developer/ a camera they aren't used to using ....
or sending film to a lab ... if any 1 of these things ( exposure, developer camera, lab ) is "off" it can foul up hte whole process ...

have fun !
john

ps if you haven't seen this http://www.fredparker.com/ultexp1.htm
not to use instead of your in camera or in phone or hand held light meter
( well, maybe, i haven't used a meter in 10 years )
but just to make sure your mechanical meter makes sense...
 
My first thought is if you bought your paper new or bought it used. My second thought is to verify you are stopping the lens down properly.

In any case, just do a strip test to determine proper exposure. I would use 2 sec exposure steps.
 
All of the above is good advice. I think Svenedin explained it best. Do test strips, and don't "snatch' the print out of the developer. Print developing should go to full development - so nothing is changing any more. To snatch the print will cause poor contrast.
Hope all of this advice helps. Just keep trying - you'll get it!
 
The rule of thumb I started with when learning to print was get the Exposure under the enlarger right for the highlights (which are the darkest parts of the negative) and then change where the blacks go using Contrast.
As several stated above, the development time in the tray is almost always "to completion" when learning, and most certainly around 2 minutes. Never a need to yank the paper out.
When learning only change one thing at a time, so get the exposure time right then find the contrast. Trying to do two things at once can get frustrating!
 
A digital photograph i.e. the frame in question to be taken with a digital camera against a lightbox, would be useful to us It should help to establish if the negative is "thin"

pentaxuser
 
hi all

I did the test with the coin.
I put a coin on the RC paper and turned off the light even de safelight for 90 seconds. The paper i developed was complete white.
So this proves there's no extra light coming into the darkroom. It is now completely dark.

But i did a nomal test (60 sec exposure with test strips)and with paper and developed it.
20,40 and 60 seconds bands.

Why are the whites , after certain time getting black as well??

You can see the image is still very dark.
The exposure must have been too strong.
Also used the magenta filter on my Enlarger . Did put it to 100/of the max of 130.
 

Attachments

  • DSCF5965.JPG
    DSCF5965.JPG
    61.6 KB · Views: 147
Last edited:
How long are you leaving it in the fixer? If its turning black there are still silver halides present in the emulsion. Tell us what your procedure is start to fnish and how well versed you are with the process itself..
 
We can go on with this kind of Question and Answer thread for a long time and still not be of much help. I'd like to repeat my request I made in #15. Please give us a digital photo and secondly try the following suggestions, some of which have already been made:

Do a test strip without any filtration and start at maybe 2 seconds, then 3 seconds, 4 seconds, 6 seconds, 8 seconds and 11 seconds. This is roughly exposures half a stop apart. No filtration is roughly grade 2. Develop, stop and fix for the time recommended by the manufacturers of the chemicals. If you don't use fresh paper, developer and fix each time then do so. We are trying to eliminate variables such as old chemicals, paper etc

Do an accurate scan of the test strip and let us have a look along with your digital photos.

pentaxuser
 
Found the solution.
Using an ND filter , using same amounts of Cyan, Magenta and Yellow....:smile:
I hope it works tomorrow.
 
I don't believe fixer is the problem.

I suggest you look at this PDF from Ilford, it explains the contrast grades possible with a Durst colour head enlarger. Page 3.

https://www.ilfordphoto.com/wp/wp-content/uploads/2017/03/Contrast-control-for-Ilford-Multigrade.pdf

There is a specific entry for the Durst systems, pick the appropriate version for your colour head and use it for changing the contrast from flat Grade 0 to high contrast grade 5.

Now to give yourself some more exposing time, you can add equal amounts of density by adding all three colours.

By adding 30 units of all three filters, you gain one f/stop of density, adding 60 units of all three filters, you gain two f/stops of density.

So if you want grade 2½ you would use 28Y/42M and say f/11 on your enlarging lens. We will for arguments sake assume you needed 5 seconds to get a reasonable print; this is a little too short for your liking, so:

We add 60 units of all three filters, so adjust your filters to 60 units of each colour, then add 28Y/42M so that the colour head reading is 60C - 88Y - 102M by not changing anything else your exposure time should be 20 seconds for the same result.

Base exposure was 5 seconds, one more stop is 10 seconds, add another stop and you arrive at 20 seconds. These times will be approximate, but reasonably close.

Mick.
 
I did the test with the coin.
I put a coin on the RC paper and turned off the light even de safelight for 90 seconds. The paper i developed was complete white.

This is not how the test should be done. Your eyes are good enough to check for light leaks in your darkroom and that isn't what the test is meant to prove. What you want to know is if your safe light is safe enough for the paper your using. So don't turn them off when doing this test. Second thing is that most paper has a tresshold. A tiny bit of light doesn't have any effect and leaves the paper white. You have to flash the paper so it becomes light grey when developing. Use a strip of paper you have flashed this way, put some coins on it and wait for 5 minutes with your safelights on, before developing. Only then you are sure your safelight is good enough.

https://www.kodak.com/uploadedfiles..._motion_products_filter_K4_Safelight_1106.pdf for the official Kodak related link.
 
And you've ruled out enlarger leak? I capped the lens on my enlarger and placed a mirror on the easel. I was shocked at the amount of light seeping through from the lens stage, and from light head.. Black cardboard masks and tape took care of it. No more fogged whites.
 
Photrio.com contains affiliate links to products. We may receive a commission for purchases made through these links.
To read our full affiliate disclosure statement please click Here.

PHOTRIO PARTNERS EQUALLY FUNDING OUR COMMUNITY:


Ilford ADOX Freestyle Photographic Stearman Press Weldon Color Lab Blue Moon Camera & Machine
Top Bottom