colour analyzer, can I use it?

Mansion

A
Mansion

  • 1
  • 2
  • 41
Lake

A
Lake

  • 5
  • 1
  • 42
One cloud, four windmills

D
One cloud, four windmills

  • 2
  • 0
  • 25
Priorities #2

D
Priorities #2

  • 0
  • 0
  • 23
Priorities

D
Priorities

  • 0
  • 0
  • 20

Recent Classifieds

Forum statistics

Threads
199,017
Messages
2,784,702
Members
99,776
Latest member
Alames
Recent bookmarks
0

Mick Fagan

Subscriber
Joined
Sep 13, 2005
Messages
4,421
Location
Melbourne Au
Format
Multi Format
Just another thought. You don't need to get the Expo Disc, but it is the best way I know to get a really dead accurate grey card negative.

You can use a grey card, or a part of a grey card, hold it in your hand and allow the light to fall on the grey card as you take the exposure. Then when in the darkroom, put the grey card negative in and place your probe so that it is only receiving the grey card image. Then adjust the enlarger dials until all three analyser lights go out, you then have correct colour balance.

As for push processing, pretty much nothing is certain, the more you push the more there is a possibility to get a colour layer crossing into another colour layer, thereby making technically correct prints impossible.

That said, technically incorrect prints, are not that bad. I have more than a few of them myself. :angel:

Mick.
 
OP
OP
Berri

Berri

Member
Joined
Feb 7, 2017
Messages
627
Location
Florence, Italy
Format
Multi Format
ok I bought the ColorStar 2000, when I recive it I'll post my impressions!
Next piece of equipment will be the mechrome colour 3 for my meopta 6 enlarger.

Thanks everybody!
 

flavio81

Member
Joined
Oct 24, 2014
Messages
5,073
Location
Lima, Peru
Format
Medium Format
ok I bought the ColorStar 2000, when I recive it I'll post my impressions!
Next piece of equipment will be the mechrome colour 3 for my meopta 6 enlarger.

Thanks everybody!

Berri,

These days, color enlargers are cheaper than ever (nobody wants them). I bet it will be cheaper for you to get a complete color enlarger. And are you Czech? No, you are Italian and thus you need a Durst, MADE IN ITALY*, accepting M39 lenses by default as God intended to be, not those tiny 23.5mm mount /30mm mount Belar enlarger lenses... Set aside those tiny lenses for the enlarger in your daughter's Barbie toy house.

Accept no substitutes. You will love how Durst assigns a code to each accesory (like Leica did) and thus making you crazy to understand what the hell is a SIXPLA, what is a diference between a VEGASET and VEGACOLSET, or between a SIVOPLA and a SIVOGLA. You will enjoy losing time learning these stuff, just as leicaphiles speak about the VIOOH versus VIDOM, NOOKY and the difference with NOOKY-HESUM, etc.

And of course now that Ferrania film is available, Ferrania films want Durst enlargers, just as Foma films want to be enlarged in Meopta enlargers. You don't want to make film feel angry, don't you!

* well, made in a region of Germany forced to act as italian...
 
Last edited:
OP
OP
Berri

Berri

Member
Joined
Feb 7, 2017
Messages
627
Location
Florence, Italy
Format
Multi Format
Berri,

These days, color enlargers are cheaper than ever (nobody wants them). I bet it will be cheaper for you to get a complete color enlarger. And are you Czech? No, you are Italian and thus you need a Durst, MADE IN ITALY*, accepting M39 lenses by default as God intended to be, not those tiny 23.5mm mount /30mm mount Belar enlarger lenses... Set aside those tiny lenses for the enlarger in your daughter's Barbie toy house.

Accept no substitutes. You will love how Durst assigns a code to each accesory (like Leica did) and thus making you crazy to understand what the hell is a SIXPLA, what is a diference between a VEGASET and VEGACOLSET, or between a SIVOPLA and a SIVOGLA. You will enjoy losing time learning these stuff, just as leicaphiles speak about the VIOOH versus VIDOM, NOOKY and the difference with NOOKY-HESUM, etc.

And of course now that Ferrania film is available, Ferrania films want Durst enlargers, just as Foma films want to be enlarged in Meopta enlargers. You don't want to make film feel angry, don't you!

* well, made in a region of Germany forced to act as italian...
I used to have a durst for 35mm and I liked it. Now though I'm pretty happy with this Meopta Opemus 6 is very well made and accepts 39mm lenses! Durst color enlarger for medium format are still quite pricey here in Italy!
 

flavio81

Member
Joined
Oct 24, 2014
Messages
5,073
Location
Lima, Peru
Format
Medium Format
I used to have a durst for 35mm and I liked it. Now though I'm pretty happy with this Meopta Opemus 6 is very well made and accepts 39mm lenses! Durst color enlarger for medium format are still quite pricey here in Italy!

The funny thing is that here in Peru, last year, i was about to buy a Meopta Opemus 6 Color, until i found a Durst M670 color for even less price. I chose the Durst because it was the exact model that my lab used (and I loved the prints they made), and because it supports 6x7 format. Also, because the Opemus 6 color looks like a toaster placed on top of an enlarger lens, while the Durst M670 looks sexy.
 
OP
OP
Berri

Berri

Member
Joined
Feb 7, 2017
Messages
627
Location
Florence, Italy
Format
Multi Format
The funny thing is that here in Peru, last year, i was about to buy a Meopta Opemus 6 Color, until i found a Durst M670 color for even less price. I chose the Durst because it was the exact model that my lab used (and I loved the prints they made), and because it supports 6x7 format. Also, because the Opemus 6 color looks like a toaster placed on top of an enlarger lens, while the Durst M670 looks sexy.
I quite like the toster-look, I admit the the durst is much better but it goes for 400/450 € and i paid 80€ for a like new meopta! Meopta is really sturdy and durable made and when it comes to print quality its the lens we must consider! I rarely do 6x7 so at the moment I'm not too bothered about it, in the future I might consider the 670 if I come across a good deal
 

wiltw

Subscriber
Joined
Oct 4, 2008
Messages
6,453
Location
SF Bay area
Format
Multi Format
You will love how Durst assigns a code to each accesory (like Leica did) and thus making you crazy to understand what the hell is a SIXPLA, what is a diference between a VEGASET and VEGACOLSET, or between a SIVOPLA and a SIVOGLA. You will enjoy losing time learning these stuff, just as leicaphiles speak about the VIOOH versus VIDOM, NOOKY and the difference with NOOKY-HESUM, etc.

Is IKEA run by a descendent of the Durst empire?
 
OP
OP
Berri

Berri

Member
Joined
Feb 7, 2017
Messages
627
Location
Florence, Italy
Format
Multi Format
today I recived the ColorStar 2000 and it looks great! It is in great condition with its original box, manual and other paper bits. It came with the probe and the transparent element for cosine correction, the 4mm disc, and the diffuser element. It also has a diffuser sheet for full-integral mesurements. I read the booklet a couple of times and tested it. Unfortunally I'm still waiting for my chemicals to arrive so I couldn't actually use it, but I tryed anyway with two negatives I know very well and for wich I have exposure time and filtration for printing on my roll of kodak endura premier. I put the first negative (a portrait on Portra film) in the enlarger, set the height and filtration to match my previous records and analyzed it with the probe set to part-integral (with the diffuser element on top) I ruled out the M a Y with the module knobs and set the time I know that gives me the right exposure, pressed "hold" to save the settings. I switched to the next negative (portrait on ektar film) and with the part integral method I anazyzed it. It gave me a filtration very similar to the one I used previously, just little less magenta and my exposure was ok. So I figured it works ok! Can't wait for mondey when I'll get the chems!
 
OP
OP
Berri

Berri

Member
Joined
Feb 7, 2017
Messages
627
Location
Florence, Italy
Format
Multi Format
I just finished my first actual test with the new colorstar 2000. It is brilliant! I'm totally in love with it! It is so accurate and saves a lot of time, paper and chemicals. I tried printing several frames from different negative after I calibrated it with a portrait in daylight. I was able to get satisfying results without having to make test strips, then of course one could work on the negative a little bit to get it perfect. I also found vrlery easy to print negatives where only very saturated colours are present, like a pink flower in the grass. I put the probe on the grass and instead of nulling the LEDs I left two yellow an one cyan out (grass green) and the print came slightly yellow but pleasing. Now my bottleneck is the Colour filters, although the work just fine it is quite a slow workflow, next thing I'll get me the colour head!
 

Mick Fagan

Subscriber
Joined
Sep 13, 2005
Messages
4,421
Location
Melbourne Au
Format
Multi Format
Congratulations, you now know how to use the best colour analyser ever made.

A quick tip. If you have made a very successful print, but wish to either make a bigger or smaller print, then density change is all that is required. For spot on density changes, this is how I do it.

With the successful negative still in the enlarger, switch off all room and any colour darkroom lights.

Slide the negative carrier half out of the enlarger (or right out if required) then place the analyser probe under the projected and filtered light (with no negative inserted) adjust the Colorstar timer to the enlarging time you used.

Place the negative back in then adjust the enlarger up or down and do a reasonably accurate framing with the negative being pretty much focused correctly. Slide the negative out and then take a time of exposure reading, that is your new exposure time. The new time should be correct to a degree you may find difficult to understand why you weren't doing this ages ago.

All that is now required is to do critical focusing, then make your next print.

I do this for B&W enlarging size changes as well; works a treat.

Mick.
 
OP
OP
Berri

Berri

Member
Joined
Feb 7, 2017
Messages
627
Location
Florence, Italy
Format
Multi Format
Congratulations, you now know how to use the best colour analyser ever made.

A quick tip. If you have made a very successful print, but wish to either make a bigger or smaller print, then density change is all that is required. For spot on density changes, this is how I do it.

With the successful negative still in the enlarger, switch off all room and any colour darkroom lights.

Slide the negative carrier half out of the enlarger (or right out if required) then place the analyser probe under the projected and filtered light (with no negative inserted) adjust the Colorstar timer to the enlarging time you used.

Place the negative back in then adjust the enlarger up or down and do a reasonably accurate framing with the negative being pretty much focused correctly. Slide the negative out and then take a time of exposure reading, that is your new exposure time. The new time should be correct to a degree you may find difficult to understand why you weren't doing this ages ago.

All that is now required is to do critical focusing, then make your next print.

I do this for B&W enlarging size changes as well; works a treat.

Mick.
thanks for the tip! very useful and it make sense. I really don't understand why so many people doesn't seem to like using colour analyzers, even if sometimes you need to adjust the filtration, it still is of a great help to get you close enough without any time loss!
 
OP
OP
Berri

Berri

Member
Joined
Feb 7, 2017
Messages
627
Location
Florence, Italy
Format
Multi Format
I found a color head for my enlarger, with 12v DC transformer, 6x6 mixing box, and new bulb. I couldn't resist...It wasn't very cheap, but I couldn't find any other so...I bough it!
I rekon I'll have to re-calibrate my colorstar soon!

Today I printed several kodak gold 200 and I'm really well impressed by the quality of this film. The prints are very sharp, bright and colorful, not much grain at all. If compared to the scans there is so much difference!
Also I printed some old negatives made in the 60s by my father. It was a 126 size film, probably Ferrania although there are only numbers and arrows. I have to say that without the colorstar I would have spent a lot of time with them because the filtration was most weird with C and a lot of M. I found myself in this situation before with a portra 400 @ 1600 and it took me several test before I realized I had to remove all the Y and eventually add some C. I was in the ballpark straight at the first print with both exposure and filtration! Amazing!!
 

RPC

Member
Joined
Sep 7, 2006
Messages
1,630
Format
Multi Format
I really don't understand why so many people doesn't seem to like using colour analyzers, even if sometimes you need to adjust the filtration, it still is of a great help to get you close enough without any time loss!

I purchased my Beseler anaylzer years ago when I was new at color printing but eventually my color correcting skills improved to the point where I could get by without it. I made a good print from a good negative of all the different film types I had used and recorded the filtration for each. When I want to print a negative of that film type, I make a trial print with the appropriate recorded filtration, and then make whatever adjustments I think are needed with additional test prints. I can usually get it to my satisfaction in another print or two, which is not much different than with the analyzer. If a negative is shot under different lighting than the reference negative then it might take additional prints, but generally that is not a problem. If a negative has faded or been incorrectly processed, that too can present a problem, as it did with the analyzer.

I would imagine other printers use a similar technique and that is probably why analyzers have never been all that popular. In addition, I have read stories in the photographic literature of users having problems with getting consistency from film type-to-film type as I talked about in an earlier post, which I myself experienced. But perhaps this could depend on the quality of the probe.

I still use the analyzer as an exposure meter when I want to change enlargement size and it works great for that.
 

Mick Fagan

Subscriber
Joined
Sep 13, 2005
Messages
4,421
Location
Melbourne Au
Format
Multi Format
RPC, you are correct that after a period of time, one uses a colour analyser less and less. There are exceptions in life with most things, and the Colorstar Lici colour analyser, is the exception in the colour analyser world.

I have worked with quite a few colour analysers, including some very good Beseler units, with the PM4L being their best unit that I have used. I had three extra modules for different papers and processes, which certainly made life a lot easier.

Nothing however, compares to the Lici Colorstar analyser. It is, as far as I know, the only colour analyser that analyses all three colours at once. Outside of using a monitor connected to a closed loop in the enlarger for correct colour analysis, nothing beats one of these units.

The late Bob Mitchell, who was pretty cluey when it came to making little doo-dads for darkroom work, invented quite a few different things over time, with the culmination of his colour negative work being the “Colorbrator”.

Which is still the only colour analyser (analogue) that one could purchase that would tell you correct colour without you having to first up obtain a correct colour print, before you know how to make a correct colour print, to enable you to set your colour analyser up.

He once had an article, which from my fading memory was probably in Creative Photography and Darkroom Techniques. In this article he challenged himself to make a perfect colour print from any colour negative first up, time and time again; which he did. I think he did six prints from six negatives of differing stock and lighting.

I remember reading through this article and wondering if I could do the same, so I attempted to do so. With the aid of either a Wallace Expo Disc, or Bob Mitchell’s Grey Key (see attached) I was able, with the aid of my Colorstar analyser, to make four perfect prints from four colour negatives all shot under very diverse light conditions. To make things more interesting, I used film stock from Kodak, Agfa and Fuji. I managed to make those four, near perfect prints first up; it was a wonderful day in the darkroom.

My take on colour darkroom printing is simple, make life as easy as possible. Aids that actually do what you are lead to believe they will do, are thin on the ground. The Lici Colorstar analyser combined with the Wallace Expo Disc is so foolproof and so accurate, once set up, there is almost nothing apart from video analysis that can better it. The Mitchell Gray Key, which uses a laminex grey coloured piece of material as a grey card, is a brilliant in your pocket have it anywhere piece of kit. It isn’t quite as good in being able to be dead accurate with regard to getting correct colour as the Wallace Expo Disc, but, it is mighty close.

Mick.

Mitchell_Colorbrator_001.jpg


Mitchell_Grey_Key_001.jpg


Mitchell_Grey_Key_002.jpg


Wallace_Expo_Disc_001.jpg
 
OP
OP
Berri

Berri

Member
Joined
Feb 7, 2017
Messages
627
Location
Florence, Italy
Format
Multi Format
I purchased my Beseler anaylzer years ago when I was new at color printing but eventually my color correcting skills improved to the point where I could get by without it. I made a good print from a good negative of all the different film types I had used and recorded the filtration for each. When I want to print a negative of that film type, I make a trial print with the appropriate recorded filtration, and then make whatever adjustments I think are needed with additional test prints. I can usually get it to my satisfaction in another print or two, which is not much different than with the analyzer. If a negative is shot under different lighting than the reference negative then it might take additional prints, but generally that is not a problem. If a negative has faded or been incorrectly processed, that too can present a problem, as it did with the analyzer.

I would imagine other printers use a similar technique and that is probably why analyzers have never been all that popular. In addition, I have read stories in the photographic literature of users having problems with getting consistency from film type-to-film type as I talked about in an earlier post, which I myself experienced. But perhaps this could depend on the quality of the probe.

I still use the analyzer as an exposure meter when I want to change enlargement size and it works great for that.
I did the other way round; started learning how to correct prints manually and got really good at it (I'm good at colours since I worked ten years as a lab tecnician doing QC tests on pigments) but even if I'm good at it it still takes time and paper to make tests; I wanted to avoid it and I thik I found how.
Also I don't agree that faded negatives are a problem at all with the analyzed, at least with the one I have. I really don't have any experience with others analyzed but trust me this one works a treat. Sometimes I had to make two prints to get it right and knowing how to filter by eye is a must, but in several negatives I only made one print to get an acceptable result and, if you read my post, you see that I was looking for something to get my "there" when I want to print a whole roll without being to concern about quality. This is the only way that works.
 
Last edited:
OP
OP
Berri

Berri

Member
Joined
Feb 7, 2017
Messages
627
Location
Florence, Italy
Format
Multi Format
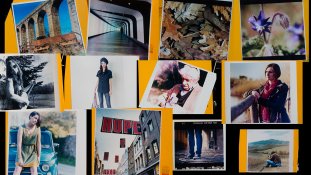
just to prove how good the colorstar is; look at these prints, they are all different negatives: ektar portra 160 & 400 kodk gold and even a fujichrome cross processed and a black and white ilford hp5 plus. with the colorstar I managed to get all of this without making any time consuming test strips. In some occasions I did some burning evaluating the density with the probe, still in one go, without making tests. You can be as good as you want at detecting a colour cast, but there is just no way you could achieve that without a colour analyzer, sorry.
The only thing the colorstar doesn't do is read your mind, so if you like a photo more warm in tones, you have to do it yourself.
Before I had the colorstar I'd had to waste at least two sheets for each print, and for x-pros a lot more. You can argue that priunting black and white on colour paper doesn't make much sense, but that was just a test to see how neutral it would come out
 

Attachments

  • Senza titolo-1.jpg
    Senza titolo-1.jpg
    586 KB · Views: 176

darkroommike

Subscriber
Joined
Mar 22, 2007
Messages
1,726
Location
Iowa
Format
Multi Format
I found an Omega SCA100 for 30€ or a Color Star 2000 for 50€ which is a timer as well but there is a piece missing on top of the three knobs on the left side, is that thing important?. What do you think, considering I'll be using it with CP filters?
The SCA100 is a toy compared to the Colorstar.
 

darkroommike

Subscriber
Joined
Mar 22, 2007
Messages
1,726
Location
Iowa
Format
Multi Format
The Colorstar is a pretty smart analyzer. I read an article where Bob Mitchell used it with filters rather than a color head by laying the added filters on top of the probe until they find the color filter pack they need and then put the filters into the drawer. Bob Mitchell was a color printing guru and consultant for the Colorstar development.
 
OP
OP
Berri

Berri

Member
Joined
Feb 7, 2017
Messages
627
Location
Florence, Italy
Format
Multi Format
The Colorstar is a pretty smart analyzer. I read an article where Bob Mitchell used it with filters rather than a color head by laying the added filters on top of the probe until they find the color filter pack they need and then put the filters into the drawer. Bob Mitchell was a color printing guru and consultant for the Colorstar development.
When I recived my colorstar I didn't yet have the colour head so I was using CP filters placed on top of the probe's diffuser. It did work very well, but it was a bottleneck in my workflow and it was slowering me down quite a bit. The colour head works much better for me.
 

rpavich

Member
Joined
Aug 24, 2015
Messages
1,520
Location
West virginia, USA
Format
35mm
Wow..I'm impressed with this thing.

I bought a Colorstar 2000 that was in great shape and complete (like a time capsule) and that worked great and then stumbled on a Colorstar 3000 so I bought that and sold my 2000 to a friend.

Other than figuring out some way to streamline the density variances it's a one-shot deal. As Mick said; as long as there is an expodisc reference shot in the roll then it's almost mindless to get a color balance without test strips.
 

darkroommike

Subscriber
Joined
Mar 22, 2007
Messages
1,726
Location
Iowa
Format
Multi Format
RPC, you are correct that after a period of time, one uses a colour analyser less and less. There are exceptions in life with most things, and the Colorstar Lici colour analyser, is the exception in the colour analyser world.

... quite as good in being able to be dead accurate with regard to getting correct colour as the Wallace Expo Disc, but, it is mighty close.

Mick.

View attachment 174624

View attachment 174625

View attachment 174626

View attachment 174627

LOL In my opinion it's just cruel to recommend pieces of equipment that haven't been made in 20-30 years. A person could go "batty" trying to track down good examples of all three. The Colorbrator is a neat piece of kit but has not been made since the 90's, the Color key is just a bit of Formica, you can substitute Wilsonart North Sea D90-60, very neutral (126 128 128 in Photoshop) and reflects about twice as much light as a gray card, and I haven't seen a new Wallace Expodisc in years, either. The other issue with old color printing "tools"? How do you know if said tool is still neutral and not faded? I pulled out a Kodak "Shirley" reference this weekend and even with dark storage it had faded considerably and not evenly in all three colors.
 
Last edited:
Photrio.com contains affiliate links to products. We may receive a commission for purchases made through these links.
To read our full affiliate disclosure statement please click Here.

PHOTRIO PARTNERS EQUALLY FUNDING OUR COMMUNITY:


Ilford ADOX Freestyle Photographic Stearman Press Weldon Color Lab Blue Moon Camera & Machine
Top Bottom