Yes, or very close. For that negative, a digital photo taken at the same time and with the same lens has the F16 patch coming in at middle grey brightness using the default Adobe profiles in ACR, and white balance for the shot is 5000, tint +4. So not quite the 5500K that film is probably designed for, but close enough.So, that would mean both right exposure and white balance, correct?
I wasn't happy with the results from ACR (the linear profile you can generate is not really linear) so I went in search of another RAW converter that would convert RAW to a TIFF with linear gamma. Before this I tried RAW Therapee and it did make a linear TIFF, I think, but the results were not good. By "not good" I mean the excessive colour cast and other colour wonkiness I showed above. It looks to me like Darktable with WB turned off (and I think that's the key) gives good results when inverted. I'm not sure what you mean about "fully manually" - you have to process the RAW file somehow. But it looks like how it's converted will have implications for the results.I guess the variable here is Darktable. Why is it used? I presume the method would work if doing fully manually?)
So I get a TIFF with linear gamma from Darktable and then everything after that is a reference to adjustment layers in Photoshop. The file is still in linear ProPhoto space. Normally ProPhoto has a gamma of 1.8 but this is a special variant with a gamma of 1.0. So I'm using the gamma sliders of the individual channels of the Levels adjustment layer(s) to adjust exposure and global colour balance of the scan. However, the order that you do them in seems to be important at least for some operations (specifically, the exposure adjustment layer should be on top of the invert layer, not underneath). The order I describe above is what worked for me.Then another levels layer to adjust the red and blue to match green using F16 patch? If possible could you explain the steps here and how?
Yes, I'm being very meticulous about getting patch F16 bang on. That's so I can compare the results to a Noritsu scan and an RA4 print where I was just as meticulous. Then I can see, for example, that ACR gave me results that are off, as did RawTherapee and Darktable with WB module turned on. But Darktable with WB module turned off was good.
In reality you wouldn't be carefully balancing from a grey reference, you'd be doing it by eye in search of whatever looks good to you. But I think it's too slow a process for doing large batches as there's too much faffing about in Photoshop. If I was doing a batch of negs then I'd get one of the plugins that interact with ACR.
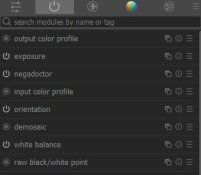
BTW, Darktable has a negative inversion function built in. It's called "negadoctor". It has lots of sliders but I haven't looked too closely at it in terms of assessing its colour accuracy or integrity.