Chromega D Dichroic II overhaul

Coquitlam River BC

D
Coquitlam River BC

  • 0
  • 0
  • 15
Mayday celebrations

A
Mayday celebrations

  • 0
  • 2
  • 49
MayDay celebration

A
MayDay celebration

  • 1
  • 0
  • 56
Cold War

Cold War

  • 1
  • 0
  • 49

Recent Classifieds

Forum statistics

Threads
197,556
Messages
2,760,995
Members
99,402
Latest member
Bask0
Recent bookmarks
0
OP
OP
Matthew Tapson
Joined
Apr 10, 2018
Messages
32
Location
South Africa
Format
Multi Format
I've managed to find some time to finish the enlarger re-assembly. It was pretty straightforward. Having the cams and the adjustment system in and lubricated, my only headache was getting the numbers on the dials to line up on the horizontal at 000 and 170 (at either extreme). Unfortunately, if there is a way to fine tune this I couldn't figure it out as the value jumps by a tooth on the gear if you adjust the position so now I'll live with the 000 being slightly lower than horizontal at the extents of the dial movement. All good.

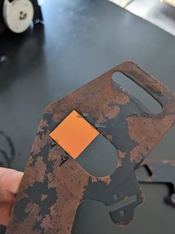
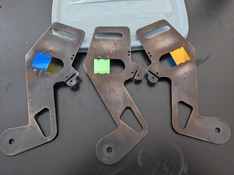
I hadn't cleaned up the filter holders and they had some light surface rust - this enlarger has come from Durban which is very hot and humid and on the coast. Here's a before and after. I used a kitchen scouring pad to clean this up, and didn't want to accidentally knock one of the Dichroic filters loose. So I guess this could be done better but it's fine for now and the rust around the pivot points is cleared off.
PXL_20250226_121427995.jpg

PXL_20250226_123320374.jpg
 
Last edited:
OP
OP
Matthew Tapson
Joined
Apr 10, 2018
Messages
32
Location
South Africa
Format
Multi Format
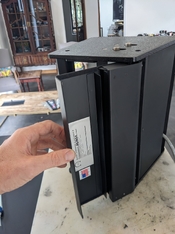
Reassembling the filters is quick and easy. I initially greased up the brass pivot lugs (for want of a better word) because of the grease I had cleaned off, but after putting it all back together I found that the grease was sticking and the springs weren't strong enough to overcome that friction, so I cleaned all the grease off again and used a few drops of watchmakers oil instead. I also found that overtightening the bolts holding the system together binds the movement, especially at the bottom where there are plastic washers, so tightening it just enough is the key. I did use grease on the filter cams though and it works well there. Also because I have the two enlargers I've been cherry-picking the nicest parts from each, even down to which screws and bolts look freshest.


PXL_20250226_142146001.jpg


PXL_20250226_142152179.jpg
 
OP
OP
Matthew Tapson
Joined
Apr 10, 2018
Messages
32
Location
South Africa
Format
Multi Format
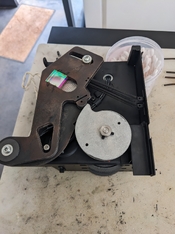
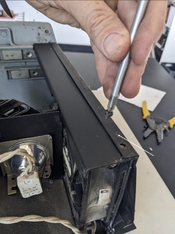
From here it was just a matter of reassembling in the reverse order of the taking apart process. Nothing is tricky here, and the only suggestion I have is that the rear most cover, which covers the fan outlet, should be screwed in on the top with 3 screws but the bottom screw should be left loose. The side covers of the enlarger need to mate to this cover and it's a lot easier to do with a bit of play there. Also, I had to do it twice as I accidentally installed the top hinged cover of the enlarger upside down.

Here is a shot of the cover. The two screws on this surface can't be accessed with the enlarger cover on, so these should be tightened up first.

Screenshot_1.jpg

PXL_20250227_112423869.jpg

Duh.
 
OP
OP
Matthew Tapson
Joined
Apr 10, 2018
Messages
32
Location
South Africa
Format
Multi Format
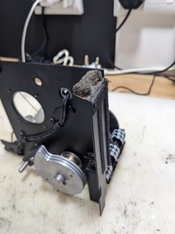
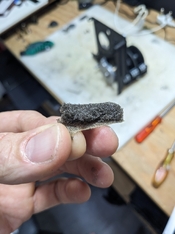
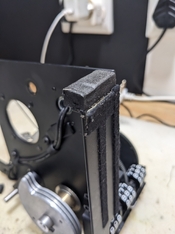
Ah, one thing I forgot to add earlier is that there is a short strip of 10mm thick light sealing foam on the filter assembly that has deteriorated in the manner of camera mirror bumper foam. I popped down to my local hardware store and found self adhesive foam strip that I replaced this section with.

PXL_20250226_113948935.jpg

PXL_20250226_114210818.jpg

PXL_20250226_114446381.jpg
 
OP
OP
Matthew Tapson
Joined
Apr 10, 2018
Messages
32
Location
South Africa
Format
Multi Format
The enlarger is now back together and seems to be working properly! I can't wait to use it though I will probably need to do a similar process with the chassis which is pretty grimey, but I think I can test the setup out in the meantime :smile: My next mission will be to design a wall mounting bracket for this as my room is way too small for that base board.
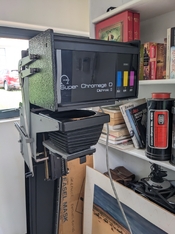
PXL_20250227_113620982.jpg


Please excuse the heavy breathing 😖
 
OP
OP
Matthew Tapson
Joined
Apr 10, 2018
Messages
32
Location
South Africa
Format
Multi Format
And finally, here is an album with all the pics and videos I took while I was doing this for reference for anyone else who is thinking of doing this! Thanks for following the thread and hope it has helped or will help someone else to restore and maintain their Chromega enlarger.

Album of Chromega Photos
 

pthornto

Member
Joined
Apr 2, 2008
Messages
121
Location
Kingston ON,
Format
Multi Format
This thread is fantastic! I’ve been working to replace the filter assembly on a super chromega II and there aren’t a lot of other resources out there. The pictures and descriptions are extremely helpful and it is reassuring to know I’m on the right track. THANK YOU! I had 2 heads- one that had two filters intact but had a bad wheel assembly and one that only had 1 filter intact but great wheels. Now I think I’ve mixed and matched parts appropriately. I also had the issue of too much friction after cleaning out the grease from the filter assemblies but will try a very light coat of an oil on the spacing washers to drop the friction and back off the tightening screws ever so slightly.
 
OP
OP
Matthew Tapson
Joined
Apr 10, 2018
Messages
32
Location
South Africa
Format
Multi Format
This thread is fantastic! I’ve been working to replace the filter assembly on a super chromega II and there aren’t a lot of other resources out there. The pictures and descriptions are extremely helpful and it is reassuring to know I’m on the right track. THANK YOU! I had 2 heads- one that had two filters intact but had a bad wheel assembly and one that only had 1 filter intact but great wheels. Now I think I’ve mixed and matched parts appropriately. I also had the issue of too much friction after cleaning out the grease from the filter assemblies but will try a very light coat of an oil on the spacing washers to drop the friction and back off the tightening screws ever so slightly.

Hey Paul :smile: So glad you found it helpful! Thanks for letting me know.
 
Photrio.com contains affiliate links to products. We may receive a commission for purchases made through these links.
To read our full affiliate disclosure statement please click Here.

PHOTRIO PARTNERS EQUALLY FUNDING OUR COMMUNITY:


Ilford ADOX Freestyle Photographic Stearman Press Weldon Color Lab Blue Moon Camera & Machine
Top Bottom